Glitter & Glam: Mastering Holiday Makeup with the Humble Eyeshadow Stick 🌟
Welcome, darlings, to the Sparkle Academy, where we transform everyday faces into dazzling masterpieces just in time for the holiday season! Today’s lecture focuses on a surprisingly versatile and often underestimated weapon in our beauty arsenal: the glitter cream eyeshadow stick. Forget fiddly palettes and fallout disasters – we’re embracing ease, speed, and maximum impact. Think of me as your glitter guru, guiding you through the shimmering wilderness. Grab your notebooks (or iPads, we’re modern!), your favorite beverage (mine’s a cranberry gin fizz, naturally 🍹), and let’s get ready to GLOW!
Lecture Outline:
I. The Eyeshadow Stick: A Glittering Introduction
- What IS a glitter cream eyeshadow stick, anyway?
- Why choose a stick over other eyeshadow formats?
- The pros and cons: Let’s be realistic, darling.
II. Choosing Your Weapon: Picking the Perfect Stick
- Texture is key: Creamy, buttery, or gritty?
- Color me impressed: Navigating the shade spectrum.
- The glitter factor: Micro-glitter vs. chunky sparkles.
- Longevity and crease-proof power: Nobody wants a raccoon eye situation at the office party.
- Brand recommendations (with a dash of sass).
III. Application 101: From Novice to Sparkle Ninja
- Prep work: The foundation for fabulous.
- Direct application: Scribble and blend!
- Using brushes: For precision and finesse.
- Layering like a pro: Building depth and dimension.
- Blending is your best friend: Say no to harsh lines!
IV. Holiday Looks: Glitterific Inspiration
- The Classic Christmas Glam: Red lips and gold lids.
- The Winter Wonderland: Silver and icy blue magic.
- The New Year’s Eve Extravaganza: Full-on sparkle and drama!
- The Subtle Shimmer: For those who prefer a touch of understated elegance.
- Bonus looks: Think outside the box!
V. Troubleshooting and Pro Tips: Avoiding Glitter Catastrophes
- Fallout prevention: The sticky tape trick and beyond.
- Creasing combat: Primers and setting sprays to the rescue.
- Fixing mistakes: Q-tips and micellar water are your friends.
- Glitter removal: Gentle but effective methods.
- Storage and care: Keeping your sticks in tip-top shape.
VI. Q&A: Ask the Glitter Guru! (Hypothetical, but feel free to ponder!)
I. The Eyeshadow Stick: A Glittering Introduction
(What IS a glitter cream eyeshadow stick, anyway?)
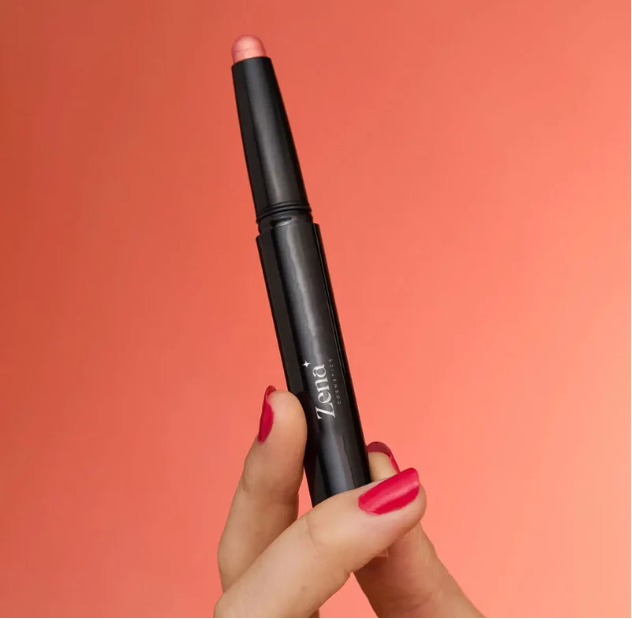
Imagine a lipstick, but instead of pigment designed for your pout, it’s a creamy, glitter-infused dream for your eyelids. That, my dears, is the glitter cream eyeshadow stick in a nutshell. It’s a portable, convenient, and often surprisingly pigmented crayon of sparkly goodness. They typically come in twist-up or retractable formats, making application a breeze. Think of it as the lazy girl’s (or busy girl’s!) shortcut to dazzling eye makeup. ✨
(Why choose a stick over other eyeshadow formats?)
Let’s face it, eyeshadow palettes can be intimidating. So many colors, so many brushes, so much potential for a smoky eye gone wrong! The eyeshadow stick offers a streamlined approach. Here’s why it deserves a spot in your makeup bag:
- Speed and Convenience: Apply directly to the lid and blend with a finger – it’s that easy! Perfect for on-the-go touch-ups or when you’re running late for that holiday party (again!). 🏃♀️
- Minimal Fallout: Unlike powder shadows, cream formulas tend to have less fallout, keeping your cheeks clean and your sanity intact. Hallelujah! 🙏
- Beginner-Friendly: No complicated blending techniques required. Just scribble and smudge – literally! It’s almost foolproof. 😇
- Portability: Fits easily into your purse or travel bag, making it ideal for jet-setting glamour. ✈️
- Versatility: Can be used as an all-over lid color, a liner, or even a subtle highlighter on the inner corner of the eye. Talk about multi-tasking! 👯♀️
(The pros and cons: Let’s be realistic, darling.)
No product is perfect, even one as fabulous as the glitter cream eyeshadow stick. Let’s weigh the pros and cons:
| Pros | Cons |
|---|---|
| Quick and easy application | Can crease if not properly primed and set |
| Minimal fallout | Limited shade range compared to powder palettes |
| Portable and convenient | May not be as long-lasting as powder shadows |
| Beginner-friendly | Some formulas can be too sheer or too glittery (watch out!) |
| Versatile (can be used in multiple ways) | Needs to be sharpened/maintained (some require special sharpeners) |
II. Choosing Your Weapon: Picking the Perfect Stick
(Texture is key: Creamy, buttery, or gritty?)
Texture is paramount! A gritty or dry formula will drag on the lid, causing irritation and uneven application. Look for a texture that’s described as:
- Creamy: Glides on smoothly and blends effortlessly. Ideal for all-over lid color.
- Buttery: Ultra-smooth and pigmented, almost like a cream eyeshadow in stick form. Excellent for building color and adding depth.
- Avoid: Anything described as "dry," "chalky," or "gritty." Your eyelids will thank you. 🥺
(Color me impressed: Navigating the shade spectrum.)
The color possibilities are endless! Consider your skin tone and the look you’re trying to achieve. Here are some popular choices:
- Gold: A classic holiday staple that complements most skin tones. Adds warmth and radiance. 💛
- Silver: Perfect for creating a winter wonderland effect. Looks stunning on cool skin tones. 🤍
- Bronze: A sophisticated and universally flattering shade. Adds a touch of warmth and depth. 🤎
- Rose Gold: A trendy and feminine option. Looks gorgeous on all skin tones. 💖
- Emerald Green: A festive and unexpected choice. Perfect for adding a pop of color to your holiday look. 💚
- Deep Plum: A sultry and sophisticated shade. Ideal for evening events. 💜
(The glitter factor: Micro-glitter vs. chunky sparkles.)
Glitter comes in all shapes and sizes!
- Micro-glitter: Tiny, finely milled sparkles that create a subtle shimmer. Ideal for daytime wear or those who prefer a more understated look. ✨
- Chunky sparkles: Larger, more noticeable glitter particles that create a bold and dramatic effect. Perfect for parties and special occasions. 💥
Consider the occasion and your personal preference when choosing the glitter intensity. Remember, you want to sparkle, not look like you’ve been attacked by a disco ball! 😅
(Longevity and crease-proof power: Nobody wants a raccoon eye situation at the office party.)
Creasing is the enemy! Look for formulas that are advertised as long-wearing and crease-proof. Reading reviews is crucial here! Also, remember these two important steps:
- Primer: Always apply an eyeshadow primer to create a smooth base and prevent creasing.
- Setting Spray: A light mist of setting spray will help lock your eyeshadow in place and prevent it from fading or smudging.
(Brand recommendations (with a dash of sass).)
Alright, let’s get down to brass tacks. These are some brands to consider:
| Brand | Product Name | Price Range | Texture | Glitter Level | Notes |
|---|---|---|---|---|---|
| Laura Mercier | Caviar Stick Eye Colour | $$$ | Creamy | Subtle | A cult classic for a reason! Expensive, but worth it. 💅 |
| Bobbi Brown | Long-Wear Cream Shadow Stick | $$$ | Buttery | Medium | Super pigmented and long-lasting. Great color selection. 🎨 |
| ColourPop | Super Shock Shadow (in stick form) | $ | Creamy | Varies | Affordable and fun! Experiment with different shades. 🎉 |
| Milk Makeup | Eye Pigment | $$ | Creamy | Medium | Vegan and cruelty-free! Beautiful shimmery shades. 🌿 |
| Kiko Milano | Long Lasting Stick Eyeshadow | $$ | Creamy | Medium | A hidden gem! Excellent quality for the price. 💎 |
| Maybelline | Color Tattoo Eyeshadow Crayon | $ | Varies | Low-Medium | Drugstore staple! Great for beginners. Start with neutral shades. 👍 |
Disclaimer: These are just suggestions, darling. Ultimately, the best eyeshadow stick for you will depend on your individual needs and preferences. Don’t be afraid to experiment and find what works best for you! And please, for the love of all that is sparkly, read reviews before you buy! 📖
III. Application 101: From Novice to Sparkle Ninja
(Prep work: The foundation for fabulous.)
(Prep work: The foundation for fabulous.)
Before you even think about glitter, you need to prep your eyelids. This is crucial for smooth application and long-lasting wear.
- Cleanse: Gently cleanse your eyelids to remove any oil or makeup residue.
- Moisturize: Apply a light eye cream to hydrate the skin.
- Prime: Apply an eyeshadow primer to create a smooth base and prevent creasing. This is non-negotiable! Trust me! 🙏
(Direct application: Scribble and blend!)
This is the easiest method, perfect for a quick and effortless look.
- Scribble: Apply the eyeshadow stick directly to your eyelid, starting from the inner corner and working your way outwards. Don’t be shy! ✍️
- Blend: Use your finger (clean, please!) to blend the eyeshadow outwards and upwards. Blend until there are no harsh lines. Remember, blending is your best friend! 🤝
(Using brushes: For precision and finesse.)
For a more precise and controlled application, use brushes.
- Apply: Apply the eyeshadow stick to the back of your hand.
- Pick up product: Use a flat eyeshadow brush to pick up the product.
- Apply to lid: Apply the eyeshadow to your eyelid, using a patting motion.
- Blend: Use a blending brush to blend the edges.
(Layering like a pro: Building depth and dimension.)
Want to take your look to the next level? Try layering different shades of eyeshadow stick.
- Base color: Apply a lighter shade all over the lid.
- Crease color: Apply a darker shade to the crease of your eye.
- Outer corner color: Apply an even darker shade to the outer corner of your eye.
- Blend: Blend, blend, blend! Make sure there are no harsh lines.
(Blending is your best friend: Say no to harsh lines!)
I can’t stress this enough! Blending is the key to a flawless eyeshadow look. Use a clean blending brush to soften the edges of your eyeshadow and create a seamless transition between colors. Think of it as erasing any evidence of your application technique. 🤫
IV. Holiday Looks: Glitterific Inspiration
(The Classic Christmas Glam: Red lips and gold lids.)
- Eyes: Apply a gold glitter cream eyeshadow stick all over the lid. Blend outwards and upwards. Line the upper lash line with black eyeliner. Add a few coats of mascara.
- Lips: Rock a classic red lipstick.
- Cheeks: Add a touch of blush and highlighter.
- Overall: The epitome of holiday glamour! 💋
(The Winter Wonderland: Silver and icy blue magic.)
- Eyes: Apply a silver glitter cream eyeshadow stick all over the lid. Blend an icy blue eyeshadow into the crease. Add a touch of white shimmer to the inner corner of the eye.
- Lips: Wear a nude or pale pink lipstick.
- Cheeks: Add a cool-toned blush and a silver highlighter.
- Overall: Embrace the magic of winter! ❄️
(The New Year’s Eve Extravaganza: Full-on sparkle and drama!)
- Eyes: Apply a dark purple or navy blue glitter cream eyeshadow stick all over the lid. Blend a black eyeshadow into the crease. Add a generous amount of chunky glitter to the lid.
- Lips: Rock a bold berry or plum lipstick.
- Cheeks: Contour your cheeks and add a generous amount of highlighter.
- Overall: Go big or go home! 🎉
(The Subtle Shimmer: For those who prefer a touch of understated elegance.)
- Eyes: Apply a champagne or rose gold glitter cream eyeshadow stick all over the lid. Blend gently. Add a touch of mascara.
- Lips: Wear a nude or sheer gloss.
- Cheeks: Add a subtle blush and highlighter.
- Overall: Effortlessly chic and subtly sparkly. 💫
(Bonus looks: Think outside the box!)
- Glitter Liner: Use a thin brush to apply a glitter cream eyeshadow stick along your upper or lower lash line.
- Inner Corner Highlight: Dab a small amount of a light glitter cream eyeshadow stick to the inner corner of your eye to brighten and awaken your eyes.
- Under Eye Sparkle: Apply a touch of glitter cream eyeshadow stick under your lower lash line for a whimsical and festive touch. (Be careful with this one, darling. Less is more!)
V. Troubleshooting and Pro Tips: Avoiding Glitter Catastrophes
(Fallout prevention: The sticky tape trick and beyond.)
Glitter fallout is the bane of our existence! Here are some tips to prevent it:
- Apply eyeshadow before foundation: This way, you can easily clean up any fallout without ruining your base makeup.
- Use a damp eyeshadow brush: This will help the glitter adhere to the brush and prevent it from falling onto your face.
- The sticky tape trick: After applying your eyeshadow, gently press a piece of sticky tape (like scotch tape) to your face to pick up any stray glitter particles. 🪄
- Setting spray: A generous spritz of setting spray will help lock the glitter in place.
(Creasing combat: Primers and setting sprays to the rescue.)
We’ve already discussed this, but it’s worth repeating: primer and setting spray are your best friends! Also, avoid applying too much product to your eyelids. Less is more!
(Fixing mistakes: Q-tips and micellar water are your friends.)
Made a mistake? Don’t panic! Use a Q-tip dipped in micellar water to gently erase any errors.
(Glitter removal: Gentle but effective methods.)
Removing glitter can be tricky. Here are some tips:
- Use an oil-based cleanser: Oil-based cleansers are effective at breaking down glitter and removing it from your skin.
- Gently massage the cleanser onto your skin: Avoid rubbing too harshly, as this can irritate your skin.
- Use a warm, damp cloth to remove the cleanser: Make sure to remove all traces of glitter.
- Avoid using harsh scrubs: These can damage your skin.
(Storage and care: Keeping your sticks in tip-top shape.)
- Store your eyeshadow sticks in a cool, dry place: Avoid storing them in direct sunlight or in a humid environment.
- Close the cap tightly after each use: This will prevent the eyeshadow stick from drying out.
- Sharpen your eyeshadow sticks regularly: Some require special sharpeners, so read the instructions. This will ensure a precise application.
VI. Q&A: Ask the Glitter Guru! (Hypothetical, but feel free to ponder!)
Okay, darlings, that concludes our lecture on mastering holiday makeup with the humble glitter cream eyeshadow stick! I hope you’ve learned a thing or two about unleashing your inner sparkle. Now go forth and create some dazzling looks that will turn heads and spread holiday cheer! Remember to practice, experiment, and most importantly, have fun! ✨ And if you ever find yourself in a glitter-related crisis, just remember the sticky tape trick! 😉
Class dismissed! 💖
For detailed product specifications and purchases, please go to :https://zenamakeup.com/products/glitter-cream-eyeshadow-stick-shimmer-for-all-eyes-colors
Leave a Reply