The Eyes Have It: Mastering the Magic of Dual-End Eyeshadow "Fusion"
(Lecture Style: Engaging, Humorous, & Slightly Dramatic)
(Icon: 👁️🗨️ (Eye in Speech Bubble) – Represents knowledge and communication regarding eyeshadow.)
(Introduction – Cue Dramatic Music 🎶)
Alright, class! Settle down, settle down! Today, we delve into the mystical, the magical, the utterly transformative world of dual-end eyeshadow – specifically, that elusive concept we call "fusion." We’re not talking nuclear fusion, mind you. Although, if you can achieve that kind of power with your eyeshadow, please contact me immediately. I need to know your secrets.
We’re talking about the seamless, harmonious, dare I say romantic blending of two complementary eyeshadow shades to create a look that’s not just "good," but absolutely stunning. Think of it as a beauty tango. A perfectly choreographed pas de deux for your eyelids.
But let’s be honest, achieving this "fusion" isn’t always a walk in the park. We’ve all been there. The vision in your head: a breathtaking gradient, a smoky masterpiece. The reality? Patchy, muddy, and looking like a toddler attacked your face with crayons.
(Emoji: 🤦♀️ (Facepalm) – Represents the common frustration with eyeshadow application.)
Fear not, my makeup minions! Today, we’ll arm ourselves with the knowledge, the techniques, and the attitude to conquer this eyeshadow conundrum. We’ll explore the science, the art, and the sheer willpower required to achieve eyeshadow fusion nirvana. Prepare yourselves!
(Section 1: Decoding the Dual-End Eyeshadow – A Love Story in Two Parts ❤️)
First things first, let’s understand the players in our drama: the dual-end eyeshadow itself. Think of it as a dynamic duo, a beauty Batman and Robin (but hopefully less brooding).
-
The Concept: A dual-end eyeshadow stick or pencil usually features two complementary shades, designed to be used together to create a quick and easy eye look. The concept is brilliant! Convenience at its finest. But the execution… that’s where we come in.
-
Types: Dual-end eyeshadows come in various forms:
- Stick: Creamy formulas in stick form, often designed for easy application and blending.
- Pencil: Similar to sticks but often with a finer tip for more precise application.
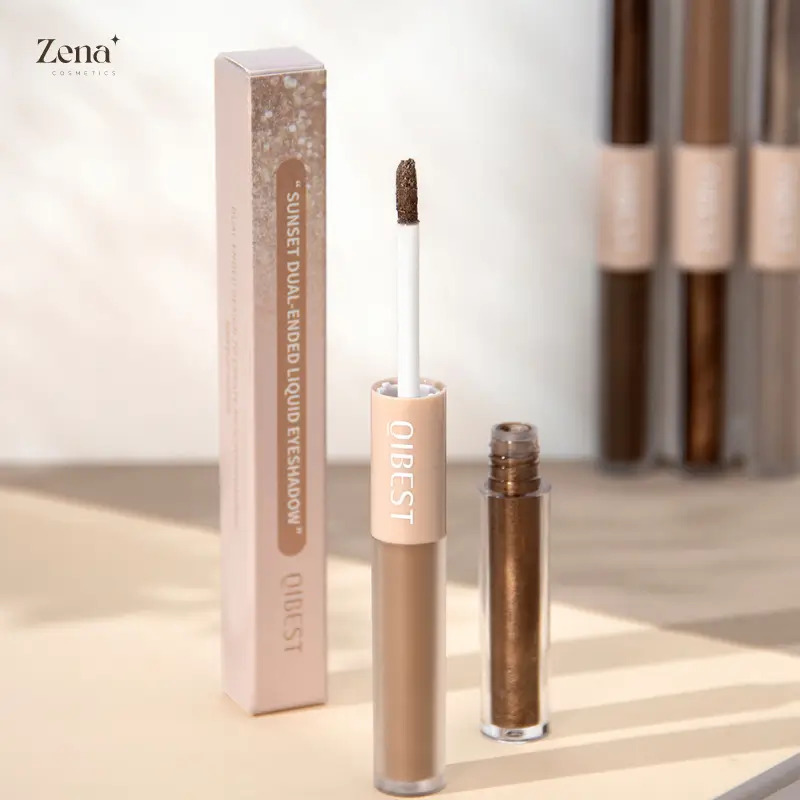
- Liquid: Liquid formulas with applicators on each end, offering intense pigmentation and a long-wearing finish.
- Powder (Rare): Less common, but some brands offer dual-end powder eyeshadows with small sponge applicators.
-
Formulas: The formula is key! Look for creamy, blendable formulas that don’t set too quickly. Nobody wants a cement-like eyeshadow situation. Here’s a quick breakdown:
Formula Pros Cons Best For Creamy Blendable, hydrating, easy to work with. Can crease if not set properly, may not be long-lasting on oily lids. Dry skin, beginners, quick and easy application. Liquid Highly pigmented, long-lasting, often waterproof. Can be difficult to blend, may dry too quickly. Experienced users, bold looks, long wear. Powder (Pressed) Buildable, blendable, comes in a wide range of finishes. Can be powdery, may require more blending. All skin types, versatile looks, layering and blending. -
Color Combinations: This is where the fun begins! Common combinations include:
- Light & Dark: A lighter shade for the lid and a darker shade for the crease. Classic and foolproof.
- Shimmer & Matte: A shimmer shade for the lid and a matte shade for definition. Adds dimension and depth.
- Neutral & Bold: A neutral shade for all-over color and a bold shade for a pop of color. Perfect for adding personality.
- Tonal: Two shades within the same color family, creating a subtle and sophisticated gradient.
(Section 2: The Anatomy of "Fusion" – Breaking Down the Blend 🔬)
"Fusion," in the eyeshadow context, refers to the seamless transition between two shades, creating a gradient effect that appears natural and effortless. It’s not just about slapping two colors on your lid; it’s about creating a harmonious relationship between them.
-
The Key Elements:
- Blendability: The ability of the eyeshadows to blend together smoothly without becoming muddy or patchy. This is crucial!
- Pigmentation: The intensity of the color. Too little pigmentation, and you’ll be blending forever. Too much, and you’ll have a hard time controlling the intensity.
- Texture: The texture of the eyeshadows should be compatible. Mixing a super powdery eyeshadow with a super creamy one is a recipe for disaster.
- Tools: The right tools can make or break your fusion attempt. More on this later.
- Technique: The method you use to apply and blend the eyeshadows. Practice makes perfect! (And concealer hides mistakes.)
-
The Science of Color Mixing: Remember those color wheels from art class? They’re actually useful here! Understanding color relationships can help you choose complementary shades that will blend beautifully.
- Complementary Colors: Colors opposite each other on the color wheel (e.g., blue and orange, purple and yellow). These create high contrast and can be used for bold, eye-catching looks.
- Analogous Colors: Colors next to each other on the color wheel (e.g., blue, blue-green, and green). These create a harmonious and subtle gradient.
- Monochromatic Colors: Different shades of the same color. This is a foolproof way to create a cohesive and sophisticated look.
(Section 3: Tools of the Trade – Your Eyeshadow Arsenal ⚔️)
You wouldn’t go into battle without the right weapons, would you? The same applies to eyeshadow fusion. Here’s a rundown of the essential tools you’ll need:
-
Eyeshadow Brushes: The most important tool in your arsenal!
Brush Type Purpose Description Blending Brush Blending and diffusing eyeshadow edges. Fluffy, tapered brush with soft bristles. Shader Brush Applying eyeshadow to the lid. Flat, firm brush with dense bristles. Crease Brush Applying eyeshadow to the crease. Tapered brush with a pointed tip. Pencil Brush Applying eyeshadow to the lower lash line or inner corner. Small, pointed brush with dense bristles. Angled Brush Applying eyeshadow as eyeliner or filling in brows. Angled brush with stiff bristles. -
Eyeshadow Primer: A must-have for preventing creasing and ensuring long-lasting wear. It also helps to intensify the color of your eyeshadows. Think of it as the foundation for your eyeshadow masterpiece.
-
Concealer: For cleaning up mistakes and creating a sharp, defined edge. Also useful for priming the lids if you don’t have a dedicated eyeshadow primer.
-
Makeup Wipes/Cotton Swabs: For correcting mistakes and cleaning up fallout.
-
Mascara: To complete the look and make your eyes pop!
-
Mascara: To complete the look and make your eyes pop!
(Section 4: The Art of Application – Techniques for Seamless Fusion 🎨)
Now for the main event! The application techniques that will transform you from eyeshadow novice to fusion master.
-
Preparation is Key:
- Prime Your Lids: Apply a thin layer of eyeshadow primer to your eyelids and blend it evenly. This will create a smooth canvas for your eyeshadow and prevent creasing.
- Set the Primer (Optional): If you have oily lids, you can set the primer with a translucent powder to further prevent creasing.
-
The Basic Technique (For Dual-End Sticks/Pencils):
- Apply the Lighter Shade: Apply the lighter shade all over the lid, from the lash line to the crease.
- Apply the Darker Shade: Apply the darker shade to the outer corner of the eye and blend it into the crease.
- Blend, Blend, Blend!: Use a blending brush to blend the two shades together, focusing on the area where they meet. Use windshield wiper motions to create a seamless transition.
- Build Intensity (Optional): If you want a more dramatic look, you can add another layer of the darker shade to the outer corner and crease.
- Highlight (Optional): Apply a light shimmer shade to the inner corner of the eye to brighten the look.
-
Advanced Techniques:
- The "Halo Eye": Apply a dark shade to the outer and inner corners of the eye, leaving the center of the lid bare. Apply a shimmer shade to the center of the lid to create a halo effect.
- The "Cut Crease": Create a sharp, defined crease with a concealer and then apply eyeshadow to the lid. This technique creates a dramatic and sculpted look.
- The "Smoky Eye": Apply a dark shade to the lid and crease, blending it upwards towards the brow bone. Use a pencil brush to smudge the same shade along the lower lash line.
-
Tips and Tricks:
- Start with a Light Hand: It’s easier to add more color than to take it away.
- Use Small, Circular Motions: This will help to blend the eyeshadows smoothly.
- Clean Your Brush Regularly: A dirty brush can transfer colors and make your eyeshadow look muddy.
- Don’t Be Afraid to Experiment: Try different techniques and color combinations to find what works best for you.
- Practice Makes Perfect: The more you practice, the better you’ll become at blending eyeshadow.
(Section 5: Troubleshooting – When "Fusion" Goes Wrong 🚨)
Even with the best techniques, sometimes things go wrong. Here are some common problems and how to fix them:
-
Patchy Eyeshadow:
- Cause: Uneven application, dry skin, or using a brush that’s too stiff.
- Solution: Exfoliate your eyelids regularly, use a hydrating eyeshadow primer, and use a soft, fluffy blending brush.
-
Muddy Eyeshadow:
- Cause: Over-blending, using too many colors, or using dirty brushes.
- Solution: Use clean brushes, blend in small sections, and avoid using too many colors at once.
-
Creasing Eyeshadow:
- Cause: Oily lids, using a cream eyeshadow without setting it, or not using an eyeshadow primer.
- Solution: Use an eyeshadow primer, set your eyeshadow with a translucent powder, and avoid using cream eyeshadows if you have oily lids.
-
Fallout:
- Cause: Powdery eyeshadows, using a brush that’s too large, or applying eyeshadow too aggressively.
- Solution: Tap off excess product from your brush before applying eyeshadow, use a smaller brush, and apply eyeshadow in gentle, patting motions.
(Table: Common Eyeshadow Problems & Solutions)
| Problem | Cause | Solution |
|---|---|---|
| Patchy Eyeshadow | Uneven application, dry skin, stiff brush. | Exfoliate lids, hydrating primer, soft brush. |
| Muddy Eyeshadow | Over-blending, too many colors, dirty brushes. | Clean brushes, blend in sections, limit colors. |
| Creasing Eyeshadow | Oily lids, cream eyeshadow, no primer. | Primer, set with powder, avoid cream shadows (if oily). |
| Fallout | Powdery shadows, large brush, aggressive application. | Tap off excess, smaller brush, gentle application. |
(Section 6: Choosing the Right Dual-End Eyeshadow – A Buyer’s Guide 🛍️)
With so many dual-end eyeshadows on the market, how do you choose the right one for you? Here are some factors to consider:
- Skin Type: If you have oily lids, look for long-wearing, powder-based formulas. If you have dry lids, look for creamy, hydrating formulas.
- Skill Level: If you’re a beginner, look for easy-to-blend formulas and simple color combinations. If you’re more experienced, you can experiment with more complex formulas and bolder colors.
- Desired Look: If you want a natural look, look for neutral shades. If you want a dramatic look, look for bold colors and shimmer finishes.
- Budget: Dual-end eyeshadows range in price from drugstore to high-end. Consider your budget and read reviews before making a purchase.
(Checklist: Choosing Your Perfect Dual-End Eyeshadow)
- [ ] Consider your skin type.
- [ ] Assess your skill level.
- [ ] Determine your desired look.
- [ ] Set a budget.
- [ ] Read reviews.
(Section 7: Beyond the Basics – Creative Applications and Advanced Techniques 🚀)
Once you’ve mastered the basics of eyeshadow fusion, you can start to explore more creative applications and advanced techniques.
- Using Dual-End Eyeshadows as Eyeliner: Use the darker shade as eyeliner to define your eyes. You can use a pencil brush to smudge the eyeliner for a softer look.
- Creating a "Pop of Color": Use a bright, vibrant shade on the lower lash line to add a pop of color to your look.
- Layering Different Textures: Combine cream and powder eyeshadows to create a unique and dimensional look. For example, you can apply a cream eyeshadow as a base and then layer a powder eyeshadow on top.
- Experimenting with Different Finishes: Mix and match matte, shimmer, and glitter eyeshadows to create a custom look.
(Section 8: The Psychology of Eyeshadow – Expressing Yourself Through Color 🌈)
Eyeshadow isn’t just about looking pretty; it’s also about expressing yourself. The colors you choose can convey your mood, your personality, and your overall style.
- Neutral Shades: Convey a sense of sophistication, elegance, and professionalism.
- Bright Colors: Convey a sense of fun, energy, and creativity.
- Dark Colors: Convey a sense of mystery, drama, and confidence.
- Shimmer Shades: Add a touch of glamour and sparkle.
- Matte Shades: Create a more subtle and understated look.
(Conclusion – Applause, Please! 👏)
Congratulations, class! You’ve now completed your crash course in the art of dual-end eyeshadow fusion. Remember, practice is key, and don’t be afraid to experiment. Embrace the mistakes, learn from them, and most importantly, have fun!
Now go forth and create some eyeshadow magic! And if you happen to achieve nuclear fusion with your eyeshadow, definitely let me know. Class dismissed!
(Final Icon: 🎉 (Party Popper) – Represents celebration of newfound knowledge and skills.)
For detailed product specifications and purchases, please go to :https://zenamakeup.com/products/liquid-dual-end-matte-glitter-fusion-eyeshadow
Leave a Reply