The Great Kajal Conundrum: Sharpening vs. Retracting the Glided-on Waterproof Kajal Eyeliner
A Lecture on the Nuances of Application and Maintenance, with a Dash of Sass
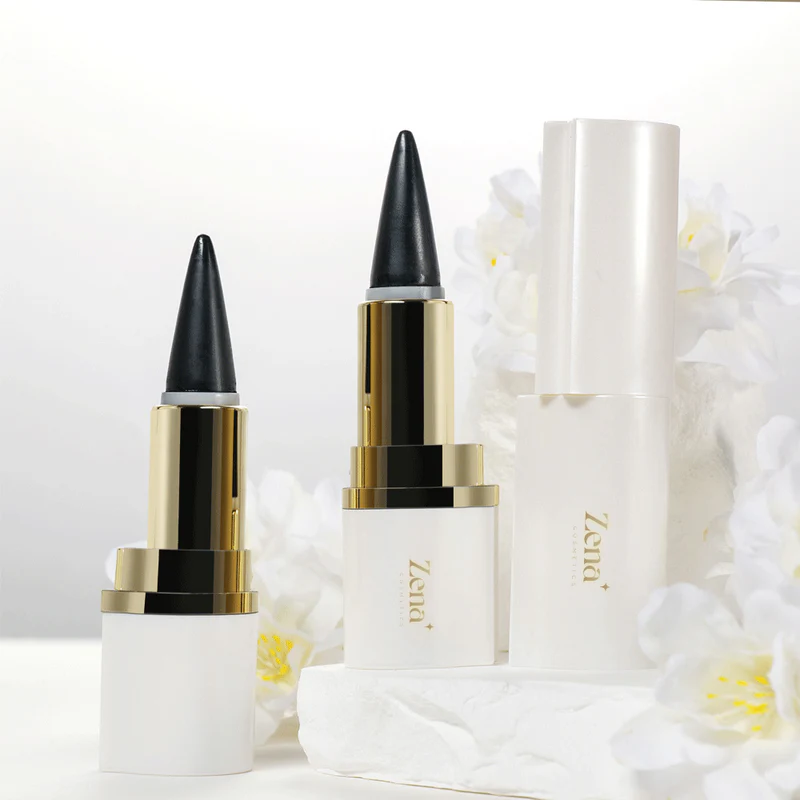
(✨ Welcome, beauty enthusiasts! ✨) Prepare yourselves, for today we delve into a topic of paramount importance in the realm of eye artistry: the Glided-on Waterproof Kajal Eyeliner. But not just any kajal eyeliner. We’re talking about this specific, potentially enigmatic, beauty weapon. The question on everyone’s perfectly lined (or not-so-perfectly lined) minds: Does it require sharpening, or is it a glorious, self-sufficient, retractable marvel?
(🤔 Dramatic pause. Cue suspenseful music. 🤔)
Fear not, my pretties, for by the end of this lecture, you will be equipped with the knowledge to confidently wield this kajal, achieving smoky eye perfection and avoiding potential pencil-related disasters. We’ll cover:
I. The Kajal Kaleidoscope: A Brief History & Types
II. Decoding the Glided-on Waterproof Kajal Eyeliner: Sharpening or Retracting?
III. The Sharpening Saga: Tools, Techniques, and Triumphs (and Tragedies)
IV. The Retractable Realm: The Joy of Twisting and The Peril of Over-Extending
V. Maintaining Your Majesty: Storage, Cleaning, and General Kajal Care
VI. Troubleshooting Troubles: Common Kajal Calamities and How to Conquer Them
VII. Application Artistry: Tips & Tricks for a Flawless Glided-on Look
VIII. Conclusion: Kajal Confidence Achieved!
(Let’s dive in! 🏊♀️)
I. The Kajal Kaleidoscope: A Brief History & Types
Kajal, oh kajal! You are more than just makeup; you are an ancient art form, a cultural icon, and a smoky-eyed siren’s best friend. Originating centuries ago in South Asia, the Middle East, and North Africa, kajal was initially created for medicinal purposes, believed to protect the eyes from harsh sunlight, infections, and even the evil eye (because let’s face it, bad eyeliner is a curse in itself).
Traditionally, kajal was made from ingredients like soot, herbs, and oils, meticulously ground and prepared. Today, we have a plethora of kajal options, each with its own unique personality and quirks. Let’s break down the main types:
| Kajal Type | Description | Pros | Cons |
|---|---|---|---|
| Traditional Kohl | Typically made from soot and natural ingredients. | Deeply pigmented, often smudgeable for a smoky effect, may have medicinal properties. | Can be messy, may contain lead (check ingredients!), application requires skill. |
| Pencil Kajal | Comes in a wooden or plastic pencil form. | Easy to apply, portable, various formulations (waterproof, smudge-proof, etc.). | May require sharpening, can break easily, pigmentation can vary. |
| Gel Kajal | Creamy formula in a pot or tube, applied with a brush. | Intense pigmentation, long-lasting, versatile. | Requires a brush, can dry out if not stored properly, may smudge if not set. |
| Liquid Kajal | Similar to liquid eyeliner, but often with a thicker, more pigmented formula. | Precise application, long-lasting, dramatic effect. | Can be tricky to apply, may dry out, not ideal for smudging. |
| Retractable Kajal | Convenient twist-up format. | No sharpening required, easy to use on the go, typically creamy and smooth. | Tip can be fragile, may not be as precise as a sharpened pencil, difficult to get a very fine point. |
(So, where does our "Glided-on Waterproof Kajal Eyeliner" fit in? 🤔 Let’s find out!)
II. Decoding the Glided-on Waterproof Kajal Eyeliner: Sharpening or Retracting?
(🥁 Drumroll, please! 🥁)
This is the moment of truth! To determine whether your Glided-on Waterproof Kajal Eyeliner requires sharpening or boasts the convenience of a retractable mechanism, you must engage in a little detective work.
Here’s how to solve the mystery:
- Visual Inspection: Examine the base of the pencil. Is there a twisting mechanism? Look for a ribbed or textured area that you can rotate. If you see one, congratulations! You have a retractable kajal.
- The Twist Test: Gently attempt to twist the base of the pencil. Does the product extend outwards? If so, you’ve cracked the code!
- The Packaging Clues: Rummage through the packaging (if you haven’t already tossed it in a fit of makeup-induced excitement). The packaging often explicitly states "retractable" or provides instructions on how to extend the product. Look for images of the pencil being twisted.
- The Brand Website: Visit the brand’s official website. Product descriptions usually include details about the mechanism.
- The Ultimate Test: If all else fails, and you’re feeling particularly adventurous (and have a backup pencil handy!), gently try to sharpen it. If it doesn’t sharpen smoothly, or if you hear a horrifying cracking sound, it’s probably retractable. (Disclaimer: I am not responsible for any kajal-related casualties resulting from this method. Proceed with caution!)
(Assuming, for the sake of this lecture, that the Glided-on Waterproof Kajal Eyeliner IS a sharpenable pencil, let’s move on to the art of sharpening.)
(However, if you’ve discovered it’s RETRACTABLE, skip ahead to Section IV!)
III. The Sharpening Saga: Tools, Techniques, and Triumphs (and Tragedies)
Sharpening a pencil may seem like a mundane task, but in the world of makeup, it’s an art form. A dull kajal is a sad kajal. A broken kajal is a tragedy. A perfectly sharpened kajal is a weapon of smoky-eyed seduction.
A. The Essential Arsenal: Sharpening Tools
- The Right Sharpener: This is crucial. Invest in a high-quality sharpener specifically designed for makeup pencils. Avoid cheap sharpeners, as they can splinter the wood and break the lead. Look for sharpeners with two holes – one for standard-sized pencils and one for larger ones.
- (Pro Tip: Clean your sharpener regularly with a cotton swab dipped in rubbing alcohol to remove buildup and ensure a clean, smooth sharpening experience.)
- The Q-Tip Army: Q-tips are your best friends for cleaning up stray shavings and smoothing the tip of the kajal after sharpening.
- The Tissue Troop: Have tissues on hand to wipe away shavings and prevent a messy situation.
B. The Sharpening Technique: Step-by-Step
- Positioning is Key: Hold the pencil firmly in one hand and the sharpener in the other.
- Gentle Insertion: Insert the pencil into the sharpener’s hole.
- The Rotation Ritual: Rotate the pencil gently and smoothly within the sharpener. Avoid applying too much pressure, as this can break the lead.
- Listen Carefully: Listen for a consistent, smooth shaving sound. If you hear cracking or splintering, stop immediately.
- Check the Point: Periodically remove the pencil from the sharpener to check the point. You want a sharp, defined point without being overly aggressive.
- The Finishing Touches: Once you’ve achieved the desired point, gently wipe the tip of the pencil with a tissue to remove any loose shavings.
C. Sharpening Troubleshooting: Common Problems and Solutions
| Problem | Solution |
|---|---|
| Broken Lead: | Use a high-quality sharpener. Don’t apply too much pressure. Store your kajal in a cool, dry place. If the lead is constantly breaking, try chilling the pencil in the refrigerator for a few minutes before sharpening. |
| Uneven Sharpening: | Try a different sharpener. Ensure the pencil is inserted straight into the sharpener. Rotate the pencil evenly. |
| Rough Point: | Use a Q-tip to smooth the point. Try sharpening the pencil at a slightly different angle. |
| Sharpener Clogged: | Clean the sharpener with a cotton swab dipped in rubbing alcohol. Empty the shavings regularly. |
| Wood Splintering: | Use a high-quality sharpener. Sharpen the pencil gently. |
(May your sharpening endeavors be filled with triumph, not tragedy! 🙏)
IV. The Retractable Realm: The Joy of Twisting and The Peril of Over-Extending
(Welcome, retractable kajal comrades! 🎉)
(Welcome, retractable kajal comrades! 🎉)
If your Glided-on Waterproof Kajal Eyeliner is indeed a retractable marvel, then congratulations! You have embraced the ease and convenience of modern makeup technology. However, even retractable pencils have their quirks.
A. The Art of the Twist:
- Gentle Rotation: Twist the base of the pencil gently to extend the product. Avoid excessive force, as this can damage the mechanism.
- The Right Amount: Only extend the amount of product you need for immediate application. Over-extending can lead to breakage and product waste.
- The Retraction Retreat: After use, twist the base of the pencil in the opposite direction to retract the product fully. This protects the tip from damage and drying out.
B. The Peril of Over-Extending:
This is the cardinal sin of retractable kajal ownership. Over-extending the product can lead to:
- Breakage: The tip of the kajal is delicate and prone to snapping if extended too far.
- Product Waste: Once broken, the kajal is difficult to repair and you’ll end up wasting precious product.
- Emotional Distress: Let’s be honest, breaking your favorite kajal is a deeply upsetting experience.
C. Retractable Kajal Troubleshooting:
| Problem | Solution |
|---|---|
| Product Won’t Extend: | Ensure the base of the pencil is not stuck. Try gently wiggling the base while twisting. If it’s still stuck, contact the brand’s customer service. |
| Product Won’t Retract: | Try gently twisting the base in the opposite direction. If it’s still stuck, avoid forcing it. You may need to use a small brush to apply the remaining product. |
| Tip Keeps Breaking: | Avoid over-extending the product. Use a light touch when applying. Store the kajal in a cool, dry place. |
| Twisting Mechanism Feels Loose: | The mechanism may be worn out. Contact the brand’s customer service. |
(Embrace the twist, but beware the over-extend! 🙅♀️)
V. Maintaining Your Majesty: Storage, Cleaning, and General Kajal Care
Whether your Glided-on Waterproof Kajal Eyeliner is a sharpenable pencil or a retractable wonder, proper maintenance is essential for prolonging its life and ensuring optimal performance.
A. Storage Sensibilities:
- Cool and Dry: Store your kajal in a cool, dry place away from direct sunlight and heat. Excessive heat can soften the product and cause it to melt or break.
- Upright Position: Store your kajal upright, with the tip facing upwards. This prevents the product from pooling at the bottom and potentially drying out.
- Separate Compartment: Store your kajal in a separate compartment in your makeup bag to prevent it from being crushed or damaged by other products.
B. Cleaning Considerations:
- Sharpeners: Clean your sharpener regularly with a cotton swab dipped in rubbing alcohol to remove buildup and ensure a clean, smooth sharpening experience.
- Pencil Body: Wipe the body of the pencil with a damp cloth to remove any smudges or fingerprints.
- Retractable Tip: Gently wipe the tip of a retractable kajal with a tissue to remove any excess product.
C. General Kajal Care:
- Handle with Care: Treat your kajal with respect. Avoid dropping it or subjecting it to excessive pressure.
- Replace Regularly: Even with proper care, kajal can expire. Replace your kajal every 6-12 months to prevent bacterial contamination.
- Listen to Your Eyes: If you experience any irritation or discomfort after using your kajal, discontinue use immediately and consult a doctor.
(Treat your kajal like royalty! 👑)
VI. Troubleshooting Troubles: Common Kajal Calamities and How to Conquer Them
Even the most skilled makeup artists encounter kajal-related challenges. Here are some common problems and their solutions:
| Problem | Solution |
|---|---|
| Kajal Smudging: | Use a waterproof kajal. Set the kajal with a powder eyeshadow. Apply a primer to your eyelids. Avoid applying moisturizer too close to your lash line. |
| Kajal Fading: | Use a long-lasting kajal. Apply a primer to your eyelids. Set the kajal with a powder eyeshadow. |
| Kajal Irritation: | Use a hypoallergenic kajal. Discontinue use immediately and consult a doctor. Check the ingredient list for potential allergens. |
| Uneven Application: | Practice makes perfect! Use short, controlled strokes. Use a Q-tip to clean up any mistakes. |
| Kajal Transferring: | Use a waterproof kajal. Set the kajal with a powder eyeshadow. Avoid applying moisturizer too close to your lash line. |
(Conquer those kajal calamities! 💪)
VII. Application Artistry: Tips & Tricks for a Flawless Glided-on Look
Now that you’ve mastered the art of sharpening (or twisting!) and maintaining your Glided-on Waterproof Kajal Eyeliner, it’s time to unleash its full potential. Here are some tips and tricks for a flawless application:
- Prep Your Lids: Apply an eyeshadow primer to create a smooth, even base for your kajal.
- Tightlining: Gently lift your upper eyelid and apply the kajal to the waterline. This creates a subtle, defined look.
- Lining the Lash Line: Apply the kajal along your upper and lower lash lines, as close to the lashes as possible.
- Smudging for Smoke: For a smoky eye effect, use a small brush or Q-tip to gently smudge the kajal immediately after application.
- Winged Liner: Use a thin, angled brush to create a winged liner effect with your kajal.
- Layering: Layer your kajal with eyeshadow for a more intense and long-lasting look.
- Experiment! Don’t be afraid to experiment with different application techniques to find what works best for you.
(Unleash your inner eye artist! 🎨)
VIII. Conclusion: Kajal Confidence Achieved!
(👏 Congratulations, graduates! 🎓)
You have successfully navigated the Great Kajal Conundrum! Whether your Glided-on Waterproof Kajal Eyeliner requires sharpening or boasts the convenience of a retractable mechanism, you are now equipped with the knowledge to wield it with confidence and achieve your desired eye look.
Remember:
- Identify your kajal type: Sharpenable or retractable?
- Master the technique: Sharpening or twisting with precision.
- Maintain your majesty: Proper storage and cleaning.
- Troubleshoot troubles: Conquer those kajal calamities.
- Embrace the artistry: Experiment with different application techniques.
(Go forth and create smoky-eyed masterpieces! And remember, always check if it needs sharpening before you break it! 😉)
For detailed product specifications and purchases, please go to :https://zenamakeup.com/products/glided-on-waterproof-kajal-eyeliner
Leave a Reply