Lecture: Mastering the Glided-on Waterproof Kajal Eyeliner: From Beginner Scribbles to Winged Goddess
(Image: A dramatic close-up of an eye with perfectly applied kajal, showcasing a sharp wing and intense color.)
Welcome, beauty enthusiasts, makeup maestros, and eyeliner aficionados! 🥂 Today, we’re diving deep into the captivating world of kajal, specifically the Glided-on Waterproof Kajal Eyeliner. Forget those shaky lines and panda eyes – we’re here to transform you from eyeliner novices to kajal connoisseurs. Think of me as your Professor Eyeliner, guiding you through this wondrous journey with wit, wisdom, and a healthy dose of makeup humor. 🤓
This isn’t just about slapping on some black pigment; it’s about understanding the power of kajal, mastering the application techniques, and unlocking your inner eyeliner goddess. We’ll explore the history, the science (a little bit!), the tools, the tricks, and, most importantly, how to achieve that coveted glided-on perfection. So grab your pencils, sharpen your wit, and let’s get started!
Lecture Outline:
- Kajal 101: A Love Story Centuries in the Making (The history and purpose of kajal, beyond just looking fabulous)
- Why Waterproof? Surviving the Elements (and Emotional Rollercoasters) (Benefits of waterproof formulas and understanding their composition)
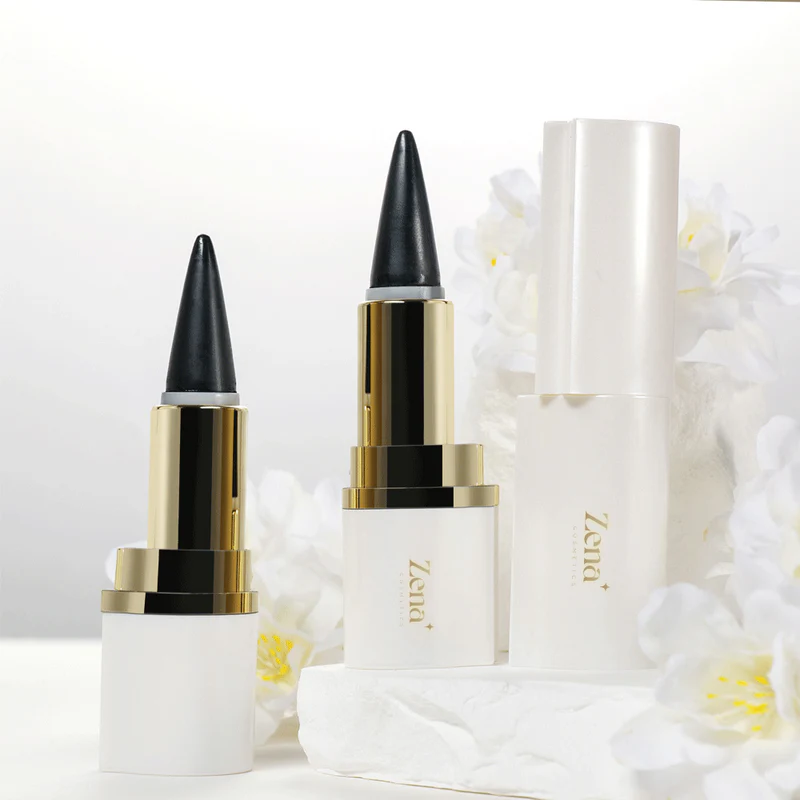
- The Anatomy of a Perfect Kajal Pencil: Choosing Your Weapon (Different kajal types, textures, and what to look for)
- Tools of the Trade: Beyond the Pencil (Because even Picasso needed a palette!) (Brushes, sharpeners, cotton swabs, and other essential accessories)
- Application Techniques: From Beginner Doodles to Pro Strokes (Step-by-step guides for various looks: tightlining, waterline application, smudging, winged liner)
- Troubleshooting: Eyeliner Fails and How to Fix Them (We’ve all been there!) (Common mistakes and quick fixes for smudging, uneven lines, and other disasters)
- Beyond Black: Exploring the Kajal Color Spectrum (Dare to be different!) (Experimenting with different colors and how to incorporate them into your makeup routine)
- Kajal Longevity: Making it Last All Day (or Night!) (Priming, setting, and other tips for extending the wear of your kajal)
- Kajal Removal: The Gentle Goodbye (Because nobody wants panda eyes… for real.) (Effective and gentle makeup removal techniques)
- Advanced Kajal Art: Taking Your Skills to the Next Level (Unleash your inner artist!) (Creative techniques and trends: graphic liner, reverse eyeliner, etc.)
- Final Exam: Putting Your Knowledge to the Test (Just kidding… mostly!) (Quick recap and encouragement to practice and experiment)
1. Kajal 101: A Love Story Centuries in the Making 📜
Kajal, also known as kohl or surma, isn’t just a modern makeup trend; it’s a beauty staple with a history as rich and dark as the pigment itself. Its origins trace back to ancient Egypt and other parts of the Middle East and South Asia, where it was used not just for cosmetic purposes but also for medicinal and protective reasons.
(Image: An ancient Egyptian portrait featuring heavily lined eyes with kohl.)
- Protection from the Sun: Kajal was believed to protect the eyes from the harsh desert sun and wind.
- Reducing Glare: The dark pigment helped to reduce glare, improving visibility in bright environments.
- Antimicrobial Properties: Some traditional kajal recipes contained ingredients with potential antimicrobial properties, helping to prevent eye infections.
- Spiritual Significance: In some cultures, kajal was believed to ward off the "evil eye" and protect the wearer from negative energy.
Today, we primarily use kajal for its aesthetic appeal, but understanding its historical significance adds a layer of appreciation to this timeless beauty product. It’s more than makeup; it’s a connection to our ancestors! Think of it as a beauty time capsule. ⏳
2. Why Waterproof? Surviving the Elements (and Emotional Rollercoasters) 💦
Let’s face it, life throws all sorts of challenges our way: unexpected rain showers, tear-jerking movies, sweaty workouts, and the occasional emotional rollercoaster ride. That’s where the magic of waterproof kajal comes in.
(Icon: A happy face with tear tracks, contrasted with a perfectly intact eyeliner wing.)
- Smudge-Proofing Power: Waterproof formulas are designed to resist smudging and fading, keeping your eye makeup looking fresh and sharp all day long.
- Long-Lasting Definition: Unlike traditional kajal, which can easily melt and disappear, waterproof versions offer superior longevity.
- Weather-Resistant: Rain, humidity, or even a good cry are no match for a well-formulated waterproof kajal.
- Confidence Booster: Knowing that your eyeliner is locked in place allows you to focus on more important things, like conquering the world (or at least your to-do list). 💪
But how does it work? Waterproof formulas typically contain ingredients like silicones and waxes that create a barrier, preventing water and oil from breaking down the pigment. It’s like a tiny, invisible raincoat for your eyes! ☔
3. The Anatomy of a Perfect Kajal Pencil: Choosing Your Weapon ⚔️
Not all kajal pencils are created equal. The texture, pigmentation, and longevity can vary significantly. Here’s a breakdown of what to look for when choosing your ideal weapon:
(Table: Comparing different types of kajal pencils)
| Type | Texture | Pigmentation | Longevity | Best For |
|---|---|---|---|---|
| Soft Kajal | Creamy, Blendable | Intense | Moderate | Smudged looks, smoky eyes, beginners |
| Hard Kajal | Firm, Precise | Good | Long-lasting | Tightlining, waterline application, sharp lines |
| Gel Kajal | Smooth, Gel-like | Very Intense | Very Long-lasting | Winged liner, graphic looks, long-wear |
| Automatic Kajal | Creamy, Retractable | Good | Moderate | On-the-go application, convenience |
Key Factors to Consider:
- Texture: Do you prefer a creamy, blendable texture for a smoky effect, or a firmer texture for precise lines?
- Pigmentation: Look for a kajal with rich, intense pigmentation for maximum impact. One swipe should be enough!
- Longevity: If you need your eyeliner to last all day, opt for a long-wearing, waterproof formula.
- Ease of Application: Consider your skill level and choose a pencil that’s easy to control and apply.
- Ingredients: Be mindful of potential allergens and opt for a formula that’s gentle on your sensitive eyes.
Remember, finding the perfect kajal is a personal journey. Experiment with different types and textures to discover what works best for you. Don’t be afraid to play!🎨
4. Tools of the Trade: Beyond the Pencil (Because even Picasso needed a palette!) 🖌️
While a good kajal pencil is essential, having the right tools can elevate your application game to a whole new level.
(Image: A collection of kajal application tools: sharpener, angled brush, cotton swabs, makeup remover wipes.)
- Sharpener: A sharpener is crucial for maintaining a precise tip, especially for hard kajal pencils. Choose a high-quality sharpener that won’t break or splinter the pencil.
- Angled Brush: An angled brush is perfect for smudging kajal for a smoky effect or for creating precise winged liner.
- Cotton Swabs: Cotton swabs are your best friend for cleaning up mistakes and creating sharp, defined lines. Dip them in makeup remover for extra precision.
- Makeup Remover Wipes: Keep makeup remover wipes on hand for quick and easy touch-ups or for removing your entire eye makeup at the end of the day.
- Eyelash Curler: Curling your lashes before applying kajal can help to open up your eyes and make your eyeliner look even more striking.
- Mirror: A well-lit mirror is essential for precise application. Consider using a magnifying mirror for close-up work.
Think of these tools as your trusty sidekicks, ready to assist you in your quest for eyeliner perfection. 🦸♀️
5. Application Techniques: From Beginner Doodles to Pro Strokes ✍️
Now for the fun part: putting your kajal pencil to work! Here’s a step-by-step guide to mastering some essential kajal application techniques:
(Icon: A series of eye icons showing different eyeliner styles: tightline, waterline, smudged, winged.)
- Tightlining: This technique involves applying kajal to the upper waterline, between your lashes. It creates a subtle definition without looking like you’re wearing eyeliner.
- How to: Gently lift your upper eyelid and apply the kajal along the waterline, filling in the gaps between your lashes.
- Pro Tip: Use a hard kajal pencil for precise application and avoid poking yourself in the eye! 🙈
- Waterline Application: Applying kajal to the lower waterline can make your eyes look bigger and more defined.
- How to: Gently pull down your lower eyelid and apply the kajal along the waterline.
- Pro Tip: Use a waterproof kajal to prevent smudging and fading.
- Smudged Liner: For a smoky, sultry look, smudge your kajal after applying it.
- How to: Apply kajal along your upper and lower lash lines, then use an angled brush or your fingertip to gently smudge the lines.
- Pro Tip: Start with a thin line of kajal and gradually build up the intensity.
- Winged Liner: The holy grail of eyeliner application!
- How to:
- Start by creating a thin line along your upper lash line, extending slightly beyond the outer corner of your eye.
- Determine the angle of your wing. A good starting point is to follow the natural angle of your lower lash line.
- Connect the end of the line to the outer corner of your eye, creating a triangle.
- Fill in the triangle with kajal.
- Clean up any mistakes with a cotton swab dipped in makeup remover.
- Pro Tip: Use a piece of tape as a guide for creating a sharp, even wing. Practice makes perfect! 🪞
- How to:
Remember, practice is key to mastering these techniques. Don’t be discouraged if your first attempts aren’t perfect. Keep experimenting and you’ll eventually find what works best for you.
6. Troubleshooting: Eyeliner Fails and How to Fix Them (We’ve all been there!) 🤕
6. Troubleshooting: Eyeliner Fails and How to Fix Them (We’ve all been there!) 🤕
Even the most experienced makeup artists encounter eyeliner mishaps. Here are some common problems and their solutions:
(Table: Common Eyeliner Problems and Solutions)
| Problem | Solution |
|---|---|
| Smudging | Use a waterproof kajal, set your eyeliner with powder, and avoid rubbing your eyes. |
| Uneven Lines | Use a cotton swab dipped in makeup remover to clean up the lines, or try using a piece of tape as a guide. |
| Fading | Apply a primer to your eyelids before applying kajal, and set your eyeliner with powder. |
| Transfer to Upper Lid | Tightline your upper waterline to create a barrier, and use a long-wearing, waterproof formula. |
| Difficult to Apply | Warm up the kajal pencil by holding it between your fingers for a few seconds, or use a softer pencil. |
Don’t beat yourself up over eyeliner fails. They’re a natural part of the learning process. Just learn from your mistakes and keep practicing! 😊
7. Beyond Black: Exploring the Kajal Color Spectrum (Dare to be different!) 🌈
While black kajal is a classic, there’s a whole world of colors to explore! Experimenting with different colors can add a unique touch to your makeup look.
(Image: A collage of eyes with kajal in various colors: brown, blue, green, purple.)
- Brown: A softer alternative to black, perfect for everyday wear.
- Blue: Can enhance blue eyes and add a pop of color to any look.
- Green: Complements green and hazel eyes.
- Purple: Adds a touch of mystery and sophistication.
- White/Nude: Can make your eyes look bigger and brighter when applied to the lower waterline.
Don’t be afraid to step outside your comfort zone and try different colors. You might be surprised at what you discover! ✨
8. Kajal Longevity: Making it Last All Day (or Night!) 🌙
Want to ensure your kajal stays put all day long? Here are some tips for extending its wear:
(Icon: A clock with a checkmark, symbolizing long-lasting makeup.)
- Prime Your Lids: Applying an eyeshadow primer to your eyelids creates a smooth base and helps to grip the kajal.
- Set with Powder: After applying your kajal, gently set it with a translucent powder or eyeshadow in a similar color.
- Use a Waterproof Formula: As we’ve already discussed, waterproof kajal is essential for long-lasting wear.
- Avoid Rubbing Your Eyes: This is a general rule for all makeup, but it’s especially important with kajal, as it can easily smudge.
- Blot Away Excess Oil: If you have oily eyelids, blot away excess oil with a tissue before applying kajal.
With these tips, your kajal will stay put through thick and thin! 💪
9. Kajal Removal: The Gentle Goodbye (Because nobody wants panda eyes… for real.) 🐼
Removing your kajal properly is just as important as applying it correctly. Harsh rubbing can irritate your eyes and damage your delicate skin.
(Image: A before-and-after photo showing kajal applied and then gently removed with a makeup remover.)
- Use a Gentle Makeup Remover: Choose a makeup remover specifically designed for removing eye makeup. Micellar water or oil-based cleansers are excellent options.
- Soak a Cotton Pad: Soak a cotton pad with makeup remover and gently press it against your closed eye for a few seconds to dissolve the kajal.
- Wipe Gently: Gently wipe away the kajal, avoiding harsh rubbing.
- Repeat if Necessary: If necessary, repeat the process until all traces of kajal are removed.
- Rinse with Water: Rinse your face with water to remove any remaining residue.
Treat your eyes with kindness, and they’ll thank you for it! ❤️
10. Advanced Kajal Art: Taking Your Skills to the Next Level (Unleash your inner artist!) 🎨
Ready to push your kajal skills to the limit? Here are some advanced techniques to try:
(Image: A collage of creative kajal looks: graphic liner, reverse eyeliner, double wing.)
- Graphic Liner: Create bold, geometric shapes around your eyes using kajal.
- Reverse Eyeliner: Apply kajal to your lower lash line only, creating a dramatic and unexpected look.
- Double Winged Liner: Create two separate wings on your upper lash line for a unique and edgy effect.
- Inner Corner Highlight: Use a white or shimmery kajal pencil to highlight the inner corners of your eyes, making them look brighter and more awake.
The possibilities are endless! Let your creativity run wild and experiment with different techniques to create your own signature kajal looks.
11. Final Exam: Putting Your Knowledge to the Test (Just kidding… mostly!) 😉
Congratulations, you’ve made it to the end of our kajal journey! You’ve learned about the history, the science, the tools, the techniques, and the troubleshooting tips.
(Image: A graduation cap and diploma.)
But the real test is applying what you’ve learned. So grab your Glided-on Waterproof Kajal Eyeliner, experiment with different looks, and don’t be afraid to make mistakes. The more you practice, the better you’ll become.
Remember, makeup is all about having fun and expressing yourself. So go out there and create some kajal magic! ✨
Bonus Tip: Don’t forget to share your creations with the world! Tag me (Professor Eyeliner!) in your social media posts so I can see your amazing work. And remember, even the most seasoned artists started with a shaky line. Keep practicing, keep experimenting, and most importantly, keep having fun! Class dismissed! 🎉
For detailed product specifications and purchases, please go to :https://zenamakeup.com/products/glided-on-waterproof-kajal-eyeliner
Leave a Reply