Get That Healthy Glow: Your Secret Weapon for a Luminous, Effortlessly Blended Cheek with Jelly Glow Liquid Blush
(Lecture Hall doors swing open, dramatic music fades in, and a figure in a lab coat, but with brightly colored sneakers and a glittery name tag that reads "Professor Glo-Up" strides confidently to the podium.)
Good morning, beauty enthusiasts, glow-getters, and blush aficionados! Welcome, welcome! I’m Professor Glo-Up, and I’m thrilled to have you all here today for a deep dive into the magical, mystical, and frankly, deliciously dewy world of liquid blush, specifically focusing on the revolutionary Jelly Glow Liquid Blush!
(Professor Glo-Up gestures wildly with a test tube filled with shimmery pink liquid.)
Forget everything you thought you knew about blush. We’re not talking about powdery, cakey cheeks that scream "clown college" anymore. We’re talking about a natural, healthy, lit-from-within radiance that says, "I just spent a week sunbathing in the Maldives, drinking green juice, and meditating on the meaning of life… but really, I just used Jelly Glow Liquid Blush!" ✨
So, grab your notebooks, charge your devices, and prepare to embark on a journey towards blush enlightenment!
(Professor Glo-Up clicks a remote, and a vibrant slide appears on the screen: a close-up of a flawlessly blushed cheek.)
Lecture Outline:
- The Blush Evolution: From Powder Puff to Liquid Luxury (A historical perspective with a touch of humor)
- Decoding the Jelly Glow: Why Liquid Blush is the Answer to Your Prayers (Ingredients, benefits, and why it’s superior)
- Shade Selection 101: Finding Your Perfect Jelly Glow Match (Skin tone analysis, undertones, and avoiding the "oops, I’m sunburnt" look)
- Application Techniques: Master the Art of Effortless Blending (Tools, tips, and tricks for a seamless, natural finish)
- Troubleshooting: Common Mistakes and How to Fix Them (Blush blunders be gone!)
- Beyond the Cheeks: Unexpected Uses for Your Jelly Glow (Creative applications for a multi-dimensional glow)
- Maintenance and Care: Keeping Your Jelly Glow Fresh and Fabulous (Storage, hygiene, and prolonging its lifespan)
- The Verdict: Why Jelly Glow Liquid Blush Deserves a Spot in Your Makeup Bag (A summary of benefits and a final call to action)
- Q&A: Ask Professor Glo-Up Anything! (Your chance to get personalized advice)
1. The Blush Evolution: From Powder Puff to Liquid Luxury
(The slide changes to a sepia-toned image of a Victorian woman applying rouge with a fluffy powder puff.)
Ah, blush! A tale as old as time, or at least as old as wanting to look like you’re not completely exhausted. For centuries, blush has been a beauty staple, but its form and function have evolved dramatically.
Let’s take a quick trip down memory lane:
- Ancient Egypt: Crushed berries and ochre were the OG blushes. Talk about commitment to the natural look! (Though, perhaps not the most hygienic.)
- Victorian Era: Think pale faces and rosy cheeks achieved with… dubious ingredients. Arsenic, anyone? (Please don’t try this at home!) ☠️
- Roaring Twenties: Powder blush came into its own, often applied with a heavy hand for a dramatic, flapper-esque look.
- The 80s: Everything was bigger, including the blush. Think bright pink stripes that could be seen from space.
- The Present Day: We’ve arrived at the age of enlightenment, embracing natural, dewy, and effortlessly blended blush. And that, my friends, is where Jelly Glow Liquid Blush enters the picture!
Powder blush, while a classic, can often look cakey, emphasize texture, and be difficult to blend seamlessly. It’s like trying to spread peanut butter on a piece of sandpaper – messy and frustrating! 😠 Liquid blush, on the other hand, offers a more natural, radiant finish that melts into the skin like a dream. Think of it as spreading butter on a warm croissant. Mmm, delicious! 🥐
2. Decoding the Jelly Glow: Why Liquid Blush is the Answer to Your Prayers
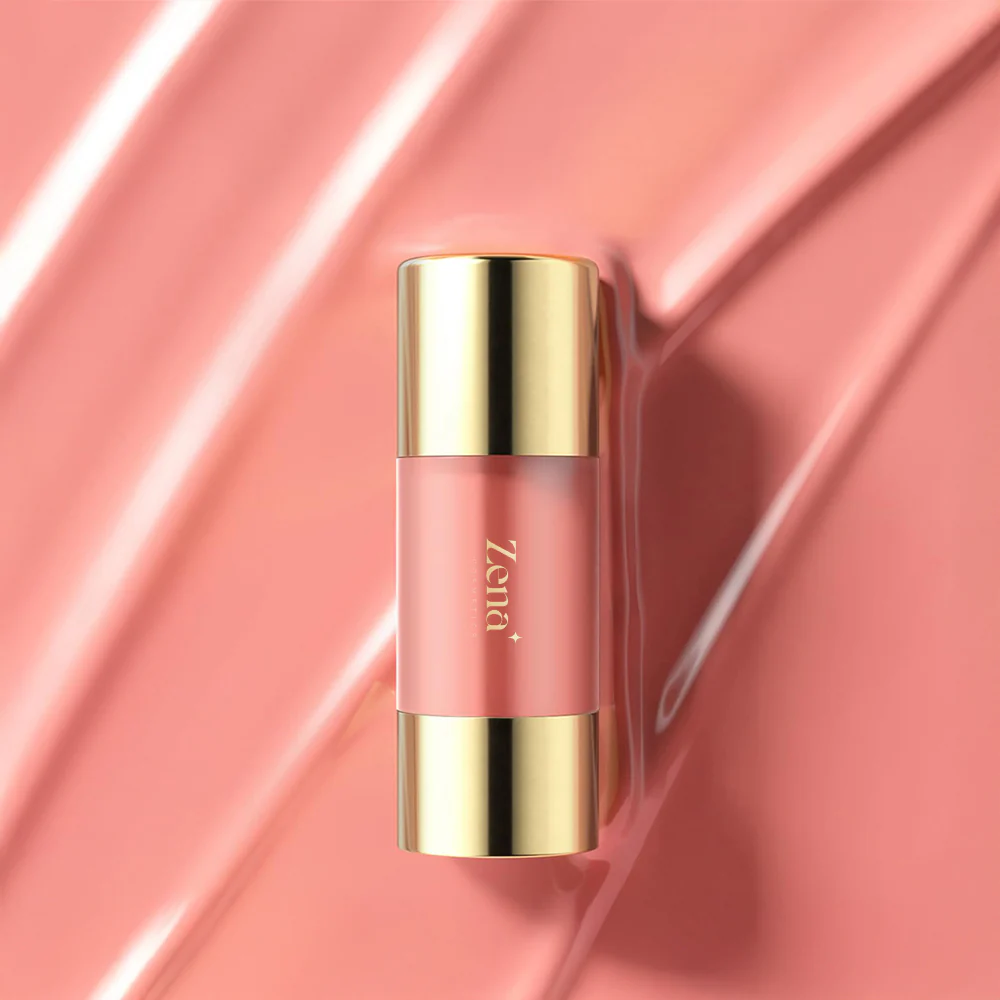
(The slide changes to a close-up of the Jelly Glow Liquid Blush packaging, highlighting its texture and ingredients.)
So, what makes Jelly Glow Liquid Blush so special? Let’s break it down:
| Feature | Benefit | Why It Matters |
|---|---|---|
| Jelly Texture | Lightweight, buildable, and easy to blend. | Prevents a heavy, cakey look and allows for customized intensity. |
| Hydrating Formula | Contains moisturizing ingredients like hyaluronic acid and vitamin E. | Keeps skin hydrated and prevents dryness, ensuring a healthy, radiant glow. |
| Long-Lasting | Stays put for hours without fading or smudging. | No need for constant touch-ups, keeping you looking fresh all day long. |
| Pigmented | Delivers vibrant color with just a few drops. | A little goes a long way, making it a cost-effective option. |
| Versatile | Can be used on cheeks, lips, and even eyes. | Simplifies your makeup routine and allows for a cohesive, monochromatic look. |
| Cruelty-Free | Not tested on animals. | You can feel good about using a product that aligns with your values. |
But the real magic lies in the texture. The "jelly" consistency is key! It allows the blush to glide onto the skin effortlessly, blurring imperfections and creating a soft-focus effect. It’s like Photoshop, but in a bottle! ✨
Think of traditional powder blush as a dusty old textbook, and Jelly Glow Liquid Blush as a captivating, interactive e-book. Which one would you rather use? 😉
3. Shade Selection 101: Finding Your Perfect Jelly Glow Match
(The slide changes to a color wheel with various blush shades and skin tone examples.)
Choosing the right blush shade is crucial. Picking the wrong one can result in looking like you’ve just run a marathon or, worse, like you’re suffering from a severe allergic reaction. 😱
Here’s a simple guide to finding your perfect match:
- Identify Your Skin Tone: Are you fair, light, medium, tan, or deep?
-
Determine Your Undertones: Are you warm, cool, or neutral?
- Warm Undertones: Yellow, golden, or peachy.
- Cool Undertones: Pink, red, or blue.
- Neutral Undertones: A mix of warm and cool.
(Professor Glo-Up pulls out a piece of white paper.)
A quick trick to determine your undertones is the vein test! Look at the veins on your wrist under natural light:
- Blue/Purple Veins: Cool Undertones
- Green Veins: Warm Undertones
- Blue-Green Veins: Neutral Undertones
Now, let’s match your skin tone and undertones to the perfect Jelly Glow shades:
| Skin Tone | Undertones | Recommended Jelly Glow Shades | Avoid |
|---|---|---|---|
| Fair | Cool | Light pinks, rosy nudes, berry tones | Deep, intense shades that can overwhelm the complexion. |
| Fair | Warm | Peach, apricot, coral | Cool-toned pinks that can make the skin look washed out. |
| Light | Cool | Rosy pinks, mauve, plum | Orange-based shades that can look unnatural. |
| Light | Warm | Warm peach, coral, bronze | Very pale pinks that can be too subtle. |
| Medium | Cool | Berry, plum, rose | Extremely pale or pastel shades that won’t show up. |
| Medium | Warm | Peachy coral, bronze, terracotta | Shades that are too cool or ashy. |
| Tan | Cool | Deep rose, berry, wine | Light, pastel shades that will disappear. |
| Tan | Warm | Bronze, copper, terracotta, warm reds | Shades that are too cool or muted. |
| Deep | Cool | Rich plum, berry, wine, deep rose | Light, pastel shades that won’t show up and can look ashy. |
| Deep | Warm | Bronze, copper, warm reds, terracotta | Shades that are too pale or muted and can look dull. |
Pro-Tip: When in doubt, swatch the blush on your inner wrist or cheek in natural light to see how it looks against your skin.
4. Application Techniques: Master the Art of Effortless Blending
(The slide changes to a series of images demonstrating different application techniques.)
Now for the fun part: application! The key to a perfect Jelly Glow application is blending, blending, blending! Think of it as a soothing massage for your cheeks, not a paint job.
Now for the fun part: application! The key to a perfect Jelly Glow application is blending, blending, blending! Think of it as a soothing massage for your cheeks, not a paint job.
Tools of the Trade:
- Fingertips: For a natural, diffused look.
- Beauty Sponge: For a seamless, airbrushed finish.
- Stippling Brush: For controlled application and buildable coverage.
- Duo-Fiber Brush: For a soft, diffused look.
Application Methods:
- The Dot Method: Place 1-3 small dots of Jelly Glow on the apples of your cheeks. Use your fingertips, a beauty sponge, or a brush to blend outwards and upwards towards your temples.
(Professor Glo-Up demonstrates on a volunteer from the audience.) - The Back-of-Hand Method: Dispense a small amount of Jelly Glow onto the back of your hand. Use your fingertip or a brush to pick up the product and apply it to your cheeks, blending as you go.
- The Brush-Direct Method: Dip your brush directly into the Jelly Glow and apply it to your cheeks, blending immediately. (Use this method sparingly, as it can be easy to overapply.)
Tips and Tricks:
- Start Small: It’s always easier to add more blush than to remove it. Remember, you can always build up the intensity.
- Blend in Natural Light: This will help you see if you’re blending evenly and avoiding harsh lines.
- Smile While Applying: This helps you locate the apples of your cheeks.
- Set with Powder (Optional): If you have oily skin, you can set your Jelly Glow with a light dusting of translucent powder to prolong its wear.
- Layer with Other Products: You can layer Jelly Glow over foundation, concealer, or even powder blush for a customized look.
Placement is Key:
- For a Youthful Look: Apply blush to the apples of your cheeks.
- For a Sculpted Look: Apply blush slightly higher, along the cheekbones.
- For a Sun-Kissed Look: Apply blush across the bridge of your nose and cheeks.
5. Troubleshooting: Common Mistakes and How to Fix Them
(The slide changes to a cartoon image of a person with overly blushed cheeks and a panicked expression.)
We’ve all been there. The dreaded "clown cheeks." 🤡 But fear not! Professor Glo-Up is here to help you avoid common blush blunders and fix them when they happen.
| Mistake | Solution |
|---|---|
| Applying Too Much | Use a damp beauty sponge or a clean brush to blend out the excess product. |
| Uneven Application | Re-blend the blush until it’s evenly distributed. |
| Harsh Lines | Use a clean brush or a beauty sponge to soften the edges of the blush. |
| Blush Fading Too Quickly | Set your blush with a light dusting of translucent powder. |
| Blush Looking Cakey | Exfoliate your skin regularly and use a hydrating moisturizer. |
| Choosing the Wrong Shade | Try a different shade that complements your skin tone and undertones. |
| Blush Emphasizing Texture | Use a blurring primer before applying your blush. |
| Blush Clashing with Other Makeup | Ensure your blush complements your lipstick and eyeshadow shades for a cohesive look. |
The Emergency Fix: If you’ve applied way too much blush, don’t panic! Grab a clean beauty sponge or a foundation brush and gently dab it over the area to pick up the excess product. You can also apply a thin layer of foundation or concealer to tone down the color.
6. Beyond the Cheeks: Unexpected Uses for Your Jelly Glow
(The slide changes to images demonstrating Jelly Glow used on lips and eyes.)
Jelly Glow Liquid Blush is not just for cheeks! Its versatile formula can be used to create a variety of looks.
- Lip Tint: Apply a small amount of Jelly Glow to your lips for a natural, stained effect. Top with a clear gloss for added shine.
- Eyeshadow: Dab a small amount of Jelly Glow onto your eyelids and blend with your finger or a brush for a subtle wash of color.
- Highlighter: Mix a tiny drop of Jelly Glow with your favorite liquid highlighter for an extra dewy glow.
- Body Luminizer: Mix a small amount of Jelly Glow with your body lotion for a subtle shimmer all over.
Pro-Tip: Experiment with different combinations and find your own creative ways to use Jelly Glow!
7. Maintenance and Care: Keeping Your Jelly Glow Fresh and Fabulous
(The slide changes to images demonstrating proper storage and hygiene practices.)
Just like any precious beauty product, Jelly Glow Liquid Blush requires a little TLC to keep it in tip-top shape.
- Storage: Store your Jelly Glow in a cool, dry place away from direct sunlight and heat.
- Hygiene: Avoid touching the applicator directly to your face to prevent contamination. Use a clean brush or your fingertips to apply the product.
- Cleaning: If the applicator becomes dirty, gently wipe it with a damp cloth or a makeup wipe.
- Expiration: Check the expiration date on the packaging and discard the product after it expires.
Pro-Tip: Keeping your Jelly Glow clean and properly stored will prolong its lifespan and ensure its quality.
8. The Verdict: Why Jelly Glow Liquid Blush Deserves a Spot in Your Makeup Bag
(The slide changes to a final image of a person with a radiant, healthy glow.)
In conclusion, Jelly Glow Liquid Blush is a game-changer. It’s:
- Easy to Use: Even for beginners!
- Versatile: Can be used on cheeks, lips, and eyes.
- Hydrating: Keeps skin moisturized and healthy.
- Long-Lasting: Stays put all day long.
- Radiant: Creates a natural, healthy glow.
So, ditch the dusty powder blush and embrace the dewy deliciousness of Jelly Glow Liquid Blush! Your cheeks (and your confidence) will thank you. 😊
(Professor Glo-Up beams at the audience.)
9. Q&A: Ask Professor Glo-Up Anything!
(Professor Glo-Up opens the floor to questions.)
Alright, my glow-rious students! Let’s hear your questions! Don’t be shy, there’s no such thing as a silly question when it comes to achieving the perfect blush!
(Professor Glo-Up spends the remaining time answering questions, offering personalized advice, and sharing more tips and tricks for achieving a healthy, luminous glow.)
(The lecture concludes with enthusiastic applause and students rushing to the front to examine the Jelly Glow Liquid Blush samples.)
(Professor Glo-Up smiles, knowing that she has successfully spread the gospel of glow!) ✨
For detailed product specifications and purchases, please go to :https://zenamakeup.com/products/jelly-liquid-blush-stick
Leave a Reply