Lecture Hall: Unleashing Your Inner Glamazon with Pigmented Glitter Eyeshadow Cream
(Lights dim, a spotlight shines on a flamboyant figure – you, the Makeup Maestro! You adjust your oversized glasses and beam at the audience.)
Alright, darlings! Welcome, welcome! Settle down, settle down! Today, we’re ditching the demure and diving headfirst into a world of sparkle, shimmer, and sheer, unadulterated GLAMOUR! We’re talking about Pigmented Glitter Eyeshadow Cream, the secret weapon for a bold and dramatic eye look that screams, "I woke up like this… fabulous!" (Okay, maybe not woke up, but created this fabulousness. Semantics, people, semantics!)
(Gestures dramatically with a glitter-covered hand.)
Forget subtle. Forget "natural." Today, we’re embracing the dramatic! We’re channeling our inner disco queens, our rockstar alter egos, and our red-carpet ready selves. Are you ready to unleash your inner Glamazon? Excellent! Grab your brushes, your mirrors, and prepare to be dazzled!
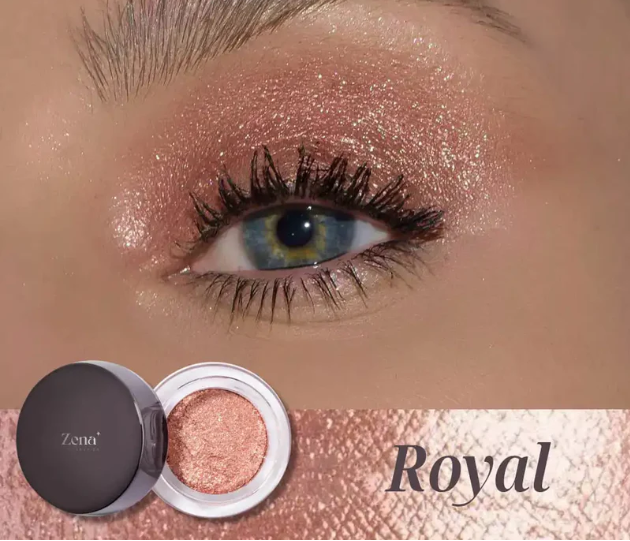
I. Why Glitter Cream? The Sparkle Deconstructed (and Why You Need It!)
(You tap a pointer on a screen displaying a close-up of glittering eyeshadow cream.)
Now, before we dive into the how-to, let’s address the why. Why glitter cream over powder? Why risk the dreaded glitter fallout that leaves you looking like you wrestled a unicorn and lost? Because, my friends, glitter cream is the superior glitter application method. Period. End of discussion. (Okay, fine, we’ll discuss it. Briefly.)
| Feature | Powder Glitter | Glitter Cream |
|---|---|---|
| Fallout | HIGH! Prepare for glitter everywhere! 😭 | LOW! The cream adheres the glitter. 🙌 |
| Pigmentation | Can be patchy, needs building. 😐 | Intense, one-swipe wonder! 🤩 |
| Application | Tricky! Requires primer, setting spray, and a prayer. 🙏 | Easy peasy! Finger, brush, whatever floats your boat! 🛥️ |
| Longevity | Can fade and crease. 😩 | Longer lasting, less likely to crease. 🥳 |
| Comfort | Can feel gritty and irritating. 😖 | Generally more comfortable and less irritating. 😌 |
As you can see, the pros of glitter cream heavily outweigh the cons. It’s easier to apply, more pigmented, less messy, and generally more comfortable. It’s basically the superhero of the glitter world!
(You strike a superhero pose, glitter catching the light.)
II. Tools of the Trade: Arming Yourself for Glittery Glory
(The screen changes to display various makeup brushes and applicators.)
A craftsman is only as good as their tools. And a glitter goddess is only as good as her… well, glitter cream and accompanying tools! Here’s your essential arsenal:
- Pigmented Glitter Eyeshadow Cream: Duh! Choose a color that speaks to your soul. Consider your skin tone, eye color, and the overall look you’re aiming for. (More on choosing colors later!)
- Eyeshadow Primer: This is your glitter’s best friend. It creates a smooth base, helps the cream adhere, and prevents creasing. Don’t skip it!
- Eyeshadow Brushes: A variety is key!
- Flat Shader Brush: For packing the glitter cream onto the lid.
- Blending Brush: For softening edges and blending with other shadows.
- Small Detail Brush: For precise application and inner corner highlights.
- Angled Brush: For creating winged liner with glitter (oh yes, we’re going there!).
- Concealer & Setting Powder: To clean up any fallout and create a sharp, defined look.
- Cotton Swabs & Makeup Remover: For correcting mistakes (we all make them!) and cleaning up edges.
- Mascara: To complete the look and make your lashes pop!
- Eyeliner (Optional): To add extra definition and drama. Consider a black or colored liner that complements your glitter.
- Glitter Glue (Optional): For extra hold, especially if you’re using a cream with larger glitter particles.
- A Good Mirror: Preferably one with magnification. You need to see what you’re doing, darling!
- Confidence: The most important tool of all! Own that glitter! ✨
(You wink at the audience.)
III. Color Theory: Choosing the Right Glitter Shade for Your Sparkly Soul
(The screen shows a color wheel with various glitter shades.)
Okay, let’s talk color! Choosing the right glitter shade can make or break your look. Here are some guidelines to help you navigate the glittering galaxy of options:
-
Skin Tone:
- Fair Skin: Cool-toned silvers, pastels, and light golds look stunning. Avoid overly dark or warm shades that can look harsh.
- Medium Skin: You can rock almost anything! Golds, bronzes, coppers, emerald greens, and vibrant blues are all fantastic choices.
- Olive Skin: Warm golds, bronzes, and jewel tones like emerald green, sapphire blue, and amethyst purple look incredible.
- Dark Skin: Rich golds, bronzes, coppers, vibrant blues, purples, and greens look absolutely divine. Don’t be afraid to experiment with bold, saturated colors!
-
Eye Color:
- Blue Eyes: Warm tones like golds, bronzes, coppers, and oranges will make your blue eyes pop!
- Green Eyes: Purples, pinks, and reddish-browns will enhance the green in your eyes.
- Brown Eyes: Lucky you! You can wear almost any color! Golds, bronzes, greens, blues, and purples all look beautiful.
- Hazel Eyes: Experiment with different colors to see which shades bring out the different flecks in your hazel eyes. Golds, greens, and purples are all great starting points.
-
The Look You’re Going For:
- Subtle Glam: Opt for a neutral glitter shade like gold, bronze, or champagne.
- Bold and Dramatic: Go for vibrant colors like blues, purples, greens, or even multi-colored glitter.
- Party Ready: Choose a glitter with larger, more reflective particles for maximum sparkle.
- Everyday Glam: A sheer glitter topper over a neutral eyeshadow can add a touch of sparkle without being too overwhelming.
(You hold up swatches of different glitter creams, showcasing their unique shimmer.)
IV. Application Techniques: From Glitter Novice to Glitter Guru
(The screen displays step-by-step photos of the application process.)
Alright, class, it’s time to put our knowledge into practice! Here’s a step-by-step guide to achieving a flawless glitter eye look:
Step 1: Prime Time!
- Apply a thin layer of eyeshadow primer to your entire eyelid, from lash line to brow bone. This will create a smooth base and help the glitter adhere.
Step 2: Base Shadow (Optional but Recommended):
- Apply a matte eyeshadow in a shade that complements your glitter. This will help to create depth and dimension. Use a blending brush to blend the shadow seamlessly into the crease.
Step 3: Glitter Application – The Main Event!
- Method 1: Finger Application: This is the easiest and most effective method for most glitter creams. Use your fingertip to gently pat the glitter cream onto your eyelid, starting at the lash line and working your way up to the crease.
- Method 2: Brush Application: Use a flat shader brush to pick up the glitter cream and pat it onto your eyelid. This method is great for more precise application and for creating a more even layer of glitter.
- Layering: If you want a more intense glitter effect, apply multiple thin layers of glitter cream, allowing each layer to dry slightly before applying the next.
Step 4: Blending is Your Friend!
- Use a clean blending brush to soften the edges of the glitter and blend it seamlessly with your base shadow.
Step 5: Winged Glitter Liner (Optional, but Oh-So-Fabulous!):
- Use an angled brush to apply a thin line of glitter cream along your upper lash line, extending it outwards to create a wing. You can also use a glitter eyeliner if you prefer.
Step 6: Inner Corner Highlight:
- Apply a small amount of glitter cream to the inner corner of your eye to brighten and open up your eyes.
Step 7: Clean Up Crew!
- Use a cotton swab dipped in makeup remover to clean up any fallout and create a sharp, defined look.
Step 8: Set and Forget!
- Apply a light dusting of setting powder under your eyes to prevent any further fallout.
Step 9: Lashes and Liner (The Finishing Touches):
- Apply mascara to your upper and lower lashes. You can also add eyeliner to your upper lash line for extra definition.
Step 10: Admire Your Masterpiece!
- Take a step back and admire your sparkly, dramatic eye look! You did it! ✨
(You demonstrate each step on a model, highlighting the key techniques.)
V. Troubleshooting: Glitter Woes and How to Conquer Them!
(The screen displays common glitter-related problems and their solutions.)
Even the most skilled glitter goddesses encounter hiccups along the way. Here are some common problems and their solutions:
- Fallout:
- Problem: Glitter particles are falling onto your cheeks.
- Solution: Use a good eyeshadow primer, apply multiple thin layers of glitter cream, and tap off any excess glitter from your brush before applying. You can also use a piece of tape to gently remove any fallout.
- Creasing:
- Problem: The glitter cream is creasing on your eyelid.
- Solution: Use an eyeshadow primer, apply a thin layer of glitter cream, and set it with a light dusting of setting powder.
- Uneven Application:
- Problem: The glitter is patchy and uneven.
- Solution: Use a flat shader brush to pack the glitter cream onto your eyelid. You can also use your fingertip to pat the glitter into place.
- Glitter Migration:
- Problem: The glitter is spreading beyond your eyelid.
- Solution: Use a waterproof eyeshadow primer and avoid applying the glitter cream too close to your brow bone or under your eyes.
- Irritation:
- Problem: Your eyes are irritated after applying the glitter cream.
- Solution: Use a high-quality glitter cream that is specifically formulated for use on the eyes. If you have sensitive skin, test the glitter cream on a small area of your skin before applying it to your eyelids.
(You offer practical tips and tricks for overcoming these challenges.)
VI. Inspiration Station: Glitter Looks to Steal (or Spark Your Own Creativity!)
(The screen displays a gallery of stunning glitter eye looks.)
Now for the fun part: inspiration! Here are some glitter eye looks to get your creative juices flowing:
- The Classic Gold Glitter Eye: A timeless and elegant look that’s perfect for any occasion.
- The Smokey Glitter Eye: A dramatic and seductive look that’s perfect for a night out.
- The Colorful Glitter Eye: A fun and playful look that’s perfect for festivals and parties.
- The Glitter Cut Crease: A bold and graphic look that’s perfect for making a statement.
- The Under Eye Glitter Pop: A subtle yet impactful look that adds a touch of sparkle to your everyday makeup.
(You encourage students to experiment and find their own unique glitter style.)
VII. Glitter Care: Keeping Your Sparkle Sparkling!
(The screen displays tips for storing and maintaining glitter products.)
Finally, a word on glitter care! To keep your glitter cream in tip-top shape:
- Store it Properly: Keep your glitter cream in a cool, dry place away from direct sunlight.
- Keep it Clean: Clean your brushes regularly to prevent contamination.
- Replace it When Necessary: Glitter cream can dry out or expire over time. If your glitter cream becomes dry or hard to apply, it’s time to replace it.
(You emphasize the importance of hygiene and proper storage.)
VIII. Conclusion: Go Forth and Sparkle!
(You step away from the podium and address the audience with a final flourish.)
And there you have it, my dazzling darlings! You are now equipped with the knowledge and skills to create bold and dramatic eye looks with pigmented glitter eyeshadow cream. Remember, makeup is all about self-expression and having fun! Don’t be afraid to experiment, to break the rules, and to let your inner Glamazon shine!
(You throw a handful of glitter into the air, creating a shower of sparkle.)
Now go forth and sparkle! Class dismissed!
(The lights fade, leaving the audience buzzing with excitement and ready to unleash their inner glitter goddess!)
For detailed product specifications and purchases, please go to :https://zenamakeup.com/products/pigmented-glitter-eyeshadow-cream
Leave a Reply