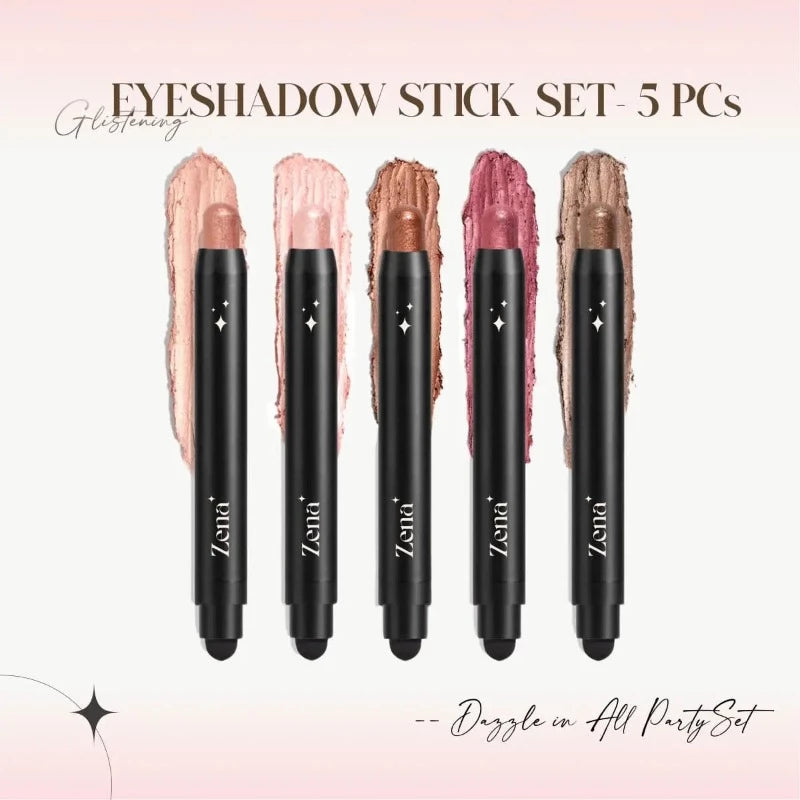
The Glitterati’s Gospel: Achieving Glitter & Cream Color Nirvana Across Five Sacred Sticks
(A Lecture in Lustrous Application)
Welcome, aspiring shimmerati! 👋 Gather ’round, you beautiful souls, for a journey into the heart of glittering goodness and creamy color perfection. Today, we embark on a quest – a quest for consistent, even application of glitter and cream color across five whole sticks! Yes, you heard that right. Five. Prepare yourselves. This isn’t just about slapping on some sparkle and hoping for the best. This is about artistry, precision, and a healthy dose of glitter-induced madness.
Instructor: Your humble narrator, Professor Sparklebottom (a.k.a., me!), a seasoned veteran of the glitter wars and a connoisseur of all things creamy and colorful.
Course Objectives: By the end of this lecture, you will be able to:
- Understand the fundamental properties of glitter and cream color sticks.
- Identify common pitfalls that lead to uneven application.
- Master techniques for achieving consistent color payoff and glitter distribution.
- Troubleshoot common application issues with grace and humor.
- Apply your newfound knowledge to five sticks, achieving a look so dazzling it could blind a disco ball. 🪩
Required Materials:
- Five glitter sticks (varying colors and glitter densities are encouraged for experimental fun!)
- Five cream color sticks (similarly, a rainbow of shades is your friend!)
- A clean workspace (preferably one that can withstand a glitter explosion).
- Makeup brushes (various sizes and shapes – think small angled brushes, fluffy blending brushes, and a flat shader brush).
- Makeup sponges (both dry and damp).
- Setting spray (for locking in that sparkle and preventing glitter migration).
- Patience (a virtue, especially when dealing with glitter).
- A sense of humor (because let’s face it, things will get messy).
- A mirror (preferably one that doesn’t judge your glitter-induced frenzy).
- Optional: A hazmat suit (kidding… mostly).
Lecture Outline:
I. The Glitterati’s Creed: Understanding Your Weapons (and Your Canvas)
- A. Glitter Stick 101: The Sparkly Truth
- B. Cream Color Codex: Decoding the Creamy Conundrum
- C. The Skin Spectrum: Preparing Your Palate
II. The Five Stick Symphony: Techniques for Consistent Application
- A. Primer Power-Up: Laying the Foundation
- B. Swatch Savvy: Color Before Chaos
- C. The Dotting Method: Precision Placement
- D. Blending Bonanza: Smoothing the Symphony
- E. Layering Like a Legend: Building Intensity
- F. Brush Brainstorm: Choosing the Right Tool
- G. Sponge Sorcery: Perfecting the Finish
III. Troubleshooting the Twinkle: Conquering Common Application Calamities
- A. Glitter Fallout Frenzy: Containing the Sparkle Storm
- B. Uneven Color Catastrophe: Achieving Seamless Blending
- C. Patchy Application Panic: Filling in the Gaps
- D. Creasing Concerns: Preventing the Dreaded Lines
- E. Glitter Migration Mayhem: Locking Down the Sparkle
IV. The Final Flourish: Setting and Sealing Your Masterpiece
- A. Setting Spray Secrets: The Glitter Glue of the Gods
- B. Blotting Bliss: Taming the Shine
- C. Touch-Up Tactics: Maintaining the Magic
V. The Five Stick Challenge: Putting Your Skills to the Test
- A. Design Inspiration: Finding Your Muse
- B. Execution Excellence: Applying Your Knowledge
- C. Post-Application Assessment: Learning and Refining
VI. The Glitterati’s Oath: Sharing the Sparkle
I. The Glitterati’s Creed: Understanding Your Weapons (and Your Canvas)
Before we dive headfirst into a glitter-fueled frenzy, let’s understand what we’re working with. Think of this as your pre-battle briefing. You wouldn’t go into war without knowing your weapons, would you? (Unless you’re a particularly brave, or foolish, warrior.)
A. Glitter Stick 101: The Sparkly Truth ✨
Glitter sticks are essentially solid sticks of glitter suspended in a binding agent, usually wax or oil-based. The type of glitter, the density of the glitter, and the quality of the binding agent all influence the final application.
- Glitter Types: Fine glitter, chunky glitter, iridescent glitter, holographic glitter – the possibilities are endless! Fine glitter blends more easily, while chunky glitter creates a bolder, more textured look.
- Glitter Density: Some sticks are packed with sparkle, while others offer a more subtle shimmer. Choose your density based on the desired intensity.
- Binding Agent: A good binding agent should hold the glitter in place without feeling sticky or greasy. Look for formulas that glide smoothly and dry down comfortably.
B. Cream Color Codex: Decoding the Creamy Conundrum 🎨
Cream color sticks are pigment-rich creams in a solid, stick form. They offer a wide range of possibilities, from subtle washes of color to bold, graphic statements.
- Pigment Payoff: High pigment payoff is generally desirable, but buildability is also key. You want to be able to control the intensity of the color.
- Blendability: A creamy, blendable formula is essential for achieving a seamless finish. Look for sticks that melt into the skin without dragging or tugging.
- Longevity: A good cream color stick should resist creasing and fading throughout the day. Look for long-wearing formulas that can withstand the test of time (and the elements).
C. The Skin Spectrum: Preparing Your Palate 👩🎨
Your skin is your canvas! And just like a painter prepares their canvas, you need to prep your skin for optimal glitter and cream color application.
- Cleanse: Start with a clean base. Remove any makeup, dirt, or oil with a gentle cleanser.
- Hydrate: Hydrated skin is happy skin. Apply a lightweight moisturizer to create a smooth, even surface.
- Prime: A primer is your secret weapon. It creates a barrier between your skin and the makeup, helping to prevent creasing, fading, and glitter migration. Choose a primer that’s appropriate for your skin type (e.g., a mattifying primer for oily skin, a hydrating primer for dry skin).
(Table 1: Choosing the Right Primer)
| Skin Type | Primer Type | Benefits |
|---|---|---|
| Oily | Mattifying Primer | Controls shine, minimizes pores, prevents makeup from sliding off. |
| Dry | Hydrating Primer | Adds moisture, creates a smooth base, prevents makeup from clinging to dry patches. |
| Combination | Balancing Primer | Addresses both oily and dry areas, provides a balanced base for makeup. |
| Sensitive | Hypoallergenic Primer | Formulated with gentle ingredients, minimizes irritation, suitable for sensitive skin. |
II. The Five Stick Symphony: Techniques for Consistent Application
Now, the fun begins! Let’s explore the techniques that will transform you from a glitter novice into a shimmering virtuoso.
A. Primer Power-Up: Laying the Foundation
As we discussed, primer is KEY. Apply a thin, even layer of your chosen primer to the areas where you’ll be applying the glitter and cream color sticks. Let it set for a minute or two before moving on. This will give it time to create a smooth, tacky base.
B. Swatch Savvy: Color Before Chaos
Before you start applying the sticks directly to your face, swatch them on the back of your hand. This will allow you to see the true color payoff and glitter distribution. It will also give you a chance to experiment with layering and blending techniques.
C. The Dotting Method: Precision Placement 📍
Instead of swiping the sticks directly across your skin (which can lead to uneven application), use the dotting method. Apply small dots of the glitter and cream color sticks to the desired areas. This allows for more precise placement and control over the intensity of the color.
D. Blending Bonanza: Smoothing the Symphony 🎶
Once you’ve dotted the product onto your skin, it’s time to blend! Use a makeup brush or sponge to gently blend the dots together. The key is to use light, circular motions and to avoid dragging or tugging at your skin.
E. Layering Like a Legend: Building Intensity
If you want to achieve a more intense color or glitter payoff, you can layer the products. Apply a thin layer of the glitter or cream color stick, blend it out, and then apply another layer on top. Repeat until you achieve the desired intensity. Remember to blend thoroughly between each layer to avoid a cakey or uneven finish.
F. Brush Brainstorm: Choosing the Right Tool 🖌️
The right brush can make all the difference! Here’s a quick guide to choosing the right brush for the job:
The right brush can make all the difference! Here’s a quick guide to choosing the right brush for the job:
- Small Angled Brush: Perfect for precise application of glitter or cream color to the inner corner of the eye or along the lash line.
- Fluffy Blending Brush: Ideal for blending cream color into the crease of the eye or across the cheekbones.
- Flat Shader Brush: Great for packing glitter onto the eyelid or applying cream color to a large area.
G. Sponge Sorcery: Perfecting the Finish 🧽
Makeup sponges are your secret weapon for achieving a flawless finish. Use a damp sponge to blend out any harsh lines or edges. You can also use a damp sponge to apply the glitter or cream color sticks for a more diffused, natural look.
(Icon Example: Different Brushes)
| Icon | Brush Type | Use |
|---|---|---|
| 🖌️ | Flat Shader Brush | Packing glitter, applying color to large areas. |
| 📐 | Angled Brush | Precise application, eyeliner. |
| ☁️ | Fluffy Blending Brush | Blending colors, creating soft transitions. |
III. Troubleshooting the Twinkle: Conquering Common Application Calamities
Even with the best techniques, things can sometimes go awry. Don’t panic! Here’s how to troubleshoot some common glitter and cream color application calamities.
A. Glitter Fallout Frenzy: Containing the Sparkle Storm ⛈️
Glitter fallout is the bane of every sparkle enthusiast’s existence. Here’s how to minimize the mess:
- Apply Eyeshadow First: Apply your eyeshadow before applying the glitter stick. This will give the glitter something to adhere to.
- Use a Glitter Glue: A glitter glue (also known as a glitter adhesive) is a must-have for serious glitter users. Apply a thin layer of glitter glue to the area where you’ll be applying the glitter stick.
- Press, Don’t Swipe: When applying the glitter stick, press the glitter onto the skin rather than swiping it. This will help to prevent fallout.
- Clean Up Crew: Keep a clean, fluffy brush on hand to sweep away any stray glitter particles.
B. Uneven Color Catastrophe: Achieving Seamless Blending 😖
Uneven color application can make your makeup look patchy and unprofessional. Here’s how to achieve seamless blending:
- Start Small: Apply a small amount of cream color stick at a time and build up the intensity gradually.
- Blend, Blend, Blend: Blend the cream color stick thoroughly using a makeup brush or sponge.
- Use a Transition Shade: Apply a transition shade (a color that’s slightly lighter than your main cream color) to the edges of the cream color stick to create a softer, more blended look.
C. Patchy Application Panic: Filling in the Gaps 😨
Patchy application can occur when the glitter or cream color stick doesn’t adhere properly to the skin. Here’s how to fill in the gaps:
- Reapply Product: Reapply the glitter or cream color stick to the patchy areas.
- Use a Dabbing Motion: Use a dabbing motion to press the product into the skin.
- Set with Powder: Set the area with a translucent powder to help the product adhere better.
D. Creasing Concerns: Preventing the Dreaded Lines 😟
Creasing is a common problem with cream products, especially around the eyes. Here’s how to prevent the dreaded lines:
- Apply a Thin Layer: Apply a thin layer of cream color stick to avoid product buildup.
- Set with Powder: Set the cream color stick with a translucent powder to help prevent creasing.
- Use an Eye Primer: An eye primer can help to create a smooth base for the cream color stick and prevent it from creasing.
E. Glitter Migration Mayhem: Locking Down the Sparkle 😫
Glitter migration is when glitter particles spread to unwanted areas of the face. Here’s how to lock down the sparkle:
- Use a Setting Spray: A setting spray is your best friend! It will help to lock the glitter in place and prevent it from migrating.
- Avoid Oily Products: Oily products can cause the glitter to slip and slide around.
- Be Mindful of Touching: Avoid touching your face throughout the day to prevent glitter migration.
IV. The Final Flourish: Setting and Sealing Your Masterpiece
You’ve applied the glitter and cream color sticks, you’ve blended them to perfection, and you’ve conquered any application calamities. Now, it’s time to set and seal your masterpiece!
A. Setting Spray Secrets: The Glitter Glue of the Gods 🌬️
Setting spray is the final step in your glitter and cream color application routine. It will help to lock the products in place, prevent creasing and fading, and minimize glitter migration.
- Choose the Right Formula: Choose a setting spray that’s appropriate for your skin type. A mattifying setting spray is best for oily skin, while a hydrating setting spray is best for dry skin.
- Hold the Spray at Arm’s Length: Hold the setting spray at arm’s length and spray it evenly across your face.
- Let it Dry Completely: Let the setting spray dry completely before touching your face.
B. Blotting Bliss: Taming the Shine ✨ ➡️ 🚫✨
If you have oily skin, you may want to blot your face with blotting papers after applying setting spray to remove any excess shine.
C. Touch-Up Tactics: Maintaining the Magic 🪄
Throughout the day, you may need to touch up your makeup to maintain the magic. Carry a small compact with powder and a brush for quick touch-ups.
V. The Five Stick Challenge: Putting Your Skills to the Test
Now that you’ve learned the techniques and troubleshooting tips, it’s time to put your skills to the test!
A. Design Inspiration: Finding Your Muse 🎨
Before you start applying the five glitter and cream color sticks, take some time to find your muse. What kind of look do you want to create? A subtle shimmer? A bold, graphic statement? The possibilities are endless! Look for inspiration online, in magazines, or even in nature.
B. Execution Excellence: Applying Your Knowledge ✅
Using the techniques you’ve learned, apply the five glitter and cream color sticks to your face. Remember to start with a primer, use the dotting method, blend thoroughly, and layer the products to achieve the desired intensity.
C. Post-Application Assessment: Learning and Refining 🧐
After you’ve applied the makeup, take a step back and assess your work. What did you do well? What could you have done better? Use this information to refine your techniques and improve your future glitter and cream color application skills.
VI. The Glitterati’s Oath: Sharing the Sparkle
Congratulations, my fellow sparkle enthusiasts! You have successfully completed the Glitterati’s Gospel. You are now equipped with the knowledge and skills to achieve consistent, even application of glitter and cream color across five sacred sticks. But your journey doesn’t end here. Share your newfound sparkle with the world! Experiment with different colors and techniques, inspire others with your creativity, and never stop learning. And remember, the most important thing is to have fun! 🎉
Now go forth and glitter! ✨
For detailed product specifications and purchases, please go to :https://zenamakeup.com/products/glimmer-glow-5-piece-glitter-cream-eyeshadow-stick-set
Leave a Reply