Lecture Hall: Gel Eyeliner Pen Mastery – A Deep Dive into Precision and Color
(Professor stands behind a podium draped with shimmering black fabric, a comically oversized gel eyeliner pen displayed prominently. Dramatic spotlight shines.)
Alright, settle down, beauty enthusiasts! Welcome, welcome! Today, we embark on a quest, a journey of epic proportions… a quest to achieve the Holy Grail of eye makeup: the consistently perfect, intensely colored gel eyeliner line. 🤩
Forget world peace, forget finding your soulmate, this is the ultimate pursuit! Why? Because a flawlessly executed gel eyeliner can transform you from "meh" to "mesmerizing" in approximately 3.7 seconds. Trust me, I’ve timed it. (Professor winks, adjusting a pair of oversized, cat-eye glasses perched on their nose.)
We’re not just talking about slapping on some black goop and calling it a day. Oh no, my friends. We’re talking about precision, consistency, and vibrant color payoff. We’re talking about wielding that gel eyeliner pen like a seasoned artist, creating masterpieces one flick at a time. 🎨
So, buckle up, sharpen your minds (and your eyeliner pens!), and prepare to become Gel Eyeliner Gurus!
(Slide appears on a screen behind the professor, featuring a stylized image of a gel eyeliner pen as a knight’s sword.)
Lecture Overview:
- The Anatomy of a Gel Eyeliner Pen: Decoding the Device (We’ll dissect this beauty weapon!)
- Choosing Your Weapon: Selecting the Right Gel Eyeliner Pen (Not all pens are created equal!)
- Prep Work is Key: Priming for Perfection (Laying the groundwork for success!)
- The Art of Application: Techniques for Flawless Lines (Secrets revealed!)
- Color Theory & Application: Beyond Basic Black (Dare to explore!)
- Troubleshooting: Conquering Common Eyeliner Calamities (We’ve all been there!)
- Maintenance & Storage: Keeping Your Pen in Tip-Top Shape (Longevity is the goal!)
- Advanced Techniques: Winged Liner Wizardry & Beyond (Level up your skills!)
- Conclusion: Embrace the Eyeliner Empowerment! (Go forth and slay!)
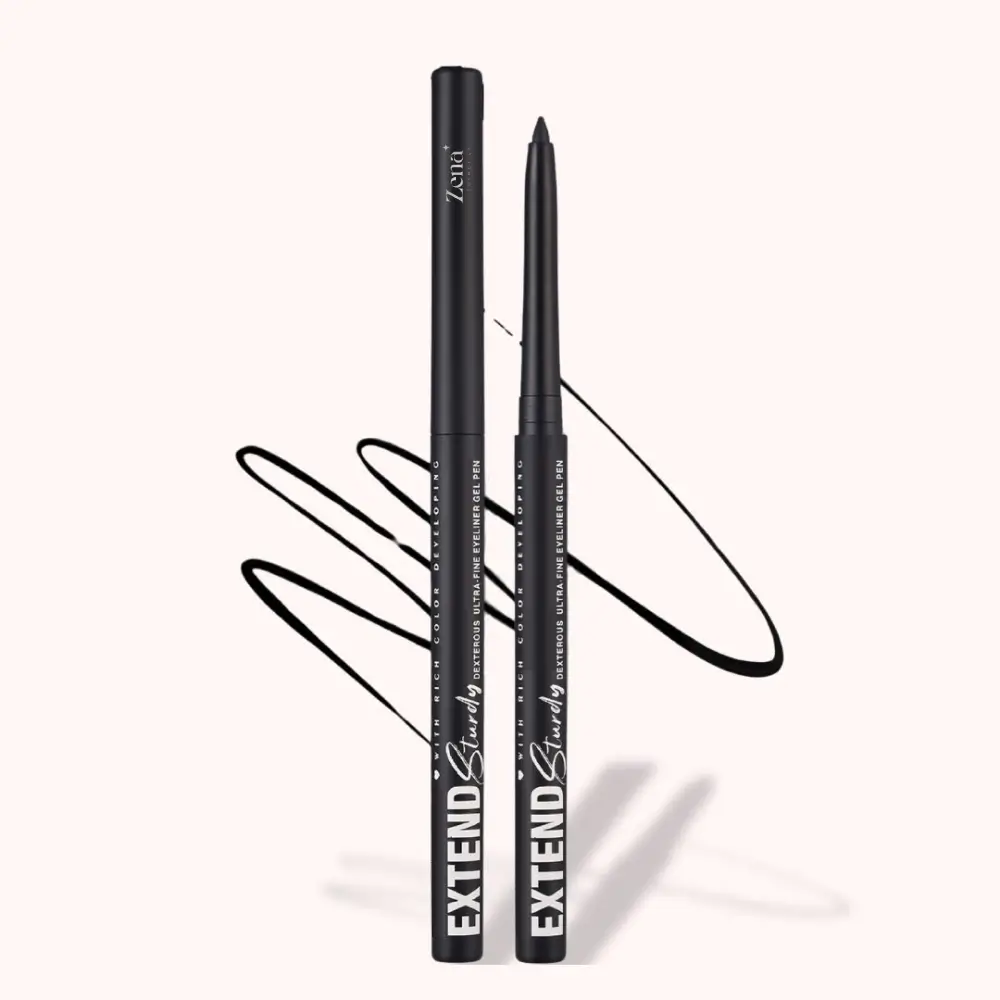
1. The Anatomy of a Gel Eyeliner Pen: Decoding the Device
(Slide shows a labeled diagram of a gel eyeliner pen.)
Okay, let’s get acquainted with our star player: the gel eyeliner pen. It’s more than just a stick with goo inside. It’s a marvel of engineering! (Okay, maybe not a marvel, but it’s pretty neat.)
Think of it as a mini-fountain pen, but instead of ink, it dispenses glorious, pigmented gel. Understanding its components is crucial for mastering its use.
| Component | Description | Function |
|---|---|---|
| The Cap | Protects the tip from drying out. Essential! Treat it with respect! | Keeps the gel from hardening and ruining your day. Think of it as the pen’s bodyguard. 🛡️ |
| The Barrel | Holds the gel reservoir. Usually plastic or metal. | Houses the magical, colorful goodness. Don’t squeeze it! (Unless you want a gel explosion.) |
| The Reservoir | Contains the gel formula. Varies in size depending on the brand. | The source of all your eyeliner dreams. A full reservoir means more creative freedom! |
| The Dispenser | Mechanism for delivering the gel to the tip. Could be a twist-up, click-pen, or brush-applicator system. | Controls the flow of gel. Too much? You’ll end up with a gloopy mess. Too little? You’ll be dragging the tip across your eyelid like a caveman. Find the sweet spot! 🍯 |
| The Tip | The part that actually touches your eyelid. Usually a fine brush or a felt tip. | The applicator! The key to precision. A fine, flexible tip is your best friend. A frayed, mangled tip is your worst enemy. Treat it gently! (Think of it as a baby bird. A slightly terrifying, eyeliner-dispensing baby bird.) 🐦 |
| The Gel | The magical, pigmented substance that creates the eyeliner line. Formulas vary wildly. | Provides the color and definition. Look for a formula that’s long-lasting, smudge-proof, and intensely pigmented. We’re talking pigment so rich, it could buy its own island. 🏝️ |
Understanding these components will help you troubleshoot any issues you encounter and appreciate the nuances of each pen.
2. Choosing Your Weapon: Selecting the Right Gel Eyeliner Pen
(Slide shows a collage of various gel eyeliner pens with different tips and colors.)
Not all gel eyeliner pens are created equal. Some are the elegant, sophisticated swords of eyeliner artistry, while others are… well, blunt butter knives. Choosing the right pen is crucial for achieving your desired look.
Here’s what to consider:
- Tip Type:
- Felt Tip: Great for beginners. Offers more control and a smoother, more consistent line. Think of it as training wheels for your eyelids. 🚲
- Brush Tip: Offers more flexibility and precision for advanced users. Allows for creating intricate designs and varying line thickness. Think of it as the Formula 1 racecar of eyeliner application. 🏎️
- Formula:
- Long-lasting: Crucial for all-day wear. Look for formulas that are waterproof, smudge-proof, and transfer-resistant. You want your eyeliner to stay put, not migrate to your cheekbones like a lost tourist. ✈️
- Highly Pigmented: Ensures vibrant color payoff. You don’t want a washed-out, barely-there line. You want a line that screams, "I’m here, I’m fabulous, and I’m ready to conquer the world!" 👑
- Fast-drying: Prevents smudging and transfer. Nobody wants to blink and end up with eyeliner imprinted on their upper eyelid. That’s just embarrassing. 😳
- Color:
- Black: The classic choice. Always a winner. But don’t be afraid to experiment with other colors!
- Brown: Softer than black, perfect for daytime looks.
- Navy: A sophisticated alternative to black.
- Emerald Green: Adds a pop of color to any eye color.
- Purple: Enhances brown and hazel eyes.
- Gold/Bronze: Great for special occasions.
(Table showing different gel eyeliner pen recommendations based on skill level and desired look.)
| Skill Level | Desired Look | Recommended Pen | Rationale |
|---|---|---|---|
| Beginner | Simple, everyday line | Felt-tip pen with a long-lasting, fast-drying formula. | Felt tip provides more control; long-lasting formula minimizes mistakes. |
| Intermediate | Winged liner | Brush-tip pen with a flexible tip and highly pigmented formula. | Brush tip allows for creating precise wings; high pigmentation ensures a bold, defined wing. |
| Advanced | Intricate designs | Ultra-fine brush-tip pen with a waterproof, smudge-proof formula. | Ultra-fine tip allows for detailed work; waterproof formula prevents smudging during complex applications. |
| All Levels | Bold, colorful look | Any pen with a highly pigmented, vibrant colored formula. | Pigment is key for achieving a bold, colorful look regardless of skill level. |
Pro Tip: Read reviews! Don’t just rely on marketing hype. See what other users are saying about the pen’s performance.
3. Prep Work is Key: Priming for Perfection
(Slide shows a close-up image of an eyelid being prepped with primer.)
Before you even think about applying eyeliner, you need to prep your eyelids. Think of it as preparing a canvas before painting a masterpiece. (Okay, maybe not a masterpiece, but a really, really good eyeliner look.)
- Cleanse: Remove any oil or makeup residue from your eyelids. Use a gentle cleanser or makeup remover. Oily eyelids are the enemy of long-lasting eyeliner.
- Prime: Apply an eyelid primer. This creates a smooth, even surface for the eyeliner to adhere to, prevents creasing, and extends wear time. Think of it as the glue that holds everything together. 💪
- Set (Optional): If you have particularly oily eyelids, you can set your primer with a translucent powder. This will further mattify the skin and prevent the eyeliner from smudging.
(List of recommended eyelid primers with brief descriptions.)
- Urban Decay Eyeshadow Primer Potion: A cult classic for a reason.
- NARS Smudge Proof Eyeshadow Base: Great for oily lids.
- Milani Eyeshadow Primer: Affordable and effective.
Why is prepping so important? Imagine trying to draw a straight line on a bumpy, oily surface. It’s going to be a disaster, right? The same applies to your eyelids. A smooth, primed surface ensures a clean, crisp line that lasts all day.
4. The Art of Application: Techniques for Flawless Lines
(Slide shows step-by-step diagrams of various eyeliner application techniques.)
Now for the main event: applying the gel eyeliner! This is where the magic happens. But don’t be intimidated. With practice and the right technique, you can achieve eyeliner perfection.
- Find Your Angle: Experiment with different angles to find what works best for your eye shape. Most people find it easiest to apply eyeliner while looking straight ahead into a mirror.
- Steady Your Hand: Use a mirror placed on a flat surface so you can look down slightly. This helps keep your eyelid taut. Rest your elbow on a table or counter for added stability. A shaky hand is the bane of eyeliner existence. 😫
- Dot-to-Dot Method: For beginners, start by creating a series of small dots along your lash line, then connect them to form a continuous line. This is like training wheels for your eyelids, version 2.0.
- Short Strokes: Apply the eyeliner in short, controlled strokes, rather than trying to draw one long line. This allows for more precision and prevents mistakes. Think of it as painting with tiny, careful brushstrokes. 🖌️
- Tightlining (Optional): Apply eyeliner to the upper waterline to create a fuller lash line. Be careful not to poke yourself in the eye! (Seriously, be careful.) Use a waterproof formula to prevent smudging.
- Layering: Start with a thin line and gradually build up the thickness to your desired look. It’s easier to add more eyeliner than it is to remove too much.
- Blending (Optional): For a softer, more smudged look, use a small brush or cotton swab to blend the eyeliner line immediately after application.
(Table showing common eyeliner application mistakes and how to avoid them.)
| Mistake | Solution |
|---|---|
| Uneven Line | Practice applying the eyeliner in short, controlled strokes. Use the dot-to-dot method if needed. |
| Wobbly Line | Steady your hand by resting your elbow on a flat surface. Use a magnifying mirror. |
| Smudged Eyeliner | Use a waterproof, smudge-proof formula. Apply an eyelid primer. Set the eyeliner with a translucent powder (optional). |
| Too Thick Line | Start with a thin line and gradually build up the thickness. Use a cotton swab dipped in makeup remover to clean up any mistakes. |
| Uneven Wings | Use a piece of tape as a guide. Practice makes perfect! |
Pro Tip: Don’t be afraid to experiment! Eyeliner is all about finding what works best for you. Practice different techniques and styles until you find your signature look.
5. Color Theory & Application: Beyond Basic Black
(Slide shows a color wheel and examples of different eyeliner colors complementing various eye colors.)
Black eyeliner is a classic, but there’s a whole rainbow of colors out there just waiting to be explored! Don’t be afraid to step outside your comfort zone and experiment with different shades.
- Complementary Colors: Use colors that are opposite each other on the color wheel to make your eyes pop. For example, blue eyeliner can enhance brown eyes, and purple eyeliner can enhance green eyes.
- Matching Colors: Use colors that are similar to your eye color to create a more subtle, harmonious look. For example, green eyeliner can enhance green eyes, and blue eyeliner can enhance blue eyes.
- Skin Tone: Consider your skin tone when choosing an eyeliner color. Darker skin tones can handle bolder, more vibrant colors, while lighter skin tones may prefer softer, more muted shades.
(Table showing eyeliner color recommendations based on eye color.)
| Eye Color | Recommended Eyeliner Colors | Rationale |
|---|---|---|
| Brown | Blue, green, purple, gold, bronze, copper | Brown eyes are versatile and can handle a wide range of colors. Complementary colors like blue and purple will make them pop. |
| Blue | Brown, bronze, copper, gold, peach, terracotta | Warm shades like brown, bronze, and copper will contrast with blue eyes and make them appear brighter. |
| Green | Purple, plum, bronze, gold, copper, brown | Purple and plum are complementary colors to green and will enhance its vibrancy. Warm metallics like bronze and gold will also complement green eyes. |
| Hazel | Green, purple, brown, gold, bronze, navy | Hazel eyes are a mix of colors and can be enhanced by a variety of shades. Green will bring out the green tones, while purple will complement the brown tones. |
| Gray | Black, navy, silver, charcoal, purple, green | Gray eyes are neutral and can be paired with a variety of colors. Black and navy will create a classic look, while silver and charcoal will enhance the gray tones. |
Pro Tip: Start with a subtle pop of color and gradually work your way up to bolder shades. You can also use colored eyeliner on your lower lash line for a more subtle effect.
6. Troubleshooting: Conquering Common Eyeliner Calamities
(Slide shows a humorous image of someone struggling with eyeliner application.)
Let’s be honest, we’ve all been there. Eyeliner application can be a messy, frustrating process. But don’t despair! Here are some common eyeliner calamities and how to conquer them:
- Smudged Eyeliner:
- Cause: Oily eyelids, watery eyes, improper application technique.
- Solution: Use a waterproof, smudge-proof formula. Apply an eyelid primer. Set the eyeliner with a translucent powder (optional). Use a cotton swab dipped in makeup remover to clean up any smudges.
- Uneven Line:
- Cause: Shaky hand, rushing the application, lack of practice.
- Solution: Steady your hand by resting your elbow on a flat surface. Use a magnifying mirror. Practice applying the eyeliner in short, controlled strokes. Use the dot-to-dot method if needed.
- Wobbly Line:
- Cause: Shaky hand, uneven eyelid surface.
- Solution: Steady your hand. Use a magnifying mirror. Gently stretch your eyelid taut while applying the eyeliner.
- Uneven Wings:
- Cause: Lack of symmetry, improper angle.
- Solution: Use a piece of tape as a guide. Practice makes perfect!
- Eyeliner Transfer to Upper Eyelid:
- Cause: Oily eyelids, hooded eyelids, using too much eyeliner.
- Solution: Use a waterproof, smudge-proof formula. Apply an eyelid primer. Set the eyeliner with a translucent powder. Apply a thin layer of eyeliner.
(List of essential tools for eyeliner troubleshooting.)
- Cotton Swabs: For cleaning up mistakes.
- Makeup Remover: For removing eyeliner completely.
- Eyelid Primer: For creating a smooth base and preventing smudging.
- Translucent Powder: For setting the eyeliner and preventing transfer.
- Tape: For creating sharp winged liner.
Pro Tip: Don’t get discouraged! Eyeliner is a skill that takes time and practice to master. The more you practice, the better you’ll become. And even the pros have bad eyeliner days!
7. Maintenance & Storage: Keeping Your Pen in Tip-Top Shape
(Slide shows images of proper gel eyeliner pen storage techniques.)
To ensure your gel eyeliner pen lasts and performs its best, proper maintenance and storage are essential.
- Cap it Tight: Always replace the cap after each use to prevent the gel from drying out. This is crucial! Think of the cap as the pen’s life support system. 🚑
- Store Horizontally: Store your gel eyeliner pen horizontally to prevent the gel from settling and clogging the tip.
- Clean the Tip: Gently clean the tip of the pen with a damp cloth or makeup remover wipe after each use to remove any excess gel buildup.
- Sharpen (If Applicable): If your gel eyeliner pen has a sharpenable tip, sharpen it regularly to maintain a precise point.
- Replace Regularly: Gel eyeliner pens have a limited shelf life. Replace your pen every 3-6 months, or sooner if the formula starts to dry out or change in consistency.
(Table showing signs that your gel eyeliner pen needs replacing.)
| Sign | Action |
|---|---|
| Dry, Crumbly Formula | Replace the pen. The formula is no longer usable. |
| Difficult to Apply | Replace the pen. The tip may be clogged or the formula may be too dry. |
| Faded Color Pigment | Replace the pen. The formula has lost its vibrancy. |
| Irritation or Redness After Use | Discontinue use immediately and replace the pen. You may be allergic to an ingredient. |
| Change in Smell or Consistency | Replace the pen. The formula may be contaminated. |
Pro Tip: Avoid storing your gel eyeliner pen in direct sunlight or extreme temperatures. This can damage the formula and shorten its lifespan.
8. Advanced Techniques: Winged Liner Wizardry & Beyond
(Slide shows various winged liner styles and other advanced eyeliner techniques.)
Once you’ve mastered the basics, it’s time to take your eyeliner game to the next level! Here are some advanced techniques to try:
- Winged Liner: The classic eyeliner look. Requires practice and patience, but the results are worth it!
- Use a piece of tape as a guide.
- Start with a thin line and gradually build up the thickness.
- Extend the wing at a 45-degree angle from the outer corner of your eye.
- Connect the wing to the upper lash line.
- Double-Winged Liner: A bold and dramatic look.
- Create a classic winged liner.
- Add a second wing parallel to the first, but slightly higher.
- Graphic Liner: A modern and edgy look.
- Experiment with different shapes and lines.
- Use bold colors and contrasting shades.
- Reverse Eyeliner: Apply eyeliner to the lower lash line only.
- Creates a smoky and sultry look.
- Use a soft, smudged line.
- Halo Eye: A technique that uses eyeliner to create a halo effect around the eyes.
- Use lighter shades in the inner and outer corners of the lid, and darker shades in the center.
- Blend well to create a seamless transition.
(Gallery of different eyeliner styles with detailed instructions.)
Pro Tip: Don’t be afraid to get creative! Eyeliner is a form of self-expression. Experiment with different techniques and styles to find what makes you feel confident and beautiful.
9. Conclusion: Embrace the Eyeliner Empowerment!
(Slide shows a powerful image of someone confidently rocking a flawless eyeliner look.)
Congratulations, graduates! You have successfully completed Eyeliner 101! You are now equipped with the knowledge and skills to achieve the consistently perfect, intensely colored gel eyeliner line of your dreams. 🎓
Remember, practice makes perfect. Don’t get discouraged if you don’t get it right away. Keep experimenting, keep practicing, and most importantly, have fun!
Eyeliner is more than just makeup. It’s a tool for self-expression, a confidence booster, and a way to enhance your natural beauty. Embrace the eyeliner empowerment! Go forth and slay! 💄
(Professor bows dramatically as the audience applauds wildly. The spotlight fades.)
For detailed product specifications and purchases, please go to :https://zenamakeup.com/products/long-wear-precision-gel-eyeliner-pen
Leave a Reply