Lecture: Kajal Conundrums & Killer Lines: Achieving Eyeliner Nirvana 🕉️
(Or, How to Stop Looking Like a Panda After a Breakup and Start Slaying the Liner Game)
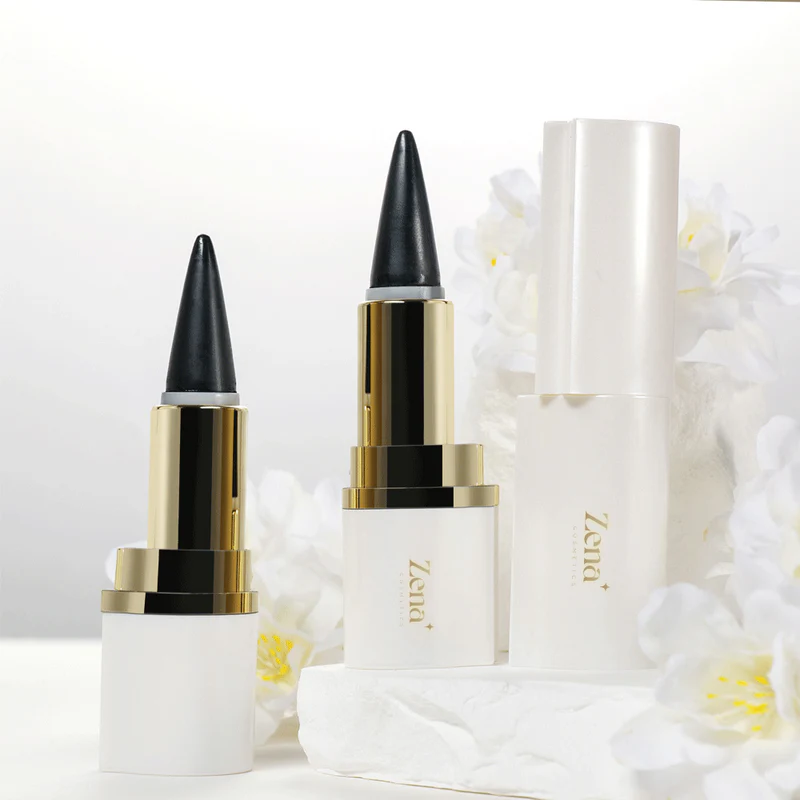
Welcome, my friends, makeup mavens, and eyeliner enthusiasts! Gather ’round, because today we’re diving deep into the mystical world of kajal – that intensely pigmented, often smudgy, sometimes temperamental eyeliner that has captivated eyes for centuries. Forget your existential crises, we’re tackling the real problem: Getting a consistently smooth and pigmented line with every application of this Kajal Eyeliner.
(Disclaimer: This lecture contains traces of humor, sarcasm, and the occasional ridiculous analogy. Viewer discretion advised. 😉)
Our Agenda for Eyeliner Enlightenment:
- Kajal 101: A Brief History & Understanding the Beast: What is kajal, anyway?
- The Kajal Lineup: Types, Formulations, and Finding Your Soulmate (Liner Edition): From cones to kohl pencils, we’ll explore the vast world of kajal.
- The Prep Talk: Setting the Stage for Eyeliner Success: Skin prep, eye primer, and why they matter.
- Application Techniques: Mastering the Art of the Swipe (and the Smudge, if you’re into that): We’ll dissect various application methods, from tightlining to winged wonders.
- Troubleshooting: Common Kajal Calamities & How to Conquer Them: Smudging, skipping, fading – we’ll slay those eyeliner demons.
- Maintenance & Aftercare: Keeping Your Kajal Happy & Your Eyes Healthy: Storage, sharpening, and hygiene.
- The Pro Tips: Secrets from the Eyeliner Gurus: Advanced techniques and insider knowledge.
- Q&A: Ask Me Anything (About Eyeliner, Not Your Love Life… Unless?)
1. Kajal 101: A Brief History & Understanding the Beast
(Imagine Indiana Jones bursting into the lecture hall, whip in hand, holding a dusty kajal cone.)
"Behold! Kajal! A beauty secret passed down through generations! More ancient than your grandma’s secret recipe for fruitcake!"
Okay, maybe not quite like that, but kajal has a rich history. Originating in ancient Egypt and the Middle East, it was used for both cosmetic and medicinal purposes. Beyond beauty, it was believed to protect the eyes from the sun and ward off evil spirits. (Hey, can’t hurt, right?)
So, what exactly IS kajal?
Traditionally, kajal was made from soot, collected from burning oil lamps or herbs, mixed with ingredients like ghee (clarified butter) and other natural elements. Today, you’ll find various formulations, but the core concept remains: intense pigmentation in a soft, blendable format.
Key Characteristics of Kajal:
| Feature | Description |
|---|---|
| Pigmentation | Usually intensely black, but can also come in colors. The goal is a rich, deep, opaque hue. |
| Texture | Soft and creamy, allowing for easy application and blending. Think of it like butter… for your eyes! (But don’t actually use butter.) |
| Smudge-ability | Often prized for its ability to be smudged for a smoky effect. However, controlled smudging is the key – we’re aiming for sultry, not sloppy. |
| Longevity | Varies depending on the formulation and your skin type. Some kajals boast all-day wear, while others require a bit more maintenance. |
(Think of kajal as the cool, rebellious cousin of regular eyeliner. It’s got attitude, it’s got depth, and it’s not afraid to smudge a little.)
2. The Kajal Lineup: Types, Formulations, and Finding Your Soulmate (Liner Edition)
(Cue dramatic music. We’re about to enter the Eyeliner Olympics.)
The world of kajal is vast and varied. Choosing the right one can feel like dating – lots of swiping (pun intended), occasional disappointment, and the eventual hope of finding "the one."
Here’s a breakdown of common kajal types:
| Type of Kajal | Description | Pros | Cons | Best For |
|---|---|---|---|---|
| Cone Kajal | Traditional form, often made with natural ingredients. Applied with a thin applicator stick. | Highly pigmented, often made with natural ingredients, long-lasting. | Can be messy to apply, requires skill and practice, less hygienic (double-dipping!). | Experienced users who prefer traditional formulations and intense pigmentation. |
| Kohl Pencil | Pencil form, typically made with waxes, pigments, and oils. Sharpenable or retractable. | Easy to use, readily available, comes in various colors, good for beginners. | Can be less pigmented than cone kajal, may require frequent sharpening, some formulations can be drying. | Beginners, everyday use, creating precise lines or blending for a softer look. |
| Gel Kajal | Creamy gel formula in a pot or tube. Applied with a brush. | Highly pigmented, long-lasting, often waterproof, versatile for creating different looks. | Requires a brush, can dry out if not stored properly, may smudge on oily lids. | Creating winged liner, smoky eyes, or bold graphic looks. |
| Liquid Kajal | Liquid formula with a fine-tipped applicator. | Precise application, long-lasting, intense pigmentation. | Requires a steady hand, can be unforgiving if mistakes are made, may feel drying on some skin types. | Creating sharp, defined lines and intricate designs. |
| Automatic Kajal Pencil | Retractable pencil formula. | Very convenient for application, no sharpening required, great for travel. | Can be less precise than traditional pencils, can break easily if too much pressure is applied, formulation may not be as pigmented. | Quick and easy application, on-the-go touch-ups. |
(Choosing your kajal is like choosing a pet. Consider your lifestyle, your patience level, and what you’re looking for in a companion… I mean, an eyeliner.)
Factors to Consider When Choosing a Kajal:
- Skin Type: Oily lids require a long-wearing, waterproof formula. Dry lids might benefit from a more moisturizing option.
- Desired Look: Are you going for a subtle tightline or a dramatic winged liner?
- Application Skill: Beginners might prefer a kohl pencil, while experienced users might tackle gel or liquid kajal.
- Ingredient Preferences: Look for natural or hypoallergenic formulations if you have sensitive eyes.
3. The Prep Talk: Setting the Stage for Eyeliner Success
(Imagine a drill sergeant yelling, "Alright, maggots! Drop and give me twenty eye blinks! We’re prepping for battle!")
Okay, maybe not that intense, but proper preparation is crucial for achieving a flawless kajal application. Think of your eyelids as a canvas – you need to prime it before you start painting your masterpiece.
Key Steps for Eyelid Prep:
- Cleanse: Remove any makeup, dirt, or oil from your eyelids. Use a gentle cleanser specifically designed for the eye area.
- Moisturize: Hydrate your eyelids with a lightweight, oil-free moisturizer. Allow it to absorb completely before moving on to the next step.
- Prime: Apply an eyeshadow primer to your eyelids. This creates a smooth base, helps the kajal adhere better, and prevents smudging.
- Set (Optional): If you have particularly oily lids, you can set your primer with a translucent powder.
(Think of primer as Spanx for your eyelids. It creates a smooth, even surface and keeps everything in place.)
Why is Prep So Important?
- Prevents Smudging: A clean, primed lid provides a barrier against oil and moisture, reducing the likelihood of smudging.
- Enhances Pigmentation: Primer helps the kajal adhere better to the skin, resulting in a more intense color payoff.
- Extends Wear Time: Proper prep ensures that your kajal stays put for longer, minimizing the need for touch-ups.
Table of Primer Recommendations based on Skin Type:
| Skin Type | Primer Recommendation | Reason |
|---|---|---|
| Oily | Oil-free, mattifying primer | Controls oil production, prevents slippage, and keeps kajal from smudging. |
| Dry | Hydrating primer with a creamy or balmy texture | Provides moisture, prevents kajal from looking dry and flaky, and ensures smooth application. |
| Sensitive | Hypoallergenic, fragrance-free primer | Minimizes the risk of irritation and allergic reactions. |
| Mature | Smoothing primer with anti-aging ingredients | Fills in fine lines and wrinkles, creates a smooth surface for kajal application, and provides added skincare benefits. |
| Normal | Most primers work well, but a brightening primer is a good choice. | Will enhance the color of the kajal. |
4. Application Techniques: Mastering the Art of the Swipe (and the Smudge, if you’re into that)
(Time to unleash your inner artist! Grab your kajal, a mirror, and a healthy dose of patience.)
(Time to unleash your inner artist! Grab your kajal, a mirror, and a healthy dose of patience.)
There’s no one "right" way to apply kajal. Experiment with different techniques to find what works best for your eye shape and desired look.
Common Kajal Application Techniques:
- Tightlining: Applying kajal to the waterline (the inner rim of your eyelid). This creates a subtle, defined look.
- Technique: Gently lift your upper eyelid and apply the kajal along the upper waterline. Repeat on the lower waterline.
- Pro Tip: Use a clean cotton swab to blot any excess moisture from the waterline before applying kajal.
- Lining the Upper Lash Line: Creating a defined line along the upper lash line.
- Technique: Start at the inner corner of your eye and draw a line along your lash line, working your way outwards. You can create a thin, precise line or a thicker, more dramatic line.
- Pro Tip: Use short, feathery strokes to build up the intensity of the line.
- Lining the Lower Lash Line: Similar to the upper lash line, but applied to the lower lash line.
- Technique: Start at the outer corner of your eye and draw a line along your lash line, working your way inwards. You can smudge the line for a softer, more diffused look.
- Pro Tip: Use a small, angled brush to smudge the lower lash line for a smoky effect.
- Winged Liner: Creating a dramatic wing at the outer corner of your eye.
- Technique: First, line your upper lash line as usual. Then, extend the line outwards and upwards at a 45-degree angle. Fill in the wing with kajal.
- Pro Tip: Use a piece of tape or a business card as a guide to create a sharp, clean wing.
- Smoky Eye: Blending kajal for a soft, diffused, smoky effect.
- Technique: Apply kajal to your upper and lower lash lines. Then, use a blending brush to smudge the kajal upwards and outwards.
- Pro Tip: Use a lighter eyeshadow to blend the edges of the kajal for a seamless transition.
(Remember, practice makes perfect! Don’t be discouraged if your first few attempts look a little… abstract. Embrace the smudges, learn from your mistakes, and keep experimenting.)
Visual Guide to Application Techniques (Illustrative):
| Technique | Description |
|---|---|
| Tightlining | 👁️ + Kajal on Inner Rim = Subtle Definition |
| Upper Line | 👁️ + Kajal Along Lashes = Classic Eyeliner |
| Lower Line | 👁️ + Kajal Below Lashes = Adds Depth & Drama |
| Winged Liner | 👁️ + Kajal Flicked Outwards = Cat-Eye Glamour |
| Smoky Eye | 👁️ + Kajal Blended = Sultry, Smoldering Look |
5. Troubleshooting: Common Kajal Calamities & How to Conquer Them
(Uh oh! Eyeliner emergency! Don’t panic! We’re here to help.)
Even with the best prep and technique, kajal can sometimes be a bit of a diva. Here are some common problems and how to fix them:
| Problem | Solution |
|---|---|
| Smudging | Use a waterproof or long-wearing kajal. Apply eyeshadow primer to your eyelids. Set your kajal with a translucent powder. Avoid touching your eyes throughout the day. * Use blotting papers to absorb excess oil. |
| Skipping | Ensure your kajal is sharp (if it’s a pencil). Warm up the kajal by gently rubbing it on the back of your hand. Apply a thin layer of eye cream to your eyelids before applying kajal. Use a gentle, gliding motion when applying. |
| Fading | Apply eyeshadow primer to your eyelids. Layer your kajal with a similar-colored eyeshadow. Use a long-wearing kajal. Carry your kajal with you for touch-ups throughout the day. |
| Irritation | Use a hypoallergenic or fragrance-free kajal. Test the kajal on a small area of skin before applying it to your eyes. Avoid sharing your kajal with others. Remove your kajal thoroughly at the end of the day. * See a doctor if irritation persists. |
| Uneven Line | Use short, feathery strokes to build up the line. Use a cotton swab or angled brush to clean up any mistakes. * Practice, practice, practice! |
| Kajal Breaks | Don’t extend the product too far out of the casing. Do not apply too much pressure |
(Think of these solutions as your eyeliner first-aid kit. Keep them handy for those inevitable kajal mishaps.)
6. Maintenance & Aftercare: Keeping Your Kajal Happy & Your Eyes Healthy
(Treat your kajal and your eyes with respect! They deserve it!)
Proper maintenance and aftercare are essential for ensuring the longevity of your kajal and the health of your eyes.
Kajal Care Tips:
- Storage: Store your kajal in a cool, dry place, away from direct sunlight.
- Sharpening (for pencils): Use a sharpener specifically designed for eyeliner pencils. Sharpen your kajal regularly to maintain a clean point and prevent bacteria buildup.
- Hygiene: Avoid sharing your kajal with others. Clean your brushes regularly with a gentle soap and water.
- Expiration Date: Pay attention to the expiration date of your kajal. Expired products can harbor bacteria and cause irritation.
Eye Care Tips:
- Remove Makeup Thoroughly: Always remove your kajal at the end of the day with a gentle makeup remover.
- Avoid Rubbing Your Eyes: Rubbing your eyes can irritate them and spread bacteria.
- See an Eye Doctor Regularly: Schedule regular eye exams to ensure the health of your eyes.
- Use Lubricating Eye Drops: Keep your eyes hydrated by using lubricating eye drops as needed.
(Think of these tips as your eyeliner and eye health commandments. Follow them religiously!)
7. The Pro Tips: Secrets from the Eyeliner Gurus
(Ready to take your kajal game to the next level? Here are some insider secrets from the pros.)
- Use a Business Card for a Sharp Wing: Hold a business card at the outer corner of your eye and use it as a guide to create a perfect wing.
- Heat Your Eyelash Curler: Gently heat your eyelash curler with a hairdryer for a few seconds before curling your lashes. This will help the curl last longer.
- Layer Your Kajal with Eyeshadow: Apply a layer of kajal to your lash line, then set it with a similar-colored eyeshadow for extra staying power.
- Use a White Eyeliner Pencil to Make Your Eyes Look Bigger: Apply a white eyeliner pencil to your waterline to brighten your eyes and make them look larger.
- Experiment with Different Colors: Don’t be afraid to experiment with different colors of kajal. Brown, navy, and green can be beautiful alternatives to black.
(These tips are like the secret sauce that will elevate your eyeliner skills from amateur to pro.)
8. Q&A: Ask Me Anything (About Eyeliner, Not Your Love Life… Unless?)
(Now it’s your turn! Ask me anything about kajal, eyeliner, or the mysteries of the universe… Okay, maybe just the eyeliner.)
(Open the floor for questions from the audience. Address each question with enthusiasm and expertise.)
Example Questions and Answers:
-
Q: My kajal always smudges under my eyes. What can I do?
- A: Smudging is a common problem! Make sure you’re prepping your eyelids properly with primer and setting your kajal with powder. Also, consider using a waterproof or long-wearing formula. If all else fails, try using blotting papers throughout the day to absorb excess oil.
-
Q: I can never get my winged liner to look even. Any tips?
- A: Winged liner is tricky! Try using a piece of tape or a business card as a guide. You can also use short, feathery strokes to build up the wing gradually. And remember, practice makes perfect!
-
Q: Is it safe to use kajal on my waterline?
- A: While many people use kajal on their waterline, it’s important to be aware of the potential risks. The waterline is a sensitive area, and applying kajal can introduce bacteria into your eyes. Choose a hypoallergenic, ophthalmologist-tested formula and avoid sharing your kajal with others. If you experience any irritation, discontinue use and see a doctor.
(And with that, we conclude our lecture on kajal mastery! Go forth and create beautiful, captivating eyes! Remember, eyeliner is an art, not a science. Have fun, experiment, and don’t be afraid to make mistakes. The most important thing is to express yourself and feel confident in your own skin (and eyeliner!).)
(Class dismissed! Now go slay! 💅)
For detailed product specifications and purchases, please go to :https://zenamakeup.com/products/glided-on-waterproof-kajal-eyeliner
Leave a Reply