Alright, class! Gather ’round, gather ’round! Professor Zena here, ready to decode the ancient secrets of the perfect brow arch! 🧙♀️ Today, we’re diving deep into the wonderful world of ZenaMakeup’s Waterproof Brow Stencil & Powder Kit, your shortcut to eyebrow perfection that even the toughest waterproof mascara can’t cry over.💧
(Disclaimer: May cause extreme eyebrow envy in onlookers. Use with caution.)
Lecture Title: Arch Enemies No More! Mastering Brow Definition with ZenaMakeup’s Waterproof Stencil & Powder Kit
Course Objective: By the end of this lecture, you will be able to confidently use the ZenaMakeup Waterproof Brow Stencil & Powder Kit to create a defined, waterproof brow arch that flatters your face shape and withstands all of life’s little (and big) dramas. 🎭😭😅
Why You NEED This Kit (Trust Me, You Do!)
Let’s face it, brows are the FRAME of your face. They can make you look polished, put-together, and ready to conquer the world. Or… they can look like two unruly caterpillars wrestling above your eyes. 🐛🐛 Not the look we’re going for.
But perfectly shaped brows? They require skill, precision, and a steady hand. And let’s be honest, not all of us are blessed with those qualities. (Myself included, some days!) That’s where ZenaMakeup’s Brow Stencil & Powder Kit comes in to save the day! Think of it as your personal eyebrow artist, ready to whip your brows into shape in minutes. ⏰
Here’s why you absolutely NEED this kit in your life:
- Waterproof & Smudge-Proof: Seriously, this stuff ain’t budging. Cry at that rom-com? 😭 Dance in the rain? 💃 Swim with dolphins? 🐬 Your brows will be on point.
- Beginner-Friendly: No artistic talent required! The stencils do all the hard work for you. Just fill in the blanks!
- Variety of Shapes: We offer a range of stencil shapes to suit different face shapes and brow preferences. From soft arches to bold angles, we’ve got you covered. 📐
- Natural-Looking Finish: The powder formula blends seamlessly into your natural brow hairs, creating a soft, defined look without looking harsh or drawn-on.
- Time-Saving: Skip the endless brow tutorials and complicated techniques. This kit streamlines the process, giving you perfect brows in minutes.
- Cost-Effective: Instead of pricey salon appointments or expensive eyebrow pencils that run out quickly, this kit offers long-lasting value. 💰
- Confidence Boosting: Let’s be real, good brows can make you feel like you can take on the world. 💪
The Anatomy of a Perfect Brow Arch (And Why It Matters!)
Before we dive into the how-to, let’s talk about the why. Understanding the anatomy of a well-shaped brow is crucial to achieving the most flattering look for your face.
- The Head (Inner Brow): This is the beginning of your brow, closest to your nose. It should ideally align with the bridge of your nose and be slightly lighter than the rest of your brow.
- The Arch: This is the highest point of your brow and provides lift and definition to your face. It should be positioned approximately two-thirds of the way along your brow.
- The Tail (Outer Brow): This is the end of your brow, tapering down towards your temple. It should end at or slightly beyond the outer corner of your eye.
Table 1: Brow Shape and Face Shape Harmony
| Face Shape | Recommended Brow Shape | Why? |
|---|---|---|
| Round | High-arched, angled brows | Adds definition and length to the face, making it appear slimmer. Avoid rounded brows, which can accentuate the roundness. |
| Square | Softly angled, slightly curved brows | Softens the angles of the face and adds a touch of femininity. Avoid overly harsh or angular brows. |
| Oval | Versatile! Can rock most brow shapes, but avoid extreme trends. | This face shape is balanced, so you can experiment with different brow styles. A classic, gently arched brow is always a safe bet. |
| Heart | Rounded, soft arches | Balances the wider forehead and draws attention to the eyes. Avoid harsh, angular brows that can make the forehead appear even wider. |
| Long/Oblong | Flat, straight brows | Creates the illusion of a shorter face and adds width. Avoid high arches, which can further elongate the face. |
| Diamond | Curved, soft arches | Softens the angles of the face and balances the wider cheekbones. Avoid overly angular brows that can make the face appear too sharp. |
Introducing the ZenaMakeup Waterproof Brow Stencil & Powder Kit: Your New Best Friend!
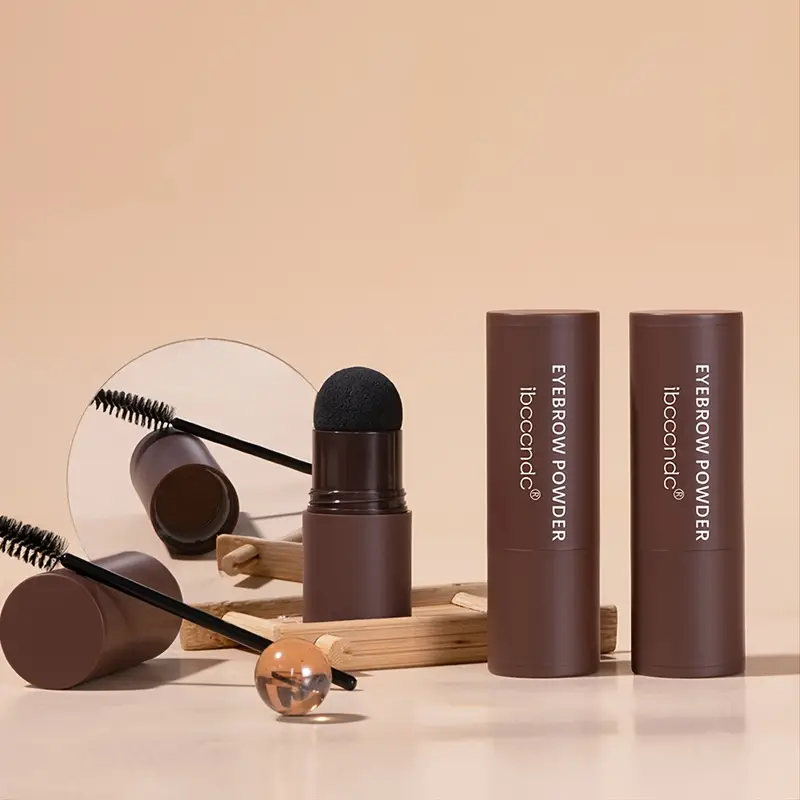
Okay, let’s get to the good stuff! Here’s what you’ll find inside your ZenaMakeup Waterproof Brow Stencil & Powder Kit:
- Multiple Stencils: A selection of stencils in various shapes and sizes. (We’re talking everything from gentle curves to dramatic arches!)
- Waterproof Brow Powder: A finely milled, highly pigmented powder that fills in your brows seamlessly. Available in a range of shades to match your hair color.
- Dual-Ended Applicator Brush: A specially designed brush with an angled tip for precise application and a spoolie brush for blending and grooming.
- Instructions (Just in case you need a refresher!) A clear and concise guide to help you achieve perfect brows every time.
The Step-by-Step Guide to Brow Perfection (It’s Easier Than You Think!)
Alright, class, pay attention! Here’s your step-by-step guide to using the ZenaMakeup Waterproof Brow Stencil & Powder Kit like a pro:
Step 1: Prep Your Brows (The Foundation is Key!)
- Cleanse: Make sure your brows are clean and free of any makeup or oils.
- Groom: Use the spoolie brush to brush your brow hairs upwards and outwards. This will help you see their natural shape and identify any gaps. Trim any stray hairs if needed. ✂️ (But please, be careful! We don’t want any brow casualties.)
- Moisturize (Optional): If you have dry skin, you can apply a light moisturizer around your brows to prevent the powder from clinging to any dry patches.
Step 2: Choose Your Stencil (The Goldilocks Moment!)
- This is where the fun begins! Hold each stencil up to your brow to see which one best aligns with your natural shape and desired arch. Consider your face shape and the recommendations in Table 1.
- Pro Tip: Start with a more natural-looking stencil if you’re unsure. You can always go bolder later!
Step 3: Position the Stencil (Accuracy is Key!)
- Carefully align the stencil with your brow, ensuring it sits comfortably and covers your natural brow hairs.
- Pro Tip: Use a mirror to make sure the stencil is positioned correctly. Hold the stencil firmly in place with your fingers.
Step 4: Fill in with Powder (Gently, Gently!)
- Carefully align the stencil with your brow, ensuring it sits comfortably and covers your natural brow hairs.
- Pro Tip: Use a mirror to make sure the stencil is positioned correctly. Hold the stencil firmly in place with your fingers.
Step 4: Fill in with Powder (Gently, Gently!)
- Dip the angled brush into the brow powder, tapping off any excess.
- Using light, feathery strokes, fill in the stencil, starting from the inner brow and working your way outwards. Focus on filling in any sparse areas and following the shape of the stencil.
- Pro Tip: Don’t press too hard! The goal is to create a soft, natural-looking fill.
Step 5: Remove the Stencil (The Reveal!)
- Carefully peel the stencil away from your brow.
- Ta-da! You should now have a perfectly shaped brow arch. 🎉
Step 6: Blend and Refine (The Finishing Touches!)
- Use the spoolie brush to blend the powder into your natural brow hairs, softening any harsh lines and creating a seamless transition.
- If you want to create a more defined arch, you can use the angled brush to add a bit more powder to the highest point of your brow.
- Pro Tip: You can also use a concealer brush to clean up the edges of your brow and create a sharper, more defined look.
Step 7: Repeat on the Other Brow (Don’t Forget Your Brow Bestie!)
- Repeat steps 3-6 on your other brow.
- Important: It’s normal for your brows to look slightly different. Don’t strive for perfect symmetry, as that can look unnatural. Just aim for a balanced and flattering look.
Step 8: Set Your Brows (Lock It In!)
- For extra staying power, you can use a clear brow gel to set your brows in place. This will help prevent smudging and keep your brows looking perfect all day long.
Troubleshooting: Common Brow Blunders and How to Fix Them
Okay, even with the best tools and techniques, things can sometimes go awry. Here are some common brow blunders and how to fix them:
- Brows Too Dark: Use a clean spoolie brush to blend out the powder and soften the color. You can also use a light concealer to lighten the brow area.
- Brows Too Light: Add more powder in thin layers until you achieve the desired intensity.
- Brows Too Angular: Use the spoolie brush to soften the arch and blend the powder outwards.
- Brows Too Rounded: Use the angled brush to create a more defined arch and sharpen the edges of your brow.
- Uneven Brows: Compare your brows side-by-side and adjust the powder and shape as needed to create a more balanced look.
Table 2: ZenaMakeup Waterproof Brow Stencil & Powder Kit: Shade Guide
| Hair Color | Recommended Brow Powder Shade | Notes |
|---|---|---|
| Light Blonde | Light Brown or Taupe | Avoid shades that are too dark, as they can look unnatural. |
| Medium Blonde | Medium Brown or Taupe | Consider your skin tone. If you have cool undertones, opt for a taupe shade. If you have warm undertones, opt for a medium brown shade. |
| Dark Blonde/Light Brown | Medium Brown or Dark Brown | Choose a shade that is slightly lighter than your hair color for a natural look. |
| Medium Brown | Dark Brown or Chocolate Brown | Experiment with different shades to find the perfect match for your hair color and skin tone. |
| Dark Brown/Black | Black or Espresso | Use a light hand when applying black or espresso powder, as it can easily look too harsh. |
| Red/Auburn | Auburn or Red-Brown | Look for shades that complement your hair color without being too matchy-matchy. |
| Gray/White | Gray or Taupe | Avoid shades that are too warm, as they can make your brows look yellow. |
Beyond the Basics: Advanced Brow Techniques
Once you’ve mastered the basics, you can start experimenting with more advanced brow techniques:
- Ombre Brows: Create a gradient effect by using a lighter shade of powder at the inner brow and a darker shade at the arch and tail.
- Highlighter Under the Brow: Apply a shimmery highlighter under the arch of your brow to create a lifted and defined look. ✨
- Colored Brow Gel: Add a touch of color to your brows with a tinted brow gel.
Why ZenaMakeup? Because We Get Brows!
At ZenaMakeup, we’re obsessed with brows! We understand that brows are more than just hairs above your eyes; they’re a statement, a reflection of your personality, and a key to unlocking your most confident self.
That’s why we’ve created the ZenaMakeup Waterproof Brow Stencil & Powder Kit with YOU in mind. We wanted to make brow perfection accessible to everyone, regardless of their skill level or budget.
We believe that everyone deserves to have beautiful, defined brows that make them feel amazing. And with our Brow Stencil & Powder Kit, you can achieve just that!
Final Exam (Just Kidding… Sort Of!)
Okay, class, time for a quick recap! Remember these key takeaways:
- The ZenaMakeup Waterproof Brow Stencil & Powder Kit is your secret weapon to achieving perfect brows in minutes.
- Choose the right stencil shape for your face shape.
- Use light, feathery strokes when applying the powder.
- Blend, blend, blend!
- Don’t be afraid to experiment and have fun!
Bonus Tip: Practice makes perfect! The more you use the kit, the more comfortable you’ll become with the process.
Congratulations, graduates! You are now well on your way to becoming brow masters! Go forth and conquer the world, one perfectly arched brow at a time! 🎉🎓
(P.S. Don’t forget to tag us in your brow selfies! We love seeing your creations! #ZenaMakeupBrows #BrowPerfection)
For detailed product specifications and purchases, please go to :https://zenamakeup.com/products/brow-stamp-kit-waterproof-3-in-1-stencil-powder
Leave a Reply