Lecture Hall: Decoding the Natural Look with Traceless Matte Foundation Repair Stick (aka, Your New Best Friend) 💄✨
Welcome, class! Settle down, settle down! Today we’re tackling a topic near and dear to my heart (and hopefully soon, yours): achieving that elusive, "I woke up like this" natural look using the often-misunderstood, sometimes-intimidating… Foundation Repair Stick. More specifically, the Buildable Traceless Matte Foundation Repair Stick.
Now, I know what you’re thinking. "Foundation Stick? That sounds…heavy." Fear not, my beauty-loving comrades! We’re not aiming for a cake-faced catastrophe. We’re aiming for natural, flawless, and effortlessly chic. Think more "lit-from-within" and less "plastered-on perfection."
(Professor adjusts glasses, a mischievous glint in her eye)
Think of this Foundation Repair Stick as your secret weapon, your beauty magician’s wand, your…well, you get the picture. It’s a powerful tool when used correctly, and today, we’re going to become masters of its manipulation.
Lecture Outline:
- Foundation Stick 101: Demystifying the Stick (and Dispelling the Myths)
- The "Buildable" Advantage: Layering Like a Pro (Without Looking Like a Clown)
- "Traceless" Technology: The Art of Blending (Goodbye, Harsh Lines!)
- "Matte" Magic: Controlling Shine and Achieving a Velvety Finish (No More Oily Disco Balls!)
- "Repair" Power: Targeting Imperfections with Precision (Spot Concealing for the Win!)
- Application Techniques: From Dab-and-Blend to Sculpt-and-Contour (Unleash Your Inner Artist!)
- Color Matching: Finding Your Perfect Shade (The Quest for the Holy Grail of Foundation!)
- Setting for Longevity: Making Your Natural Look Last All Day (Because Who Has Time for Touch-Ups?)
- Troubleshooting: Common Mistakes and How to Avoid Them (Learn from My Painful Experiences!)
- Beyond the Basics: Customizing Your Look (The Fun Part!)
- The Importance of Skincare: The Foundation Under the Foundation (Get it? Get it? 😉)
- Q&A: Ask Me Anything! (No Judgement…Okay, Maybe a Little)
(Professor dramatically points to the screen)
1. Foundation Stick 101: Demystifying the Stick (and Dispelling the Myths) 🧱
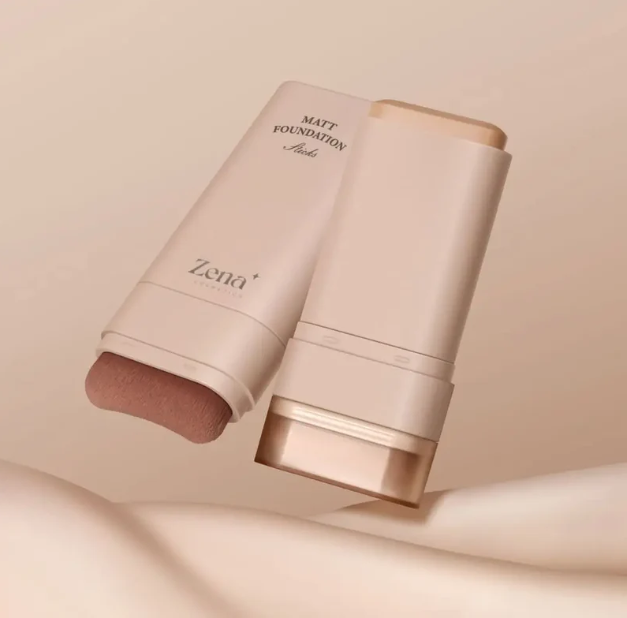
Let’s start with the basics. A foundation stick is essentially a solid form of foundation, typically in a twist-up tube. It’s known for its portability, ease of application, and often, its buildable coverage.
Common Myths Debunked:
- Myth #1: Foundation sticks are always heavy and cakey. False! Modern formulas, like our Traceless Matte Foundation Repair Stick, are designed to be lightweight and buildable.
- Myth #2: Foundation sticks are only for dry skin. Nope! While some can be drying, matte formulas are great for controlling shine on oily and combination skin.
- Myth #3: You can only use a foundation stick for full coverage. Absolutely not! We’re going for natural today, remember?
- Myth #4: They’re hard to blend. This one can be true with poorly formulated sticks, but our "Traceless" technology is specifically designed for seamless blending.
Key Advantages of a Foundation Stick:
| Feature | Benefit | 🤩 |
|---|---|---|
| Portability | Perfect for travel, touch-ups on the go, and fitting in even the smallest purse. | ✈️ |
| Targeted Coverage | Allows for precise application to specific areas, like blemishes or redness. | 🎯 |
| Buildable Coverage | Can be layered for sheer to medium coverage, depending on your desired look. | 🧱 |
| Versatility | Can be used as foundation, concealer, or even for contouring (we’ll get to that later!). | 🎭 |
| Less Mess | No spills, no pumps, no fuss! | 🧼 |
2. The "Buildable" Advantage: Layering Like a Pro (Without Looking Like a Clown) 🤡➡️😇
The "buildable" aspect is crucial for achieving a natural look. It means you can start with a sheer layer and gradually add more coverage only where you need it.
The Key to Successful Building:
- Start Small: Apply a thin layer first. You can always add more, but it’s much harder to take away!
- Focus on Problem Areas: Target areas that need the most coverage, like redness around the nose, blemishes, or dark circles.
- Blend, Blend, Blend: After each layer, blend thoroughly. This prevents the foundation from looking cakey or uneven.
- Patience is a Virtue: Don’t rush the process. Building coverage gradually takes time, but it’s worth it for a natural finish.
Think of it like painting: You wouldn’t slap a thick coat of paint on a canvas right away, would you? You’d start with a base layer and gradually build up the colors and details. Same principle applies here!
3. "Traceless" Technology: The Art of Blending (Goodbye, Harsh Lines!) 👋
"Traceless" means exactly what it sounds like: the foundation should blend seamlessly into your skin, leaving no visible lines or edges. This is where the magic happens!
Factors Contributing to Traceless Blending:
- Formula: The formula is designed to melt into the skin, blurring imperfections and creating a smooth, even finish.
- Tools: Using the right tools is essential for blending. We’ll discuss this in detail later.
- Technique: The way you apply and blend the foundation can make all the difference.
Blending Tips & Tricks:
- Warm Up the Product: Before applying, warm up the stick slightly by rubbing it on the back of your hand. This helps it melt into the skin more easily.
- Use a Damp Sponge: A damp beauty sponge is your best friend for achieving a seamless blend.
- Stipple and Press: Instead of dragging the sponge across your face, use a stippling and pressing motion. This helps the foundation melt into the skin and prevents streaks.
- Work in Small Sections: Focus on blending one section of your face at a time. This prevents the foundation from drying out before you have a chance to blend it.
- Check Your Work in Natural Light: Once you’re finished blending, check your work in natural light to make sure there are no harsh lines or patches.
4. "Matte" Magic: Controlling Shine and Achieving a Velvety Finish (No More Oily Disco Balls!) 🪩➡️✨
Matte doesn’t have to mean flat or lifeless. A good matte foundation controls shine while still allowing your skin’s natural radiance to shine through.
Benefits of a Matte Finish:
- Controls Shine: Ideal for oily and combination skin types.
- Long-Lasting: Tends to last longer than dewy foundations.
- Minimizes Pores: Can help to blur the appearance of pores.
- Photographs Well: Less likely to reflect light and cause a "shiny face" in photos.
Tips for Achieving a Velvety Matte Finish:
- Prep Your Skin: Start with a clean, moisturized face. Use a mattifying primer if you have oily skin.
- Apply a Thin Layer: Less is more! A thick layer of matte foundation can look heavy and unnatural.
- Use a Setting Powder: Lightly dust your face with a translucent setting powder to lock in the foundation and further control shine. Focus on the T-zone (forehead, nose, and chin).
- Blotting Papers are Your Savior: Keep blotting papers on hand for quick touch-ups throughout the day.
(Professor pulls out blotting papers and dramatically dabs her forehead)
5. "Repair" Power: Targeting Imperfections with Precision (Spot Concealing for the Win!) 🎯
The "Repair" aspect of this foundation stick refers to its ability to effectively cover imperfections like blemishes, redness, and dark circles.
Using the Stick as a Spot Concealer:
- Choose a Shade That Matches Your Skin Tone: For concealing, it’s best to use a shade that closely matches your skin tone to avoid creating a noticeable patch.
- Apply Directly to the Imperfection: Use the tip of the stick to apply a small amount of foundation directly to the blemish or area you want to conceal.
- Blend Gently: Use your fingertip, a small brush, or a damp sponge to gently blend the foundation into the surrounding skin.
- Build Coverage as Needed: If the imperfection is still visible, apply another thin layer of foundation and blend again.
Pro Tip: For dark circles, try using a slightly lighter shade of foundation than your skin tone to brighten the under-eye area.
6. Application Techniques: From Dab-and-Blend to Sculpt-and-Contour (Unleash Your Inner Artist!) 🎨
Now for the fun part! Let’s explore different application techniques to achieve various looks.
6. Application Techniques: From Dab-and-Blend to Sculpt-and-Contour (Unleash Your Inner Artist!) 🎨
Now for the fun part! Let’s explore different application techniques to achieve various looks.
Technique #1: The Dab-and-Blend (For Sheer Coverage)
- Dab the foundation stick lightly onto your forehead, cheeks, nose, and chin.
- Use a damp beauty sponge to blend the foundation outwards, starting from the center of your face.
Technique #2: The Strip-and-Blend (For Medium Coverage)
- Draw a few stripes of foundation onto your forehead, cheeks, nose, and chin.
- Use a damp beauty sponge or a foundation brush to blend the foundation outwards.
Technique #3: The Spot Treatment (For Targeted Coverage)
- Apply the foundation directly to any areas that need extra coverage, such as blemishes or redness.
- Use your fingertip, a small brush, or a damp sponge to blend the foundation into the surrounding skin.
Technique #4: The Sculpt-and-Contour (For Added Dimension)
- Choose a foundation stick that is 2-3 shades darker than your skin tone for contouring.
- Apply the darker shade to the hollows of your cheeks, along your jawline, and on the sides of your nose.
- Blend the contour shade upwards and outwards.
Tools of the Trade:
| Tool | Best For | 👍 |
|---|---|---|
| Damp Beauty Sponge | Achieving a seamless, airbrushed finish. | 🧽 |
| Foundation Brush | Applying a more precise and controlled layer of foundation. | 🖌️ |
| Fingertips | Blending small areas, like around the eyes and nose. | 👆 |
7. Color Matching: Finding Your Perfect Shade (The Quest for the Holy Grail of Foundation!) 🏆
Finding the right shade is arguably the most important step in achieving a natural look. A foundation that’s too light or too dark will be immediately noticeable.
Tips for Finding Your Perfect Shade:
- Test in Natural Light: The best place to test foundation is in natural light. Artificial light can distort the color.
- Test on Your Jawline: Apply a small amount of foundation to your jawline and blend it in. The shade that disappears into your skin is the closest match.
- Consider Your Undertones: Determine whether you have warm, cool, or neutral undertones.
- Warm: Yellow or golden undertones.
- Cool: Pink or blue undertones.
- Neutral: A mix of warm and cool undertones.
- Don’t Be Afraid to Mix: If you can’t find an exact match, try mixing two shades together to create your perfect color.
- Ask for Help: Don’t be afraid to ask a makeup artist or beauty consultant for help. They can help you determine your skin tone and undertones and find the right shade for you.
(Professor points to a complex color wheel diagram)
8. Setting for Longevity: Making Your Natural Look Last All Day (Because Who Has Time for Touch-Ups?) ⏱️
Setting your foundation is essential for making it last all day, especially if you have oily skin.
Setting Options:
- Translucent Setting Powder: A translucent setting powder is a great option for all skin types. It helps to lock in the foundation without adding any color or coverage.
- Colored Setting Powder: A colored setting powder can add a bit of extra coverage and help to even out your skin tone.
- Setting Spray: A setting spray helps to lock in your makeup and keep it looking fresh all day.
Application Techniques:
- Use a Large, Fluffy Brush: Dip the brush into the setting powder and tap off any excess.
- Apply in Light, Circular Motions: Gently dust the powder over your face, focusing on the T-zone.
- Don’t Overdo It: Too much setting powder can make your skin look dry and cakey.
9. Troubleshooting: Common Mistakes and How to Avoid Them (Learn from My Painful Experiences!) 😫
We all make mistakes, especially when it comes to makeup. Here are some common mistakes to avoid when using a foundation stick:
- Applying Too Much Product: Start with a small amount of product and build up coverage as needed.
- Using the Wrong Shade: Make sure to test the foundation in natural light and choose a shade that matches your skin tone.
- Not Blending Properly: Blend the foundation thoroughly to avoid harsh lines and streaks.
- Using the Wrong Tools: Use a damp beauty sponge or a foundation brush for best results.
- Forgetting to Set: Set your foundation with a setting powder or spray to make it last all day.
(Professor shares a humorous anecdote about a foundation disaster from her past)
10. Beyond the Basics: Customizing Your Look (The Fun Part!) 🎉
Once you’ve mastered the basics, you can start experimenting with different techniques and products to create your own unique look.
Ideas for Customizing Your Look:
- Mix with Moisturizer: For an even sheerer look, mix a small amount of foundation with your favorite moisturizer.
- Create a Tinted Moisturizer: Add a few drops of liquid highlighter to your foundation for a dewy, radiant finish.
- Use as a Concealer: Apply the foundation to blemishes or dark circles for targeted coverage.
- Contour and Highlight: Use a darker shade of foundation to contour and a lighter shade to highlight.
11. The Importance of Skincare: The Foundation Under the Foundation (Get it? Get it? 😉) 🧖♀️
No matter how good your foundation is, it will only look as good as your skin. Proper skincare is essential for achieving a flawless, natural look.
Essential Skincare Steps:
- Cleanse: Cleanse your face twice a day to remove dirt, oil, and makeup.
- Exfoliate: Exfoliate 1-2 times a week to remove dead skin cells and reveal brighter, smoother skin.
- Moisturize: Moisturize your skin every day to keep it hydrated and healthy.
- Protect: Wear sunscreen every day to protect your skin from the sun’s harmful rays.
(Professor dramatically applies sunscreen)
12. Q&A: Ask Me Anything! (No Judgement…Okay, Maybe a Little) ❓
Alright class, the floor is now open for questions! Don’t be shy! Anything you’ve ever wanted to know about foundation sticks, achieving a natural look, or even my questionable fashion choices in the 80s… I’m (mostly) an open book.
(Professor smiles expectantly, ready to answer any and all questions. The lecture hall buzzes with anticipation.)
Remember, class, practice makes perfect! Don’t be afraid to experiment and find what works best for you. And most importantly, have fun!
(Professor winks and exits the stage to thunderous applause. The quest for the perfect natural look continues!)
For detailed product specifications and purchases, please go to :https://zenamakeup.com/products/traceless-matte-foundation-repair-stick
Leave a Reply