Lecture: Achieving Glimmering Goddess Status: Mastering Even Application with Earth Heartbeat Eyeshadows
(Opening music: A dramatic, slightly cheesy, nature-inspired orchestral piece)
(Lights dim, spotlight on a slightly frazzled but enthusiastic presenter – you!)
Hello, darlings! Welcome, welcome, one and all, to what I like to call “Glimmer School!” Today, we’re not just applying eyeshadow; we’re embarking on a journey. A shimmering, sparkling, Earth-toned odyssey into the heart of even application with our beloved Earth Heartbeat Eyeshadows.
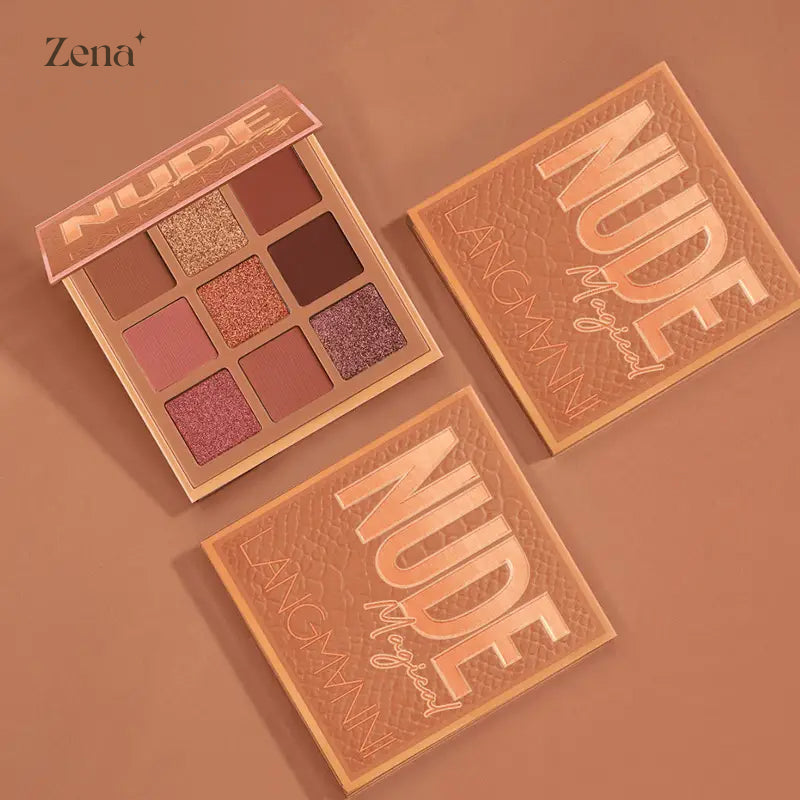
(Gesture dramatically towards a display of Earth Heartbeat eyeshadow palettes)
These aren’t just powders, my friends. They’re captured sunsets, crushed moonbeams, and the very essence of Mother Earth’s sparkle distilled into pigment form. But, like taming a wild unicorn, getting that even, flawless glimmer can be… a challenge.
(Audience chuckles)
Fear not! I, your humble guide, am here to equip you with the knowledge and techniques to transform from "glitter bomb victim" to "glimmering goddess" in no time. So, buckle up, grab your brushes, and let’s dive in!
(Slide appears on screen: "The Quest for Even Glimmer")
I. Understanding the Earth Heartbeat Magic: Formulations and Finishes
Before we wield our weapons of mass beautification (aka eyeshadow brushes), we need to understand the nature of our quarry. Earth Heartbeat eyeshadows, while divine, often have unique textures and finishes that demand specific approaches.
(Slide: Table showcasing common Earth Heartbeat eyeshadow finishes and their characteristics)
| Finish | Description | Application Notes | Potential Challenges |
|---|---|---|---|
| Shimmer | Fine, subtle reflective particles; provides a soft, diffused glow. | Can be applied dry or wet for increased intensity. Best applied with a flat, dense brush. | Can sometimes lack impact if not built up properly. |
| Glitter | Larger, more noticeable reflective particles; creates a dazzling, sparkling effect. | Best applied with a finger or a silicone applicator. Consider using a glitter glue for maximum adhesion and minimal fallout. | Fallout is a major concern! Can be difficult to remove and end up everywhere. 😱 |
| Metallic | Highly reflective, almost foil-like finish; delivers intense color and shine. | Best applied wet or with a dampened brush for maximum impact. Can emphasize texture on the eyelid, so prime well. | Can crease if applied too thickly. Can be overwhelming if not used strategically. |
| Satin | A subtle sheen with a smooth, almost creamy texture. | Easy to blend and build. Works well with various brushes. Great for all-over lid color or blending. | Can sometimes appear flat if not paired with more dimensional shades. |
| Duo-chrome | Shifts in color depending on the angle of light; adds dimension and intrigue. | Best applied with a finger or a damp brush to showcase the color shift. Avoid over-blending, as it can diminish the effect. | Can be tricky to work with if you’re not familiar with how the color shifts. |
| Iridescent | Pearlescent, multifaceted shimmer with a subtle color shift. | Can be applied dry or wet, depending on the desired intensity. Great for highlighting the inner corner of the eye or the brow bone. | Can sometimes be too subtle if not built up. |
(Emojis added for emphasis and visual appeal)
Key Takeaway: Understanding the finish is half the battle! You wouldn’t use a bulldozer to plant a flower, would you? (Unless you’re really committed to gardening!) Similarly, each finish requires a specific application technique.
II. The Arsenal: Essential Tools for Glimmering Success
Now that we know our enemy (or, rather, our fickle friend – glimmer!), let’s arm ourselves with the right tools.
(Slide: Image displaying various eyeshadow brushes, glitter glue, primer, etc.)
A. Brushes: Your Painting Companions
- Flat, Dense Brush: For packing on shimmer and metallic shades. Think of it as a tiny trowel for spreading glimmering goodness.
- Blending Brush (Fluffy and Tapered): For diffusing edges and creating a seamless transition. This is your "soften the blow" brush.
- Pencil Brush: For precise placement of shimmer in the inner corner or along the lower lash line. Think of it as a tiny spotlight.
- Angled Brush: For applying shimmer along the lash line as a liner. For that extra pop of sparkle!
B. Primer: The Foundation of Flawless
Eyeshadow primer is your best friend. It creates a smooth, even surface, enhances color payoff, and, most importantly, prevents creasing and fallout. Think of it as spackle for your eyelids, filling in any imperfections and creating a perfect canvas.
(Humorous aside: Imagine trying to paint a masterpiece on a bumpy wall – the results wouldn’t be pretty, right?)
C. Glitter Glue (Optional but Highly Recommended):
This is your secret weapon for glitter shades. It acts like double-sided tape, ensuring those sparkly particles stay exactly where you want them. No more rogue glitter wandering down your cheeks!
This is your secret weapon for glitter shades. It acts like double-sided tape, ensuring those sparkly particles stay exactly where you want them. No more rogue glitter wandering down your cheeks!
D. Setting Spray: The Finishing Touch
Locks everything in place and helps meld the shadows together for a seamless finish.
E. Cotton Swabs and Makeup Remover:
Because mistakes happen! Consider these your "undo" buttons.
(Slide: A humorous image of someone covered in glitter with the caption: "Without Glitter Glue: This Could Be You!")
III. The Art of Application: Techniques for Even Glimmer
Alright, troops, let’s get our hands dirty (figuratively, of course – we want clean brushes!). Here’s the step-by-step guide to achieving that coveted even glimmer.
(Slide: Step-by-step guide with images or illustrations)
Step 1: Prime Time!
- Apply a thin, even layer of eyeshadow primer to your entire eyelid, from lash line to brow bone.
- Let it set for a minute or two. This allows the primer to become slightly tacky, providing a better grip for the shadows.
Step 2: Base Shadow (Optional):
- Apply a matte base shadow that complements your chosen shimmer shade. This will create a smooth, even canvas and help the shimmer blend seamlessly.
Step 3: The Glimmer Application (The Main Event!)
This is where things get interesting. The technique varies depending on the finish:
- Shimmer:
- Dry Application: Use a flat, dense brush to pack the shimmer onto your lid. Gently press the brush onto the lid to deposit the color, rather than swiping. This will minimize fallout and maximize color payoff.
- Wet Application: Dampen your brush with setting spray or water before picking up the shimmer. This will create a more intense, metallic finish. Be careful not to over-saturate the brush, as this can make the shadow patchy.
- Glitter:
- Apply a thin layer of glitter glue to the area where you want to apply the glitter.
- Use your finger or a silicone applicator to gently press the glitter onto the glue. Avoid swiping, as this can create fallout.
- Pat, pat, pat! This ensures the glitter adheres properly.
- Metallic:
- Apply wet or with a dampened brush for maximum impact.
- Use a flat, dense brush and gently press the shadow onto the lid.
- Avoid applying too thickly, as this can cause creasing.
- Satin:
- Use a fluffy brush to blend the color all over the lid.
- Can be layered for more intensity.
- Duo-chrome:
- Apply with a finger or a damp brush to bring out the color shift.
- Avoid over-blending, as this can diminish the effect.
- Iridescent:
- Use a fluffy brush to apply the color to the inner corner of the eye or brow bone.
- Can be layered for more intensity.
Step 4: Blending is Key!
- Use a clean blending brush to soften the edges of the shimmer and blend it seamlessly with your base shadow (if using).
- Small, circular motions are your friend!
Step 5: Clean Up Crew!
- Use a cotton swab dipped in makeup remover to clean up any fallout or stray glitter particles.
- Apply concealer under your eyes to brighten and cover any remaining fallout.
Step 6: Seal the Deal!
- Spritz your face with setting spray to lock everything in place and help the shadows meld together.
(Slide: Image showcasing examples of different eyeshadow looks using Earth Heartbeat eyeshadows with even glimmer application.)
IV. Troubleshooting: Common Glimmer Gremlins and How to Slay Them
Even with the best techniques, glimmer can still be a mischievous minx. Here are some common problems and their solutions:
(Slide: Table addressing common problems and solutions)
| Problem | Solution | Solution |
|---|
For detailed product specifications and purchases, please go to :https://zenamakeup.com/products/earth-heartbeat-9-shade-glimmer-eyeshadow-palette
Leave a Reply