Glitterati, Assemble! Mastering the Deluxe Liquid Glitter Cream Eyeshadow Stick: A Lecture in Sparkle Supremacy ✨
Welcome, my dear Glitter Gladiators, to Glitter 101! Forget your textbooks and bring on the bling, because today we’re diving headfirst into the shimmering, swirling, and occasionally sticky world of liquid glitter eyeshadow. Specifically, we’re tackling the magnificent, the marvelous, the sometimes-temperamental… Deluxe Liquid Glitter Cream Eyeshadow Stick!
(Sound of dramatic cymbal clash)
Yes, my friends, this little stick of sparkle has the power to transform you from drab to dazzling in seconds. But, like a mischievous gremlin covered in rhinestones, it can also leave you looking like you wrestled a unicorn and lost. Fear not! This lecture is your shield, your sword, your glitter-application guru, guiding you through the shimmering minefield to achieve an even, breathtaking application.
(Emoji of a warrior with a glitter shield and sword)
Professor Sparkle (that’s me!) will be your guide. I’ve battled glitter fallout that rivaled a snowstorm, navigated the treacherous terrain of uneven application, and emerged victorious (and slightly sparkly) on the other side. So, grab your brushes, your glitter sticks, and a healthy dose of patience, because class is in session!
I. Understanding Your Glittery Opponent: The Deluxe Liquid Glitter Cream Eyeshadow Stick Deconstructed
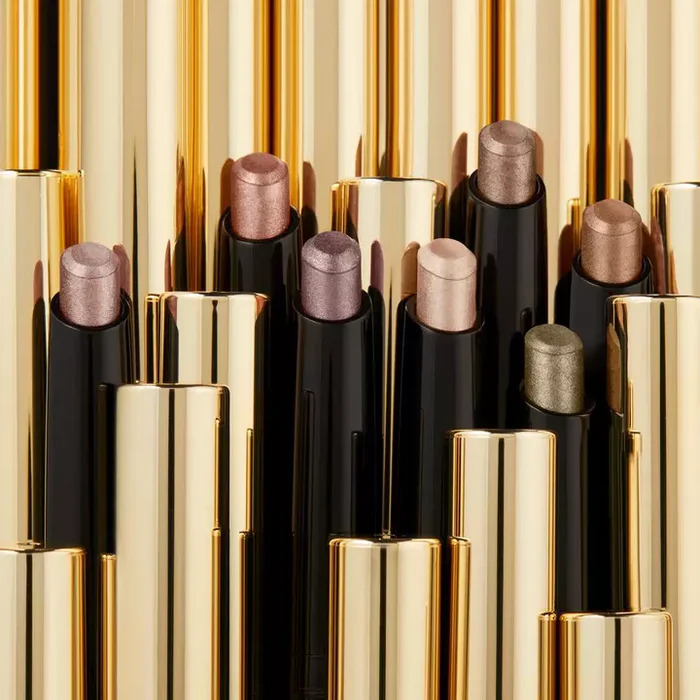
Before we unleash the sparkle, let’s understand what we’re dealing with. Not all glitter is created equal, and neither are all glitter application tools. The Deluxe Liquid Glitter Cream Eyeshadow Stick is a unique beast, a hybrid of creamy pigment and dazzling glitter particles, all conveniently packaged in a stick format.
(Font: Use a slightly fancy, cursive font for headings like "I. Understanding…" for visual flair)
Here’s a breakdown:
| Component | Description | Potential Issues |
|---|---|---|
| Cream Base | Provides the color and adhesion for the glitter. Can be sheer, opaque, or somewhere in between. | Can be prone to creasing, especially on oily lids. Uneven application can lead to patchiness. |
| Glitter Particles | Vary in size, shape, and color. Can range from fine shimmer to chunky, eye-catching glitter. | Fallout is a common concern. Larger particles can feel gritty if not applied correctly. Uneven distribution leads to a patchy, unprofessional look. |
| Applicator Stick | Typically a rounded or slightly pointed stick. Designed for direct application to the eyelid. | Can deposit too much product in one spot. Difficult to reach the inner corner and crease with precision. Prone to picking up product from the eyelid and creating a smudged mess. |
| Formula | The overall consistency of the product. Can be creamy, gel-like, or somewhere in between. | Some formulas dry down quickly, making blending difficult. Others remain sticky, attracting dust and debris. |
Key takeaway: This isn’t your grandma’s glitter eyeshadow. The creamy base requires careful application to prevent creasing and patchiness, while the applicator stick demands finesse to avoid over-application and uneven distribution.
(Emoji of a magnifying glass examining a glitter particle)
II. Prep School for Sparkle: Laying the Foundation for Glitter Greatness
Before you even think about applying that glitter stick, you need to prep your eyelids like you’re prepping for a red-carpet event. This is crucial for a smooth, long-lasting, and even application.
(Icon of a paint palette and brushes)
A. The Cleansing Ritual:
- Cleanse: Start with a clean, dry eyelid. Remove any traces of makeup, oils, or leftover fairy dust from yesterday’s escapades. Use a gentle, oil-free cleanser.
- Pat Dry: Gently pat your eyelids dry with a soft towel. Avoid rubbing, as this can irritate the delicate skin.
B. The Priming Power-Up:
- Eyeshadow Primer: This is your secret weapon against creasing and fading. Apply a thin, even layer of eyeshadow primer to your entire eyelid, from lash line to brow bone. Allow it to dry completely before moving on.
- Pro-Tip: Choose a primer that matches your skin tone for a seamless base.
C. The Base Shadow: Optional, But Highly Recommended:
- Neutral Eyeshadow: Applying a neutral eyeshadow base (think matte beige, taupe, or brown) can create a more even canvas for the glitter and help it adhere better.
- Color Coordination: If you want to intensify the glitter’s color, apply a similar color eyeshadow underneath. For example, a bronze eyeshadow under a gold glitter.
Why is prepping so important? Think of your eyelid as a canvas. A smooth, primed canvas allows the paint (glitter) to glide on evenly and last longer. A bumpy, oily canvas… well, you get the picture. It’s a glittery disaster waiting to happen.
(Table: Example of base eyeshadow color pairings with glitter stick colors)
| Glitter Stick Color | Recommended Base Eyeshadow Color |
|---|---|
| Gold | Bronze, Warm Brown |
| Silver | Grey, Charcoal |
| Rose Gold | Pink, Peach |
| Blue | Navy, Cobalt |
| Green | Olive, Forest Green |
III. The Art of the Application: Mastering the Glitter Stick Technique
Okay, my Glitter Gurus, the moment we’ve all been waiting for! Time to unleash the sparkle! But remember, patience and precision are key. We’re not aiming for a Jackson Pollock painting here (unless Jackson Pollock was really into glitter).
(Font: Use a bold, slightly futuristic font for headings like "III. The Art…")
A. The Dab and Blend Method:
This is the most foolproof method for achieving an even application.
- Dab, Don’t Drag: Instead of swiping the glitter stick directly across your eyelid, gently dab the product onto your lid. Focus on the center of your lid first, where you want the most impact.
- Why? Swiping can create uneven distribution and drag the product around, leading to patchiness. Dabbing allows you to control the amount of product and placement.
- Blend, Blend, Blend! Using a small, dense eyeshadow brush (a flat shader brush or a synthetic concealer brush works well), gently blend the glitter outwards from the center of your lid.
- Why? Blending diffuses the edges and creates a seamless transition between the glitter and your skin or base eyeshadow.
- Build in Layers: If you want more intensity, add another layer of glitter using the dab and blend method. But remember, less is often more! Over-application can lead to creasing and fallout.
- Pro-Tip: Let each layer dry slightly before applying the next.
B. The Finger-Tapping Technique:
For a more diffused, natural glitter look, try using your finger.
- Dab and Transfer: Dab the glitter stick onto the back of your hand.
- Tap and Blend: Using your ring finger (it has the lightest touch!), gently tap the glitter onto your eyelid. Start in the center and work your way outwards.
- Why? Your finger warms the product, making it easier to blend. Tapping prevents harsh lines and creates a softer, more diffused effect.
C. Addressing the Inner Corner and Crease Conundrum:
The inner corner and crease can be tricky areas to navigate with the glitter stick.
- Inner Corner: Use a small, pointed eyeshadow brush to pick up a small amount of glitter from the stick (or the back of your hand) and gently apply it to the inner corner.
- Pro-Tip: A touch of glitter in the inner corner can brighten your eyes and make you look more awake.
- Crease: Applying glitter directly into the crease can be risky business (creasing alert!). If you want to add glitter to your crease, use a very small amount and blend it meticulously with a blending brush.
- Alternative: Consider using a matte or shimmer eyeshadow in your crease for definition instead.
(Emoji of a hand dabbing glitter delicately)
IV. Glitter First Aid: Troubleshooting Common Application Issues
IV. Glitter First Aid: Troubleshooting Common Application Issues
Even the most skilled Glitter Gladiators encounter the occasional obstacle. Here’s how to tackle some common glitter application woes:
(Icon of a first aid kit)
A. The Dreaded Fallout:
- Prevention is Key: The best way to deal with fallout is to prevent it in the first place. Use a good eyeshadow primer, apply thin layers of glitter, and avoid rubbing your eyes.
- Clean Up Crew:
- Scotch Tape: Gently press a piece of scotch tape to the affected area to lift away loose glitter particles.
- Makeup Remover Wipe: Gently swipe a makeup remover wipe under your eyes to remove any stray glitter.
- Large Fluffy Brush: Use a large, fluffy brush to dust away any remaining glitter.
B. The Crease Catastrophe:
- Blotting is Your Best Friend: If your glitter eyeshadow is creasing, gently blot your eyelids with a tissue to remove excess oil and product.
- Setting Powder to the Rescue: Apply a light dusting of translucent setting powder to your eyelids to help set the glitter and prevent further creasing.
- Reapplication: If the creasing is severe, you may need to remove the glitter eyeshadow and reapply it using a thinner layer and more primer.
C. The Patchy Application Panic:
- Assess the Damage: Determine the cause of the patchiness. Is it uneven primer application? Uneven glitter distribution?
- Even Out the Base: If the primer is uneven, gently blend it out with your finger or a sponge.
- Reapply with Precision: Apply more glitter to the patchy areas using the dab and blend method.
- Blend, Blend, Blend! Seriously, I can’t stress this enough. Blending is your salvation.
D. The Sticky Situation:
- Setting Spray is Your Savior: A generous spritz of setting spray can help to set the glitter and prevent it from feeling sticky.
- Translucent Powder: A light dusting of translucent powder can also help to absorb excess moisture and reduce stickiness.
- Avoid Touching: Resist the urge to touch your eyelids! This will only transfer oils and make the stickiness worse.
(Table: Troubleshooting Chart)
| Problem | Possible Cause | Solution |
|---|---|---|
| Fallout | Over-application, Poor primer, Rubbing eyes | Apply thinner layers, Use a strong primer, Avoid touching eyes, Use scotch tape/makeup remover wipe for clean-up |
| Creasing | Oily lids, Too much product, Humid environment | Use oil-free primer, Apply thinner layers, Blot excess oil, Set with translucent powder, Use setting spray |
| Patchy Application | Uneven primer, Uneven glitter distribution | Ensure even primer application, Dab and blend glitter, Build in layers, Use a small brush for precise application |
| Sticky Texture | Humid environment, Oily lids, Product formula | Use setting spray, Apply translucent powder, Choose a less sticky formula, Avoid touching eyelids |
V. Beyond the Basics: Advanced Glitter Techniques
Once you’ve mastered the fundamentals, it’s time to unleash your inner glitter artist and explore some more advanced techniques!
(Font: Use a creative, handwritten-style font for headings like "V. Beyond…")
A. The Halo Eye:
This technique involves placing the glitter in the center of your eyelid, creating a halo-like effect.
- Apply a dark eyeshadow to the outer and inner corners of your eyelid.
- Leave the center of your lid bare.
- Apply the glitter stick to the center of your lid using the dab and blend method.
- Blend the edges of the glitter into the surrounding eyeshadow.
B. The Cut Crease with Glitter:
This technique involves creating a sharp, defined crease and adding a pop of glitter to the lid.
- Create a defined cut crease using a matte eyeshadow.
- Apply the glitter stick to the lid using the dab and blend method.
- Keep the glitter within the defined crease for a dramatic look.
C. The Glitter Eyeliner:
This technique involves using the glitter stick as an eyeliner.
- Use a fine-tipped eyeliner brush to pick up some glitter from the stick.
- Carefully draw a line along your upper lash line.
- You can also create a winged eyeliner look with glitter.
(Emoji of a shooting star)
VI. Glitter Maintenance: Keeping Your Sparkle Strong
The final step in your glitter journey is maintaining your dazzling look throughout the day (or night!).
(Icon of a mirror and comb)
A. Touch-Up Tactics:
- Carry a small mirror and a setting spray with you.
- Blot any creasing with a tissue and reapply setting spray as needed.
- If fallout occurs, use a scotch tape or a makeup remover wipe to clean it up.
B. Removal Ritual:
- Use an oil-based makeup remover to gently dissolve the glitter.
- Avoid rubbing your eyes, as this can irritate the skin.
- Follow up with a gentle cleanser to remove any remaining residue.
C. Storage Secrets:
- Store your glitter stick in a cool, dry place.
- Keep the cap tightly closed to prevent the product from drying out.
VII. Conclusion: Go Forth and Sparkle!
Congratulations, my Glitter Graduates! You have now successfully completed Glitter 101! You are armed with the knowledge and skills necessary to conquer the Deluxe Liquid Glitter Cream Eyeshadow Stick and achieve a flawless, dazzling application every time.
(Emoji of a graduation cap)
Remember, practice makes perfect. Don’t be afraid to experiment with different techniques and find what works best for you. And most importantly, have fun! Glitter is all about expressing your creativity and embracing your inner sparkle.
Now, go forth and shine! The world needs your glitter!
(Final flourish: Shower of glitter emojis)
For detailed product specifications and purchases, please go to :https://zenamakeup.com/products/liquid-glitter-waterproof-eyeshadow-stick
Leave a Reply