Lecture: Getting High-Impact Sparkle with the Glitter End of a Dual-End Liquid Eyeshadow: A Glitterati’s Guide
(Professor Sparkle’s voice, think Edna Mode meets Lisa Eldridge)
Alright, darlings! Settle down, settle down! Today, we’re not just talking about glitter; we’re talking about high-impact sparkle! We’re diving headfirst into the dazzling world of dual-end liquid eyeshadows and mastering the art of wielding their glittery powers. Forget subtle shimmers; we’re aiming for supernova status! ✨
(A dramatic pause, adjusts oversized glasses)
Now, I know what some of you are thinking: "Glitter? Isn’t that, like, for children’s art projects and questionable bachelorette parties?" 🤦♀️ To that, I say, poppycock! When used correctly, glitter eyeshadow is a sophisticated, mesmerizing tool that can elevate any look from mundane to magnificent. And the dual-end liquid eyeshadow? It’s the Swiss Army knife of sparkle! ⚔️
(Professor Sparkle gestures emphatically)
So, grab your notebooks, your brushes, and your best "I’m ready to shine" attitude! Let’s get sparkling!
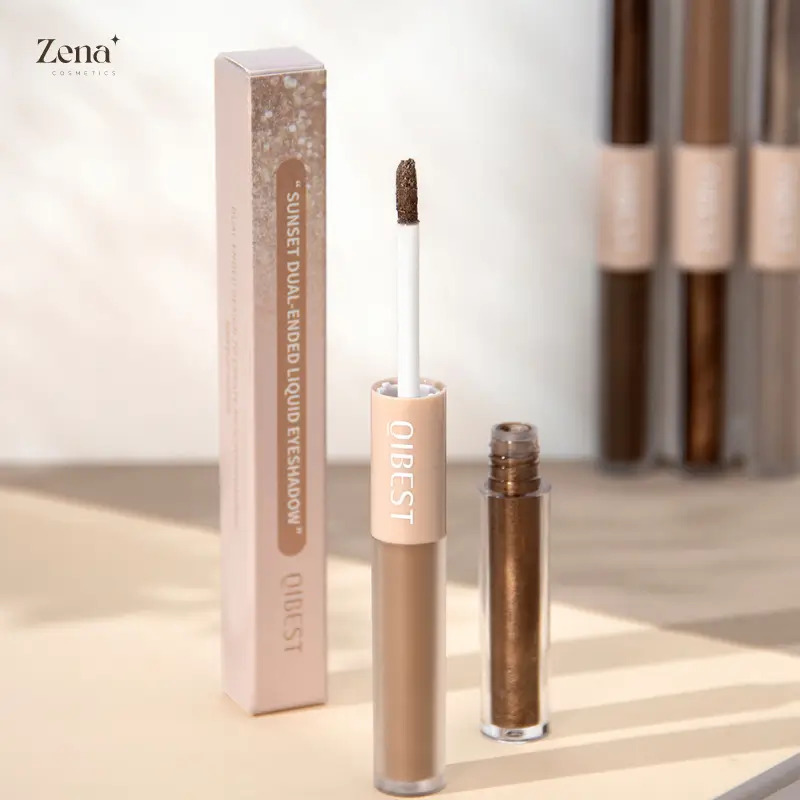
I. The Anatomy of a Dual-End Liquid Eyeshadow: Understanding Your Arsenal
Before we unleash the glitter beast, let’s dissect our weapon of choice. A dual-end liquid eyeshadow, as the name suggests, boasts two distinct formulations in one convenient package. Usually, you’ll find:
-
The Pigmented End (The Base): This end typically houses a highly pigmented, often metallic or shimmer-based liquid eyeshadow. Think of it as your canvas, providing a base color and often a subtle glow.
-
The Glitter End (The Star): This is where the magic happens! This end is packed with glitter particles suspended in a clear or slightly tinted base. It’s designed to deliver intense sparkle and dimension.
(Professor Sparkle draws a quick sketch on the board, labeling the parts with dramatic flair)
Think of it like this: the pigmented end is the supporting actor, setting the stage for the star – the glitter! You wouldn’t send a stagehand out for the finale, would you? No! You need the glitter! 🌟
II. Why Dual-End? The Benefits of a Two-in-One Sparkle Solution
Why opt for a dual-end formula over, say, loose glitter or a single glitter eyeshadow? Let’s explore the advantages:
- Convenience is King (or Queen!): Everything you need for a dazzling eye look is in one place. No more rummaging through your makeup bag for that one specific glitter pot! 👑
- Minimal Fallout: Liquid formulas are generally less prone to fallout than loose glitter. This means less glitter on your cheeks, your clothes, your furniture… and everywhere else! (Though, let’s be honest, finding glitter months later is kind of charming, right?… Right?) ✨
- Controlled Application: The applicator (usually a doe-foot or a brush) allows for precise placement of the glitter, preventing a glitter explosion. 💥 (Unless that’s what you’re going for, of course. In that case, go wild!)
- Layering Made Easy: The dual-end format encourages layering. You can build the intensity of your sparkle by applying multiple layers of glitter over the pigmented base. 🎨
- Beginner-Friendly: Liquid glitter eyeshadows are generally easier to work with than loose glitter, making them a great option for beginners. No need to be intimidated! 💪
(Professor Sparkle pulls out a table to illustrate the point):
| Feature | Dual-End Liquid Eyeshadow | Loose Glitter | Single Glitter Eyeshadow (Pressed) |
|---|---|---|---|
| Convenience | High | Low | Medium |
| Fallout | Low | High | Medium |
| Application | Controlled | Messy | Moderate |
| Layering | Easy | Tricky | Moderate |
| Beginner-Friendly | Yes | No | Maybe |
III. Prep Work: Laying the Foundation for Sparkle Success
Before we even think about glitter, we need to prepare the canvas. Proper prep work is crucial for ensuring that your glitter stays put, looks its best, and doesn’t irritate your delicate eyelids.
- Prime Time: Always start with an eyeshadow primer! This creates a smooth, even surface for your eyeshadow, prevents creasing, and helps the glitter adhere better. Think of it as the glue that holds your sparkle dreams together! 💖
- Base Eyeshadow (Optional): While the pigmented end of your dual-end shadow can serve as a base, you can also use a matte eyeshadow to create depth and dimension. This is especially useful if you want a more dramatic or smoky look. Choose a shade that complements the glitter you’ll be using. 🎨
- Set the Stage: If you’ve used a cream or liquid eyeshadow as a base, set it with a powder eyeshadow before applying the glitter. This helps to prevent the glitter from moving around and creasing.
(Professor Sparkle demonstrates the priming technique with a flourish)
Remember, darlings, a solid foundation is key to any masterpiece, even a glittery one! 🏛️
IV. Application Techniques: Mastering the Art of Glitter Placement
Now for the fun part! Let’s explore different techniques for applying the glitter end of your dual-end liquid eyeshadow.
Now for the fun part! Let’s explore different techniques for applying the glitter end of your dual-end liquid eyeshadow.
- The All-Over Glitter Bomb: For maximum impact, apply the glitter all over your eyelid, from lash line to crease. This is a bold and glamorous look that’s perfect for parties and special occasions. 🎉
- Technique: Using the applicator, apply a thin layer of glitter to your eyelid. Gently pat the glitter into place with your fingertip or a flat eyeshadow brush. Build up the intensity by layering more glitter as needed.
- The Glitter Lid Pop: Focus the glitter on the center of your eyelid, creating a pop of sparkle that catches the light. This is a great way to add a touch of glamour to a more subtle eye look. ✨
- Technique: Apply a small amount of glitter to the center of your eyelid using the applicator. Blend the edges of the glitter outward with your fingertip or a small blending brush.
- The Inner Corner Highlight: Apply a small amount of glitter to the inner corner of your eye to brighten and open up your eyes. This is a subtle but effective way to add a touch of sparkle to your everyday look. 👁️
- Technique: Using the applicator, apply a tiny dot of glitter to the inner corner of your eye. Gently blend the glitter with your fingertip or a small detail brush.
- The Glitter Liner: Use the glitter end to create a dazzling glitter eyeliner. This is a fun and edgy look that’s perfect for adding a touch of sparkle to your everyday look. ✒️
- Technique: Using a fine-tipped brush, carefully apply the glitter along your lash line, creating a thin line of sparkle. You can also layer the glitter over your existing eyeliner for extra impact.
(Professor Sparkle demonstrates each technique with impressive speed and precision)
Experiment, darlings! Find what works best for your eye shape and your personal style. Don’t be afraid to get creative! 🎨
V. Pro Tips and Tricks: Elevating Your Glitter Game
Here are some extra tips and tricks to help you achieve glitter greatness:
- Less is More (Initially): Start with a small amount of glitter and build up the intensity as needed. It’s easier to add more glitter than to remove too much. 🤏
- Pat, Don’t Swipe: When applying glitter, pat it onto your eyelid rather than swiping. This helps to prevent fallout and ensures that the glitter adheres properly.
- Use Your Finger: Your fingertip is a surprisingly effective tool for applying and blending glitter. The warmth of your finger helps the glitter to adhere to your skin. 👆
- Clean Up Crew: Keep a cotton swab dipped in makeup remover handy to clean up any stray glitter particles. 🧹
- Seal the Deal: Once you’re happy with your glitter application, you can use a setting spray to help keep it in place. 🔒
- Consider the Undertone: Match the glitter undertone to your skin tone and the rest of your makeup. Cool-toned glitter looks great on cool skin, while warm-toned glitter flatters warm skin. 🌡️
- Don’t Forget the Rest of Your Face! Make sure your overall makeup look complements the glitter. Avoid overwhelming your face with too many other sparkly elements. Find the balance! ⚖️
(Professor Sparkle winks knowingly)
Remember, darlings, glitter is a statement. Make it a fabulous one! ✨
VI. Troubleshooting: Addressing Common Glitter Gripes
Even with the best techniques, you might encounter some common glitter-related problems. Let’s troubleshoot:
- Fallout Frenzy: If you’re experiencing excessive fallout, try using a glitter glue or a sticky eyeshadow base. You can also apply your eye makeup before your foundation to catch any stray glitter particles.
- Creasing Catastrophe: If your glitter is creasing, make sure you’re using an eyeshadow primer and setting your base eyeshadow with a powder. You can also try using a thinner layer of glitter.
- Irritation Inferno: If your eyelids are irritated by the glitter, switch to a hypoallergenic formula or avoid applying glitter too close to your lash line. Always do a patch test before applying a new glitter product to your entire eyelid.
- Blending Blues: If you’re struggling to blend the glitter, try using a small, fluffy blending brush or your fingertip. Gently pat the glitter into place and blend the edges outward.
(Professor Sparkle sighs dramatically)
Even the most seasoned glitterati face challenges. The key is to learn from your mistakes and adapt your techniques! 🤓
VII. Glitter Inspiration: Unleashing Your Inner Sparkle Artist
Need some inspiration? Here are a few glitter-tastic look ideas to get you started:
- The Galaxy Eye: A deep blue or purple eyeshadow base with silver or holographic glitter layered on top. 🌌
- The Rose Gold Romance: A warm rose gold eyeshadow base with rose gold or pink glitter applied to the center of the lid. 🌹
- The Emerald Envy: A vibrant green eyeshadow base with green or gold glitter used as a liner or inner corner highlight. 🍀
- The Disco Fever: A bold and colorful eyeshadow look with chunky glitter scattered all over the lid. 🕺
- The Subtle Shimmer: A neutral eyeshadow look with a touch of gold or silver glitter applied to the inner corner of the eye. ✨
(Professor Sparkle projects images of stunning glitter eye looks onto the screen)
The possibilities are endless! Let your imagination run wild and create your own unique glitter masterpieces! 🎨
VIII. Conclusion: Embrace the Sparkle, My Darlings!
Congratulations, my dazzling students! You’ve successfully completed Glitter Eyeshadow 101! You now possess the knowledge and skills to wield the power of the dual-end liquid eyeshadow and create high-impact sparkle looks that will turn heads and steal hearts.
(Professor Sparkle beams proudly)
Remember, glitter is more than just makeup; it’s an attitude. It’s about embracing your inner sparkle, expressing your creativity, and having fun! So go forth, my darlings, and shine! ✨
(Professor Sparkle blows a kiss to the class and strikes a dramatic pose. Class dismissed!)
For detailed product specifications and purchases, please go to :https://zenamakeup.com/products/liquid-dual-end-matte-glitter-fusion-eyeshadow
Leave a Reply