Okay, buckle up, beauty besties! 👋 As the Product Manager for ZenaMakeup, I’m thrilled to finally spill the tea on our latest brow innovation: The ZenaMakeup Brow Boss Kit: Natural-Looking Waterproof Brows with Stencil & Powder! 👑
Forget those overdrawn, blocky brows that scream "Instagram filter IRL." We’re here to help you achieve naturally defined, waterproof brows that last all day, no matter what life throws your way – sweat, tears (of joy, hopefully!), or a sudden downpour. ☔️
Think of this as your ultimate brow bootcamp. We’re going to take you from brow novice to brow boss in a few simple steps.
Lecture Outline:
- The Brow Evolution: From Pencil-Thin to Power Brows (and Everything In Between) – A quick history lesson on eyebrow trends!
- Why Powder & Stencil? The Perfect Combo for Natural-Looking Brows – Unveiling the secrets behind this winning formula.
- Introducing the ZenaMakeup Brow Boss Kit: Your Brow BFF – A detailed look at what’s inside and why it’s amazing.
- Step-by-Step Guide: Mastering the Brow Boss Technique – The nitty-gritty, with tips and tricks galore!
- Troubleshooting Common Brow Blunders: We’ve All Been There! – Solving your brow dilemmas.
- Maintaining Your Brow Masterpiece: Keeping Your Brows On Point – Aftercare and tips for long-lasting brows.
- Beyond the Basics: Brow Customization and Advanced Techniques – Taking your brow game to the next level.
- Q&A: Ask Me Anything! – Your chance to grill me on all things brows.
1. The Brow Evolution: From Pencil-Thin to Power Brows (and Everything In Between) 🕰️
Let’s take a trip down memory lane, shall we? Eyebrow trends have been more volatile than my dating life. 😂
| Decade | Brow Style | Description | Celebrities | ZenaMakeup Tip |
|---|---|---|---|---|
| 1920s | Pencil-Thin | Dramatically arched, often drawn on higher than the natural brow. | Clara Bow | DON’T DO IT! (But if you must, use a light touch with our Brow Boss Powder.) |
| 1950s | Arched & Defined | Fuller, more sculpted brows emphasizing a strong arch. | Audrey Hepburn | Use our Brow Boss stencils to create a perfect arch. 📐 |
| 1980s | Bushy & Natural | Embracing natural thickness and texture. | Brooke Shields | Less is more! Just fill in sparse areas with our Brow Boss Powder. 🌿 |
| 1990s/2000s | Over-Plucked/Thin | A return to thinner, often over-plucked brows. | Pamela Anderson | Please, let your brows grow back! 🙏 Our Brow Boss Serum can help! |
| 2010s – Now | Bold & Defined | A focus on full, defined brows with a strong arch. | Cara Delevingne | The Brow Boss Kit is perfect for achieving this look! 💖 |
As you can see, brow trends are constantly evolving. But one thing remains constant: well-groomed, defined brows enhance your features and frame your face. The ZenaMakeup Brow Boss Kit helps you achieve that, no matter the current trend!
2. Why Powder & Stencil? The Perfect Combo for Natural-Looking Brows 🤝
Now, let’s talk strategy. Why powder and stencils? Why not a pencil, pomade, or microblading?
- Powder:
- Natural Finish: Powder mimics the look of natural brow hairs better than most other products. It fills in sparse areas without looking harsh or drawn-on. Think soft and fluffy, not sharp and severe. ☁️
- Buildable Coverage: You can easily build up the intensity of the color, from a subtle hint of definition to a bolder, more dramatic look.
- Easier to Blend: Powder is incredibly easy to blend, which is crucial for achieving a natural, seamless finish. No harsh lines here!
- Less Intimidating: Let’s be honest, wielding a brow pencil can be scary. Powder is much more forgiving and beginner-friendly.
- Stencils:
- Perfect Symmetry (Almost!): Stencils help you create symmetrical brows, even if your natural brows are a little uneven. No one’s perfect, and neither are our brows!
- Consistent Shape: They ensure that your brows are the same shape every time, taking the guesswork out of your routine.
- Beginner-Friendly: Stencils are a godsend for beginners who struggle with shaping their brows. They provide a guideline to follow, making the process much easier.
- Time-Saving: Stencils speed up your brow routine, allowing you to achieve perfectly shaped brows in minutes. ⏰
Together, powder and stencils are a match made in brow heaven! They allow you to create naturally defined, symmetrical brows quickly and easily.
3. Introducing the ZenaMakeup Brow Boss Kit: Your Brow BFF 👯♀️
Okay, drumroll, please! 🥁 Let’s dive into what makes the ZenaMakeup Brow Boss Kit so special:
-
Waterproof Brow Powder: Our finely milled, waterproof brow powder is the star of the show. It’s formulated to adhere to your brow hairs and skin, providing long-lasting color that won’t smudge, fade, or budge, even in the face of sweat, humidity, or tears. It’s available in a range of shades to match every hair color, from blonde to black.
- Key Features:
- Highly Pigmented
- Waterproof & Smudge-Proof
- Long-Lasting
- Buildable Coverage
- Natural-Looking Finish
- Key Features:
-
Reusable Brow Stencils: We’ve included a set of six reusable brow stencils in a variety of shapes to suit different face shapes and brow preferences. Made from flexible, durable material, these stencils are easy to use and clean.
- Stencil Shapes:
- Classic Arch: A universally flattering shape with a gentle arch.
- High Arch: A more dramatic arch that adds lift and definition.
- Straight Brow: A modern, minimalist shape with minimal arch.
- Rounded Brow: A softer, more feminine shape with a rounded arch.
- Natural Brow: Closely follows the natural brow shape for a subtle enhancement.
- Full Brow: A bolder, thicker brow shape for a more dramatic look.
- Stencil Shapes:
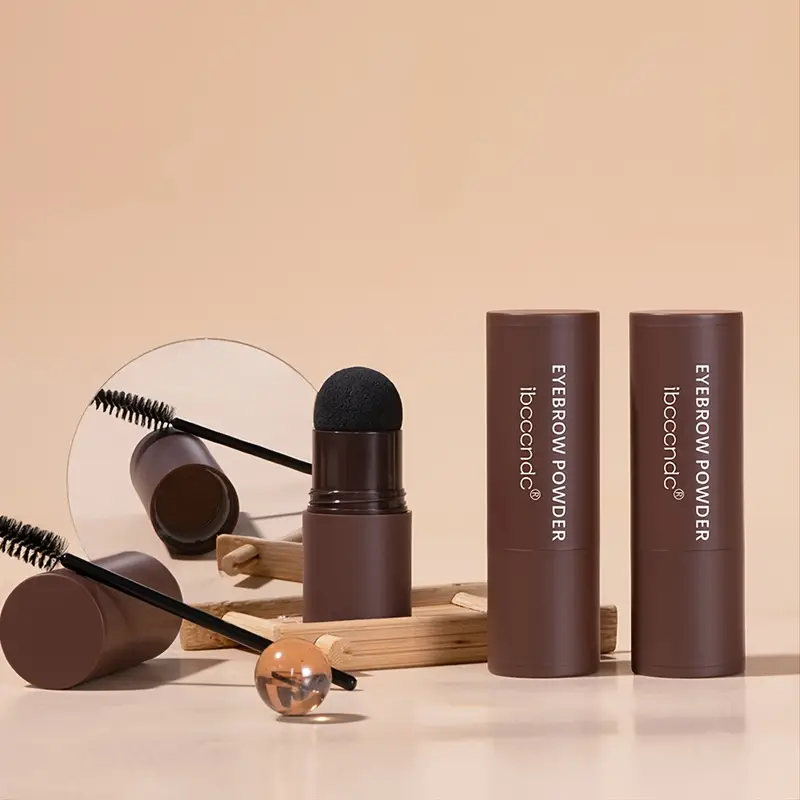
-
Double-Ended Angled Brush & Spoolie: This essential tool features an angled brush for precise powder application and a spoolie for blending and grooming.
- Angled Brush: Allows for precise application of brow powder, creating defined lines and filling in sparse areas.
- Spoolie: Used to blend the powder for a natural finish and groom the brow hairs into place.
- Brow Boss Serum (Optional Add-On): For those of you recovering from over-plucking incidents (we’ve all been there!), our Brow Boss Serum is a game-changer. It’s formulated with peptides and botanical extracts to promote brow growth and thickness.
Why is this kit different from others?
| Feature | ZenaMakeup Brow Boss Kit | Other Brow Kits |
|---|---|---|
| Waterproofing | Superior waterproof formula for all-day wear. 💧 | May offer some water resistance, but not as reliable. |
| Stencil Variety | 6 diverse shapes for various face shapes & preferences. 💖 | Limited stencil options, often just one or two shapes. |
| Powder Quality | Finely milled, highly pigmented, and easy to blend. ✨ | Can be chalky, patchy, or difficult to blend. |
| Brush Quality | High-quality, double-ended brush for precise application. 🖌️ | Often flimsy or poorly designed brushes. |
| Brow Serum | Option for brow growth stimulation. 🌿 | Rarely includes a brow serum. |
| Price Point | Competitively priced for exceptional value. 💰 | Varies widely, but often overpriced for the quality. |
4. Step-by-Step Guide: Mastering the Brow Boss Technique 👩🏫
Alright, let’s get down to business! Here’s how to use the ZenaMakeup Brow Boss Kit to achieve your dream brows:
Step 1: Prep Your Brows
- Cleanse your brows to remove any oil or makeup.
- Groom your brow hairs with the spoolie to brush them into place.
- Trim any excessively long hairs with small eyebrow scissors. (Be careful!)
Step 2: Choose Your Stencil
- Hold each stencil up to your brow to see which shape best complements your face and natural brow shape.
- Consider your desired brow look: natural, defined, or dramatic.
Step 3: Position the Stencil
- Hold each stencil up to your brow to see which shape best complements your face and natural brow shape.
- Consider your desired brow look: natural, defined, or dramatic.
Step 3: Position the Stencil
- Align the stencil with your natural brow, ensuring that it’s positioned correctly.
- Hold the stencil firmly in place with one hand.
Step 4: Fill in the Brow
- Dip the angled brush into the brow powder, tapping off any excess.
- Using light, feathery strokes, fill in the stencil outline with the powder.
- Focus on filling in sparse areas and defining the arch.
- Build up the color gradually, layering the powder until you achieve your desired intensity.
Step 5: Remove the Stencil
- Carefully remove the stencil, lifting it straight up.
- Avoid smudging the powder.
Step 6: Blend & Groom
- Use the spoolie to blend the powder and soften any harsh lines.
- Groom your brow hairs into place, following the natural direction of growth.
Step 7: Repeat on the Other Brow
- Repeat steps 3-6 on the other brow, using the same stencil.
- Pay attention to symmetry and adjust as needed.
Step 8: Clean Up (Optional)
- If needed, use a cotton swab dipped in makeup remover to clean up any stray powder or sharpen the edges of your brows.
- You can also use a concealer to highlight the brow bone for a more defined look.
Pro Tips:
- Start with a lighter shade of powder and build up the color gradually. It’s easier to add more color than to remove it.
- Use a light touch when applying the powder to avoid creating harsh lines.
- Focus on filling in sparse areas rather than completely covering your brows with powder.
- Don’t be afraid to experiment with different stencil shapes to find the one that works best for you.
- Practice makes perfect! The more you use the Brow Boss Kit, the better you’ll become at creating perfect brows.
5. Troubleshooting Common Brow Blunders: We’ve All Been There! 😩
Brow mishaps happen to the best of us. Here are some common problems and how to fix them:
| Problem | Solution |
|---|---|
| Brows are too dark | Use a clean spoolie to blend the powder and soften the color. You can also use a cotton swab dipped in makeup remover to lighten the brows. |
| Brows are uneven | Use the stencil to reshape the brows and ensure they are symmetrical. Pay attention to the arch and length of each brow. |
| Brows look too harsh | Use a light touch when applying the powder and blend thoroughly. Avoid creating harsh lines and focus on filling in sparse areas. |
| Powder is smudging | Apply a waterproof brow gel or setting spray to lock the powder in place. Avoid touching your brows throughout the day. |
| Stencil is moving | Hold the stencil firmly in place with one hand while filling in the brow. You can also use a brow glue or primer to help the stencil adhere to your skin. |
| Brows look unnatural | Choose a powder shade that closely matches your natural brow color. Avoid using too much powder and focus on creating a soft, natural finish. Blend, blend, blend! |
| One brow is thicker than other | This is often due to uneven natural brows. Try thinning the thicker brow by tweezing stray hairs, or adding more to the thinner brow. Remember, Brows are sisters, not twins! |
6. Maintaining Your Brow Masterpiece: Keeping Your Brows On Point 💅
Your brows are looking fabulous! Now, let’s talk maintenance:
- Daily Grooming: Brush your brows with a spoolie every day to keep them in place.
- Regular Trimming: Trim any excessively long hairs with small eyebrow scissors.
- Tweezing: Pluck stray hairs that fall outside of your desired brow shape. (Avoid over-plucking!)
- Brow Serum: Use the ZenaMakeup Brow Boss Serum to promote brow growth and thickness.
- Touch-Ups: Touch up your brows with the Brow Boss Kit as needed, especially after showering or exercising.
7. Beyond the Basics: Brow Customization and Advanced Techniques 🎨
Ready to take your brow game to the next level? Here are some advanced techniques to try:
- Ombre Brows: Use a lighter shade of powder at the inner corner of your brows and a darker shade at the arch and tail to create a gradient effect.
- Highlighted Brow Bone: Apply a shimmer highlighter to your brow bone to add lift and definition.
- Colored Brow Powder: Experiment with colored brow powders to create unique and eye-catching looks. (Think burgundy for fall or blue for a pop of color!)
- Combining Products: Use the Brow Boss Kit in combination with other brow products, such as a brow pencil or gel, to create a customized look.
8. Q&A: Ask Me Anything! 🙋♀️
Alright, beauty gurus, it’s your turn! Ask me anything about the ZenaMakeup Brow Boss Kit, brow shaping, or anything else brow-related. I’m here to help you achieve your brow goals!
(Example Questions & Answers)
-
Q: What shade of Brow Boss Powder should I use?
- A: As a general rule, choose a shade that is one to two shades lighter than your hair color. If you have blonde hair, opt for a light brown or taupe shade. If you have dark hair, choose a dark brown or black shade.
-
Q: Can I use the Brow Boss Kit if I have sparse brows?
- A: Absolutely! The Brow Boss Kit is perfect for filling in sparse areas and creating the illusion of fuller brows. The Brow Boss Serum can help stimulate brow growth over time.
-
Q: How often should I clean my stencils?
- A: Clean your stencils after each use with a makeup wipe or mild soap and water. This will prevent buildup and ensure that they remain in good condition.
-
Q: Is the Brow Boss Powder cruelty-free?
- A: Yes! All ZenaMakeup products are cruelty-free and never tested on animals. 🐰
So, there you have it! Your comprehensive guide to achieving natural-looking, waterproof brows with the ZenaMakeup Brow Boss Kit. Now go forth and conquer the world, one perfectly shaped brow at a time! 💖
For detailed product specifications and purchases, please go to :https://zenamakeup.com/products/brow-stamp-kit-waterproof-3-in-1-stencil-powder
Leave a Reply