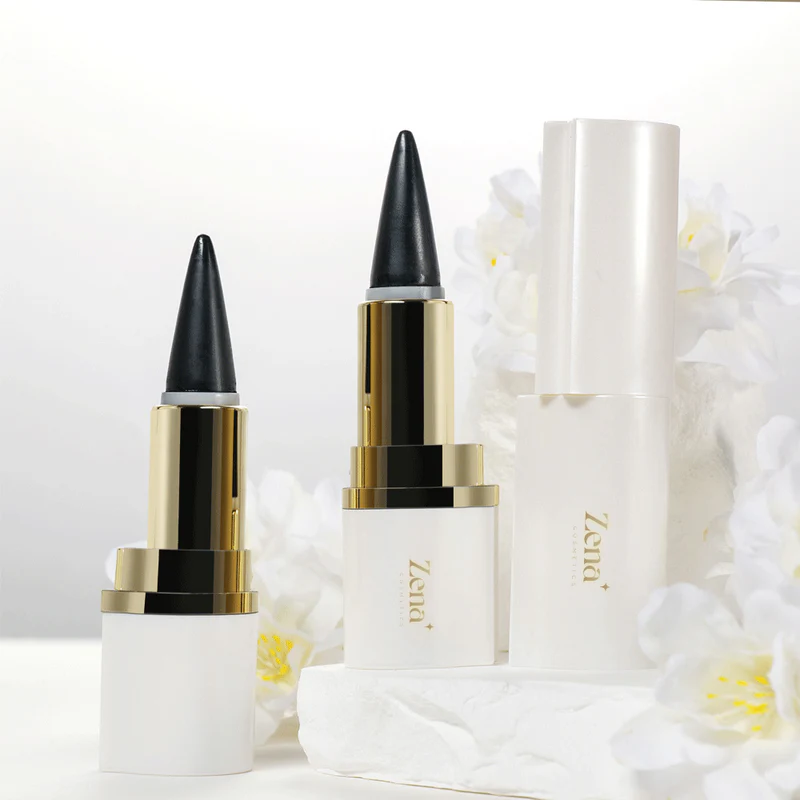
Lecture: Glided-on Waterproof Kajal Eyeliner: Effortless Definition and a Line That Won’t Budge (Hallelujah!)
Professor: Dr. Liner Lovely, PhD (Pretty Hot Dame)
Welcome, my beautiful budding makeup artists and eyeliner enthusiasts! 👋 I see so many eager faces! Today, we’re diving deep, and I mean deep, into the wondrous world of Glided-on Waterproof Kajal Eyeliner. Forget everything you think you know about shaky hands, smudged tragedies, and the existential dread of midday mirror checks. We’re talking effortless definition, a line that laughs in the face of humidity, and a look that lasts longer than your last questionable relationship.
(Holds up a pristine kajal eyeliner like a sacred artifact) This, my friends, is not just makeup. This is power. This is confidence. This is the key to unlocking your inner Cleopatra, without the whole asp situation.
Course Outline:
- Kajal 101: History, Mystery, and Makeup Magic 🏺
- Decoding the Waterproof Promise: Science vs. Marketing Hype 🔬
- The Glided-On Advantage: What Makes It So Darn Special? ✨
- Application Techniques: From Beginner Babes to Liner Legends ✍️
- Troubleshooting: Avoiding the Common Kajal Catastrophes 🚑
- Beyond the Basics: Creative Kajal Looks to Slay 🎨
- The Care and Feeding of Your Kajal: Keeping It Sharp (and You, Sharper) ✂️
- Kajal Konundrums: FAQs and Expert Answers 🤔
- Conclusion: Embrace the Kajal, Unleash Your Inner Eye Goddess! 👑
1. Kajal 101: History, Mystery, and Makeup Magic 🏺
Alright, settle in for a little history lesson that’s actually, dare I say, interesting! Kajal, also known as kohl, isn’t some fleeting trend. It’s been around for millennia. Think ancient Egypt, where royalty (including our girl Cleo) rocked the kohl-rimmed look not just for beauty, but also for protection against the harsh desert sun and, according to some beliefs, evil spirits. 👻
Fun Fact: Early kajal was often made from galena (lead sulfide), soot, and other natural ingredients. (Don’t worry, modern formulas are much safer!)
Why the fascination?
- Definition: Even then, kajal created a dramatic, captivating look, instantly defining the eyes.
- Protection: The dark pigment acted as a barrier against the sun and dust.
- Spiritual Significance: It was believed to ward off negative energy and enhance inner vision.
Evolution of Kajal:
| Era | Material | Purpose | Style |
|---|---|---|---|
| Ancient Egypt | Galena, soot, malachite, animal fat | Protection from sun, ward off evil spirits, beauty | Thick lines, extended wings, geometric shapes |
| Ancient India | Soot, sandalwood, herbs | Cooling effect, medicinal properties, beauty | Thinner lines, inner rim emphasis |
| Modern Times | Waxes, pigments, polymers, oils | Beauty, definition, long-lasting wear | Variety of styles, from subtle to dramatic |
So, when you’re applying your kajal, remember you’re not just putting on makeup. You’re channeling centuries of beauty wisdom! 😎
2. Decoding the Waterproof Promise: Science vs. Marketing Hype 🔬
"Waterproof!" The word that sends shivers down the spines of running mascara victims everywhere. But what does it really mean? Let’s break it down:
- Waterproof: Theoretically, impervious to water. In the makeup world, this means the formula creates a barrier that prevents water from penetrating and dissolving the pigment.
- Water-Resistant: Offers some protection against water, but prolonged exposure or vigorous rubbing can still lead to smudging.
The Science-y Stuff:
Waterproof kajal eyeliners achieve their staying power through a combination of:
- Waxes: These create a hydrophobic (water-repelling) layer on the skin. Think beeswax, carnauba wax, etc.
- Polymers: These act as binding agents, holding the pigments together and forming a flexible film.
- Silicones: These enhance the glide and create a smooth, waterproof barrier.
- Pigments: Finely milled, highly pigmented formulas ensure rich color payoff and long-lasting wear.
Marketing Hype Alert! 🚨
Not all "waterproof" kajals are created equal. Some might hold up during a light drizzle, while others can withstand a full-blown monsoon. Look for terms like "smudge-proof," "long-wearing," and "ophthalmologist-tested" for extra assurance. Read reviews! Your fellow makeup mavens will tell you the truth.
Key Ingredients to Look For:
| Ingredient | Benefit |
|---|---|
| Dimethicone | Silicone that creates a smooth, waterproof barrier |
| Cyclopentasiloxane | Another silicone for glide and water resistance |
| Beeswax | Natural wax for water resistance and texture |
| Carnauba Wax | Another natural wax, harder than beeswax |
| Isododecane | Solvent that helps pigments disperse evenly |
3. The Glided-On Advantage: What Makes It So Darn Special? ✨
So, why should you choose a "Glided-on Waterproof Kajal Eyeliner" over the billions of other eyeliner options out there? Let’s highlight the key benefits:
- Effortless Application: The "glided-on" aspect is crucial. A creamy, smooth formula means less tugging and pulling on the delicate skin around your eyes. We’re talking glide-and-go goodness! 🏃♀️
- Intense Pigment: Nobody wants a wishy-washy eyeliner. Look for a kajal with rich, saturated pigment that delivers a bold, impactful line in a single swipe.
- Waterproof (and Smudge-Proof!) Formula: A non-negotiable for long-lasting wear. This means you can confidently face sweat, tears (happy or sad!), and unexpected downpours without fear of raccoon eyes. 🦝🚫
- Long-Wearing Power: A kajal that lasts all day (or all night!) without fading, smudging, or transferring. Because who has time for constant touch-ups?
- Safe for Sensitive Eyes: If you have sensitive eyes or wear contact lenses, look for a formula that is ophthalmologist-tested and hypoallergenic. No stingy surprises!
- Versatility: A good kajal can be used on the waterline, lash line, and even smudged out for a smoky eye effect. Talk about multi-tasking!
The Ideal Kajal Checklist: ✅
- [ ] Creamy, smooth texture
- [ ] Intensely pigmented
- [ ] Waterproof & Smudge-proof
- [ ] Long-wearing
- [ ] Safe for sensitive eyes
- [ ] Versatile application
4. Application Techniques: From Beginner Babes to Liner Legends ✍️
Okay, class, time for the practical portion! Grab your kajal and a mirror. Let’s get lining!
A. The Basics (For Eyeliner Newbies):
- Prep Your Lids: Clean, dry, and primed eyelids are essential for smooth application and long-lasting wear. Use an eyeshadow primer to prevent creasing and oil buildup.
- Start Small: Don’t try to create a perfect wing in one go. Begin with small, light strokes along your lash line.
- Connect the Dots: Connect the small strokes to create a continuous line.
- Thicken as Desired: Gradually build up the thickness of the line until you achieve your desired look.
- Practice Makes Perfect: Don’t get discouraged if your first attempt isn’t flawless. Keep practicing, and you’ll get the hang of it!
B. Waterline Application (For the Bold and Beautiful):
- Gentle Does It: Be gentle when applying kajal to your waterline. Avoid pressing too hard, as this can irritate your eyes.
- Apply to the Inner Rim: Gently pull down your lower lid and apply the kajal to the inner rim.
- Blink and Repeat: Blink a few times to transfer the pigment to your upper waterline.
- Set with Eyeshadow (Optional): To increase longevity, lightly dust a dark eyeshadow over the kajal on your waterline.
C. Winged Eyeliner (For the Experienced Liner Lovers):
- Start with the Wing: Using the outer corner of your eye as a guide, draw a line upward at a 45-degree angle. This will be the tail of your wing.
- Connect to the Lash Line: Connect the end of the wing to your upper lash line.
- Fill in the Wing: Fill in the space between the wing and the lash line.
- Clean Up (If Needed): Use a cotton swab dipped in makeup remover to clean up any mistakes and create a sharp, defined wing.
Application Tools & Techniques Table:
| Technique | Tool | Tip |
|---|---|---|
| Basic Line | Kajal Pencil | Use short, light strokes; build up gradually. |
| Waterline | Kajal Pencil | Be gentle; avoid pressing too hard. |
| Winged Liner | Kajal Pencil or Angled Brush (with kajal) | Start with the wing; connect to the lash line; clean up with a cotton swab. |
| Smoky Eye | Kajal Pencil, Smudge Brush | Apply to the lash line and waterline; smudge immediately for a smoky effect. |
5. Troubleshooting: Avoiding the Common Kajal Catastrophes 🚑
Even with the best kajal, mistakes can happen. Here’s how to handle them like a pro:
- Smudging:
- Cause: Oily lids, excessive blinking, touching your eyes.
- Solution: Blot excess oil with blotting papers, set with translucent powder, avoid touching your eyes.
- Transferring:
- Cause: Oily lids, hooded eyes, not using a primer.
- Solution: Use an eyeshadow primer, set with translucent powder, try a waterproof formula.
- Uneven Line:
- Cause: Shaky hands, uneven pressure, poor lighting.
- Solution: Rest your elbow on a table for stability, use short strokes, ensure good lighting.
- Irritation:
- Cause: Sensitive eyes, allergic reaction, old or contaminated kajal.
- Solution: Use a hypoallergenic formula, patch test before use, replace your kajal every 3-6 months.
Emergency Kit Essentials:
- Cotton swabs
- Makeup remover
- Blotting papers
- Translucent powder
- Eyeshadow primer
6. Beyond the Basics: Creative Kajal Looks to Slay 🎨
Once you’ve mastered the basics, it’s time to unleash your inner artist! Here are some creative kajal looks to inspire you:
- The Classic Smoky Eye: Apply kajal to your upper and lower lash lines, then smudge it out with a brush for a sultry, smoky effect. Add some shimmery eyeshadow to the lid for extra drama.
- The Graphic Liner: Use your kajal to create bold, geometric shapes along your lash line. Think sharp angles, double wings, or even abstract designs.
- The Tightline: Apply kajal to your upper waterline to create the illusion of thicker lashes without visible eyeliner.
- The Pop of Color: Use a colored kajal (like emerald green, sapphire blue, or amethyst purple) to add a fun and unexpected twist to your look.
Inspiration Board:
- (Image: A classic smoky eye with kajal)
- (Image: A graphic liner look with bold angles)
- (Image: A tightlined eye with subtle definition)
- (Image: An eye with a pop of colored kajal on the lower lash line)
7. The Care and Feeding of Your Kajal: Keeping It Sharp (and You, Sharper) ✂️
To ensure your kajal performs its best, proper care is essential:
- Sharpen Regularly: A sharp tip allows for precise application and prevents bacterial buildup. Use a sharpener specifically designed for eyeliner pencils.
- Clean the Sharpener: Clean your sharpener regularly with rubbing alcohol to prevent contamination.
- Store Properly: Store your kajal in a cool, dry place away from direct sunlight.
- Replace Regularly: Replace your kajal every 3-6 months to prevent bacterial growth and ensure optimal performance.
Kajal Care Checklist:
- [ ] Sharpen regularly
- [ ] Clean the sharpener
- [ ] Store properly
- [ ] Replace every 3-6 months
8. Kajal Konundrums: FAQs and Expert Answers 🤔
Let’s address some common questions about kajal:
Q: Can I use kajal if I wear contact lenses?
A: Yes, but choose a hypoallergenic and ophthalmologist-tested formula. Avoid applying kajal too close to the inner corner of your eye, as this can irritate your lenses.
Q: How do I prevent kajal from smudging on my lower lash line?
A: Set the kajal with a light dusting of translucent powder. You can also try applying a thin layer of waterproof mascara to your lower lashes to create a barrier.
Q: Is it safe to use kajal on my waterline?
A: Yes, but choose a formula that is specifically designed for waterline use. Avoid using kajal that contains harsh chemicals or irritants.
Q: How do I remove waterproof kajal?
A: Use a waterproof makeup remover or cleansing oil. Gently massage the remover onto your eyelids and lash lines, then rinse with warm water.
Q: What’s the best way to sharpen a kajal pencil?
A: Use a sharpener specifically designed for eyeliner pencils. Gently twist the pencil into the sharpener, avoiding excessive pressure.
9. Conclusion: Embrace the Kajal, Unleash Your Inner Eye Goddess! 👑
Congratulations, my dazzling darlings! You’ve survived Kajal 101! You are now equipped with the knowledge and skills to wield the power of Glided-on Waterproof Kajal Eyeliner with confidence and grace.
Remember, makeup is about self-expression and feeling good about yourself. So, experiment, have fun, and don’t be afraid to embrace your inner eye goddess! Go forth and create looks that are as captivating and unforgettable as you are. ✨
(Professor Liner Lovely winks and blows a kiss to the class.) Now, go forth and CONQUER! Class dismissed! 💖
For detailed product specifications and purchases, please go to :https://zenamakeup.com/products/glided-on-waterproof-kajal-eyeliner
Leave a Reply