Okay, class! Settle down, settle down! Welcome to ZenaMakeup University, where today’s lecture is all about achieving the perfect pout with our newest star pupil: Glowy Stain, the Layering Legend! 💄✨
(Professor Zena, a vibrant woman with perfectly stained lips, adjusts her glasses and beams at the eager faces before her.)
Alright, let’s ditch the dry textbooks and dive headfirst into the juicy world of lip stains! We’re not just talking about any lip stain, people. We’re talking about a Glowy Stain that’s so versatile, so buildable, and so downright amazing that it practically begs to be layered with all your other lip loves.
(Professor Zena winks.)
Think of it as the Swiss Army Knife of lip products! 🛠️ But, you know, much prettier and way more delicious-looking.
Lecture Outline: Glowy Stain 101: Layering Like a Pro
- Why Glowy Stains? The Science of Seduction (and Pigment!)
- Introducing ZenaMakeup’s Glowy Stain: Meet the Star
- The Layering Lowdown: A Step-by-Step Guide
- Glowy Stain + [Insert Lip Product]: The Perfect Pairings
- Troubleshooting Layering: Avoiding Common Mistakes
- Beyond the Basics: Advanced Glowy Stain Techniques
- Q&A: Ask Professor Zena Anything!
1. Why Glowy Stains? The Science of Seduction (and Pigment!)
(Professor Zena dramatically flourishes a tube of Glowy Stain.)
Why glowy stains, you ask? Well, my dears, let’s talk about the holy trinity of lip product desires:
- Long-lasting color: We want a stain that sticks around longer than your last Tinder date. 🗓️ No more constant mirror checks after every sip of coffee!
- Comfortable wear: Nobody wants lips that feel like the Sahara Desert. 🏜️ We’re aiming for hydrated, happy, and kissable!
- Versatility: Because let’s face it, who wants a one-trick pony? 🐴 We need a product that can go from subtle daytime chic to full-on evening glam with a single swipe (or layer!).
Glowy stains hit all these marks and then some. Unlike traditional matte stains, they offer a subtle sheen that makes your lips look naturally plump and healthy. They’re also typically formulated with hydrating ingredients, which keeps your pout feeling soft and supple.
Think of it this way:
| Feature | Matte Stain | Glowy Stain |
|---|---|---|
| Finish | Matte, often drying | Subtle sheen, hydrating |
| Longevity | Excellent, can be drying | Very good, more comfortable |
| Versatility | Can be less forgiving to layer | Excellent for layering, adds dimension |
| Look | Bold, defined | Natural, healthy-looking, radiant |
| Hydration | Potentially drying, may need extra balm | Usually hydrating due to formula |
Why Layering is Key
Now, layering! This is where the magic happens. Why settle for one lip product when you can create a custom masterpiece? Layering allows you to:
- Create custom colors: Mix and match to find your perfect shade! 🎨
- Add dimension and depth: Create a fuller, more defined lip. 💋
- Control the intensity: Go from a subtle hint of color to a bold statement. 💪
- Experiment and have fun! Makeup should be playful, not a chore. 🎉
2. Introducing ZenaMakeup’s Glowy Stain: Meet the Star
(Professor Zena points to a large screen displaying various shades of ZenaMakeup’s Glowy Stain.)
Ladies and gentlemen, boys and girls, allow me to introduce the star of our show: ZenaMakeup’s Glowy Stain! 🌟
This isn’t just any lip stain, honey. This is a game-changer. We’ve poured all our love, science, and a healthy dose of fairy dust ✨ into creating a formula that’s:
- Infused with Hyaluronic Acid: For ultimate hydration and plumping. 💧
- Lightweight and Non-Sticky: Feels like you’re wearing nothing at all! ☁️
- Buildable Pigment: Go from sheer to bold with ease. 🎨
- Available in a Range of Stunning Shades: From everyday nudes to vibrant reds. 🌈
- Deliciously Scented: A subtle hint of [insert delightful scent, e.g., berry, vanilla]. 🍓🍦
The ZenaMakeup Glowy Stain Promise:
- Long-lasting color that won’t fade or feather.
- Comfortable wear all day long.
- A radiant, healthy-looking pout.
- Effortless layering with your other favorite lip products.
Shade Spotlight (Examples):
| Shade Name | Description | Perfect For |
|---|---|---|
| "Sunrise Kiss" | A warm, peachy nude | Everyday wear, natural look, layering with glosses |
| "Berry Bliss" | A vibrant, juicy berry shade | Adding a pop of color, date night |
| "Crimson Crush" | A classic, bold red | Making a statement, special occasions |
| "Mauve Magic" | A sophisticated, muted mauve | Professional settings, adding subtle elegance |
| "Rose Dew" | A delicate, sheer pink | Fresh, youthful look, layering with balms |
(Professor Zena holds up a tube of "Sunrise Kiss.")
See this? This is your new best friend. It’s the perfect base for any lip look. Trust me on this. 😉
3. The Layering Lowdown: A Step-by-Step Guide
(Professor Zena gestures to a model who is ready for a lip makeover.)
Alright, class, time for a demonstration! Let’s break down the layering process step-by-step:
Step 1: Prep Your Canvas
- Exfoliate: Gently exfoliate your lips to remove any dead skin. A sugar scrub or a soft toothbrush works wonders. 🧽
- Hydrate: Apply a thin layer of lip balm and let it absorb for a few minutes. 💦 This will create a smooth base for your stain.
- Blot: Gently blot off any excess balm with a tissue. 🧻
Step 2: Apply Your Glowy Stain
- Start with a thin layer: Apply a thin, even layer of ZenaMakeup’s Glowy Stain to your lips. You can use the applicator or your finger for a more natural look. ☝️
- Build the intensity: If you want a bolder color, apply a second layer after the first layer has dried slightly. Patience, young Padawans! 🧘♀️
- Don’t overdo it: Remember, you can always add more, but it’s harder to take away! 🚫
Step 3: Layer On the Magic!
- Choose your layering partner: This is where the fun begins! We’ll explore some perfect pairings in the next section. 🎉
- Apply your chosen product: Whether it’s a gloss, lipstick, or lip liner, apply it carefully over the Glowy Stain. 🖌️
- Blend, blend, blend: Use your finger or a lip brush to blend the products together seamlessly. 🔄
Step 4: Admire Your Masterpiece!
- Check your reflection: Make sure everything looks even and polished. 🪞
- Adjust as needed: Add more gloss, lipstick, or stain to achieve your desired look. 👍
- Strut your stuff! You’ve created a custom lip look that’s all your own. 💃
Example: Sunrise Kiss + Clear Gloss
- Check your reflection: Make sure everything looks even and polished. 🪞
- Adjust as needed: Add more gloss, lipstick, or stain to achieve your desired look. 👍
- Strut your stuff! You’ve created a custom lip look that’s all your own. 💃
Example: Sunrise Kiss + Clear Gloss
- Exfoliate and hydrate lips.
- Apply a thin layer of Sunrise Kiss Glowy Stain.
- Let it dry for a minute.
- Apply a layer of clear gloss.
- Admire your perfectly plump, naturally glowing lips! ✨
4. Glowy Stain + [Insert Lip Product]: The Perfect Pairings
(Professor Zena claps her hands together enthusiastically.)
Now for the main event! Let’s explore some of the most delicious and dazzling combinations you can create with ZenaMakeup’s Glowy Stain.
Glowy Stain + Lip Gloss: The Classic Combo
- Why it works: Gloss adds shine and dimension to the stain, creating a fuller, more luscious pout. It’s the perfect way to amp up your everyday look. ✨
- Pro Tip: Choose a clear or tinted gloss to customize the color. A shimmery gloss will add extra sparkle! ✨✨
- Example: Berry Bliss + a clear, high-shine gloss.
Glowy Stain + Lipstick: The Power Couple
- Why it works: Layering a lipstick over a stain creates a long-lasting, multi-dimensional color. The stain acts as a base, ensuring that your lipstick stays put. 💄
- Pro Tip: Choose a lipstick in a similar shade to your stain for a subtle boost of color, or go for a contrasting shade for a bold statement. 💥
- Example: Crimson Crush + a deep berry lipstick.
Glowy Stain + Lip Liner: The Definition Duo
- Why it works: Lip liner defines the shape of your lips and prevents your stain from bleeding. It’s the secret weapon for creating a perfectly sculpted pout. ✍️
- Pro Tip: Choose a lip liner that matches your natural lip color or the shade of your stain. Overline slightly for a fuller effect. 📏
- Example: Mauve Magic + a mauve lip liner.
Glowy Stain + Lip Balm: The Hydration Hero
- Why it works: A tinted lip balm adds a sheer wash of color and keeps your lips hydrated. It’s the perfect way to enhance your natural beauty. 🌸
- Pro Tip: Choose a lip balm with SPF for added sun protection. ☀️
- Example: Rose Dew + a tinted lip balm with a hint of shimmer.
Glowy Stain + Glitter: The Party Starter
- Why it works: Because glitter makes everything better! ✨ Add a touch of sparkle to your lips for a fun and festive look. 🎉
- Pro Tip: Use a lip-safe glitter and apply it sparingly. A little goes a long way! ✨
- Example: Any shade of Glowy Stain + a dusting of iridescent glitter.
The Ultimate Layering Chart:
| Glowy Stain Shade | Layering Partner | Effect | Occasion |
|---|---|---|---|
| Sunrise Kiss | Clear Gloss | Natural, plump, glossy | Everyday |
| Berry Bliss | Berry Lipstick | Bold, long-lasting berry color | Date Night |
| Crimson Crush | Red Lip Liner | Defined, classic red pout | Special Event |
| Mauve Magic | Nude Lip Balm | Subtle, hydrated, natural | Casual |
| Rose Dew | Iridescent Glitter | Fun, sparkly, festive | Party |
| Any Shade | Shimmering Lip Topper | Adds dimension and shine | Evening Out |
5. Troubleshooting Layering: Avoiding Common Mistakes
(Professor Zena raises a warning finger.)
Now, class, layering lip products isn’t rocket science, but there are a few common mistakes to avoid. Let’s nip those in the bud right now! 🌷
- Mistake #1: Applying too much product. Remember, less is more! Start with thin layers and build up the intensity gradually. 🚫
- Mistake #2: Not exfoliating your lips. Dry, flaky lips will ruin any lip look. Exfoliate regularly to keep your pout smooth and kissable. 💋
- Mistake #3: Using incompatible formulas. Oil-based products can break down water-based products, so choose your layering partners carefully. 🤔
- Mistake #4: Not blending properly. Blending is key to creating a seamless, polished look. Take your time and blend, blend, blend! 🔄
- Mistake #5: Ignoring your skin tone. Choose shades that complement your complexion. Don’t be afraid to experiment, but be mindful of what works best for you. 🌈
Troubleshooting Table:
| Problem | Possible Cause | Solution |
|---|---|---|
| Lip color looks patchy | Dry lips, uneven application | Exfoliate, hydrate, apply stain evenly |
| Lip color fades quickly | Not enough product, incompatible formulas | Apply more stain, choose compatible layering partners |
| Lip color bleeds | Not using lip liner, applying too much product | Use lip liner, apply stain in thin layers |
| Lip color looks muddy | Using too many different shades, not blending properly | Simplify your color palette, blend thoroughly |
| Lips feel dry and tight | Dehydrated lips, drying formulas | Hydrate lips, choose hydrating formulas, use lip balm |
6. Beyond the Basics: Advanced Glowy Stain Techniques
(Professor Zena smiles mischievously.)
Alright, my little lip artists, ready to take your Glowy Stain game to the next level? Let’s explore some advanced techniques! 🚀
- The Ombre Lip: Create a gradient effect by applying a darker shade of stain to the outer corners of your lips and a lighter shade to the center. Blend for a seamless transition. 🌅
- The Reverse Ombre Lip: Similar to the ombre lip, but with the darker shade in the center and the lighter shade on the outer corners. This creates a more dramatic and defined pout. 🌃
- The "Bitten" Lip: Apply a stain to the center of your lips and blend outwards for a natural, "just kissed" look. 💋
- The Glossy Stain Cocktail: Mix a few drops of Glowy Stain with your favorite clear gloss for a custom-tinted gloss. 🍹
- The Multi-Layered Masterpiece: Combine multiple layers of stain, lipstick, gloss, and liner to create a truly unique and personalized lip look. The sky’s the limit! 🌌
Pro Tip: Don’t be afraid to experiment! Makeup is all about having fun and expressing yourself. Try different combinations and techniques until you find what works best for you. 🎉
7. Q&A: Ask Professor Zena Anything!
(Professor Zena beams at the class.)
Alright, class! The floor is now open for questions. Don’t be shy! No question is too silly or too complicated. Let’s talk all things Glowy Stain! 🙋♀️🙋♂️
(Professor Zena answers questions with enthusiasm and wit.)
Example Questions and Answers:
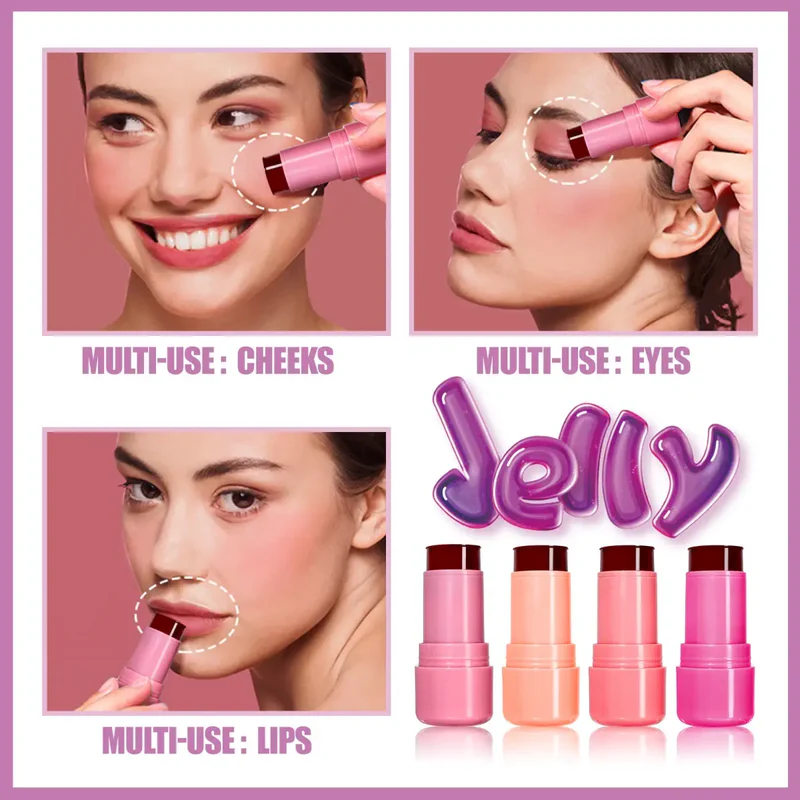
- Student: "Professor Zena, can I use Glowy Stain on my cheeks?"
- Professor Zena: "Absolutely! Just dab a tiny amount onto the apples of your cheeks and blend quickly for a natural flush of color. Just be sure to blend quickly, as it is a stain!"
- Student: "What’s the best way to remove Glowy Stain?"
- Professor Zena: "A good oil-based makeup remover or cleansing balm will do the trick. Gently massage the remover onto your lips and then wipe away with a soft cloth."
- Student: "I have very dry lips. Can I still use Glowy Stain?"
- Professor Zena: "Yes! Just be sure to exfoliate and hydrate your lips thoroughly before applying the stain. You can also layer a lip balm on top for extra moisture."
- Student: "What’s your favorite Glowy Stain layering combination?"
- Professor Zena: "Ooh, that’s a tough one! But I’m currently obsessed with layering Sunrise Kiss with a shimmery rose gold gloss. It’s the perfect combination of natural and glamorous!"
(Professor Zena smiles warmly.)
And that, my dears, concludes our lecture on Glowy Stain 101! I hope you’ve learned a thing or two about the magic of layering and the power of a perfectly stained pout. Now go forth and create some lip masterpieces! ✨
(Professor Zena blows a kiss to the class and exits the stage, leaving behind a trail of glitter and the faint scent of delicious [berry/vanilla] lip stain.)
(Class dismissed!) 🎓
Remember to always experiment, have fun, and embrace your inner lip artist! And don’t forget to tag ZenaMakeup in your Glowy Stain creations! We can’t wait to see what you come up with! #ZenaMakeup #GlowyStain #LayeringLegend
(End of Lecture)
For detailed product specifications and purchases, please go to :https://zenamakeup.com/products/everglow-sculpting-cooling-jelly-tint-sheer-lip-face-stain
Leave a Reply