Lecture: Hairline Dye Powder – Your Secret Weapon Against Grays (Or How I Learned to Stop Worrying and Love the Powder Puff)
(Intro Music: A jaunty, slightly retro tune)
Hello, fellow follicle fanatics! Welcome, welcome, welcome! Today, we’re diving deep into a topic near and dear to many of our hearts (and hairlines): Hairline Dye Powder for Root Touch-Up for Gray Hair Coverage. Yes, we’re talking about the magical dust that can temporarily banish those pesky grays lurking at your roots. 🧙♀️
Forget expensive salon visits every few weeks. Forget that frantic "I-have-a-meeting-in-an-hour" dye job that always ends with stained ears and a slightly orange forehead. We’re talking about a quick, convenient, and surprisingly effective solution: Hairline Dye Powder.
Think of this lecture as your comprehensive guide, your powder-puff powered passport to a world where grays are optional, not mandatory. We’ll cover everything from the science behind the magic, to choosing the right shade, to application techniques that even a toddler could (probably) master.
(Slide 1: Title Slide with an image of a woman looking confidently at the camera, her hairline perfectly blended.)
Lecture Outline:
- The Gray Area: Understanding Why We Gray (and Why We Care) 👵👴
- Powder Power: What IS Hairline Dye Powder Anyway? 🧪
- Choosing Your Weapon: Selecting the Right Shade and Formula 🎨
- Application Ninja: Mastering the Art of Powder Puff Perfection 🥷
- Troubleshooting Tribulations: Common Mistakes and How to Avoid Them 🚧
- The Great Debate: Powder vs. Other Root Touch-Up Methods 🥊
- Powder Care: Storage, Maintenance, and Removal 🧺
- Beyond the Hairline: Creative Uses for Your Dye Powder 🎭
- Top Recommendations: My Favorite Powders on the Market ⭐
- Conclusion: Embrace the Powder, Embrace the Possibilities! 🎉
(Slide 2: A humorous image depicting someone looking terrified at their reflection with a large patch of gray roots.)
1. The Gray Area: Understanding Why We Gray (and Why We Care) 👵👴
Let’s face it, folks. Gray hair is a natural part of aging. It’s as inevitable as taxes and realizing you can’t eat an entire pizza in one sitting anymore. But that doesn’t mean we have to like it.
So, why do we go gray? The culprit is a little thing called melanin. Melanin is the pigment responsible for the color of our hair, skin, and eyes. As we age, the cells that produce melanin, called melanocytes, gradually slow down and eventually stop producing pigment altogether. No melanin = no color = gray (or white) hair.
Here’s the science-y bit (simplified!):
| Factor | Explanation |
|---|---|
| Genetics | Thanks, Mom and Dad! Your genes play a HUGE role in when you start to gray. If your parents went gray early, chances are you will too. |
| Age | The older you get, the less melanin you produce. It’s a numbers game, really. |
| Ethnicity | People of European descent tend to gray earlier than those of African or Asian descent. (Sorry, Europeans! But you’re still fabulous!) |
| Stress | While not a direct cause, chronic stress can potentially accelerate the graying process. So, maybe skip that extra cup of coffee and try some yoga. 🧘♀️ |
| Medical Conditions | Certain medical conditions, like thyroid disorders and vitamin deficiencies, can sometimes contribute to premature graying. If you’re concerned, chat with your doctor. |
Why do we care? Well, for some, gray hair is a sign of wisdom, experience, and embracing natural beauty. For others, it’s a reminder of…well, aging. There’s absolutely nothing wrong with either perspective! The beauty of modern beauty products is that you get to choose. You want to rock the silver fox look? Go for it! You want to pretend those grays don’t exist for a little while longer? That’s where hairline dye powder comes in.
(Slide 3: A cartoon image of a hair follicle with a tiny worker diligently producing melanin, then suddenly collapsing in exhaustion.)
2. Powder Power: What IS Hairline Dye Powder Anyway? 🧪
Hairline dye powder is essentially a tinted powder designed to temporarily conceal gray roots and blend them seamlessly with your existing hair color. Think of it as makeup for your hair. It’s not permanent dye; it’s a cosmetic fix that washes out with shampoo.
What’s in the magic dust?
- Pigments: These provide the color. They can be mineral-based (like iron oxides) or synthetic.
- Binders: These help the powder adhere to your hair. Common binders include talc, mica, and silica.
- Emollients: These provide a smooth texture and help the powder blend in.
- Other Ingredients: Some powders may contain ingredients like vitamins, antioxidants, or even UV protectants.
Key Benefits of Hairline Dye Powder:
- Instant Coverage: Grays vanish in seconds! POOF! Gone!
- Convenience: Quick and easy application at home. No salon appointments needed.
- Affordability: Significantly cheaper than regular salon visits. Think of all the lattes you can buy with the savings! ☕
- Non-Permanent: Washes out easily, so you’re not committed to a color.
- Gentle on Hair: Less damaging than permanent dyes.
- Versatile: Can be used not just on the hairline, but also on part lines, eyebrows, and even to fill in sparse areas.
(Slide 4: A close-up image of different types of hairline dye powder applicators – brush, sponge, compact.)
3. Choosing Your Weapon: Selecting the Right Shade and Formula 🎨
Choosing the right shade and formula is CRUCIAL. You wouldn’t wear a foundation that’s five shades too dark, would you? (Well, maybe in the 90s… but we’ve all learned from our mistakes). The same principle applies to hairline dye powder.
Shade Selection:
- Match Your Roots: The goal is to blend the gray roots seamlessly with your existing hair color. Choose a shade that’s as close as possible to your natural or dyed hair color.
- Go Slightly Lighter: If you’re unsure, it’s generally better to go a shade lighter than darker. A too-dark shade can look harsh and unnatural.
- Read Reviews: Reviews often mention how the shade appears in real life.
- Test It Out: If possible, test the powder on a small, inconspicuous section of your hair before applying it to your entire hairline.
- Consider Your Undertones: Just like with makeup, your hair has undertones (warm, cool, or neutral). Choose a powder with undertones that complement your hair.
Formula Considerations:
| Formula Type | Description | Pros | Cons | Best For |
|---|---|---|---|---|
| Loose Powder | Finely milled powder that is applied with a brush. | Versatile, buildable coverage, good for precise application. | Can be messy, requires a good brush. | People who want precise control and buildable coverage. |
| Pressed Powder | Compact powder that is applied with a sponge or brush. | Less messy than loose powder, convenient for travel. | Can be difficult to blend, may not provide as much coverage as loose powder. | People who want a less messy option and are on the go. |
| Stick/Crayon | Creamy or waxy formula in a stick or crayon format. | Easy to apply, good for targeting specific areas, provides good coverage. | Can be greasy or heavy, may not blend as seamlessly as powder. | People who want to target specific areas and need good coverage. |
| Spray | Liquid formula that is sprayed onto the hair. | Quick and easy application, good for covering large areas. | Can be messy, may not provide precise coverage, can feel stiff or sticky. | People who want quick coverage for large areas and don’t need pinpoint precision. |
Don’t be afraid to experiment! Buy a few different shades and formulas and see what works best for you. You might even find that you like to mix two shades together to create your perfect custom blend. Think of yourself as a hair color artist! 🎨
(Slide 5: A table comparing different hairline dye powder formulas with pros and cons.)
4. Application Ninja: Mastering the Art of Powder Puff Perfection 🥷
Okay, you’ve chosen your weapon (the perfect powder!). Now it’s time to learn how to wield it like a true application ninja.
Tools You’ll Need:
- Hairline Dye Powder: Duh.
- Applicator: This will vary depending on the formula you choose (brush, sponge, stick).
- Mirror: A well-lit mirror is essential. Avoid applying in dim lighting – you’ll end up looking like you’ve been rolling around in charcoal.
- Hairbrush or Comb: To smooth and style your hair.
- Hair Spray (Optional): To set the powder and prevent it from transferring.
- Old Towel or Cape: To protect your clothing. Trust me, you don’t want to learn this lesson the hard way. 👕
Application Steps:
- Prep Your Hair: Make sure your hair is dry and styled as usual.
- Protect Your Clothing: Drape an old towel or cape over your shoulders to prevent powder from getting on your clothes.
- Apply the Powder:
- Loose/Pressed Powder: Dip your brush or sponge into the powder, tap off any excess, and gently apply to the gray roots along your hairline and part line. Use short, light strokes. Build up the coverage gradually.
- Stick/Crayon: Apply the stick or crayon directly to the gray roots, using short, light strokes. Blend with your fingers or a brush.
- Spray: Hold the can 6-8 inches away from your hair and spray in short bursts, focusing on the roots. Avoid spraying too much in one spot.
- Blend, Blend, Blend! Use a brush or your fingers to blend the powder seamlessly with your existing hair color.
- Set the Powder (Optional): Lightly spray your hairline with hairspray to set the powder and prevent it from transferring.
- Admire Your Work: Take a step back and admire your flawless, gray-free hairline! 😎
Pro Tips:
- Start Small: It’s always better to start with a small amount of powder and build up the coverage gradually.
- Use a Light Hand: Avoid applying too much pressure, as this can result in a cakey or unnatural look.
- Focus on the Roots: Concentrate the powder on the roots, rather than applying it to your entire hair shaft.
- Clean Up Excess: Use a damp cloth or cotton swab to clean up any excess powder that may have gotten on your skin.
- Practice Makes Perfect: Don’t be discouraged if you don’t get it right the first time. Keep practicing, and you’ll become a powder puff pro in no time!
(Slide 6: A series of images demonstrating the application steps with different applicator types.)
5. Troubleshooting Tribulations: Common Mistakes and How to Avoid Them 🚧
Even the most skilled ninjas make mistakes. But fear not! We’re here to help you avoid common pitfalls and achieve powder puff perfection.
Common Mistakes:
- Choosing the Wrong Shade: As we discussed, this is a big one.
- Solution: Revisit the "Shade Selection" section and try a different shade.
- Applying Too Much Powder: This can result in a cakey, unnatural look.
- Solution: Start with a small amount of powder and build up the coverage gradually. Use a light hand and blend thoroughly.
- Uneven Application: Patchy or uneven coverage can look sloppy.
- Solution: Use a mirror to ensure even coverage. Apply the powder in short, light strokes, and blend thoroughly.
- Powder Transfer: The powder can transfer onto your clothes, pillows, or even your hands.
- Solution: Set the powder with hairspray. Avoid touching your hair unnecessarily. Wear dark clothing.
- Powder Buildup: Repeated application without washing can lead to powder buildup.
- Solution: Wash your hair regularly. Use a clarifying shampoo to remove any buildup.
- Ignoring Your Scalp: Sometimes, the powder can emphasize a dry or flaky scalp.
- Solution: Exfoliate your scalp regularly. Use a moisturizing shampoo and conditioner.
Troubleshooting Table:
| Problem | Possible Cause | Solution |
|---|---|---|
| Cakey/Unnatural Look | Too much powder, wrong shade | Use less powder, blend thoroughly, choose a shade that matches your hair color. |
| Patchy Coverage | Uneven application | Use a mirror to ensure even coverage, apply the powder in short, light strokes. |
| Powder Transfer | Not setting the powder, touching hair frequently | Set the powder with hairspray, avoid touching your hair unnecessarily, wear dark clothing. |
| Powder Buildup | Repeated application without washing | Wash your hair regularly, use a clarifying shampoo. |
| Dry/Flaky Scalp | Powder emphasizing scalp condition | Exfoliate your scalp regularly, use a moisturizing shampoo and conditioner. |
| Powder Not Adhering | Hair is too oily | Use a dry shampoo to absorb excess oil before applying the powder. |
(Slide 7: A humorous image of someone covered in hair dye powder, looking utterly defeated.)
6. The Great Debate: Powder vs. Other Root Touch-Up Methods 🥊
Hairline dye powder is fantastic, but it’s not the only option for covering gray roots. Let’s compare it to some other popular methods:
| Method | Pros | Cons | Best For |
|---|---|---|---|
| Hairline Dye Powder | Quick, easy, affordable, non-permanent, gentle on hair, versatile. | Can be messy, may transfer, requires regular application. | People who want a quick and easy fix for gray roots and don’t want to commit to permanent dye. |
| Root Touch-Up Sprays | Quick, easy, good coverage. | Can be messy, can feel stiff or sticky, may not be as precise as powder. | People who want quick coverage for large areas and don’t need pinpoint precision. |
| Root Touch-Up Kits (Permanent/Semi-Permanent) | Long-lasting results, good coverage. | Can be damaging to hair, requires more time and effort, can be messy, more expensive. | People who want a longer-lasting solution and are willing to commit to dyeing their hair at home. |
| Salon Dyeing | Professional results, long-lasting, expert color matching. | Expensive, time-consuming, can be damaging to hair. | People who want professional results and are willing to pay for them. |
| Root Concealer Mascara | Precise application, good for targeting individual strands. | Can be clumpy, may not blend as seamlessly as powder, can be time-consuming for larger areas. | People who want to target individual strands of gray hair and need precise application. |
The Verdict: Hairline dye powder is a great option for those who want a quick, convenient, and affordable way to cover gray roots without damaging their hair. However, it’s not a permanent solution, and you’ll need to reapply it regularly. Choose the method that best suits your needs and lifestyle.
(Slide 8: An image depicting a boxing match between a bottle of permanent hair dye and a container of hairline dye powder.)
7. Powder Care: Storage, Maintenance, and Removal 🧺
To keep your hairline dye powder in tip-top shape, here are a few tips on storage, maintenance, and removal:
Storage:
- Store in a cool, dry place: Avoid storing your powder in a humid environment, as this can cause it to clump or become moldy.
- Keep the lid tightly closed: This will prevent the powder from drying out or spilling.
- Keep out of reach of children and pets: Hairline dye powder is not meant to be ingested (obviously!).
Maintenance:
- Clean your applicators regularly: Wash your brushes and sponges with soap and water to remove any buildup of powder.
- Replace your powder when it expires: Hairline dye powder typically has a shelf life of 12-24 months. Check the expiration date on the packaging.
Removal:
- Shampoo Your Hair: The easiest way to remove hairline dye powder is to shampoo your hair. Use a clarifying shampoo to remove any stubborn residue.
- Avoid Scrubbing: Don’t scrub your scalp too vigorously, as this can irritate it.
- Rinse Thoroughly: Make sure to rinse your hair thoroughly to remove all traces of the powder.
(Slide 9: An image of a well-organized makeup drawer with various beauty products, including hairline dye powder.)
8. Beyond the Hairline: Creative Uses for Your Dye Powder 🎭
Hairline dye powder is a versatile product that can be used for more than just covering gray roots. Here are a few creative uses:
- Eyebrow Filler: Use a small brush to fill in sparse eyebrows and create a more defined shape.
- Eyeliner: Dampen a small brush and use the powder as eyeliner.
- Contouring: Use a darker shade of powder to contour your face.
- Mascara: Dampen a mascara wand and dip it into the powder to create a tinted mascara.
- Mustache/Beard Filler: For men with patchy facial hair, hairline dye powder can be used to fill in sparse areas.
Disclaimer: Use caution when applying hairline dye powder to areas other than your hair. Avoid getting the powder in your eyes or mouth.
(Slide 10: A collage of images showcasing different creative uses for hairline dye powder.)
9. Top Recommendations: My Favorite Powders on the Market ⭐
Now, for the moment you’ve all been waiting for! Based on my extensive (and sometimes slightly embarrassing) testing, here are a few of my favorite hairline dye powders on the market:
(Note: These are just suggestions based on general popularity and positive reviews. Individual results may vary. Always do your own research and choose a product that is right for you.)
| Product Name | Formula Type | Key Features | Price Range |
|---|---|---|---|
| [Insert Product Name 1 Here] | Loose Powder | Excellent coverage, long-lasting, natural-looking finish, wide range of shades. | $$ |
| [Insert Product Name 2 Here] | Pressed Powder | Convenient for travel, less messy, good for touch-ups on the go. | $ |
| [Insert Product Name 3 Here] | Stick/Crayon | Easy to apply, good for targeting specific areas, provides good coverage. | $$$ |
| [Insert Product Name 4 Here] | Spray | Quick and easy application, good for covering large areas. | $$ |
(Disclaimer: These are examples. Replace with actual product recommendations and include affiliate links if applicable.)
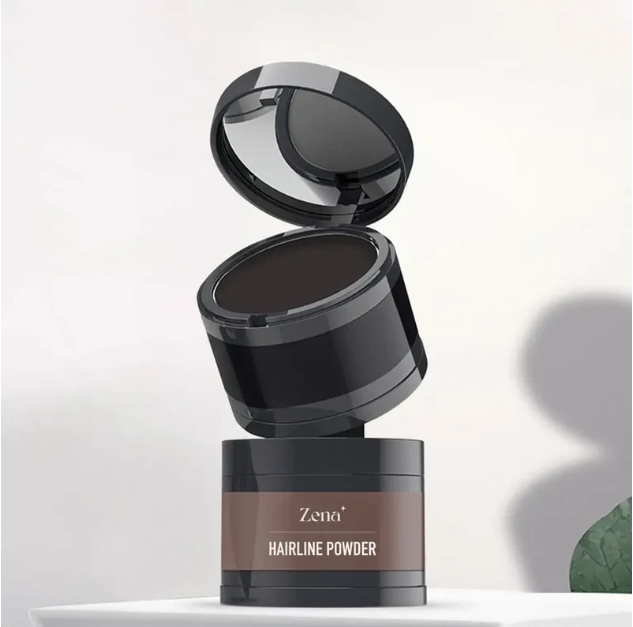
(Slide 11: Images and descriptions of recommended hairline dye powder products.)
10. Conclusion: Embrace the Powder, Embrace the Possibilities! 🎉
Congratulations, follicle fanatics! You’ve reached the end of our hairline dye powder lecture. You are now equipped with the knowledge and skills to conquer those pesky grays and embrace the power of the powder puff.
Remember, gray hair is a natural part of aging, and there’s absolutely nothing wrong with embracing it. But if you prefer to keep those grays at bay, hairline dye powder is a quick, convenient, and affordable solution.
So go forth, experiment with different shades and formulas, and discover the magic of hairline dye powder. Embrace the possibilities, and remember to have fun with it!
(Outro Music: The jaunty, slightly retro tune returns.)
Thank you for attending my lecture! Now go forth and conquer those grays! And don’t forget to tell your friends about the magic of hairline dye powder! Until next time, stay fabulous! ✨
For detailed product specifications and purchases, please go to :https://zenamakeup.com/products/hairline-dye-powder-for-root-touch-up
Leave a Reply