The Art of Vanishing Act: Mastering Seamless Blending with Traceless Matte Foundation Repair Stick
(A Lecture in Foundation Alchemy)
(Professor Estée La Laughlines, Chair of Concealment Studies, presents…)
Ah, students! Welcome, welcome! Settle in, grab your metaphorical beakers and brushes, because today, we’re delving into the mystical art of making imperfections poof into thin air! We’re not talking about pulling rabbits out of hats (though if you can do that with makeup, call me!), but rather, mastering the seamless application and blending of the Traceless Matte Foundation Repair Stick.
Yes, my darlings, this little stick is a powerhouse, a superhero in disguise, ready to combat blemishes, discoloration, and the dreaded "oops-I-stayed-up-all-night-binge-watching-cat-videos" look. But like any powerful tool, it requires finesse, a touch of magic, and a healthy dose of knowledge to wield it effectively.
So, let’s embark on this journey together, shall we? Prepare yourselves for enlightenment, laughter, and the potential for truly flawless skin! 🤩
Lecture Outline:
-
The Foundation Repair Stick: An Introduction 🧐
- What is it? Why do we love it?
- Understanding the formula: Matte vs. Dewy.
- Color matching: Finding your perfect shade soulmate.
-
Prepping the Canvas: The Importance of Skincare 🎨
- Cleanse, tone, moisturize: The holy trinity of skincare.
- Primers: Laying the foundation for flawless blending.
- Dealing with dry patches, oily zones, and other skincare quirks.
-
Application Techniques: From Dab to Dreamy ✨
- Direct application vs. Brush application: Pros and cons.
- Targeted concealing: Focusing on problem areas.
- The dotting method: Precision and control.
- Layering: Building coverage without looking cakey.
-
Blending Like a Boss: Tools and Techniques 🧰
- The Blending Sponge: Your new best friend.
- Blending Brushes: A variety for every purpose.
- Fingertips: When organic is best.
- Circular motions vs. Stippling: Mastering the moves.
- The "press and roll" technique: For seamless integration.
-
Troubleshooting Blending Mishaps: Rescue Missions 🚨
- Cakey foundation: The dreaded dessert face.
- Patchy application: Spot the flaw, fix the flaw.
- Uneven blending: No one wants a half-blended face.
- Oxidation: When your foundation turns orange.
-
Setting Your Masterpiece: Ensuring Longevity 🔐
- Powders: Loose vs. Pressed.
- Setting Sprays: The finishing touch.
- Blotting papers: Keeping shine at bay.
-
Advanced Techniques: Taking it to the Next Level 🚀
- Color correcting: Banish those blemishes for good.
- Highlighting and contouring: Sculpting your features.
- Baking: For the ultimate flawless finish.
Let the lecture begin!
1. The Foundation Repair Stick: An Introduction 🧐
(What is it? Why do we love it?)
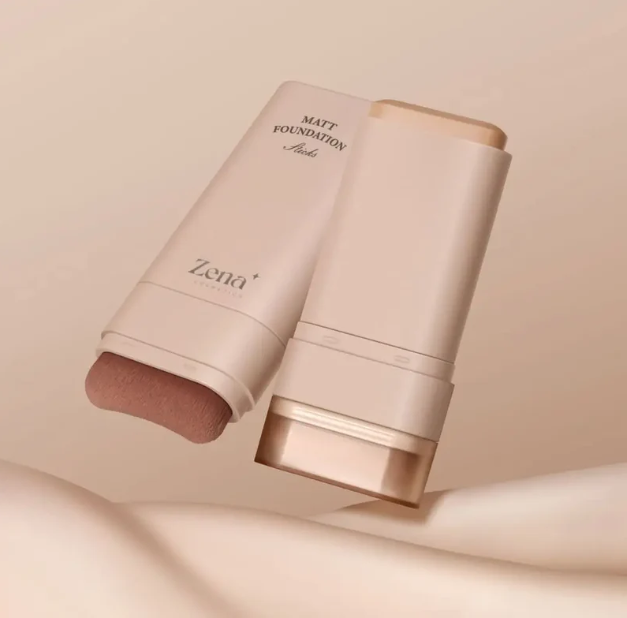
Let’s face it, life throws curveballs – and sometimes, those curveballs land right on our faces in the form of blemishes, hyperpigmentation, or just a general lack of radiance. Enter the Foundation Repair Stick, a creamy, concentrated formula designed to provide targeted coverage and seamlessly blend away imperfections.
Think of it as your portable Photoshop, your on-the-go skin savior. It’s compact, convenient, and surprisingly versatile. Unlike traditional liquid foundations, the stick format allows for precise application, minimizing product waste and maximizing control.
Why do we love it? Because it’s:
- Portable: Toss it in your purse, your gym bag, even your pocket (though maybe not your really tight jeans).
- Versatile: Use it as a concealer, a spot treatment, or even as an all-over foundation in a pinch.
- Buildable: Achieve your desired level of coverage, from sheer to full, without feeling like you’re wearing a mask.
- Quick and Easy: Perfect for those mornings when you’re running late (which, let’s be honest, is most mornings).
(Understanding the formula: Matte vs. Dewy.)
The key to seamless blending lies in understanding the formula. The Traceless Matte Foundation Repair Stick is designed for a matte finish, which means it’s less likely to slip and slide, making it ideal for those with oily or combination skin. However, the "traceless" part is crucial. We don’t want a flat, lifeless matte! We want a matte that looks natural, refined, and… well, traceless.
A matte formula often contains ingredients that absorb oil and minimize shine. It’s crucial to properly hydrate your skin beforehand to prevent the foundation from clinging to dry patches and emphasizing texture.
(Color matching: Finding your perfect shade soulmate.)
This is arguably the most important step. A foundation that’s too light will make you look ghostly. Too dark, and you’ll resemble a badly-bronzed Oompa Loompa. We want to find your perfect shade soulmate – the one that disappears into your skin, leaving behind only a flawless complexion.
Here’s the cheat sheet:
| Undertone | Description | Recommended Foundation Shades |
|---|---|---|
| Warm | Yellow, golden, or peachy undertones. You tan easily. | Look for foundations with yellow or golden undertones. |
| Cool | Pink, red, or blue undertones. You tend to burn easily. | Look for foundations with pink or red undertones. |
| Neutral | A balance of warm and cool undertones. You can wear both gold and silver jewelry. | Look for foundations that are described as "neutral" or "natural." |
Pro Tip: Test the foundation on your jawline in natural light. The shade that disappears is the winner! If you’re still unsure, consult a professional makeup artist. They’re like shade-matching wizards. 🧙
2. Prepping the Canvas: The Importance of Skincare 🎨
(Cleanse, tone, moisturize: The holy trinity of skincare.)
Think of your skin as a canvas. Would you paint a masterpiece on a dirty, uneven canvas? Of course not! The same principle applies to makeup. A proper skincare routine is essential for creating a smooth, hydrated base that allows the foundation to blend seamlessly.
Cleanse: Remove dirt, oil, and makeup from your skin. Choose a cleanser that’s appropriate for your skin type.
Tone: Balances your skin’s pH levels and prepares it for moisturization.
Moisturize: Hydrates your skin, creating a plump, smooth surface for makeup application. Even oily skin needs moisture!
(Primers: Laying the foundation for flawless blending.)
Primer is like the magic ingredient that transforms a good base into a great base. It creates a smooth, even surface, fills in pores and fine lines, and helps your foundation last longer.
Choose a primer that’s appropriate for your skin type:
- Oily Skin: Look for a mattifying primer that will control shine and minimize pores.
- Dry Skin: Look for a hydrating primer that will add moisture and prevent the foundation from clinging to dry patches.
- Combination Skin: Look for a balancing primer that will address both oiliness and dryness.
(Dealing with dry patches, oily zones, and other skincare quirks.)
We all have our skin quirks. Maybe you have dry patches on your cheeks, an oily T-zone, or a tendency to break out in certain areas. The key is to address these issues before applying your foundation.
- Dry Patches: Exfoliate gently and apply a rich moisturizer to the affected areas.
- Oily Zones: Use a mattifying primer and consider applying a powder specifically to these areas before applying your foundation.
- Breakouts: Spot treat blemishes with a salicylic acid or benzoyl peroxide treatment. Avoid picking! (We know it’s tempting, but resist!)
3. Application Techniques: From Dab to Dreamy ✨
(Direct application vs. Brush application: Pros and cons.)
Now for the fun part! Let’s talk about how to actually apply the Foundation Repair Stick. You have two main options: direct application and brush application.
Direct Application:
- Pros: Quick, easy, and convenient. Allows for targeted concealing.
- Cons: Can be less precise, may require more blending.
Brush Application:
- Pros: More precise, allows for even coverage, can be more hygienic.
- Cons: Requires a brush, takes a bit more time.
(Targeted concealing: Focusing on problem areas.)
One of the great things about the Foundation Repair Stick is its ability to provide targeted concealing. If you have a blemish, discoloration, or dark circles, simply apply the stick directly to the affected area.
One of the great things about the Foundation Repair Stick is its ability to provide targeted concealing. If you have a blemish, discoloration, or dark circles, simply apply the stick directly to the affected area.
(The dotting method: Precision and control.)
For a more controlled application, try the dotting method. Apply small dots of foundation to your face, focusing on areas that need the most coverage. Then, blend the dots together using your preferred blending tool.
(Layering: Building coverage without looking cakey.)
Less is more! Start with a thin layer of foundation and build up coverage as needed. This will prevent the foundation from looking cakey or heavy.
Pro Tip: Apply the foundation in thin layers, allowing each layer to set before applying the next. This will help the foundation adhere to your skin and prevent it from sliding around.
4. Blending Like a Boss: Tools and Techniques 🧰
(The Blending Sponge: Your new best friend.)
The blending sponge, often egg-shaped, is a game-changer. Dampening it is crucial for optimal blending. A damp sponge absorbs less product and creates a more natural, airbrushed finish.
(Blending Brushes: A variety for every purpose.)
Blending brushes come in all shapes and sizes. Some popular options include:
- Buffing Brush: Ideal for all-over blending and creating a seamless finish.
- Stippling Brush: Creates a light, airbrushed effect.
- Concealer Brush: Perfect for targeted concealing.
(Fingertips: When organic is best.)
Don’t underestimate the power of your fingertips! The warmth of your fingers can help to melt the foundation into your skin, creating a more natural finish.
(Circular motions vs. Stippling: Mastering the moves.)
- Circular Motions: Ideal for buffing the foundation into your skin and creating a seamless finish.
- Stippling: A light, tapping motion that creates an airbrushed effect.
(The "press and roll" technique: For seamless integration.)
This is my personal favorite! After applying the foundation, gently press and roll your blending sponge over your skin. This will help to push the foundation into your pores and create a truly seamless finish.
Pro Tip: Focus on blending the edges of the foundation, especially around your hairline and jawline. This will prevent harsh lines and create a more natural look.
5. Troubleshooting Blending Mishaps: Rescue Missions 🚨
(Cakey foundation: The dreaded dessert face.)
Oh, the horror! Cakey foundation is a common problem, but it’s easily fixable.
- Cause: Too much product, dry skin, improper blending.
- Solution: Dampen your blending sponge and gently blot away excess product. Apply a hydrating setting spray.
(Patchy application: Spot the flaw, fix the flaw.)
Patchy foundation can be caused by dry patches, uneven skin texture, or improper blending.
- Cause: Dry skin, uneven skin texture, improper blending.
- Solution: Exfoliate gently and apply a rich moisturizer to the affected areas. Use a damp blending sponge to blend the foundation more thoroughly.
(Uneven blending: No one wants a half-blended face.)
This usually happens when you’re rushing or using the wrong blending technique.
- Cause: Rushing, improper blending technique.
- Solution: Take your time and use a damp blending sponge or brush to blend the foundation thoroughly.
(Oxidation: When your foundation turns orange.)
Oxidation happens when your foundation reacts with your skin’s natural oils.
- Cause: Reaction with skin oils.
- Solution: Choose a non-oxidizing foundation. Use a primer to create a barrier between your skin and the foundation.
6. Setting Your Masterpiece: Ensuring Longevity 🔐
(Powders: Loose vs. Pressed.)
Setting your foundation with powder is essential for preventing shine and ensuring that your makeup lasts all day.
- Loose Powder: Provides a more natural finish and is ideal for baking.
- Pressed Powder: More convenient for on-the-go touch-ups.
(Setting Sprays: The finishing touch.)
Setting sprays lock in your makeup and create a flawless finish.
- Hydrating Setting Spray: Adds moisture and prevents the foundation from looking dry or cakey.
- Mattifying Setting Spray: Controls shine and keeps your makeup looking fresh all day.
(Blotting papers: Keeping shine at bay.)
Blotting papers are a must-have for anyone with oily skin. They absorb excess oil without disturbing your makeup.
7. Advanced Techniques: Taking it to the Next Level 🚀
(Color correcting: Banish those blemishes for good.)
Color correcting involves using colored concealers to neutralize discoloration.
- Green: Neutralizes redness (blemishes, rosacea).
- Peach/Orange: Neutralizes dark circles and hyperpigmentation (especially on deeper skin tones).
- Yellow: Brightens dullness and neutralizes purple tones.
(Highlighting and contouring: Sculpting your features.)
Highlighting and contouring can enhance your features and create a more sculpted look.
- Highlighting: Use a lighter shade to highlight the high points of your face (cheekbones, brow bone, bridge of nose).
- Contouring: Use a darker shade to contour the hollows of your face (under cheekbones, sides of nose, jawline).
(Baking: For the ultimate flawless finish.)
Baking involves applying a thick layer of loose powder to areas that tend to crease (under eyes, around mouth) and allowing it to sit for several minutes. This allows the heat from your face to "bake" the powder into your skin, creating a flawless, long-lasting finish.
Congratulations, Graduates!
You have now completed Foundation Alchemy 101! Armed with this knowledge, you are ready to conquer any blending challenge and achieve a truly traceless, matte finish with your Foundation Repair Stick.
Remember, practice makes perfect! Don’t be afraid to experiment and find what works best for you. And most importantly, have fun! Makeup should be an expression of your creativity and a way to enhance your natural beauty.
Now go forth and blend! And may your foundation always be flawless! ✨
For detailed product specifications and purchases, please go to :https://zenamakeup.com/products/traceless-matte-foundation-repair-stick
Leave a Reply