How to Clean Your Skin Revive Tint Stick After Summer Use 2025: A ZenaMakeup Masterclass!
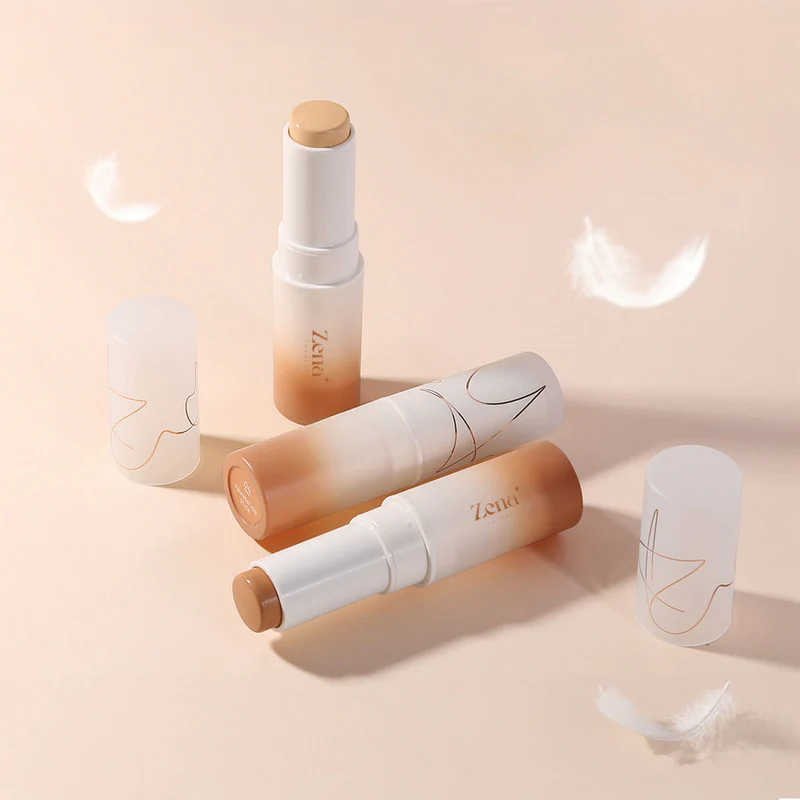
(Image: A vibrant, slightly distressed ZenaMakeup Skin Revive Tint Stick lying next to a beach towel, sunglasses, and a half-eaten popsicle. The image evokes the fun of summer and the need for a post-summer refresh.)
Hey there, Glow-Getters! 👋
It’s your favorite product manager from ZenaMakeup, ready to dive deep into a topic near and dear to my heart (and, hopefully, your beautifully tinted faces!): Keeping your ZenaMakeup Skin Revive Tint Stick squeaky clean after a summer of sun-kissed adventures!
Let’s face it, summer 2025 was a whirlwind! We chased sunsets, conquered tan lines, and, of course, rocked our Skin Revive Tint Sticks like the radiant royalty we are. 👑 But now, as we transition into the cozy embrace of autumn, it’s time to give our beloved beauty companions a little TLC.
Think of your Tint Stick as your best friend who joined you on every beach trip, pool party, and rooftop rendezvous. It deserves a little pampering after all that hard work! 🌞
Why is Cleaning Your Tint Stick So Important? (Besides, You Know, Basic Hygiene!)
Imagine this: you’re applying your Tint Stick, ready to face the world with that effortless, dewy glow. But instead of a smooth application, you feel a little… grit? 😱
That "grit" is likely a cocktail of:
- Dead skin cells: Yes, even your gorgeous face sheds skin. It’s a natural process, but those cells can accumulate on your Tint Stick.
- Sunscreen residue: We all know sunscreen is our BFF during the summer, but it can leave a sneaky residue that clings to your makeup.
- Dust and debris: From beach sand to city smog, your Tint Stick encounters a lot throughout the day.
- Bacteria: (Cue dramatic music!) Bacteria loves a warm, moist environment, and your Tint Stick can become a breeding ground if not cleaned regularly.
The Consequences of a Dirty Tint Stick (Prepare to be Shocked!… Or Maybe Just Mildly Annoyed)
- Breakouts: Clogged pores are the enemy! Dirty makeup tools can transfer bacteria and debris onto your skin, leading to unwanted blemishes.
- Dullness: A build-up of product and grime can prevent your Tint Stick from applying smoothly and evenly, resulting in a less-than-stellar glow.
- Uneven application: Imagine trying to paint a masterpiece with a brush covered in old paint! A dirty Tint Stick can create streaks and patches, ruining your flawless finish.
- Shortened lifespan: Cleaning your Tint Stick regularly helps maintain its texture and consistency, prolonging its life and saving you money in the long run. Cha-ching! 💰
- Transfer of Oil and Germs to your skin: This may be the most important thing to remember; you could have already cleansed your skin only to reapply germs and oils using a dirty tint stick.
The ZenaMakeup Guide to Immaculate Tint Sticks: A Step-by-Step Cleansing Ritual!
Alright, let’s get down to business! Here’s my foolproof, ZenaMakeup-approved method for keeping your Skin Revive Tint Stick sparkling clean and ready for action:
1. The Prep (Gather Your Supplies!)
Before we begin, gather these essentials:
- Gentle cleanser: Choose a mild, fragrance-free cleanser that’s safe for your skin and your Tint Stick. Think of a gentle facial cleanser or even a baby shampoo. (ZenaMakeup Recommendation: Our "Barely There" Cleansing Balm is a perfect choice! It’s gentle, effective, and leaves your skin feeling super soft.)
- Soft cloth or paper towel: Opt for a lint-free cloth or a durable paper towel to avoid leaving behind any fuzzies.
- Warm water: Not too hot, not too cold – just right!
- Optional: Isopropyl alcohol (70% or higher): For a deeper clean, especially after heavy use, a little isopropyl alcohol can work wonders.
- Optional: Small bowl: For easier rinsing and soaking.
(Image: A visually appealing flat lay showcasing the cleansing supplies: ZenaMakeup "Barely There" Cleansing Balm, a soft microfiber cloth, a small bowl of warm water, and a bottle of isopropyl alcohol.)
2. The Surface Clean (Daily Maintenance)
This is your quick and easy daily ritual to keep your Tint Stick fresh:
- After each use: Gently wipe the surface of your Tint Stick with a clean, dry cloth or paper towel to remove any excess product or debris.
- Pro Tip: Store your Tint Stick in a cool, dry place away from direct sunlight and heat. This will help prevent it from melting or becoming contaminated.
3. The Deep Clean (Weekly or Bi-Weekly Refresh)
This is where we get serious! Follow these steps for a thorough cleaning:
- Step 1: The Gentle Wash:
- Dampen a soft cloth with warm water and apply a small amount of your chosen cleanser.
- Gently wipe the surface of the Tint Stick, paying attention to any areas with visible build-up.
- Avoid getting water inside the Tint Stick container.
- Step 2: The Rinse:
- Dampen a clean cloth with warm water and gently wipe away any remaining cleanser.
- Alternatively, you can carefully rinse the Tint Stick under running water, making sure to avoid getting water inside the container.
- Step 3: The Sanitize (Optional but Recommended):
- Dip a clean cloth or cotton swab in isopropyl alcohol.
- Gently wipe the surface of the Tint Stick with the alcohol.
- Allow the alcohol to evaporate completely before using the Tint Stick.
- Step 4: The Dry:
- Gently pat the Tint Stick dry with a clean, dry cloth or paper towel.
- Allow it to air dry completely before replacing the cap.
(Table: Cleaning Schedule for Your ZenaMakeup Skin Revive Tint Stick)
| Cleaning Type | Frequency | Purpose |
|---|---|---|
| Surface Clean | After Each Use | Removes excess product and debris; prevents build-up. |
| Deep Clean | Weekly/Bi-Weekly | Thoroughly cleanses and sanitizes; removes bacteria and stubborn residue. |
| Inspection Check | Monthly | Checks for signs of damage or contamination; determines if replacement is needed. |
4. The Stubborn Stain Solution (For Those Extra-Tough Moments!)
Sometimes, your Tint Stick might encounter a particularly stubborn stain. Don’t panic! Here’s how to tackle it:
- The Oil Cleanse: If the stain is oily, try using a small amount of oil-based cleanser (like the ZenaMakeup "Barely There" Cleansing Balm!) to dissolve it. Gently massage the cleanser onto the stain, then rinse and dry as usual.
- The Gentle Scrub: For dried-on stains, gently scrub the surface of the Tint Stick with a soft toothbrush or a cotton swab dipped in cleanser. Be careful not to apply too much pressure, as this could damage the stick.
5. The "Oops, I Dropped It!" Protocol
Accidents happen! If you drop your Tint Stick on the floor, follow these steps:
- Assess the damage: Check for any cracks or breaks in the packaging.
- Sanitize thoroughly: Clean the entire surface of the Tint Stick with isopropyl alcohol to kill any bacteria.
- Consider replacement: If the packaging is damaged or if you’re concerned about contamination, it’s best to replace the Tint Stick.
(Icon: A cute, slightly clumsy cartoon character dropping a Tint Stick with a surprised expression.)
ZenaMakeup’s Tint Stick Care Tips: Beyond the Cleaning!
Cleaning is crucial, but here are a few extra tips to keep your Tint Stick in tip-top shape:
- Avoid sharing: Sharing makeup can spread bacteria and infections. Keep your Tint Stick to yourself! (Sorry, bestie! 😉)
- Replace regularly: Even with proper care, makeup products have a limited lifespan. Replace your Tint Stick every 6-12 months, or sooner if you notice any changes in texture, color, or smell.
- Store properly: Keep your Tint Stick in a cool, dry place away from direct sunlight and heat.
- Listen to your skin: If you experience any irritation or breakouts after using your Tint Stick, discontinue use and consult a dermatologist.
Marketing Magic: Why You Need the ZenaMakeup Skin Revive Tint Stick (and Why You Need to Clean It!)
Okay, let’s be real. You’re reading this because you already love the ZenaMakeup Skin Revive Tint Stick. But just in case you need a little reminder of why it’s the ultimate summer (and beyond!) must-have:
- Effortless Glow: Achieve that coveted "lit-from-within" radiance with just a swipe.
- Hydrating Formula: Infused with hyaluronic acid and other skin-loving ingredients to keep your skin plump and hydrated.
- Buildable Coverage: Customize your look from sheer to medium coverage.
- Portable Perfection: The convenient stick format is perfect for on-the-go touch-ups.
- Variety of Shades: Find your perfect match from our inclusive range of shades.
(Image: A collage showcasing diverse models with different skin tones wearing the ZenaMakeup Skin Revive Tint Stick in various shades. The image highlights the product’s versatility and inclusivity.)
Special Offer! (Because We Love You!)
For a limited time, use code CLEANGLOW2025 at checkout to receive 15% off your next ZenaMakeup "Barely There" Cleansing Balm! It’s the perfect partner for keeping your Skin Revive Tint Stick sparkling clean and your skin glowing! ✨
The Bottom Line (and a Final Pep Talk!)
Cleaning your ZenaMakeup Skin Revive Tint Stick is an essential part of your beauty routine. It’s not just about hygiene; it’s about protecting your skin, maximizing your product’s lifespan, and ensuring a flawless application every time.
So, take a few minutes to pamper your Tint Stick. Your skin (and your glow!) will thank you for it!
Remember, at ZenaMakeup, we believe that beauty should be fun, effortless, and empowering. By following these simple tips, you can keep your Skin Revive Tint Stick in pristine condition and continue to rock that radiant glow all year long!
(Final Image: A close-up shot of a perfectly clean ZenaMakeup Skin Revive Tint Stick, radiating light and promising a flawless application.)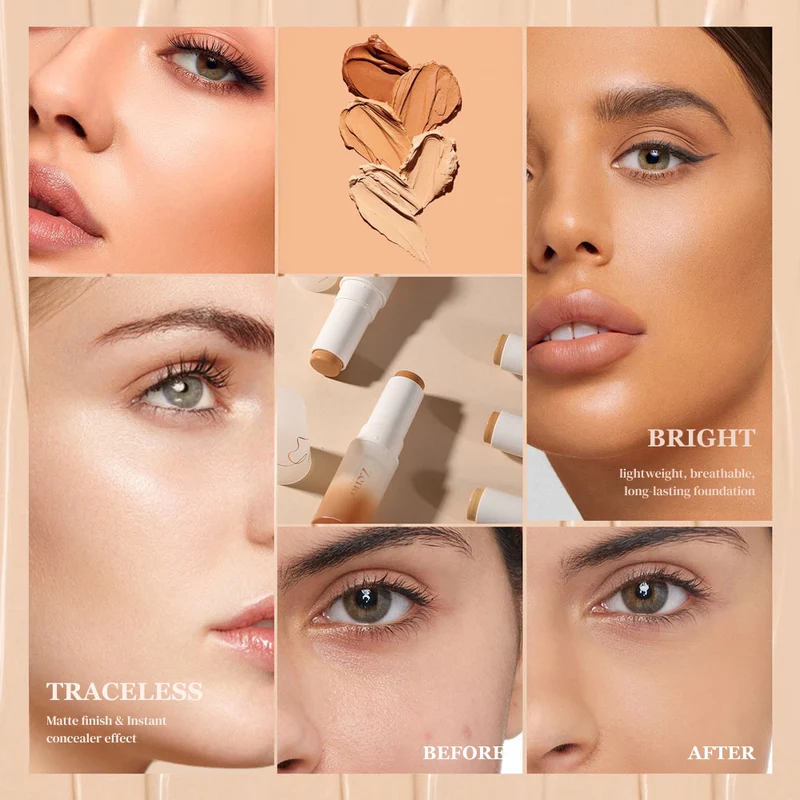
Stay glowing!
Your friend at ZenaMakeup,
The Product Manager (aka, your Glow Guide!) 😊
For detailed product specifications and purchases, please go to :https://zenamakeup.com/products/skin-revive-tint-stick
Leave a Reply