Lecture: Mastering the Liquid Dual-End Matte & Glitter Fusion Eyeshadow: From Zero to Eye-Con! ✨
Alright, settle in, beauty buffs! Grab your coffees (or mimosas, no judgment here 🥂), because today we’re diving headfirst into the dazzling world of Liquid Dual-End Matte & Glitter Fusion Eyeshadows. These little tubes are the unsung heroes of quick, easy, and downright stunning eye looks. Forget complicated palettes and fifteen different brushes – we’re streamlining the process and maximizing the shimmer!
(Disclaimer: May cause excessive blinking and uncontrollable urges to take selfies. Proceed with caution.)
Lecture Outline:
- Introduction: Why Liquid Dual-End Eyeshadows are Your New Best Friend
- Understanding the Players: Dissecting the Dual-End Dynamics
- The Matte Side: Your Basecamp for Beauty
- The Glitter Side: Unleash the Sparkle!
- Tools of the Trade: Brushes, Blenders, and Beyond!
- Prepping the Canvas: Priming for Perfection
- The Art of Application: Techniques for the Matte Side
- All-Over Base: The Foundation of Your Masterpiece
- Contour and Define: Sculpting Those Peepers!
- Creating Depth: Dimension is Everything, Darling!
- Glitter Galore: Techniques for the Glitter Side
- All-Over Glitter Wash: A Sheer, Sparkling Dream
- Spotlight Glitter: The Pop of Perfection
- Glitter Liner: A Dazzling Detail
- Blending is Your BFF: Achieving Seamless Transitions
- Troubleshooting: Avoiding Common Pitfalls
- Creasing Catastrophes
- Glitter Fallout Fiascos
- Uneven Application Emergencies
- Look Inspiration: From Subtle Shimmer to Full-On Glam!
- Maintenance and Storage: Keeping Your Glitter Glowing
- Conclusion: Go Forth and Sparkle!
1. Introduction: Why Liquid Dual-End Eyeshadows are Your New Best Friend 👯♀️
Let’s be honest, sometimes we just don’t have time for a full-blown eyeshadow symphony. We need something quick, effective, and, dare I say, idiot-proof. Enter the Liquid Dual-End Matte & Glitter Fusion Eyeshadow. These ingenious creations offer the best of both worlds in a single tube:
- Convenience: Two finishes, one product. Need I say more?
- Speed: Application is a breeze. Perfect for busy mornings or last-minute events.
- Beginner-Friendly: No complicated color combinations or blending techniques required.
- Versatility: From subtle day looks to dazzling night looks, the possibilities are endless.
- Sparkle (duh!): Because everyone deserves a little shimmer in their life. ✨
Think of them as the eyeshadow equivalent of a Swiss Army knife – compact, multi-functional, and ready for anything!
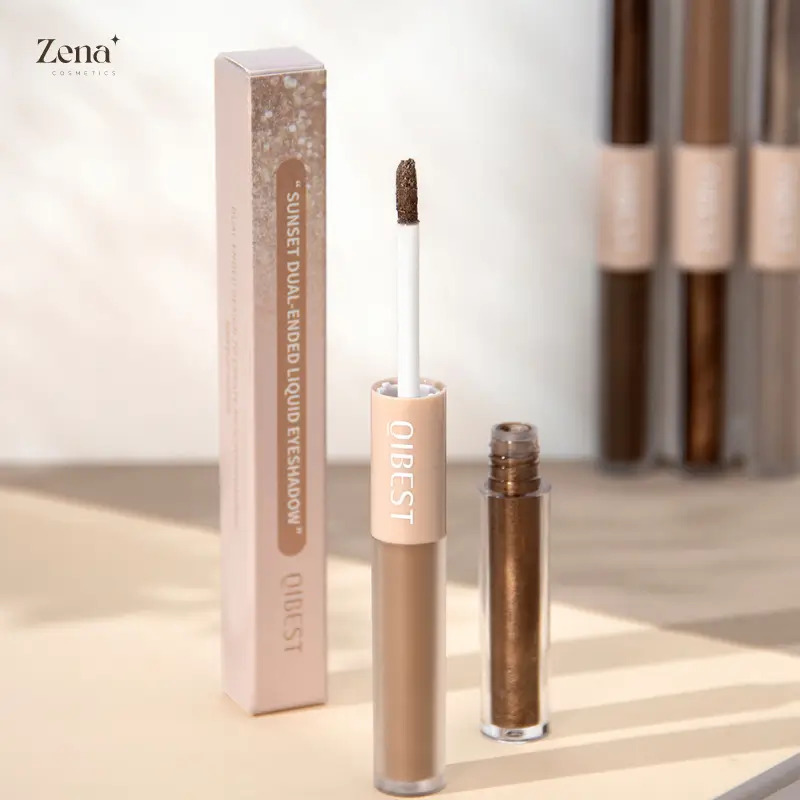
2. Understanding the Players: Dissecting the Dual-End Dynamics 🔎
These dual-ended wonders aren’t just about convenience; they’re about synergy! Let’s break down each side:
2.1 The Matte Side: Your Basecamp for Beauty 🏕️
The matte side is your foundation, your canvas, your trusted companion. It provides:
- Base Color: Creates a smooth, even surface for the glitter to adhere to.
- Definition: Can be used to contour the eyes and add depth.
- Blendability: Typically formulated for easy blending, ensuring a seamless transition with the glitter.
- Longevity: Helps to extend the wear of the glitter, preventing it from fading or creasing.
Think of the matte side as the unsung hero. It’s the quiet professional that sets the stage for the glittery performance.
2.2 The Glitter Side: Unleash the Sparkle! ✨
Ah, the glitter! This is where the magic happens. The glitter side offers:
- Intense Shimmer: Adds a dazzling pop of sparkle to your eyes.
- Variety of Finishes: Available in various glitter sizes and colors, from subtle shimmer to chunky glitter.
- Long-Lasting Wear: Formulated to stay put without excessive fallout.
- Easy Application: Typically comes with a doe-foot applicator for precise placement.
The glitter side is the star of the show, the headliner, the reason everyone’s asking, "Wow, your eyes look amazing!"
| Feature | Matte Side | Glitter Side |
|---|---|---|
| Purpose | Base, Contour, Definition | Sparkle, Highlight |
| Texture | Smooth, Creamy, Blendable | Liquid, Gel-Based, Various Glitter Sizes |
| Finish | Matte | Glitter, Shimmer |
| Application | Sponge Applicator, Brush | Doe-Foot Applicator, Finger |
| Benefits | Creates base, Adds depth, Extends wear | Adds sparkle, Highlights, Easy to apply |
3. Tools of the Trade: Brushes, Blenders, and Beyond! 🛠️
While the liquid eyeshadow itself is the star, having the right tools can elevate your game. Here are some essentials:
- Eyeshadow Brushes:
- Flat Shader Brush: For packing color onto the lid.
- Blending Brush: For softening edges and creating seamless transitions.
- Pencil Brush: For precise application in the crease or along the lash line.
- Makeup Sponges: For blending and smoothing out any harsh lines.
- Cotton Swabs: For cleaning up any mistakes or fallout.
- Eyelash Curler: To prep those lashes for mascara.
- Mascara: To complete the look!
(Pro-Tip: Clean your brushes regularly! Dirty brushes can harbor bacteria and lead to breakouts. Plus, clean brushes apply eyeshadow more smoothly.)
4. Prepping the Canvas: Priming for Perfection 🎨
Just like a painter primes their canvas, you need to prep your eyelids for eyeshadow. This ensures:
- Increased Pigment Payoff: The colors will appear more vibrant.
- Longer Wear: Prevents creasing and fading.
- Smoother Application: Creates an even surface for the eyeshadow to glide on.
How to Prime:
- Cleanse: Start with a clean, dry eyelid.
- Apply Eyeshadow Primer: Use a dedicated eyeshadow primer or a concealer. Apply a thin layer all over the eyelid and blend well.
- Set with Powder (Optional): If you have oily eyelids, you can set the primer with a translucent powder.
5. The Art of Application: Techniques for the Matte Side 🖌️
Now for the fun part! Let’s explore different ways to use the matte side of your liquid eyeshadow:
5.1 All-Over Base: The Foundation of Your Masterpiece 🏛️
This is the simplest and most common technique.
- Apply: Use the applicator to apply a thin layer of the matte eyeshadow all over your eyelid, from the lash line to the crease.
- Blend: Use a blending brush or your finger to blend the eyeshadow upwards towards the brow bone. Make sure there are no harsh lines.
This creates a smooth, even base for the glitter to adhere to and provides a subtle wash of color.
5.2 Contour and Define: Sculpting Those Peepers! 🔪
Use a darker shade of matte eyeshadow to contour the eyes and add definition.
- Apply: Use the applicator or a pencil brush to apply the darker matte eyeshadow to the crease of your eye.
- Blend: Use a blending brush to blend the eyeshadow back and forth in the crease, creating a defined socket.
- Smudge: You can also smudge the darker matte eyeshadow along the lower lash line for a smoky effect.
5.3 Creating Depth: Dimension is Everything, Darling! 💫
Combine multiple shades of matte eyeshadow to create a more complex and dimensional look.
- Apply: Apply a medium shade of matte eyeshadow all over the eyelid as a base.
- Contour: Apply a darker shade of matte eyeshadow to the crease.
- Highlight: Apply a lighter shade of matte eyeshadow to the inner corner of the eye and under the brow bone.
- Blend: Blend all the shades together seamlessly.
(Pro-Tip: Start with a small amount of product and build up the color gradually. It’s easier to add more eyeshadow than to remove it!)
6. Glitter Galore: Techniques for the Glitter Side ✨
Time to unleash the sparkle! Here’s how to make the most of the glitter side:
6.1 All-Over Glitter Wash: A Sheer, Sparkling Dream 🌠
This is a subtle and effortless way to add a touch of shimmer to your eyes.
- Apply: Use the doe-foot applicator to apply a thin layer of the glitter eyeshadow all over your eyelid, on top of the matte base.
- Blend: Gently pat the glitter eyeshadow with your finger or a flat shader brush to distribute it evenly.
This creates a beautiful, shimmering effect that’s perfect for everyday wear.
6.2 Spotlight Glitter: The Pop of Perfection 💡
This technique involves applying the glitter eyeshadow to the center of the eyelid to create a spotlight effect.
- Apply: Use the doe-foot applicator to apply a small amount of the glitter eyeshadow to the center of your eyelid.
- Blend: Gently pat the glitter eyeshadow with your finger or a flat shader brush to blend it outwards.
This adds a dazzling pop of sparkle that draws attention to the eyes.
6.3 Glitter Liner: A Dazzling Detail 🖋️
This is a fun and unexpected way to add some sparkle to your eyeliner.
- Apply: Use a thin eyeliner brush to apply the glitter eyeshadow along your upper lash line, creating a glittery eyeliner.
- Layer: You can layer the glitter eyeliner on top of a regular eyeliner for a more dramatic effect.
This is a great way to add a touch of glamour to your look.
(Pro-Tip: For maximum glitter payoff, apply the glitter eyeshadow with your finger. The warmth of your finger helps the glitter adhere to the skin.)
7. Blending is Your BFF: Achieving Seamless Transitions 🤝
Blending is the key to a flawless eyeshadow look. It ensures that there are no harsh lines and that the colors transition seamlessly.
How to Blend:
- Use a clean blending brush: This will prevent the colors from becoming muddy.
- Use windshield wiper motions: Gently sweep the blending brush back and forth in the crease of your eye.
- Focus on the edges: Pay special attention to the edges of the eyeshadow, blending them outwards.
- Take your time: Blending takes practice, so don’t get discouraged if it doesn’t come naturally at first.
8. Troubleshooting: Avoiding Common Pitfalls 🚧
Even the most experienced makeup artists encounter problems from time to time. Here are some common pitfalls and how to avoid them:
| Problem | Solution |
|---|---|
| Creasing | Use an eyeshadow primer, set with powder, apply thin layers of eyeshadow. |
| Glitter Fallout | Use a glitter glue, apply the glitter eyeshadow with your finger, tap off excess product. |
| Uneven Application | Apply thin layers of eyeshadow, blend thoroughly, use a cotton swab to clean up any mistakes. |
| Muddy Colors | Use clean brushes, avoid over-blending, use complementary colors. |
| Glitter Overload | Start with a small amount of glitter, build up gradually, use a light hand. |
9. Look Inspiration: From Subtle Shimmer to Full-On Glam! 💃
Okay, let’s get those creative juices flowing! Here are a few look ideas to inspire you:
- Everyday Shimmer: Matte base in a neutral shade, with a light wash of champagne glitter all over the lid.
- Smoky Glitter: Dark matte base in a smoky color, with a pop of silver glitter in the center of the lid.
- Colorful Glitter: Bright matte base in a fun color, with a matching glitter eyeliner.
- Cut Crease Glitter: Defined cut crease with a contrasting matte shade, filled in with glitter.
- Halo Eye: Dark matte shades on the outer and inner corners, with a bright glitter in the center.
The possibilities are endless! Experiment with different colors and techniques to find what works best for you.
10. Maintenance and Storage: Keeping Your Glitter Glowing 🧽
To ensure your liquid eyeshadow stays in top condition:
- Close the lid tightly: This prevents the product from drying out.
- Store in a cool, dry place: Avoid direct sunlight and extreme temperatures.
- Clean the applicator regularly: Use a makeup wipe to remove any excess product.
- Check the expiration date: Liquid eyeshadow typically has a shelf life of 6-12 months.
11. Conclusion: Go Forth and Sparkle! 🌟
Congratulations, you’ve made it through our liquid eyeshadow extravaganza! You are now armed with the knowledge and techniques to create stunning eye looks that will turn heads and leave everyone mesmerized. So go forth, experiment, and most importantly, have fun! Don’t be afraid to embrace the sparkle and let your inner eye-con shine! ✨
For detailed product specifications and purchases, please go to :https://zenamakeup.com/products/liquid-dual-end-matte-glitter-fusion-eyeshadow
Leave a Reply