Glitterati Glam: A Lecture on Layering Glitter Cream Eyeshadow Sticks for Dimensional Drama ✨
Welcome, darlings, to Glitterati Glam 101! Forget your contouring kits and painstakingly precise eyeliner wings for a moment. Today, we’re diving headfirst into a shimmering, sparkling, utterly captivating world: the art of layering glitter cream eyeshadow sticks for eye-catching dimension! 🤩
I see some skeptical faces out there. "Cream eyeshadow sticks? Glitter? Layering? Sounds like a recipe for a sticky, sparkly disaster!" Fear not, my pretties! With the right techniques, a dash of courage, and a sprinkle of humor, you too can wield the power of glitter cream eyeshadow sticks to create mesmerizing eye looks that will have everyone wondering if you’ve been personally blessed by the disco ball gods.
Your Professor of Sparkle: Me! (Though you can call me Professor Sparkle, if you’re feeling fancy. 😉) I’ve been experimenting with glitter and gleam since I was a wee lass, raiding my mother’s (much-to-her-dismay) makeup stash. So, trust me, I’ve seen the glitter graveyard and emerged victorious, ready to share my hard-won wisdom.
Course Objectives:
By the end of this lecture, you will be able to:
- Understand the different types of glitter cream eyeshadow sticks and their properties.
- Choose the right color combinations for layering.
- Master the techniques for applying and blending glitter cream eyeshadow sticks.
- Create dimensional eye looks using layered glitter.
- Avoid common glitter cream eyeshadow stick pitfalls (aka, the sticky sparkly mess).
- Confidently rock a glittery eye look, no matter the occasion. 🎉
Let’s get this glitter party started!
Chapter 1: Understanding the Glittery Goods 🔬
Before we start slathering on the sparkle, let’s understand what we’re working with. Glitter cream eyeshadow sticks aren’t all created equal. They vary in texture, glitter concentration, longevity, and, of course, color!
Types of Glitter Cream Eyeshadow Sticks:
| Type | Description | Pros | Cons | Ideal For |
|---|---|---|---|---|
| Fine Glitter | Contains very small, almost imperceptible glitter particles. Creates a subtle shimmer. | Easy to blend, buildable, less likely to crease, good for everyday wear. | May not be impactful enough for those seeking dramatic glitter. | Subtle shimmer, everyday looks, highlighting. |
| Chunky Glitter | Contains larger, more noticeable glitter particles. Creates a bold, eye-catching effect. | High impact, dramatic, fun, attention-grabbing. | Can be prone to creasing, fallout, and irritation if not applied carefully. Requires a good primer. | Night out, special events, statement looks. |
| Iridescent/Duochrome | Contains glitter particles that shift color depending on the angle of the light. Creates a multi-dimensional effect. | Unique, interesting, catches the light beautifully, adds depth. | Can be tricky to layer with other colors, may require some experimentation. | Adding dimension, creating interesting effects, experimenting with color. |
| Metallic/Shimmer | Technically not glitter, but often categorized with it. Contains finely milled metallic pigments that create a smooth, luminous sheen. | Easy to blend, flattering on all skin tones, adds a sophisticated shimmer. | Doesn’t have the same bold sparkle as glitter, can sometimes look flat if not layered correctly. | Everyday wear, subtle shimmer, adding a metallic sheen. |
Key Ingredients to Consider:
- Emollients (oils, waxes): These provide the creamy texture and help the product glide on smoothly. Look for non-comedogenic options if you have oily or acne-prone skin.
- Binders (silicones, polymers): These hold the glitter particles together and prevent fallout.
- Pigments: These provide the color.
- Preservatives: To keep the product fresh and safe.
Pro-Tip: Always do a patch test on your inner arm before applying any new product to your eyes, especially glitter, to check for any allergic reactions. ⚠️ Safety first, sparkle second!
Chapter 2: Color Theory: Choosing Your Glitter Dream Team 🌈
Okay, now for the fun part! Choosing your glitter colors! This is where your inner artist can truly shine (literally!). Layering glitter is all about creating depth and dimension, so you’ll want to select colors that complement each other and build upon each other.
Basic Color Harmony Principles:
- Monochromatic: Using different shades of the same color (e.g., light gold, medium gold, dark gold). Creates a sophisticated and subtle look.
- Analogous: Using colors that are next to each other on the color wheel (e.g., gold, bronze, copper). Creates a harmonious and natural-looking blend.
- Complementary: Using colors that are opposite each other on the color wheel (e.g., blue and gold, purple and green). Creates a high-contrast, eye-catching look.
- Triadic: Using three colors that are equally spaced on the color wheel (e.g., purple, orange, green). Creates a vibrant and playful look.
Glitter Layering Color Combination Ideas:
| Look | Color Combination | Description | Occasion |
|---|---|---|---|
| Golden Hour Glow | Light gold shimmer + Medium gold glitter + Bronze glitter | A warm, radiant look that mimics the sun’s golden rays. Perfect for adding a touch of glamour to your everyday look. | Everyday, date night, brunch. |
| Oceanic Opulence | Teal shimmer + Sapphire glitter + Silver glitter | A cool, aquatic look that evokes the depths of the ocean. Perfect for making a statement and adding a touch of mystery. | Night out, party, special event. |
| Berry Bliss | Light pink shimmer + Mauve glitter + Burgundy glitter | A romantic and feminine look that is perfect for adding a touch of sweetness to your outfit. | Date night, wedding, special occasion. |
| Smoky Sparkle | Charcoal shimmer + Gunmetal glitter + Silver glitter | A edgy and sophisticated look that is perfect for a night out. The charcoal creates a smoky base, while the gunmetal and silver add a touch of sparkle and dimension. | Night out, concert, party. |
| Mystical Amethyst | Lavender shimmer + Purple glitter + Iridescent purple glitter | A dreamy and ethereal look that is perfect for adding a touch of magic to your makeup. | Festival, themed party, creative shoot. |
| Autumnal Alchemy | Copper shimmer + Bronze glitter + Gold glitter | Warm and inviting, reminiscent of falling leaves and cozy nights. | Fall events, Thanksgiving gatherings, adding warmth to a neutral look. |
| Jewel-Toned Treasure | Emerald shimmer + Sapphire glitter + Amethyst glitter (applied sparingly) | A bold and luxurious look, reminiscent of precious gems. Apply the amethyst sparingly to avoid overwhelming the look. | Formal events, holiday parties, making a grand entrance. |
Important Considerations:
- Skin Tone: Consider your skin tone when choosing colors. Warmer skin tones tend to look great in golds, bronzes, and coppers, while cooler skin tones tend to look great in silvers, blues, and purples.
- Eye Color: Certain colors can enhance your eye color. For example, bronze and gold can make blue eyes pop, while purple can make green eyes sparkle.
- Occasion: Choose colors that are appropriate for the occasion. A subtle shimmer is perfect for everyday wear, while a bold glittery look is perfect for a night out.
- Personal Preference: Ultimately, the best colors are the ones you love and feel confident wearing! Don’t be afraid to experiment and find what works best for you.
Chapter 3: Application Techniques: From Novice to Glitter Guru ✨
Alright, class! Time to get our hands dirty (or should I say, sparkly?). Here are some essential techniques for applying and blending glitter cream eyeshadow sticks like a pro:
Tools of the Trade:
- Glitter Cream Eyeshadow Sticks: Obviously!
- Eyeshadow Primer: Crucial for preventing creasing and fallout. Trust me on this one.
- Eyeshadow Brush (Flat & Fluffy): For blending and smoothing the edges.
- Fingertips: Can be surprisingly effective for applying and pressing glitter onto the lid.
- Setting Spray: To lock everything in place and minimize fallout.
- Cotton Swabs/Makeup Remover: For cleaning up any mistakes. (We all make them!)
Step-by-Step Application Guide:
- Prime Time! Apply a thin layer of eyeshadow primer to your entire eyelid, from lash line to brow bone. This creates a smooth, even base for the glitter and helps it adhere better. 🛡️ Think of it as a glitter shield!
- Base Color: Choose your base color (usually the lightest shade) and apply it all over your eyelid. You can apply it directly from the stick and blend it out with your fingertip or a flat eyeshadow brush.
- Layering Magic: Apply the next shade (usually a medium shade) to the center of your eyelid, blending it into the base color. Use a fluffy eyeshadow brush to diffuse the edges and create a seamless transition.
- Adding Depth: Apply the darkest shade to the outer corner of your eyelid and blend it inwards, creating a gradient effect. This will add depth and dimension to your eye look.
- Glitter Placement: If you’re using chunky glitter, apply it sparingly to the center of your eyelid, using your fingertip to gently press it into place. This will prevent fallout and ensure that the glitter stays put.
- Blending is Key! Use a clean, fluffy eyeshadow brush to blend all the colors together, ensuring that there are no harsh lines. The goal is to create a smooth, seamless transition between the shades.
- Lower Lash Line (Optional): Apply a small amount of the base color or a complementary color to your lower lash line for a more complete look.
- Setting Spray: Once you’re happy with your look, spritz a generous amount of setting spray all over your face to lock everything in place and prevent fallout.
- Clean Up Crew: Use a cotton swab dipped in makeup remover to clean up any mistakes or fallout.
Tips and Tricks for Flawless Glitter Application:
- Start with a Light Hand: It’s always easier to add more glitter than to remove it.
- Pat, Don’t Swipe: When applying glitter, pat it onto your eyelid instead of swiping. This will prevent fallout and ensure that the glitter stays put.
- Layer in Thin Coats: Avoid applying thick layers of glitter, as this can lead to creasing and fallout. Instead, layer the glitter in thin coats, allowing each layer to dry before applying the next.
- Use Your Fingertip: Your fingertip can be a surprisingly effective tool for applying and pressing glitter onto the lid. The warmth of your finger helps the glitter adhere better.
- Clean Your Brushes Regularly: Glitter can build up on your brushes, so it’s important to clean them regularly with soap and water.
- Embrace Imperfection: Glitter is all about having fun, so don’t be afraid to experiment and make mistakes. The most important thing is to enjoy the process!
Chapter 4: Troubleshooting Glitter Mishaps (and How to Fix Them!) 🚑
Even the most experienced glitter enthusiasts encounter mishaps from time to time. Here are some common problems and how to fix them:
| Problem | Solution |
|---|---|
| Creasing | Use a good eyeshadow primer, apply thin layers of glitter, and avoid applying too much product to the crease area. |
| Fallout | Use a glitter glue or adhesive, pat the glitter onto your eyelid instead of swiping, and set your makeup with setting spray. |
| Uneven Application | Use a fingertip or a flat eyeshadow brush to evenly distribute the glitter. Blend the edges with a fluffy eyeshadow brush. |
| Too Much Glitter | Use a clean, fluffy eyeshadow brush to gently dust off the excess glitter. You can also use a cotton swab dipped in makeup remover to clean up any mistakes. |
| Glitter Irritation | Discontinue use immediately and consult a doctor. Choose glitter products that are specifically formulated for use around the eyes and avoid using large, chunky glitter. |
Pro-Tip: If you’re prone to glitter fallout, apply your eye makeup before your foundation. This way, you can easily clean up any fallout without ruining your base. 🧹
Chapter 5: Level Up: Advanced Glitter Techniques 🚀
Ready to take your glitter game to the next level? Here are some advanced techniques for creating even more dramatic and dimensional eye looks:
- Cut Crease with Glitter: Create a sharp cut crease using concealer and then apply glitter to the lid for a dramatic, defined look.
- Halo Eye with Glitter: Apply a dark shade to the outer and inner corners of your eyelid and a lighter, glittery shade to the center for a halo effect.
- Glitter Liner: Use a thin brush dipped in glitter glue to create a glittery eyeliner wing.
- Ombre Glitter: Create an ombre effect by layering different shades of glitter, starting with the darkest shade at the lash line and gradually lightening towards the brow bone.
- Reverse Glitter: Instead of applying glitter to the eyelid, apply it to the lower lash line for a unique and unexpected look.
Final Exam (Just Kidding!)
Congratulations, graduates! You’ve successfully completed Glitterati Glam 101! 🎉 Now go forth and spread your sparkle upon the world! Remember, the key to mastering glitter is experimentation, practice, and a healthy dose of self-confidence. Don’t be afraid to try new things, make mistakes, and most importantly, have fun!
Bonus Points: Share your glittery creations with me on social media using #GlitteratiGlam101. I can’t wait to see what you come up with! ✨💖
Class Dismissed! 👩🏫
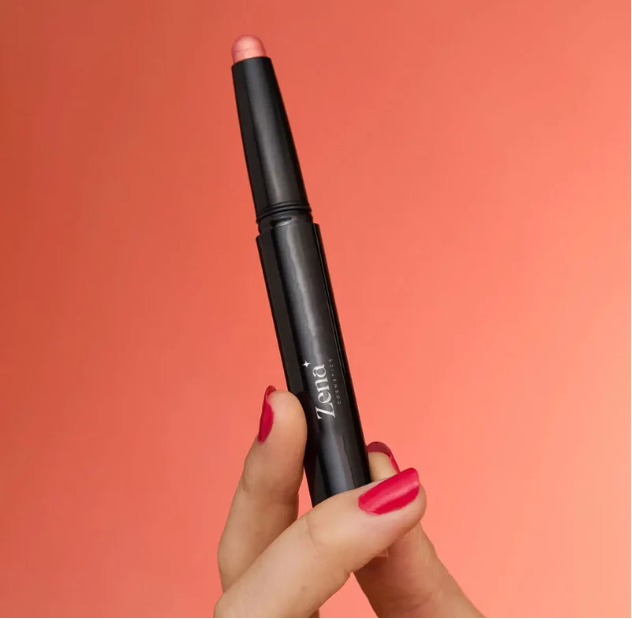
For detailed product specifications and purchases, please go to :https://zenamakeup.com/products/glitter-cream-eyeshadow-stick-shimmer-for-all-eyes-colors
Leave a Reply