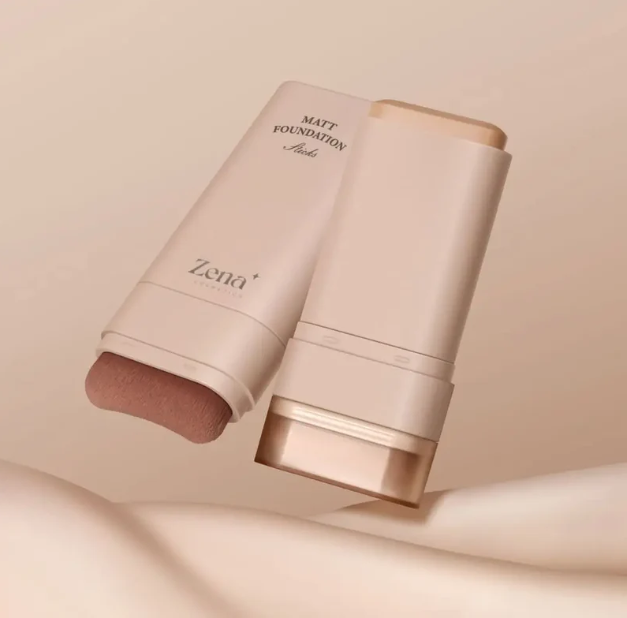
Traceless Matte Foundation Repair Stick: An Epic Saga of Longevity (and How to Conquer It!) 👑✨
(A Lecture in Makeup Artistry, Starring You!)
Alright, class! Gather ’round, beauty warriors! Today, we’re not just talking about makeup; we’re talking about survival. Specifically, the survival of your meticulously crafted face against the relentless onslaught of humidity, oil, life in general, and that one friend who always leans in for the cheek kiss. 😩
Our hero today? The Traceless Matte Foundation Repair Stick. A trusty companion, a concealer’s best friend, a touch-up ninja in your makeup bag. But, like any superhero, it needs its training montage! 🏋️♀️ We’re going to unlock its full potential and make it last through thick and thin.
Think of this lecture as your personal instruction manual. We’ll delve into the science, the secrets, and the slightly insane (but effective!) techniques to ensure your foundation repair stick becomes a legend in its own right.
Course Outline:
- Understanding Our Warrior: The Anatomy of a Foundation Repair Stick
- The Battlefield: Assessing Your Skin Type and Environmental Enemies
- Prep for Victory: Priming is NOT Optional!
- Strategic Application: Mastering the Art of Concealing & Correcting
- Setting the Stage: Powders, Sprays, and the Quest for Immovability
- Advanced Tactics: Layering, Baking, and Other Sorcery
- Maintenance & Monitoring: The Art of Touch-Ups (without Going Overboard!)
- Troubleshooting: Common Problems and Their Solutions
- The Final Verdict: Congratulations, You’re a Foundation Longevity Master! 🏆
1. Understanding Our Warrior: The Anatomy of a Foundation Repair Stick 🔬
Before we send our Traceless Matte Foundation Repair Stick into battle, we need to know what we’re dealing with. Think of it as disassembling a weapon before heading into a zombie apocalypse (because, let’s be honest, a bad makeup day can feel pretty apocalyptic).
These sticks are generally a blend of:
- Pigments: The colour, the magic, the reason we look alive!
- Emollients (oils and waxes): These give the stick its creamy texture and allow it to glide onto the skin. This is where matte formulas differ; they often have less oil, or oil-absorbing ingredients.
- Fillers: These provide bulk and improve the texture.
- Polymers: Help with adhesion and longevity.
- Absorbents: (Think clay, silica, etc.) Crucial in matte formulas to control shine.
- Preservatives: To keep the bad bacteria away! 🦠 (Nobody wants a face infection)
Why a Repair Stick?
This isn’t just your average foundation. It’s designed for targeted application. Think:
- Concealing blemishes: Zits, dark spots, redness – gone!
- Correcting imperfections: Evening out skin tone, neutralizing discolouration.
- Touching up: Mid-day shine control, rescuing fading foundation.
The Matte Factor:
The "matte" aspect is key. It means less shine, more staying power (theoretically!). However, matte can sometimes mean drier, so we need to balance longevity with hydration.
2. The Battlefield: Assessing Your Skin Type and Environmental Enemies ⚔️
Before we even think about makeup, we need to understand the terrain we’re working with. Your skin type is the battlefield, and the environment is the enemy.
Let’s break down the skin types:
| Skin Type | Characteristics | Foundation Repair Stick Considerations |
|---|---|---|
| Oily | Shiny, prone to breakouts, large pores. | Embrace the matte! Oil-absorbing primers and powders are your BFFs. Blotting papers are your secret weapon. |
| Dry | Tight, flaky, prone to irritation. | Hydrate, hydrate, hydrate! Look for moisturizing primers and avoid heavy powders. Consider a hydrating mist to refresh throughout the day. |
| Combination | Oily T-zone (forehead, nose, chin), dry cheeks. | Targeted application is key! Use oil-absorbing products on the T-zone and hydrating products on the cheeks. |
| Normal | Balanced, not too oily or dry. | You lucky duck! Still, prep and setting are essential for longevity. |
| Sensitive | Prone to redness, itching, and reactions. | Patch test everything! Look for fragrance-free, hypoallergenic formulas. Avoid harsh ingredients like alcohol and parabens. |
Environmental Enemies:
- Humidity: The ultimate makeup melter. Invest in waterproof and sweat-resistant formulas.
- Heat: Similar to humidity, heat causes makeup to slide and fade.
- Pollution: Grime and dirt can break down makeup and clog pores.
- Wind: Can dry out skin and cause makeup to crack.
- Sun: Causes premature aging and can fade makeup. SPF is non-negotiable! ☀️
Action Plan: Identify your skin type and environmental challenges. This knowledge is your first line of defence!
3. Prep for Victory: Priming is NOT Optional! 🛡️
Imagine painting a masterpiece on a cracked, uneven canvas. It’s not going to look pretty, right? Priming is like prepping that canvas. It creates a smooth, even base for your foundation repair stick to adhere to.
Why Prime?
- Smooths texture: Minimizes pores, fine lines, and imperfections.
- Controls oil: Keeps shine at bay and prevents makeup from sliding.
- Hydrates: Provides a moisture barrier for dry skin.
- Extends wear time: Creates a grippy surface for makeup to cling to.
- Colour corrects: Neutralizes redness, dark spots, and other discolourations.
Primer Types & Recommendations:
| Primer Type | Benefits | Skin Type Recommendation |
|---|---|---|
| Silicone-based | Smooths texture, fills pores, creates a silky finish. | Oily, combination, normal. Use sparingly if you’re dry. |
| Water-based | Hydrating, lightweight, good for sensitive skin. | Dry, sensitive, normal. |
| Mattifying | Controls oil, minimizes shine. | Oily, combination. |
| Hydrating | Provides moisture, plumps skin. | Dry, mature. |
| Colour-Correcting | Neutralizes discolouration (green for redness, peach for dark circles). | All skin types, depending on the colour and issue being addressed. |
Application Technique:
- Cleanse and moisturize: Start with a clean, hydrated face.
- Apply a pea-sized amount: Less is more!
- Focus on problem areas: T-zone, pores, fine lines.
- Let it set: Give the primer a minute or two to absorb before applying your foundation repair stick.
Pro Tip: Experiment with different primers to find the perfect match for your skin type and concerns. It’s like finding the perfect sword for your particular style of fighting!
4. Strategic Application: Mastering the Art of Concealing & Correcting 🎨
Our foundation repair stick isn’t a magic wand, but it’s pretty darn close! The key is strategic application. We’re not slathering it all over our faces; we’re using it to target specific imperfections.
Techniques:
- Spot Concealing: Dab the stick directly onto blemishes or dark spots. Gently blend the edges with your finger, a brush, or a sponge.
- Colour Correcting: Use a colour-correcting stick (green for redness, peach for dark circles) before applying your foundation repair stick.
- Under-Eye Concealing: Apply the stick in an inverted triangle shape under the eyes. Blend upwards towards the temples.
- Highlighting: Choose a shade lighter than your skin tone to highlight the high points of your face (cheekbones, bridge of nose, cupid’s bow).
Tools of the Trade:
- Fingers: Great for warming up the product and blending seamlessly.
- Concealer Brush: Provides precision and control.
- Makeup Sponge (Beauty Blender): Creates a natural, airbrushed finish.
Blending is Key!
The goal is to make the product disappear into the skin, not sit on top of it. Blend, blend, blend until there are no harsh lines or edges. Think of it as a makeup massage for your face!
Pro Tip: Use a stippling motion (lightly tapping the product onto the skin) for maximum coverage and minimal product waste.
5. Setting the Stage: Powders, Sprays, and the Quest for Immovability 🔒
5. Setting the Stage: Powders, Sprays, and the Quest for Immovability 🔒
You’ve prepped, you’ve applied, you’ve blended. Now it’s time to lock everything in place! Setting is crucial for preventing creasing, fading, and shine. It’s the equivalent of putting up a fortress around your face!
Powder Power:
- Loose Powder: Lightweight, provides a natural finish. Great for setting the entire face.
- Pressed Powder: More coverage, convenient for touch-ups.
- Translucent Powder: Doesn’t add colour, perfect for setting without altering your foundation shade.
- Setting Powder: Designed specifically to lock makeup in place.
Application Techniques (Powder):
- Baking: Apply a thick layer of powder under the eyes, on the forehead, and on the chin. Let it "bake" for 5-10 minutes, then dust off the excess. (More on this later!)
- Dusting: Lightly dust powder over the entire face with a large, fluffy brush.
- Pressing: Press powder into the skin with a sponge or puff for maximum longevity.
Setting Spray Sensations:
- Matte Setting Spray: Controls oil, minimizes shine, and extends wear time.
- Hydrating Setting Spray: Provides moisture, prevents makeup from looking cakey.
- Long-Lasting Setting Spray: Designed to lock makeup in place for hours.
Application Techniques (Setting Spray):
- Hold the bottle 8-10 inches away from your face.
- Close your eyes and mouth.
- Spray in an "X" and "T" motion.
- Let it dry completely before touching your face.
Pro Tip: For extra staying power, apply powder before setting spray. This creates a "powder sandwich" that will keep your makeup in place all day. 🥪
6. Advanced Tactics: Layering, Baking, and Other Sorcery ✨
Now we’re getting into the really good stuff! These techniques are for the makeup mavens who want to take their longevity game to the next level. Consider this your advanced makeup black belt. 🥋
Layering Like a Pro:
- Primer + Foundation Repair Stick + Concealer + Powder + Setting Spray: This is the ultimate layering strategy. Each layer builds upon the previous one, creating a long-lasting, flawless finish.
- Cream Products First, Then Powder: This prevents the powder from clinging to dry patches and creating a cakey look.
Baking (The Controversial Technique):
- Apply a thick layer of loose powder under the eyes, on the forehead, and on the chin.
- Let it "bake" for 5-10 minutes. The heat from your skin will help the powder set the makeup underneath.
- Dust off the excess powder with a large, fluffy brush.
Why is baking controversial? It can be drying, and too much baking can lead to a cakey appearance. Proceed with caution! This is best for special occasions and events where you need your makeup to last all night.
The "Reverse Baking" Method:
Some people prefer to apply a hydrating mist after baking to rehydrate the skin. This can help prevent the powder from looking too dry.
Pro Tip: Don’t be afraid to experiment with different techniques to find what works best for your skin. Makeup is an art, not a science! (Okay, maybe a little science…)
7. Maintenance & Monitoring: The Art of Touch-Ups (without Going Overboard!) 🔎
Even with the best prep and setting, your makeup may still need a little TLC throughout the day. The key is to touch up strategically and avoid going overboard. We don’t want to end up looking like a powdered doughnut! 🍩
Touch-Up Essentials:
- Blotting Papers: To absorb excess oil without disturbing your makeup.
- Pressed Powder: To control shine and touch up coverage.
- Foundation Repair Stick (Mini Version!): For targeted touch-ups of blemishes or fading.
- Setting Spray (Travel Size): To refresh your makeup and lock it in place.
Touch-Up Techniques:
- Blot First, Then Powder: Always blot away excess oil before applying powder. This will prevent the powder from clumping and looking cakey.
- Use a Light Hand: Apply powder sparingly, focusing on areas that tend to get oily.
- Don’t Over-Conceal: Avoid piling on more concealer. Instead, blend what’s already there.
- Refresh with Setting Spray: A quick spritz of setting spray can revive your makeup and give it a fresh, dewy look.
Monitoring Your Makeup:
- Check your makeup in natural light throughout the day. This will give you a more accurate idea of how it’s holding up.
- Pay attention to areas that tend to fade or crease. This will help you identify your problem areas and adjust your routine accordingly.
Pro Tip: Keep a small makeup kit in your purse or desk for quick and easy touch-ups. Being prepared is half the battle!
8. Troubleshooting: Common Problems and Their Solutions 🚨
Even the most experienced makeup artists encounter problems from time to time. Here are some common issues and their solutions:
| Problem | Solution |
|---|---|
| Cakey Makeup | Exfoliate regularly, use a hydrating primer, apply powder sparingly, use a damp sponge to blend, use a hydrating setting spray. |
| Creasing Under Eyes | Hydrate the under-eye area, use a lightweight concealer, set with a translucent powder, avoid applying too much product, look up while applying powder. |
| Foundation Sliding Off | Use an oil-absorbing primer, set with a powder, use a matte setting spray, blot away excess oil throughout the day, avoid touching your face. |
| Makeup Fading | Use a long-lasting primer, set with a powder, use a setting spray, layer your products, touch up throughout the day. |
| Dry Patches | Exfoliate regularly, use a hydrating moisturizer, use a hydrating primer, avoid using powder on dry areas, use a hydrating setting spray. |
| Breakouts | Clean your makeup brushes regularly, use non-comedogenic products, avoid touching your face, consult a dermatologist. |
| Uneven Texture | Exfoliate regularly, use a smoothing primer, use a brush with soft bristles, apply foundation in thin layers. |
Pro Tip: Keep a journal of your makeup routine and track what works and what doesn’t. This will help you identify your problem areas and tailor your routine to your specific needs.
9. The Final Verdict: Congratulations, You’re a Foundation Longevity Master! 🏆
You’ve made it! You’ve conquered the course! You are now equipped with the knowledge and skills to make your Traceless Matte Foundation Repair Stick last through anything.
Remember, makeup is a journey, not a destination. Keep experimenting, keep learning, and keep having fun! Don’t be afraid to try new techniques and products. And most importantly, don’t take yourself too seriously. 😉
Final Checklist:
- ✅ Understand your skin type and environmental challenges.
- ✅ Choose the right primer and setting products.
- ✅ Master the art of strategic application.
- ✅ Layer your products for maximum longevity.
- ✅ Touch up throughout the day (without going overboard!).
- ✅ Troubleshoot common problems and adjust your routine accordingly.
Bonus Tip: Confidence is the best makeup of all! Wear your makeup with pride and rock your flawless face! 🎉
Now go forth and conquer the world, one perfectly concealed blemish at a time! Class dismissed! 🎓
For detailed product specifications and purchases, please go to :https://zenamakeup.com/products/traceless-matte-foundation-repair-stick
Leave a Reply