Root Awakening: A Hilariously Practical Guide to Hairline Dye Powder for Gray Root Touch-Ups 👵➡️👩🦰
Alright, settle in, folks! Class is in session! Today, we’re tackling a problem that plagues us all (well, most of us): the dreaded GRAY ROOT. 👻 It’s like that unwelcome guest who shows up uninvited and refuses to leave. We’re talking about those sneaky silver strands that peek out from your perfectly dyed mane, screaming, "I’M HERE! SHE’S OLDER THAN SHE LOOKS!"
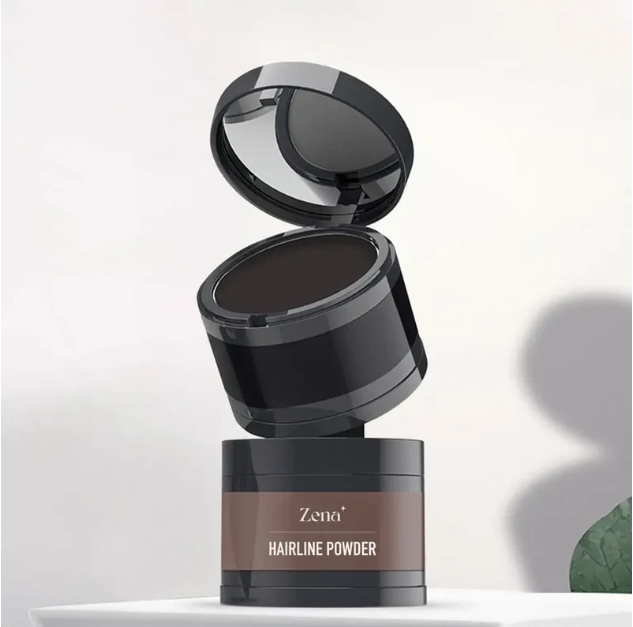
Fear not, my color-treated comrades! We’re not reaching for the full dye kit just yet. We’re deploying the secret weapon: Hairline Dye Powder. Think of it as makeup for your hair, a quick-and-dirty fix for those pesky roots that threaten to reveal our age-related secrets.
This isn’t just a tutorial; it’s a journey! We’ll delve deep into the art of root concealing, from choosing the right shade to mastering the application technique. So, grab your coffee (or wine, no judgment here!), and let’s get started!
Lecture Outline:
- The Gray Root Crisis: A National Emergency! (Why we hate gray roots so much, with a touch of humor)
- Hairline Dye Powder 101: The Magical Concealer (What it is, its benefits, and different types)
- Choosing Your Weapon: Selecting the Perfect Shade (Matching your hair color like a pro)
- Gather Your Arsenal: Essential Tools for Root Touch-Up (Brushes, mirrors, and other helpful gadgets)
- The Art of Application: Mastering the Technique (Step-by-step guide with tips and tricks)
- Advanced Maneuvers: Dealing with Stubborn Grays and Receding Hairlines (Expert advice for complex situations)
- Maintenance and Removal: Keeping Your Secret Safe (How to keep your touch-up looking fresh and remove it properly)
- Troubleshooting: Common Problems and Solutions (Addressing common issues like fallout and uneven coverage)
- Beyond the Hairline: Creative Uses for Dye Powder (Eyebrow filling, beard touch-ups, and more!)
- The Grand Finale: Embrace the Power of Hairline Dye Powder! (Concluding thoughts and encouragement)
1. The Gray Root Crisis: A National Emergency! 🚨
Let’s be honest, seeing those first few gray hairs pop up is a moment of pure existential dread. It’s like your hair is staging a rebellion against your youthful aspirations. You’ve spent time and money (💰!) meticulously dyeing your hair, and BAM! Here come the grays, mocking your efforts like tiny silver trolls.
Why do we hate them so much? It’s not just about vanity (though, let’s be real, vanity plays a part). Gray hair is often associated with aging, and in a society that glorifies youth, it can feel like you’re losing the battle against time.
But fear not! We’re not going down without a fight! We’re armed with knowledge, determination, and, most importantly, hairline dye powder.
2. Hairline Dye Powder 101: The Magical Concealer ✨
So, what exactly is this magical powder we’re placing our hopes on?
Hairline dye powder, also known as root touch-up powder, is essentially pigmented powder designed to temporarily conceal gray roots and blend them seamlessly with your dyed hair. Think of it as a concealer for your hair. It’s typically applied with a brush and clings to the hair shaft, masking the gray.
Benefits of Hairline Dye Powder:
- Instant Gratification: Results are immediate! No waiting for dye to process.
- Temporary Fix: Perfect for in-between salon visits.
- Low Commitment: Washes out with shampoo, so no long-term dye damage.
- Versatile: Can be used on hairlines, part lines, and even eyebrows.
- Cost-Effective: Much cheaper than frequent salon appointments.
- Convenient: Easy to apply at home, on the go, or before an important event.
Types of Hairline Dye Powder:
| Type | Description | Best For | Pros | Cons |
|---|---|---|---|---|
| Pressed Powder | Compact powder, applied with a small brush. | Fine to medium hair, precise application. | Easy to control, less messy. | Can look cakey if overapplied, may not cover coarse grays as well. |
| Loose Powder | Loose powder, typically applied with a larger brush. | Thicker hair, broader coverage. | Covers larger areas quickly, can be layered for more intense coverage. | Can be messy, requires more practice to avoid fallout. |
| Stick/Crayon | Solid stick form, applied directly to the roots. | Targeted application, travel-friendly. | Very precise, great for travel, good for hairline definition. | Can be difficult to blend seamlessly, may not be suitable for larger areas. |
| Spray | Aerosol spray, applied from a distance. | Quick coverage, large areas. | Fast and easy, good for covering a wide area quickly. | Can be messy, difficult to control, may leave a sticky residue, can transfer onto clothing. |
Considerations: The best type for you will depend on your hair type, application preferences, and the extent of your gray coverage needs.
3. Choosing Your Weapon: Selecting the Perfect Shade 🎨
This is where things get serious. Choosing the wrong shade is like wearing the wrong foundation – it’s a disaster waiting to happen. You want a shade that seamlessly blends with your dyed hair, not one that creates a stark contrast.
Here’s how to choose the right shade:
- Match Your Roots, Not Your Ends: Focus on matching the color of your dyed roots, not the ends of your hair, which may be faded.
- Go a Shade Lighter (Sometimes): If you’re unsure, err on the side of a slightly lighter shade. It’s easier to build up color than to tone it down.
- Check Under Different Lighting: What looks good in your bathroom might look different in natural light. Test the color in various lighting conditions before committing.
- Read Reviews and Watch Tutorials: See what other people with similar hair colors are using.
- When in Doubt, Mix: If you can’t find the perfect shade, consider buying two similar shades and mixing them together.
- Consider Undertones: Hair colors have undertones (warm, cool, neutral). Match the undertones of your dye powder to your hair color for a natural blend.
Example: If you have a dark brown hair with warm (reddish) undertones, look for a dark brown dye powder with warm undertones.
Don’t be afraid to experiment! You can always wash it out and try again. It’s better to take your time and find the perfect match than to end up with a patchy, unnatural look.
4. Gather Your Arsenal: Essential Tools for Root Touch-Up 🛠️
Before you dive in, make sure you have all the necessary tools at your disposal. This isn’t brain surgery, but a little preparation goes a long way.
Here’s your root touch-up toolkit:
- Hairline Dye Powder: Obviously!
- Application Brush: Choose a brush that’s appropriate for the type of powder you’re using. A small, angled brush is great for precise application, while a larger brush is better for broader coverage.
- Mirror: A handheld mirror is essential for seeing the back of your head.
- Magnifying Mirror (Optional): For those super-stubborn grays that require extra attention.
- Hair Clips: To section off your hair and keep it out of the way.
- Old Towel or Cape: To protect your clothing from fallout.
- Hairspray (Optional): To set the powder and prevent it from transferring.
- Cotton Swabs (Optional): To clean up any mistakes.
- Baby Wipes (Optional): For wiping your hands and cleaning up spills.
- Dry Shampoo (Optional): To absorb excess oil and create a better surface for the powder to grip.
Pro Tip: Lay everything out on a clean surface before you start. This will prevent you from scrambling for tools in the middle of the application process.
5. The Art of Application: Mastering the Technique 🖌️
Now for the main event! Here’s a step-by-step guide to applying hairline dye powder like a pro:
Step 1: Prep Your Hair
Step 1: Prep Your Hair
- Start with clean, dry hair. Oily hair can prevent the powder from adhering properly. Use dry shampoo if necessary.
- Brush your hair to remove any tangles.
Step 2: Protect Your Clothing
- Drape an old towel or cape over your shoulders to prevent staining your clothes.
Step 3: Section Your Hair
- Use hair clips to section off the areas you want to touch up. Start with the hairline and part line.
Step 4: Apply the Powder
- Pressed Powder: Dip your brush into the powder and tap off any excess. Apply the powder in short, light strokes, focusing on the roots.
- Loose Powder: Swirl your brush in the powder and tap off any excess. Apply the powder in a blotting motion, pressing it into the roots.
- Stick/Crayon: Apply the stick directly to the roots, then blend with your fingers or a brush.
- Spray: Hold the can 6-8 inches away from your hair and spray in short bursts, focusing on the roots.
Step 5: Blend, Blend, Blend!
- Use your brush to blend the powder seamlessly into your dyed hair. Pay attention to the edges to avoid a harsh line.
Step 6: Repeat as Needed
- Repeat the application process until you’ve achieved the desired coverage.
Step 7: Set the Powder (Optional)
- Lightly spritz your hair with hairspray to set the powder and prevent it from transferring.
Step 8: Clean Up
- Use a cotton swab or baby wipe to clean up any mistakes.
Step 9: Admire Your Work!
- Check your hair in the mirror and make any necessary adjustments.
Tips and Tricks:
- Less is More: Start with a small amount of powder and build up the color gradually.
- Focus on the Roots: Avoid applying the powder to the length of your hair.
- Use a Light Hand: Apply the powder with a light hand to avoid a cakey or unnatural look.
- Don’t Forget the Back: Use a handheld mirror to check the back of your head and make sure you’ve covered all the gray roots.
- Practice Makes Perfect: Don’t get discouraged if you don’t get it right the first time. Keep practicing, and you’ll become a root touch-up master in no time!
6. Advanced Maneuvers: Dealing with Stubborn Grays and Receding Hairlines 🧐
Some gray hairs are more resistant than others. And let’s be honest, sometimes Mother Nature isn’t kind and we start to see a receding hairline. Here’s how to deal with those situations:
Stubborn Grays:
- Pre-Treat with Dry Shampoo: Apply dry shampoo to the roots before applying the powder. This will create a better surface for the powder to grip.
- Use a Root Concealer Stick: These are more pigmented and provide better coverage for stubborn grays.
- Layer the Powder: Apply several thin layers of powder instead of one thick layer.
- Use a Magnifying Mirror: This will help you see the individual gray hairs and target them more effectively.
Receding Hairlines:
- Create a Faux Hairline: Use the dye powder to create the illusion of a fuller hairline. Apply the powder along the front of your hairline, blending it into your existing hair.
- Use a Small, Angled Brush: This will allow you to create precise lines and fill in any gaps in your hairline.
- Don’t Overdo It: Avoid creating a harsh or unnatural hairline. The goal is to create a subtle, natural-looking effect.
- Consider a Hair Fiber Product: These products contain tiny fibers that cling to your hair and create the illusion of thickness.
7. Maintenance and Removal: Keeping Your Secret Safe 🤫
Now that you’ve successfully concealed your gray roots, it’s important to maintain your touch-up and remove it properly.
Maintenance:
- Avoid Touching Your Hair: Constantly touching your hair can cause the powder to transfer and fade.
- Avoid Sweating: Sweat can also cause the powder to fade or run.
- Reapply as Needed: Reapply the powder as needed to maintain your coverage.
Removal:
- Shampoo Your Hair: Hairline dye powder is designed to wash out with shampoo.
- Use a Clarifying Shampoo: If you’re having trouble removing the powder, use a clarifying shampoo.
- Avoid Sleeping with the Powder On: This can cause the powder to transfer to your pillowcase.
8. Troubleshooting: Common Problems and Solutions 🤕
Even with the best techniques, things can sometimes go wrong. Here are some common problems and their solutions:
| Problem | Solution |
|---|---|
| Fallout | Tap off excess powder from your brush before applying. Use a lighter hand. Set the powder with hairspray. |
| Uneven Coverage | Apply the powder in thin, even layers. Blend thoroughly. Use a magnifying mirror to check for gaps. |
| Cakey Appearance | Use less powder. Apply the powder with a light hand. Blend thoroughly. |
| Color Transfer | Set the powder with hairspray. Avoid touching your hair. |
| Powder Won’t Stick | Use dry shampoo to create a better surface for the powder to grip. Make sure your hair is clean and dry. |
9. Beyond the Hairline: Creative Uses for Dye Powder 🎨
Hairline dye powder isn’t just for roots! Here are some other creative ways to use it:
- Eyebrow Filling: Use a small, angled brush to fill in sparse eyebrows.
- Beard Touch-Ups: Conceal gray hairs in your beard.
- Scar Concealing: Camouflage small scars on your scalp.
- Creating a Fuller Ponytail: Apply the powder to the roots around your ponytail to make it look thicker.
- Contouring Your Hairline: Use a slightly darker shade to contour your hairline and create the illusion of a smaller forehead.
10. The Grand Finale: Embrace the Power of Hairline Dye Powder! 🥳
Congratulations! You’ve completed our crash course in hairline dye powder mastery! You’re now armed with the knowledge and skills to conquer those pesky gray roots and maintain your youthful appearance.
Remember, hairline dye powder is a temporary fix, not a permanent solution. But it’s a fantastic tool for in-between salon visits or when you need a quick confidence boost.
So, go forth and embrace the power of hairline dye powder! Say goodbye to those silver trolls and hello to a more confident, youthful you! You’ve got this! Now, go forth and conquer your grays! You are a Hairline Dye Powder Warrior! 💪
For detailed product specifications and purchases, please go to :https://zenamakeup.com/products/hairline-dye-powder-for-root-touch-up
Leave a Reply