The Traceless Matte Foundation Repair Stick: Your Secret Weapon for Flawless Skin (A Lecture in Fabulousness)
Alright, darling students of the skin, settle in! Today, we’re diving deep into the wonderful world of the Traceless Matte Foundation Repair Stick. Forget everything you think you know about touch-ups; this isn’t your grandma’s powdery compact. We’re talking about precision, power, and a whole lotta pigment-packed goodness. Prepare to unlock the secrets to a flawlessly matte complexion, no matter what life throws your way.
(Professor sniffs dramatically, adjusts oversized glasses, and points a laser pointer at a slide that reads "Traceless Matte Foundation Repair Stick: A Love Story")
I. Introduction: Why You Need This Stick in Your Life (Seriously)
Let’s be honest, life isn’t always picture-perfect. We’ve got late nights, early mornings, unexpected breakouts, and that rogue gust of wind that decides to redistribute your foundation across your face. 🙄 It’s a battlefield out there! But fear not, because the Traceless Matte Foundation Repair Stick is your trusty shield, your magic wand, your… well, you get the picture.
Think of this stick as a portable photoshop for your face. It’s not just about covering up blemishes; it’s about seamlessly blending, blurring imperfections, and restoring your makeup to its original glory. It’s about confidence in a compact, a flawless finish on the go, and the power to say, "Yes, I woke up like this… after a five-minute touch-up with my secret weapon." 😉
Why is it better than just slapping on more foundation? Good question! (I asked it myself, actually.) Traditional foundation application, especially on top of existing makeup, can lead to:
- Cakey-ness: The dreaded layered look that screams "I’m wearing too much makeup!" 🍰
- Patchiness: Uneven coverage that highlights imperfections instead of hiding them.
- Creasing: Foundation settling into fine lines and wrinkles, making you look older than you actually are (and nobody wants that!). 👵
- Color Mismatch: Your skin’s natural oils can oxidize your foundation throughout the day, leading to a color shift. Adding more of the same foundation can exacerbate this issue.
The Traceless Matte Foundation Repair Stick, on the other hand, is designed to address these problems with a targeted approach. Its creamy, blendable formula melts into the skin, providing seamless coverage without the heavy, cakey feel.
II. Understanding the Traceless Matte Foundation Repair Stick: Deconstructing the Magic
So, what makes this little stick so special? Let’s break it down:
- The Formula: Typically, these sticks boast a creamy, lightweight formula that’s designed to blend seamlessly into the skin. Look for ingredients like:
- Silicones: For that smooth, blurring effect. Think of them as the Photoshop filter in stick form.
- Emollients: To keep your skin hydrated and prevent that dry, cakey look.
- Pigments: Finely milled pigments that deliver high coverage without feeling heavy.
- Oil Absorbers: Crucial for that matte finish! These ingredients help control shine and keep your makeup looking fresh all day long.
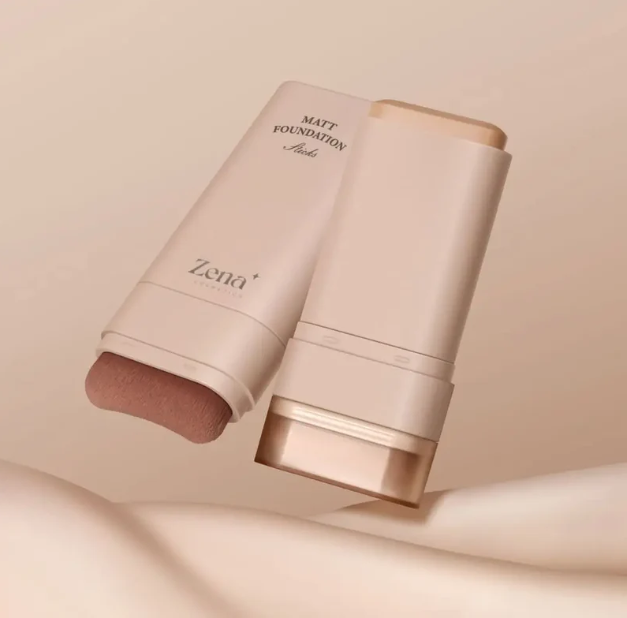
- The Packaging: Designed for portability and precision. The stick format allows for targeted application, so you can address specific areas of concern without applying product all over your face.
- The Purpose: To repair, conceal, and perfect your makeup on the go. It’s a multi-tasker that tackles everything from blemishes and redness to uneven skin tone and shine.
III. Choosing the Right Shade: The Quest for Perfect Match
This is arguably the most important step. A mismatched shade can ruin even the most flawless application. Here’s your guide to shade selection:
- Know Your Undertones: Are you warm (golden, yellow), cool (pink, blue), or neutral? Understanding your undertones is key to finding the perfect match.
- Warm Undertones: Look for shades with yellow or golden hues.
- Cool Undertones: Opt for shades with pink or blue hues.
- Neutral Undertones: You can usually wear a wider range of shades.
- Test, Test, Test! Don’t just rely on the color in the tube. Swatch the foundation on your jawline in natural light. The shade that disappears into your skin is the one for you.
- Consider Seasonal Variations: Your skin tone may change slightly depending on the time of year. You might need a lighter shade in the winter and a slightly darker shade in the summer.
- When in Doubt, Go Lighter: It’s always easier to add warmth with bronzer than it is to lighten a foundation that’s too dark.
(Professor dramatically points to a table projected on the screen)
Table 1: Shade Selection Cheat Sheet
| Skin Tone | Undertone | Shade Recommendations |
|---|---|---|
| Fair | Cool | Lightest shades with pink or peach undertones. Avoid anything too yellow, as it can make you look sallow. |
| Fair | Warm | Lightest shades with yellow or golden undertones. |
| Light | Cool | Light to medium shades with pink or peach undertones. |
| Light | Warm | Light to medium shades with yellow or golden undertones. |
| Medium | Cool | Medium shades with pink or peach undertones. Consider shades with beige undertones for a more natural look. |
| Medium | Warm | Medium shades with yellow or golden undertones. Olive undertones are common in this skin tone range. |
| Tan | Cool | Tan shades with pink or peach undertones. Consider shades with reddish undertones for added warmth. |
| Tan | Warm | Tan shades with yellow or golden undertones. Bronze shades can enhance your natural glow. |
| Deep | Cool | Deep shades with red or blue undertones. |
| Deep | Warm | Deep shades with golden or olive undertones. |
| Very Deep | Cool | Rich, deep shades with cool undertones. Look for shades that are true to your skin tone. |
| Very Deep | Warm | Rich, deep shades with warm undertones. Look for shades that enhance your natural radiance. |
IV. Mastering the Application: The Art of the Touch-Up
Now, for the fun part! Let’s learn how to wield this magical stick like a pro.
Now, for the fun part! Let’s learn how to wield this magical stick like a pro.
A. Preparing the Canvas:
- Blot Away Excess Oil: Before you even think about applying the repair stick, blot away any excess oil with blotting papers. This will prevent the product from sliding around and ensure a smooth, even application.
- Hydrate (If Needed): If your skin feels dry, spritz a hydrating mist or dab on a lightweight moisturizer. This will prevent the foundation from clinging to dry patches.
B. Application Techniques:
- Direct Application: For targeted coverage, gently swipe the stick directly onto the areas you want to conceal or correct. This is ideal for blemishes, redness, and dark spots.
- Indirect Application: For larger areas or a more diffused look, swipe the stick onto your fingertip or a makeup brush and then apply to your skin. This is great for covering uneven skin tone or blurring fine lines.
- Less is More: Start with a small amount of product and build up coverage as needed. Remember, it’s easier to add more than it is to take away.
- Blending is Key: Use your fingertip, a makeup brush, or a damp makeup sponge to blend the product seamlessly into your skin. Pay special attention to the edges to avoid harsh lines.
C. Specific Problem Areas:
- Blemishes: Apply the stick directly to the blemish and blend outwards, feathering the edges into your surrounding skin.
- Redness: Use a slightly thicker layer of product to neutralize the redness. Set with a light dusting of powder to prevent creasing.
- Dark Circles: Apply the stick in an inverted triangle shape under your eyes and blend upwards towards your temples. This will brighten your under-eye area and conceal dark circles.
- Shine: Apply the stick to oily areas like your forehead, nose, and chin. Blend well and set with a matte setting powder.
(Professor demonstrates various application techniques on a volunteer, much to the amusement of the class)
V. Pro Tips and Tricks: Level Up Your Foundation Repair Game
Alright, class, let’s move beyond the basics and delve into some advanced techniques that will take your foundation repair game to the next level.
- Use as a Concealer: The Traceless Matte Foundation Repair Stick can double as a concealer. Choose a shade that’s slightly lighter than your foundation to brighten your under-eye area or highlight the high points of your face.
- Mix and Match: Don’t be afraid to mix and match shades to create your perfect custom blend. This is especially useful if you’re between shades or if you want to adjust your foundation for different seasons.
- Set with Powder: To ensure long-lasting wear and prevent creasing, set your makeup with a light dusting of translucent powder or a colored setting powder that matches your skin tone.
- Carry Blotting Papers: Keep blotting papers in your bag for quick touch-ups throughout the day. They’re a lifesaver for controlling shine and preventing your makeup from breaking down.
- Clean Your Tools: Regularly clean your makeup brushes and sponges to prevent bacteria buildup and ensure a smooth, hygienic application.
- Practice Makes Perfect: Don’t get discouraged if you don’t get it right away. The more you practice, the better you’ll become at using the Traceless Matte Foundation Repair Stick to achieve flawless skin.
- Don’t Forget the Neck! Ensure your foundation blends seamlessly into your neck to avoid the dreaded "mask" effect.
(Professor dramatically gestures with a makeup brush, nearly knocking over a stack of textbooks)
VI. Troubleshooting: Common Issues and How to Fix Them
Even with the best techniques, you might encounter some challenges along the way. Here’s how to troubleshoot common issues:
- Cakey-ness: You’re using too much product. Start with a small amount and build up coverage as needed. Make sure you’re blending well. Also, ensure your skin is properly moisturized.
- Patchiness: Your skin is dry or uneven. Exfoliate regularly and use a hydrating moisturizer before applying makeup.
- Creasing: You’re not setting your makeup properly or you’re using too much product under your eyes. Use a light dusting of translucent powder to set your makeup and avoid applying too much product in areas prone to creasing.
- Color Mismatch: You’re using the wrong shade. Re-evaluate your shade selection and consider testing different shades in natural light.
- Product Sliding Off: Your skin is too oily. Use blotting papers to absorb excess oil before applying makeup and set with a matte setting powder.
(Professor sighs dramatically, as if having experienced all these problems firsthand)
VII. Conclusion: Embrace the Flawless Life!
Congratulations, my darlings! You’ve officially graduated from Foundation Repair 101. You are now armed with the knowledge and skills to conquer any makeup mishap and achieve a flawlessly matte complexion on the go. The Traceless Matte Foundation Repair Stick is more than just a makeup product; it’s a tool for confidence, a symbol of empowerment, and a testament to the fact that you can always put your best face forward, no matter what life throws your way.
So go forth, embrace your inner makeup artist, and conquer the world, one flawless touch-up at a time! And remember, a little confidence and a great foundation repair stick can go a long way. Now, if you’ll excuse me, I need to go touch up my own face. Class dismissed! ✨💄
(Professor blows a kiss to the class and exits stage left, leaving behind a trail of glitter and the faint scent of setting spray.)
For detailed product specifications and purchases, please go to :https://zenamakeup.com/products/traceless-matte-foundation-repair-stick
Leave a Reply