Jelly Stain & Glow Lip Tint: Layering for Increased Intensity – A ZenaMakeup Masterclass! 💋✨
Alright, beauty lovers, gather ’round! Professor Zena (that’s me, your Product Manager at ZenaMakeup!) is here to bestow upon you the secrets of our Jelly Stain & Glow Lip Tint. Prepare to have your lip game elevated from "meh" to "MEGA-WATT" with just a few simple layering techniques. 🎓💄
Forget those clumpy, cakey lipsticks that feel like you’re wearing concrete on your pout. We’re talking lightweight, buildable color that’s so comfortable, you’ll forget you’re even wearing anything. And that GLOW? Honey, it’s like sunshine kissed your lips and decided to stay. ☀️
So, grab your favorite shade (or five, we don’t judge 😉) and let’s dive into the delicious world of layering our Jelly Stain & Glow Lip Tint!
Course Syllabus:
- Introduction: Why Jelly Stain & Glow Lip Tint is Your New BFF
- The Anatomy of Awesome: Understanding the Formula
- Layering 101: The Basics You Need to Know
- Layering for Intensity: Building Your Perfect Color
- Layering for Dimension: Creating a Multi-Tonal Masterpiece
- Layering with Other Lip Products: Mixing and Matching Like a Pro
- Troubleshooting Tips: Avoiding Common Lip Tint Layering Fails
- Pro-Tips from Professor Zena: Secrets to Lip Tint Perfection
- Q&A: Your Burning Lip Tint Questions Answered
- Conclusion: Embrace the Jelly Glow Life!
1. Introduction: Why Jelly Stain & Glow Lip Tint is Your New BFF 👯♀️
Let’s be honest, finding the perfect lip product can feel like searching for a unicorn riding a rainbow. You want color that lasts, feels good, and doesn’t dry out your lips like the Sahara Desert. Enter: ZenaMakeup’s Jelly Stain & Glow Lip Tint!
Why is it so special?
- Stain Power: The staining pigments grab onto your lips, leaving behind a beautiful, long-lasting color. Think "effortlessly chic" even after your morning coffee (or three). ☕
- Glow Getter: The subtle, shimmering finish adds dimension and makes your lips look fuller and more luscious. It’s like a built-in lip plumper without the tingle (or the questionable ingredients). ✨
- Lightweight & Comfortable: Forget that heavy, suffocating feeling! This tint feels like you’re wearing nothing at all. Seriously, you might even forget you have it on…until you catch your reflection and think, "Damn, I look good!" 😎
- Buildable Color: Whether you want a subtle wash of color or a bold statement, this tint can do it all. That’s where the layering comes in, folks!
- Hydrating Formula: Infused with ingredients that love your lips, like Vitamin E and Hyaluronic Acid, this tint keeps your pout feeling soft and smooth. No more dry, cracked lips! 🙅♀️
2. The Anatomy of Awesome: Understanding the Formula 🧪
Before we dive into the layering techniques, let’s take a peek under the hood of our Jelly Stain & Glow Lip Tint. Knowing what makes it tick will help you understand how to best work with it.
| Ingredient Category | Key Ingredients | Benefits |
|---|---|---|
| Pigments | Red, Yellow, Blue Dyes | Provides the long-lasting stain effect and vibrant color. |
| Emollients | Jojoba Oil, Castor Oil | Keeps lips soft, smooth, and hydrated. Prevents the tint from drying out and cracking. |
| Humectants | Hyaluronic Acid, Glycerin | Attracts and retains moisture, keeping lips plump and hydrated. |
| Film Formers | Polymers | Creates a thin, flexible film that helps the tint adhere to the lips and provides a glossy finish. |
| Shimmering Agents | Mica, Titanium Dioxide | Adds a subtle, light-reflecting glow that makes lips look fuller and more dimensional. |
| Antioxidants | Vitamin E | Protects lips from environmental damage and helps to keep them healthy. |
| Preservatives | Phenoxyethanol | Ensures the product is safe and stable for use. |
Key Takeaways:
- It’s a Stain, Not a Lipstick: Think of it as watercolor for your lips. It’s designed to blend and build, not sit on top like a traditional lipstick.
- Hydration is Key: The moisturizing ingredients ensure comfortable wear, even with multiple layers.
- The Glow is Subtle: The shimmer is designed to enhance, not overwhelm. It’s a sophisticated glow, not a disco ball. ✨
3. Layering 101: The Basics You Need to Know 📚
Okay, class, let’s get down to the basics. Layering lip tint isn’t rocket science, but there are a few things you should keep in mind:
- Start with a Clean Canvas: Exfoliate your lips to remove any dead skin. This will ensure even application and prevent the tint from clinging to dry patches. A simple sugar scrub works wonders! 🍬
- Hydrate, Hydrate, Hydrate!: Apply a thin layer of lip balm before applying the tint. This will create a smooth base and prevent the tint from drying out your lips.
- Thin Layers are Your Friend: Don’t glob it on! Apply thin, even layers and let them dry slightly between applications. This will prevent the tint from becoming patchy or uneven.
- Blotting is Optional: If you want a more subtle stain, blot your lips with a tissue after each layer. This will remove excess product and leave behind a beautiful, natural-looking color.
- Precision is Key: Use the applicator carefully to outline your lips and then fill in the rest. You can also use a lip brush for more precise application.
- Experiment and Have Fun!: Don’t be afraid to try different techniques and combinations to find what works best for you. Makeup is all about self-expression! 🎨
4. Layering for Intensity: Building Your Perfect Color 🎨
Want a barely-there flush or a bold, statement lip? Layering is the key! Here’s how to build the intensity of your Jelly Stain & Glow Lip Tint:
| Number of Layers | Result | Perfect For |
|---|---|---|
| 1 Layer | Subtle stain, natural-looking glow | Everyday wear, no-makeup makeup look, a hint of color for Zoom calls. |
| 2 Layers | Medium intensity, more defined color | Date night, brunch with friends, adding a pop of color to your outfit. |
| 3+ Layers | Bold, vibrant color, high-impact glow | Special occasions, making a statement, channeling your inner diva. 💃 |
Example:
Let’s say you’re using our shade "Berry Bliss" (a gorgeous, deep berry color).
- 1 Layer: Gives you a beautiful, berry-stained pout that looks naturally flushed.
- 2 Layers: Deepens the berry color, making it more noticeable and defined.
- 3+ Layers: Creates a bold, berry lip that’s sure to turn heads.
5. Layering for Dimension: Creating a Multi-Tonal Masterpiece 🌈
Ready to take your layering game to the next level? Let’s talk about creating dimension by layering different shades of Jelly Stain & Glow Lip Tint.
Techniques:
- Ombre Lips: Apply a darker shade to the outer corners of your lips and a lighter shade to the center. Blend them together for a gradient effect.
- Highlighted Center: Apply a lighter, shimmery shade to the center of your bottom lip to make it appear fuller.
- Contoured Lips: Use a slightly darker shade to outline your lips and create the illusion of more definition.
- Two-Toned Effect: Apply one shade to your top lip and a different shade to your bottom lip. This is a fun and playful way to experiment with color.
Example:
- Top Lip: "Peach Perfect" (a warm, peachy nude)
- Bottom Lip: "Rose Romance" (a classic, rosy pink)
This combination creates a soft, romantic look with a subtle pop of color.
Pro-Tip: Choose shades that are complementary or within the same color family for a harmonious look.
6. Layering with Other Lip Products: Mixing and Matching Like a Pro 💄💋
Our Jelly Stain & Glow Lip Tint plays well with others! Here are some fun ways to layer it with other lip products:
Our Jelly Stain & Glow Lip Tint plays well with others! Here are some fun ways to layer it with other lip products:
| Product | Technique | Result |
|---|---|---|
| Lip Balm | Apply lip balm before applying the tint for extra hydration and a smoother application. | Creates a comfortable base for the tint and prevents it from drying out your lips. |
| Lip Liner | Line your lips with a matching lip liner before applying the tint for more definition and longer wear. | Prevents the tint from feathering and creates a more polished look. |
| Lip Gloss | Apply a clear or tinted lip gloss over the tint for extra shine. | Amplifies the glow and creates a more plumped-up look. |
| Matte Lipstick | Apply a matte lipstick first, then dab the tint onto the center of your lips for a blurred effect. | Creates a unique texture and adds a touch of glow to a matte lip. |
Example:
- Apply "Cherry Bomb" (a bold, red shade) Jelly Stain & Glow Lip Tint.
- Top with a clear lip gloss for a high-shine, red lip that’s perfect for a night out.
7. Troubleshooting Tips: Avoiding Common Lip Tint Layering Fails 🚑
Even the best makeup artists have their off days. Here are some common lip tint layering mistakes and how to avoid them:
| Problem | Solution |
|---|---|
| Patchy Application | Exfoliate your lips, apply a lip balm, and use thin, even layers. |
| Uneven Color | Use a lip brush for more precise application and blend the tint evenly. |
| Dry Lips | Apply a hydrating lip balm before and after applying the tint. Choose a lip balm with ingredients like hyaluronic acid and shea butter. |
| Bleeding/Feathering | Use a lip liner to outline your lips before applying the tint. |
| Color Doesn’t Last | Apply multiple layers of the tint and blot your lips with a tissue after each layer. |
| Too Much Shine | Blot your lips with a tissue to remove excess product. |
| Shade Doesn’t Look Right on You | Experiment with different shades and layering techniques to find what works best for your skin tone. |
8. Pro-Tips from Professor Zena: Secrets to Lip Tint Perfection 🤫
Okay, class, listen up! Here are some of my personal secrets for achieving lip tint perfection:
- Use Your Fingers: For a more natural, diffused look, apply the tint with your fingertips and gently blend it into your lips.
- Layer Over Lip Liner: For a long-lasting, defined lip, fill in your entire lips with a lip liner that matches the tint before applying the tint.
- Mix Your Own Shades: Get creative and mix different shades of Jelly Stain & Glow Lip Tint together to create your own custom color.
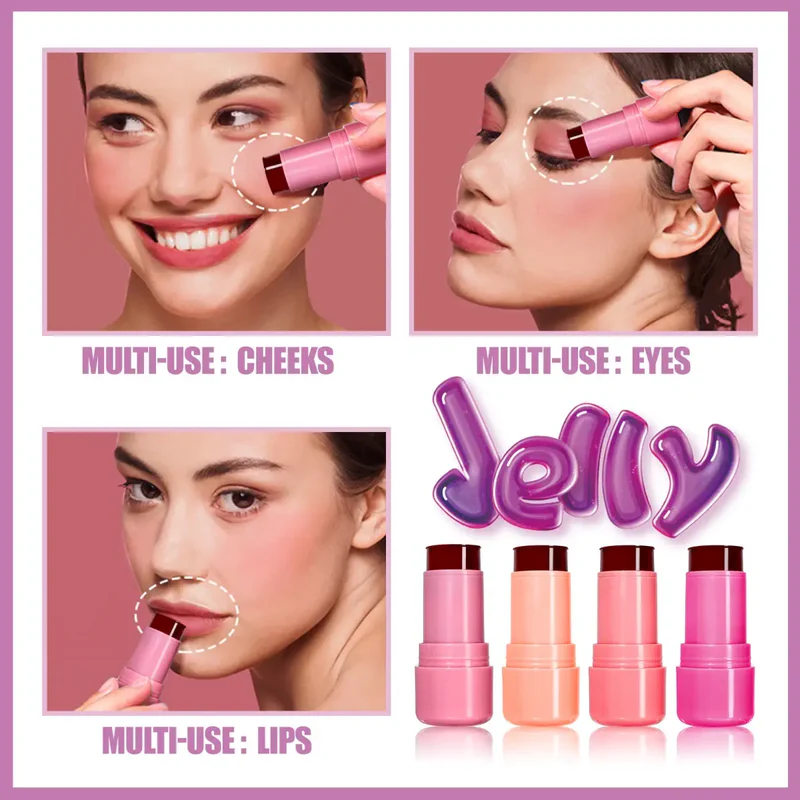
- Apply to Cheeks: For a cohesive look, dab a small amount of the tint onto your cheeks and blend it in for a natural-looking flush. 🍑
- Set with Translucent Powder: To prevent the tint from transferring, lightly dust your lips with translucent powder after applying it.
- Practice Makes Perfect: Don’t be afraid to experiment and try new things. The more you practice, the better you’ll get at layering lip tint!
9. Q&A: Your Burning Lip Tint Questions Answered 🔥
Q: How do I choose the right shade of Jelly Stain & Glow Lip Tint for my skin tone?
A: Generally, warmer skin tones look great with warm-toned shades like peaches, corals, and reds. Cooler skin tones look best with cool-toned shades like pinks, berries, and plums. But ultimately, the best shade is the one you feel most confident in!
Q: Can I wear Jelly Stain & Glow Lip Tint every day?
A: Absolutely! The lightweight formula and hydrating ingredients make it perfect for everyday wear.
Q: How long does the stain last?
A: The stain can last for several hours, depending on how much you eat and drink. Reapply as needed for a fresh burst of color.
Q: Is Jelly Stain & Glow Lip Tint cruelty-free?
A: YES! ZenaMakeup is committed to being cruelty-free. We never test our products on animals. 🐰
Q: Where can I buy ZenaMakeup’s Jelly Stain & Glow Lip Tint?
A: You can find it on our website (ZenaMakeup.com), at select retailers, and at ZenaMakeup counters in department stores.
10. Conclusion: Embrace the Jelly Glow Life! ✨
Congratulations, graduates! You’ve officially completed Professor Zena’s Masterclass on Layering Jelly Stain & Glow Lip Tint. Now go forth and create some stunning lip looks!
Remember, makeup is all about having fun and expressing yourself. So, don’t be afraid to experiment, get creative, and embrace the Jelly Glow Life! 💋✨
And if you happen to stumble upon the perfect lip tint layering combination, be sure to share it with me! I’m always looking for new inspiration. 😉
Until next time, stay fabulous!
Disclaimer: Individual results may vary. Always patch test new products before applying them to your entire face.
For detailed product specifications and purchases, please go to :https://zenamakeup.com/products/everglow-sculpting-cooling-jelly-tint-sheer-lip-face-stain
Leave a Reply