Alright, beauty aficionados! Gather ’round, because Professor Zena (that’s me, your product manager and eyebrow guru!) is about to drop some serious knowledge bombs on achieving eyebrow perfection with our revolutionary ZenaMakeup AquaBrow Stencil Kit.
Forget everything you think you know about brow powders and stencils. We’re not talking about those flimsy, hard-to-manage templates that leave you looking like you just got a Sharpie-induced eyebrow makeover. No, no, no! We’re talking about a game-changing system designed to give you consistently flawless, waterproof brows that last all day. 💧
Introducing: ZenaMakeup AquaBrow Stencil Kit – Your Ticket to Brow Nirvana!
Our AquaBrow Stencil Kit isn’t just a product; it’s an experience. It’s the culmination of years of research, development, and countless hours of obsessing over the perfect brow arch. We wanted to create something that’s:
- Foolproof: Even if you’ve never touched a brow product in your life, you can achieve stunning results.
- Waterproof: Seriously, you can swim, sweat, and cry your heart out, and your brows will still be on point. 😭 (Okay, maybe not the cry your heart out part, but you get the idea!)
- Customizable: With a variety of stencil shapes and powder shades, you can create a look that’s uniquely you.
- Long-Lasting: We’re talking all-day wear, baby! No more midday brow touch-ups.
- Fun! Because let’s face it, makeup should be enjoyable, not a chore. 🎉
What’s Inside the Magic Box?
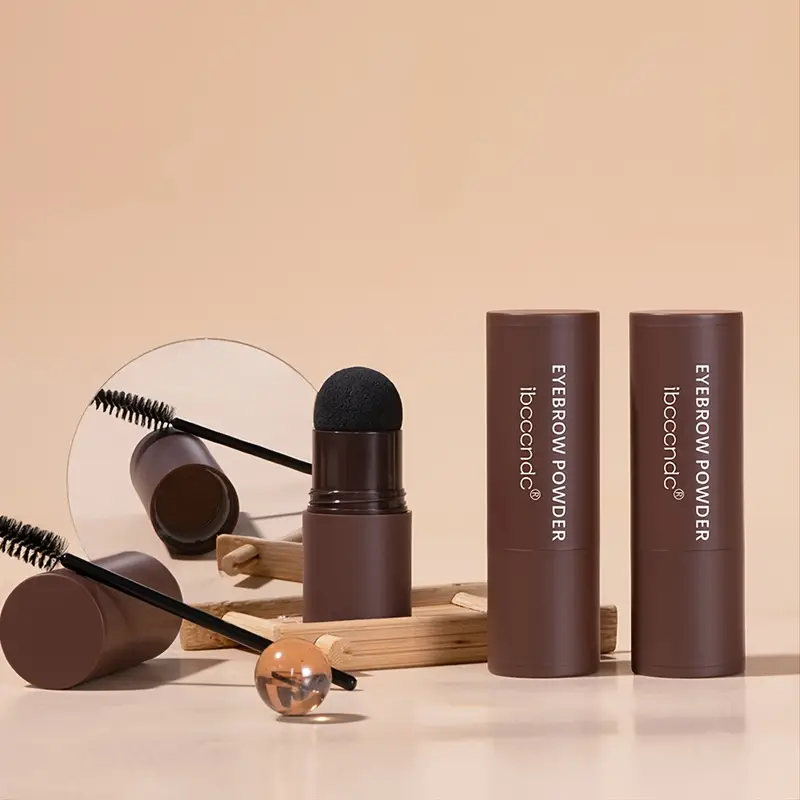
- AquaBrow Waterproof Brow Powder: This isn’t your grandma’s dusty old powder. This is a highly pigmented, finely milled formula that adheres to the skin like a dream. It’s available in a range of shades to match every hair color, from the fairest blonde to the deepest brunette.
- Reusable Stencils: These aren’t your average stencils. They’re made from a flexible, durable material that contours to your brow bone for a precise application. We offer a variety of shapes, from natural arches to bold, dramatic curves.
- Dual-Ended Applicator Brush: One end features a dense, angled brush for precise powder application, and the other end has a spoolie brush for blending and grooming.
- Stencil Holder: A handy tool to help keep the stencil in place while you apply the powder.
- Instruction Manual: A comprehensive guide with step-by-step instructions and tips for achieving the perfect brow look.
Lecture Time: Mastering Waterproof Brow Powder Application with a Stencil
Alright class, let’s dive into the nitty-gritty. We’re going to break down the process into easy-to-follow steps, complete with helpful tips and tricks. Get ready to take notes (or just bookmark this page, you know, whatever works).
Step 1: Brow Prep – Laying the Foundation
Before you even think about touching that brow powder, you need to prep your brows. Think of it like prepping a canvas before painting.
- Cleanse: Start with a clean, dry face. Remove any makeup or oils from your brow area.
- Groom: Use the spoolie brush (the one that looks like a tiny mascara wand) to brush your brows upwards and outwards, following their natural shape. This will help you see their natural shape and identify any sparse areas.
- Trim (Optional): If you have any unruly hairs that are sticking out, trim them carefully with small scissors. Be conservative! You can always trim more later, but you can’t un-trim. ✂️
- Moisturize (Lightly): If you have dry skin, apply a very light moisturizer to the brow area. This will help the powder adhere better. However, avoid using anything too oily, as this can prevent the powder from sticking.
Step 2: Stencil Selection – Finding Your Brow Soulmate
This is where the magic happens. Choosing the right stencil shape is crucial for achieving a natural-looking result.
- Consider Your Natural Brow Shape: Look at your existing brows. Are they naturally arched, straight, or slightly curved? Choose a stencil that complements your natural shape.
- Think About Your Face Shape: Different brow shapes can flatter different face shapes.
- Round Face: A higher arch can help create the illusion of a longer, more defined face.
- Square Face: Softer, more rounded brows can help soften the angles of your face.
- Oval Face: You’re lucky! Most brow shapes will look good on you.
- Heart-Shaped Face: A slightly fuller brow can help balance out a wider forehead.
- Experiment! Don’t be afraid to try out different stencils to see what looks best on you. We recommend starting with a stencil that’s close to your natural brow shape and then experimenting from there.
Here’s a handy table to help you choose the right stencil shape:
| Face Shape | Recommended Brow Shape | Stencil Suggestion (ZenaMakeup) |
|---|---|---|
| Round | High Arch, Angled | "Dramatic Arch" or "Angled Defined" |
| Square | Softly Rounded, Curved | "Soft Curve" or "Natural Arch" |
| Oval | Versatile, can wear most shapes | Experiment! |
| Heart | Fuller, Slightly Angled | "Natural Arch" or "Subtle Angle" |
Step 3: Stencil Placement – The Art of Precision
Now that you’ve chosen your stencil, it’s time to place it correctly. This is where the stencil holder comes in handy!
- Align the Stencil: Hold the stencil up to your brow and align it with your natural brow line. Make sure the start of the stencil aligns with the inner corner of your eye, and the arch of the stencil aligns with the highest point of your natural arch.
- Use the Stencil Holder (Recommended): Place the stencil in the stencil holder. This will free up your hands and help you maintain a steady grip.
- Hold Firmly: Press the stencil firmly against your skin to prevent the powder from bleeding underneath.
- Mirror, Mirror on the Wall: Use a well-lit mirror to ensure accurate placement.
Step 4: Powder Application – Painting Within the Lines (But Stylishly!)
This is where the AquaBrow Waterproof Brow Powder comes into play.
- Choose Your Shade: Select a shade that matches your hair color or is slightly darker. If you’re unsure, it’s always better to go lighter than darker.
- Load the Brush: Dip the angled brush into the powder and tap off any excess. You want to avoid applying too much powder at once, as this can create a harsh, unnatural look.
- Apply in Short, Feather-Light Strokes: Start at the inner corner of your brow and work your way outwards, following the shape of the stencil. Use short, feather-light strokes to build up the color gradually.
- Focus on Sparse Areas: Pay extra attention to any sparse areas in your brows. Fill them in with the powder to create a fuller, more even look.
- Don’t Overdo It: Remember, less is more. You can always add more powder later, but it’s harder to remove it.
Step 5: Blend, Blend, Blend! – The Secret to Natural-Looking Brows
Blending is key to achieving a natural, seamless look.
- Remove the Stencil: Carefully remove the stencil, holding it steady to avoid smudging the powder.
- Use the Spoolie Brush: Use the spoolie brush to blend the powder into your brows. Brush upwards and outwards, following the natural direction of your hair growth.
- Soften the Edges: Pay special attention to the edges of your brows, especially the inner corner. You want to soften the edges to create a more natural look.
- Repeat on the Other Brow: Repeat steps 3-5 on the other brow.
Step 6: Fine-Tuning – The Finishing Touches
Now that you’ve applied the powder and blended it in, it’s time to fine-tune your brows.
- Check for Symmetry: Stand back from the mirror and check for symmetry. Are your brows the same shape and size? If not, make any necessary adjustments.
- Clean Up Any Stray Powder: Use a cotton swab dipped in makeup remover to clean up any stray powder around your brows.
- Highlight (Optional): Apply a small amount of highlighter underneath your brow bone to accentuate the arch and create a more lifted look.
- Brow Gel (Optional): If you want extra hold, you can apply a clear brow gel to set your brows in place.
Pro Tips & Tricks – Elevating Your Brow Game
- Start Light, Build Up: It’s always easier to add more powder than to remove it.
- Use a Light Hand: Avoid pressing too hard with the brush, as this can create a harsh, unnatural look.
- Blend, Blend, Blend! We can’t stress this enough. Blending is key to achieving a natural-looking result.
- Experiment with Different Shades: Don’t be afraid to try out different shades of brow powder to find the perfect match for your hair color.
- Practice Makes Perfect: The more you practice, the better you’ll get at applying brow powder with a stencil.
- Keep Your Stencils Clean: Clean your stencils regularly with soap and water to prevent the buildup of powder and bacteria.
- Customize Your Stencils: If you can’t find a stencil that perfectly matches your brow shape, you can customize it by trimming it with small scissors.
- Don’t Be Afraid to Ask for Help: If you’re struggling to apply brow powder with a stencil, don’t be afraid to ask a friend or makeup artist for help.
- Remember, Brows Are Sisters, Not Twins: Don’t strive for perfect symmetry. A little bit of variation is natural and can actually make your brows look more realistic.
- Embrace the Imperfection: At the end of the day, makeup is all about having fun and expressing yourself. Don’t be too hard on yourself if your brows aren’t perfect. Just keep practicing and experimenting until you find a look that you love.
Troubleshooting – Addressing Common Brow Blunders
Let’s face it, even the most experienced brow artists have their off days. Here are some common brow blunders and how to fix them:
| Problem | Solution |
|---|---|
| Brows are too dark | Use a clean spoolie brush to blend the powder. You can also use a cotton swab dipped in makeup remover to lighten the color. |
| Brows are too light | Apply more powder in short, feather-light strokes. |
| Brows are uneven | Adjust the stencil placement on the uneven brow. You can also use a cotton swab dipped in makeup remover to reshape the brow. |
| Powder is smudging underneath the stencil | Make sure the stencil is pressed firmly against your skin. You can also use a small amount of concealer to clean up any smudging. |
| Brows look too harsh | Blend, blend, blend! Use the spoolie brush to soften the edges of your brows. |
| Brows look unnatural | Choose a shade of brow powder that’s closer to your natural hair color. Also, make sure you’re not applying too much powder. |
Why ZenaMakeup AquaBrow Stencil Kit is Superior
We’re not just saying it; we can prove it! Here’s why our kit reigns supreme:
- The Waterproof Formula: Seriously, this stuff stays put. We’ve tested it under the most extreme conditions (okay, maybe not extreme, but we did splash some water on our faces!).
- The Variety of Stencils: We offer a range of shapes to suit every face shape and brow preference.
- The High-Quality Brush: Our dual-ended brush is designed for precise application and seamless blending.
- The Easy-to-Use Stencil Holder: This little gadget makes all the difference in achieving a perfectly symmetrical brow look.
- The Comprehensive Instruction Manual: We’ve included a detailed guide with step-by-step instructions and helpful tips to ensure that you achieve brow perfection.
- The ZenaMakeup Promise: We stand behind our products 100%. If you’re not completely satisfied, we’ll give you your money back.
In Conclusion: Go Forth and Conquer Your Brows!
Congratulations, class! You’ve now completed Professor Zena’s crash course in mastering waterproof brow powder application with a stencil. Armed with this knowledge and the ZenaMakeup AquaBrow Stencil Kit, you’re ready to conquer your brows and achieve the look you’ve always dreamed of.
Remember, practice makes perfect, so don’t be discouraged if you don’t get it right away. Just keep experimenting and having fun!
Now go forth and create some brow magic! ✨ And don’t forget to tag us in your brow selfies! #ZenaMakeup #AquaBrow #BrowGoals
Final Exam (Just Kidding!):
Okay, okay, I lied. There’s no final exam. But I do want you to promise me one thing: that you’ll never, ever settle for less than perfect brows. You deserve to look and feel your best, and the ZenaMakeup AquaBrow Stencil Kit is here to help you achieve that.
So go out there and rock those brows! And remember, confidence is the best makeup of all. 😉
Professor Zena, signing off!
For detailed product specifications and purchases, please go to :https://zenamakeup.com/products/brow-stamp-kit-waterproof-3-in-1-stencil-powder
Leave a Reply