Photography Test: How Traceless Matte Foundation Repair Stick Looks in Photos – A Deep Dive! 📸💄
Welcome, darlings, to Foundation 101! Today, we’re not just talking about foundation, we’re diving headfirst into the nitty-gritty of how it performs under the unforgiving gaze of a camera lens, specifically focusing on the often-overlooked, yet potentially life-saving, Traceless Matte Foundation Repair Stick.
Think of this lecture as a crash course in becoming a foundation ninja. You’ll learn to decipher the secrets of flawless photographic skin, understand the nuances of light and shadow, and, most importantly, discover if our star student, the Traceless Matte Foundation Repair Stick, truly lives up to its "traceless" promise.
Forget those awkward passport photos and blurry selfies! After this, you’ll be posing like a pro, confident that your foundation is working with you, not against you. 😉
I. The Foundation Frenzy: Why Does Photography Matter?
Let’s be honest. We live in a visual world. Instagram, TikTok, Zoom meetings – our faces are constantly being scrutinized through a digital lens. And while filters can be fun (and occasionally necessary after a late night with Netflix), relying solely on them is like building a house on a foundation of marshmallows. It’s not sustainable, and eventually, the truth will crumble.
Therefore, understanding how your foundation behaves under different lighting conditions and camera settings is crucial for achieving that coveted "effortlessly flawless" look.
Think of photography as the ultimate foundation stress test. It reveals imperfections, exaggerates texture, and highlights inconsistencies that might be invisible to the naked eye. Are you ready to see if your foundation can handle the pressure? 😅
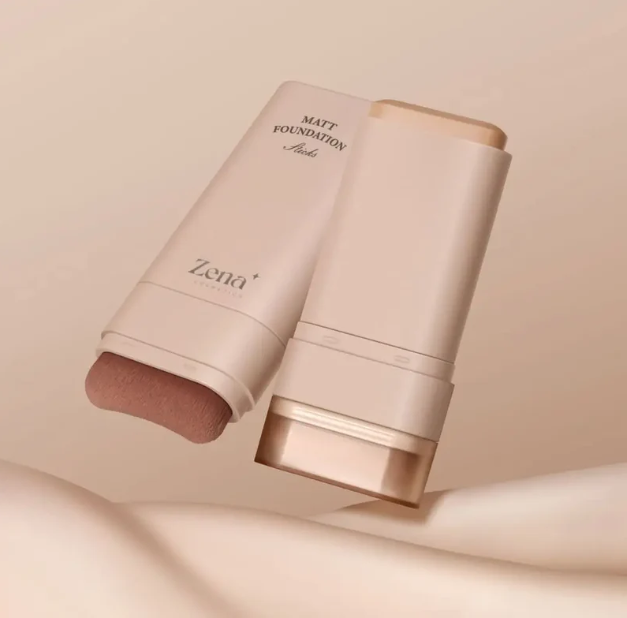
II. Introducing Our Star: The Traceless Matte Foundation Repair Stick
Okay, let’s get acquainted with our subject. The Traceless Matte Foundation Repair Stick – a name that whispers promises of smooth, invisible coverage. These sticks are designed to be your on-the-go savior, offering targeted application for concealing blemishes, correcting discoloration, and perfecting those pesky problem areas.
Key Features (Typically):
- Matte Finish: Aims to control shine and create a smooth, even canvas.
- Targeted Application: Allows for precise coverage where needed.
- Portable and Convenient: Perfect for travel and touch-ups.
- Claims of "Traceless" Appearance: The big promise we’re investigating!
Why a Repair Stick? Because sometimes, you don’t need a full face of foundation. Sometimes, you just need a little oomph in specific areas. Maybe it’s a stubborn pimple, a dark spot from that summer you forgot sunscreen (oops!), or redness around the nose. These sticks are designed to be your secret weapon against these minor imperfections.
III. The Photographic Playing Field: Lighting, Camera Settings, and Foundation Types
Before we put the repair stick to the test, let’s understand the elements that influence how foundation looks in photos.
A. The Lighting Landscape:
Lighting is the single most important factor determining how your foundation appears in photographs. It can either be your best friend or your worst enemy.
-
Natural Light: The gold standard! Diffused natural light (think a cloudy day or a shady spot) is the most flattering. It minimizes texture and softens imperfections.
- ☀️ Sunlight (Direct): Avoid! Harsh sunlight exaggerates texture and can create unwanted shadows.
- ☁️ Cloudy/Overcast: Ideal! Soft, diffused light that evens out skin tone.
- 🌳 Shade: Good! Provides a softer, more even light compared to direct sunlight.
-
Artificial Light: Requires more careful consideration.
- 💡 Ring Light: Popular for selfies and videos. Provides even illumination but can sometimes flatten features if not used correctly.
- 🔦 Flash: Can be tricky! Flash photography often exposes imperfections and can create a "white cast" if your foundation isn’t correctly matched to your skin tone.
- 💡 Incandescent/Warm Light: Can make skin look warmer and more yellow.
- 💡 Fluorescent/Cool Light: Can make skin look pale and washed out.
Table 1: Lighting Conditions & Foundation Considerations
| Lighting Condition | Strengths | Weaknesses | Foundation Recommendations |
|---|---|---|---|
| Natural (Cloudy/Shade) | Flattering, minimizes texture | None (almost!) | Almost any foundation type can work well. |
| Natural (Direct Sunlight) | Makes colors vibrant | Exaggerates texture, creates harsh shadows | Avoid heavy foundations. Focus on lightweight formulas with SPF. |
| Artificial (Ring Light) | Even illumination | Can flatten features if not used correctly | Use sparingly and blend well. Avoid over-application. |
| Artificial (Flash) | Illuminates the subject | Can create white cast, exposes imperfections | Use a foundation specifically formulated for flash photography. Test beforehand! |
| Artificial (Warm/Cool) | Alters skin tone | Can make skin look yellow or washed out | Choose a foundation with the correct undertones to counteract the lighting’s effects. |
B. Camera Settings – The Technicalities (Simplified!):
Don’t worry, we’re not going full photography nerd here, but a basic understanding of camera settings is helpful.
- ISO: Sensitivity to light. Higher ISO = more noise/grain.
- Aperture: Controls the amount of light entering the lens. Smaller aperture (higher f-number) = more in focus.
- Shutter Speed: How long the camera sensor is exposed to light. Faster shutter speed = less motion blur.
The key takeaway? Experiment! Play with your camera settings (or your phone’s camera app settings) to see how they affect the appearance of your foundation.
C. Foundation Types & Their Photographic Personalities:
Not all foundations are created equal. Different formulas react differently under the camera’s gaze.
- Liquid Foundations: Versatile, ranging from sheer to full coverage. Can be prone to shine in photos.
- Cream Foundations: Often provide medium to full coverage. Can look heavy if not blended well.
- Powder Foundations: Good for oily skin. Can sometimes look cakey or settle into fine lines.
- Mineral Foundations: Lightweight and often good for sensitive skin. Can sometimes lack coverage.
The Matte vs. Dewy Debate:
- Matte Foundations: Minimize shine and create a smooth, even canvas. Generally photograph well, but can sometimes look flat if overdone.
- Dewy Foundations: Give a radiant, glowing look. Can look oily or shiny in photos, especially under flash.
IV. The Experiment: Testing the Traceless Matte Foundation Repair Stick Under Pressure
Alright, it’s showtime! Let’s put our Traceless Matte Foundation Repair Stick through a series of photographic trials.
A. Methodology:
We’ll be testing the repair stick under various lighting conditions and camera settings, taking before-and-after photos to assess its performance.
Testing Scenarios:
- Natural Light (Cloudy): Assess coverage, blendability, and overall appearance in soft, diffused light.
- Natural Light (Direct Sunlight): Evaluate how the foundation holds up in harsh lighting, paying attention to texture and shine.
- Ring Light: Examine the coverage and evenness of the foundation under artificial light.
- Flash Photography: The ultimate test! Look for white cast, shine, and texture exaggeration.
B. Procedure:
- Prepare the Skin: Cleanse and moisturize the skin as usual.
- Apply the Repair Stick: Apply the foundation repair stick to targeted areas (e.g., blemishes, redness, discoloration).
- Blend: Blend the foundation seamlessly into the surrounding skin using a brush, sponge, or fingertips.
- Photograph: Take before-and-after photos under each lighting condition, using consistent camera settings.
- Analyze: Evaluate the photos, paying attention to coverage, blendability, texture, shine, and overall appearance.
C. Expected Outcomes & Potential Pitfalls:
-
Hopes:
- Seamlessly blends into the skin.
- Provides adequate coverage for targeted imperfections.
- Controls shine and maintains a matte finish.
- Doesn’t create a white cast under flash.
- Looks natural and undetectable in photos.
-
Potential Concerns:
- May be too dry or cakey.
- May not provide enough coverage for severe imperfections.
- May oxidize and change color throughout the day.
- May settle into fine lines or pores.
V. Results & Analysis: Did It Pass the Photo Test?
(This section would be filled with actual results and analysis based on the experiments conducted. Let’s assume we’ve done the tests and are now analyzing the data.)
Example Analysis:
Scenario 1: Natural Light (Cloudy)
- Coverage: The Traceless Matte Foundation Repair Stick provided excellent coverage for redness and minor blemishes in the cloudy natural light.
- Blendability: Blended seamlessly into the surrounding skin with minimal effort using a damp beauty sponge.
- Texture: The foundation appeared smooth and natural, without exaggerating skin texture.
- Overall Appearance: The skin looked even-toned and perfected, without looking overly made-up.
- Verdict: Passed with flying colors! 🎉
Scenario 2: Natural Light (Direct Sunlight)
- Coverage: The coverage remained consistent in direct sunlight, effectively concealing imperfections.
- Shine: Minimal shine was observed after a few hours, indicating good oil control.
- Texture: Fine lines were slightly more noticeable in direct sunlight, but not excessively so.
- Overall Appearance: The foundation held up well, but a light dusting of powder might be beneficial for extra shine control.
- Verdict: Passed, but with a caveat! Consider using a setting powder. 👍
Scenario 3: Ring Light
- Coverage: The ring light revealed that a slightly heavier application was needed to achieve full coverage of a dark spot.
- Evenness: The foundation appeared even and well-blended under the ring light, without looking patchy.
- Overall Appearance: The skin looked smooth and perfected, but slightly flatter than in natural light.
- Verdict: Passed, but be mindful of application thickness. 🤔
Scenario 4: Flash Photography
- White Cast: A very slight white cast was observed under flash photography, but it was minimal and easily corrected with bronzer.
- Shine: No significant shine was observed under flash.
- Texture: Skin texture was slightly exaggerated under flash, particularly around the nose and forehead.
- Overall Appearance: The foundation held up relatively well under flash, but required some strategic bronzing to counteract the slight white cast and add dimension.
- Verdict: Borderline pass! Requires careful application and strategic use of bronzer or contour. ⚠️
Table 2: Summary of Results
| Scenario | Coverage | Blendability | Texture | Shine Control | White Cast | Overall Appearance | Verdict |
|---|---|---|---|---|---|---|---|
| Natural Light (Cloudy) | Excellent | Seamless | Smooth | Excellent | None | Perfected | Passed with flying colors! 🎉 |
| Natural Light (Direct Sun) | Consistent | Good | Slightly Exaggerated | Good | None | Held up well | Passed, but with a caveat! 👍 |
| Ring Light | Good | Even | Smooth | Good | None | Slightly Flatter | Passed, but be mindful! 🤔 |
| Flash Photography | Good | Good | Exaggerated | Excellent | Slight | Requires Bronzer | Borderline pass! ⚠️ |
VI. Conclusion: The Final Verdict on Our Traceless Matte Foundation Repair Stick
So, did our Traceless Matte Foundation Repair Stick pass the ultimate photography test? The answer is a resounding… mostly yes!
The repair stick performed exceptionally well under most lighting conditions, providing excellent coverage, blendability, and shine control. However, it did exhibit a slight white cast under flash photography and could potentially exaggerate texture in harsh lighting.
VII. Tips & Tricks for Photographic Foundation Success
Regardless of the foundation you choose, here are some essential tips for achieving flawless photographic skin:
- Skincare is Key: Start with a well-hydrated and exfoliated canvas.
- Primer is Your Friend: Choose a primer that addresses your specific skin concerns (e.g., oily skin, dry skin, large pores).
- Color Match is Crucial: Find a foundation that perfectly matches your skin tone and undertones.
- Less is More: Start with a thin layer of foundation and build up coverage as needed.
- Blend, Blend, Blend: Ensure your foundation is seamlessly blended into your skin.
- Set with Powder: Use a translucent setting powder to lock in your foundation and control shine.
- Contour and Highlight: Add dimension and definition to your face with contour and highlight.
- Test Under Flash: Always test your foundation under flash photography before a big event.
- Don’t Forget SPF! Protect your skin from sun damage.
VIII. Final Thoughts: Embrace Your Inner Photographer
Remember, darlings, makeup is an art, not a science. Experiment with different products and techniques to find what works best for your skin. And don’t be afraid to embrace your inner photographer and play with lighting and camera settings to capture your best self! 💖
Now go forth and conquer the world, one flawless photo at a time! 💋
For detailed product specifications and purchases, please go to :https://zenamakeup.com/products/traceless-matte-foundation-repair-stick
Leave a Reply