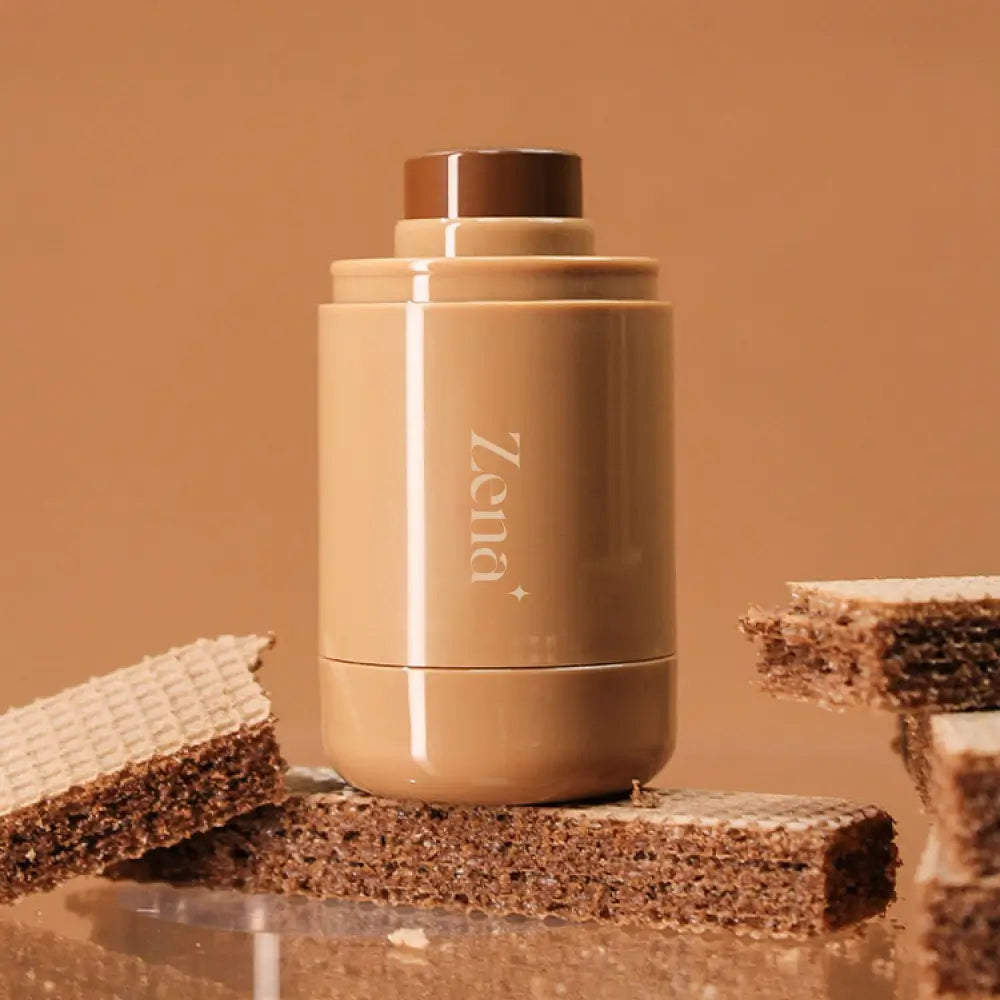
The Jelly Essence Blush Stick Masterclass: From Zero to Rosy-Cheeked Hero 🦸♀️
Alright, future blush aficionados! Welcome, welcome, WELCOME to Blush 101: Jelly Essence Blush Stick Edition! Forget those dusty powder blushes that resemble your grandma’s ancient compact. We’re diving headfirst into the bouncy, juicy, and unbelievably user-friendly world of jelly blush sticks.
Think of me as your fairy blush mother (but with slightly less glitter and more practical advice). I’m here to guide you through every step, from selecting the perfect shade to blending like a pro, ensuring you achieve that coveted "just-came-from-a-romantic-picnic" glow. We’ll laugh, we’ll learn, and by the end, you’ll be wielding that jelly stick like a blush Picasso.
So, grab your beverage of choice (mine’s a strawberry smoothie, naturally), settle in, and let’s get started!
Lecture Outline:
- Why Jelly Blush Sticks? The Blush Revolution is Here! (A humorous look at the benefits)
- Decoding the Jelly: What Is This Magical Formula? (Ingredients and advantages)
- Shade Selection: Finding Your Perfect Rosy Match 💖 (Skin tone considerations and undertones)
- Prep & Prime: Laying the Foundation for Blush Success (Skincare and base makeup)
- Application Techniques: Mastering the Dot, Swipe, and Tap (Different methods and their pros/cons)
- Blending Like a Boss: The Art of Seamless Color (Tools, techniques, and avoiding the clown look 🤡)
- Building Intensity: From Subtle Flush to Bold Statement (Layering and creating different looks)
- Troubleshooting: Fixing Common Blush Blunders (Uneven application, over-blending, and more!)
- Setting & Longevity: Making Your Blush Last All Day (and Night!) (Powders, sprays, and touch-up tips)
- Beyond the Cheeks: Creative Uses for Your Jelly Stick (Eyes, lips, and a hint of sun-kissed glow)
- Product Recommendations: My Top Jelly Blush Stick Picks (Various brands and price points)
- Practice Makes Perfect: Your Homework Assignment! (Encouragement and final thoughts)
1. Why Jelly Blush Sticks? The Blush Revolution is Here!
Let’s be honest, powder blushes can be tricky. They can be dusty, patchy, and sometimes end up looking like you face-planted into a bag of Cheetos (not the vibe we’re going for). Enter the jelly blush stick, the revolutionary product that’s changing the blush game!
Here’s why they’re so amazing:
- Effortless Application: These are practically foolproof. You literally swipe and blend. No complicated brush techniques required. Perfect for makeup newbies and busy bees 🐝.
- Natural, Dewy Finish: Jelly blushes impart a beautiful, natural flush that looks like it’s coming from within. They give you that "lit-from-within" glow without looking greasy. Think "romantic picnic" not "just ran a marathon."
- Buildable Coverage: Want a subtle hint of color? Easy. Want a bold, statement blush? No problem! Jelly blushes are easily buildable, allowing you to customize your look.
- Hydrating Formula: Many jelly blushes contain hydrating ingredients, leaving your skin feeling soft and supple. It’s like skincare and makeup had a baby!
- Travel-Friendly: Compact and convenient, jelly blush sticks are perfect for throwing in your purse for on-the-go touch-ups. Say goodbye to shattered powder blush in your travel bag! ✈️
2. Decoding the Jelly: What Is This Magical Formula?
So, what makes these blush sticks so…jelly-like? It’s all about the formula! While the specific ingredients vary from brand to brand, most jelly blush sticks contain a blend of:
- Water: Provides hydration and gives the product its lightweight texture.
- Glycerin or Hyaluronic Acid: Humectants that draw moisture to the skin, keeping it plump and dewy.
- Silicones or Polymers: Contribute to the smooth, blendable texture and provide a blurring effect on pores.
- Pigments: The color payoff! These can be mineral-based or synthetic.
- Emollients: Such as oils or butters, to soften and condition the skin.
Advantages of this formula:
| Feature | Benefit |
|---|---|
| Water-Based | Lightweight, hydrating, and comfortable on the skin. |
| Blendable | Effortless to blend into the skin for a seamless, natural finish. |
| Buildable | Allows you to customize the intensity of the color. |
| Dewy Finish | Creates a healthy, radiant glow. |
| Long-Lasting | Many formulas are long-wearing, providing all-day color. |
| Skin-Friendly | Often formulated without harsh chemicals, making them suitable for sensitive skin. |
3. Shade Selection: Finding Your Perfect Rosy Match 💖
Choosing the right blush shade is crucial for achieving a natural and flattering look. It’s not a one-size-fits-all situation! Here’s a breakdown based on skin tone and undertone:
-
Skin Tone:
- Fair Skin: Opt for light pinks, peaches, or sheer berry shades. Avoid anything too dark or intense, as it can look overwhelming.
- Light Skin: Peaches, rosy pinks, and light mauves will complement your complexion.
- Medium Skin: Corals, berry shades, and warm pinks look stunning.
- Olive Skin: Terracotta, bronze, and deep rose shades will enhance your natural warmth.
- Tan Skin: Vibrant corals, oranges, and rich berry shades will add a beautiful pop of color.
- Deep Skin: Deep reds, plums, and vibrant oranges will create a gorgeous, radiant flush.
-
Undertone: (This is the subtle hue beneath the surface of your skin)
- Cool Undertones: (Skin tends to burn easily in the sun; veins appear blue) Look for blushes with blue or pink undertones, such as cool pinks, berries, and plums.
- Warm Undertones: (Skin tans easily in the sun; veins appear green) Choose blushes with yellow or orange undertones, such as peaches, corals, and warm pinks.
- Neutral Undertones: (You have a mix of both cool and warm tones) You’re lucky! You can wear almost any blush shade. Experiment and have fun!
How to Determine Your Undertone:
- Vein Test: Look at the veins on your wrist. Blue veins suggest cool undertones, green veins suggest warm undertones, and a mix suggests neutral undertones.
- Jewelry Test: Do you look better in gold or silver jewelry? Gold tends to flatter warm undertones, while silver looks better on cool undertones.
- White vs. Off-White Test: Hold a pure white piece of clothing next to your face, then try an off-white piece. If you look healthier and more radiant in the off-white, you likely have warm undertones. If you look better in the pure white, you probably have cool undertones.
4. Prep & Prime: Laying the Foundation for Blush Success
Before you even think about touching that jelly stick, it’s essential to prep your skin properly. Think of it as preparing a canvas before painting a masterpiece.
- Skincare: Start with a clean, moisturized face. Hydrated skin will help the blush blend seamlessly and prevent it from clinging to dry patches. Apply your usual moisturizer and allow it to fully absorb before moving on.
- Base Makeup: Apply your foundation or tinted moisturizer as usual. If you’re using a powder foundation, make sure it’s well-blended and set with a setting spray. If you’re using a liquid or cream foundation, you can apply the jelly blush directly on top.
- Concealer (Optional): If you have any blemishes or discoloration, conceal them before applying blush. This will ensure an even base for the color to adhere to.
- Primer (Optional but Recommended): A primer can help create a smooth canvas for your makeup, extending the wear time of your blush and preventing it from fading. Look for a hydrating or blurring primer for best results.
5. Application Techniques: Mastering the Dot, Swipe, and Tap
Now for the fun part! There are several ways to apply your jelly blush stick, each with its own advantages and disadvantages. Let’s explore them:
-
The Dot Method:
- How to: Apply 2-3 small dots of blush to the apples of your cheeks (the roundest part that pops out when you smile).
- Pros: Great for beginners, as it allows for controlled placement and prevents over-application.
- Cons: Can be time-consuming if you want a more intense blush look.
- Best For: Subtle, natural blush.
-
The Swipe Method:
- How to: Swipe the blush stick directly onto your cheeks, starting from the apples and blending outwards towards your temples.
- Pros: Quick and easy application.
- Cons: Can be easy to over-apply, especially with highly pigmented shades.
- Best For: Those who are confident with blush application and want a more noticeable flush.
-
The Tap Method:
- How to: Tap the blush stick onto the back of your hand or a makeup palette, then use your fingers or a brush to pick up the product and apply it to your cheeks.
- Pros: Allows for precise application and prevents you from directly contaminating the blush stick with your skin.
- Cons: Requires an extra step.
- Best For: Sensitive skin or those who want to maintain hygiene.
Important Tip: Start with a small amount of product and build up the color gradually. It’s always easier to add more blush than to take it away!
6. Blending Like a Boss: The Art of Seamless Color
6. Blending Like a Boss: The Art of Seamless Color
Blending is the key to achieving a natural and flawless blush look. You want the color to seamlessly melt into your skin, not sit on top like a separate layer.
Tools for Blending:
- Fingers: The warmth of your fingers can help melt the blush into the skin for a natural, dewy finish. Use gentle tapping motions to blend.
- Makeup Sponge: A damp makeup sponge (like a Beautyblender) is excellent for creating a seamless, airbrushed effect.
- Blush Brush: A fluffy, tapered blush brush is ideal for blending the edges of the blush and creating a soft, diffused look.
Blending Techniques:
- Circular Motions: Use small, circular motions to blend the blush into your skin. This will help diffuse the color and prevent harsh lines.
- Tapping Motions: For a more precise application, use gentle tapping motions to blend the blush. This is especially useful for building up the color gradually.
- Back-and-Forth Motions: Use short, back-and-forth motions to blend the edges of the blush and create a seamless transition between the blush and your foundation.
Avoiding the Clown Look 🤡:
- Blend, Blend, Blend! Seriously, don’t underestimate the power of blending. Spend a few extra seconds ensuring that the blush is seamlessly blended into your skin.
- Start Light: It’s always better to start with a small amount of product and build up the color gradually.
- Check Your Lighting: Apply your blush in good lighting to ensure that you’re not over-applying it. Natural daylight is best.
- Don’t Apply Too Close to Your Nose: Keep the blush on the apples of your cheeks and blend outwards towards your temples. Applying it too close to your nose can make you look like a clown.
- Use a Clean Brush or Sponge: If you’ve accidentally over-applied your blush, use a clean brush or sponge to gently blend it out and remove excess product.
7. Building Intensity: From Subtle Flush to Bold Statement
The beauty of jelly blush sticks is their versatility. You can create a subtle, natural flush for everyday wear or build up the color for a bold, statement look.
- Subtle Flush: Apply a small amount of blush to the apples of your cheeks and blend well. You want to see a hint of color, but it shouldn’t be too noticeable.
- Medium Intensity: Apply a second layer of blush to the apples of your cheeks, focusing on the center of the area. Blend well to create a seamless transition.
- Bold Statement: Apply a third layer of blush, extending the color slightly towards your temples. Blend well to create a dramatic, sculpted look.
Experiment with different techniques to find the intensity that you like best!
8. Troubleshooting: Fixing Common Blush Blunders
Even the most experienced makeup artists make mistakes. Don’t worry, we’ve all been there! Here are some common blush blunders and how to fix them:
- Uneven Application: If one cheek has more blush than the other, use a clean brush or sponge to blend out the excess product on the darker cheek. Then, apply a small amount of blush to the lighter cheek to even out the color.
- Over-Blended: If you’ve blended the blush too much and it’s disappeared, apply a small amount of additional blush to the apples of your cheeks and blend again.
- Too Much Blush: If you’ve applied too much blush, use a clean brush or sponge to gently blend it out and remove excess product. You can also apply a small amount of foundation or concealer over the blush to tone it down.
- Patchy Blush: If your blush looks patchy, exfoliate your skin regularly to remove dead skin cells. Also, make sure your skin is well-moisturized before applying blush.
- Blush That Fades Quickly: Use a primer to create a smooth canvas for your makeup. Set your blush with a translucent powder to help it last longer.
9. Setting & Longevity: Making Your Blush Last All Day (and Night!)
You’ve perfected your blush application, now you want to make sure it lasts all day (or night!). Here’s how:
- Setting Powder: Apply a light dusting of translucent setting powder over your blush to lock in the color and prevent it from fading. Use a fluffy brush and tap off any excess powder before applying it to your face.
- Setting Spray: A setting spray can help meld all your makeup together and extend its wear time. Choose a setting spray that’s specifically designed for your skin type (e.g., hydrating for dry skin, mattifying for oily skin).
- Blotting Papers: If you have oily skin, blotting papers can help absorb excess oil and prevent your blush from fading. Gently press a blotting paper onto your cheeks to remove shine.
- Touch-Ups: Keep your jelly blush stick in your purse for on-the-go touch-ups. Reapply a small amount of blush to the apples of your cheeks as needed.
10. Beyond the Cheeks: Creative Uses for Your Jelly Stick
Jelly blush sticks are more versatile than you might think! Here are some creative ways to use them beyond your cheeks:
- Eyeshadow: Use your finger or a brush to apply a small amount of blush to your eyelids for a monochromatic look.
- Lip Tint: Dab a small amount of blush onto your lips for a subtle, natural flush of color. Top with a clear lip gloss for added shine.
- Sun-Kissed Glow: Apply a tiny amount of blush to the bridge of your nose and forehead for a sun-kissed glow. Blend well to avoid looking too red.
- Color Correction: Use a peach or orange blush to color correct dark circles under your eyes. Apply a small amount of blush to the inner corner of your eyes and blend well.
11. Product Recommendations: My Top Jelly Blush Stick Picks
Okay, time for some recommendations! Here are a few of my favorite jelly blush sticks across various price points:
| Product | Price Range | Pros | Cons |
|---|---|---|---|
| EM Cosmetics Color Drops Serum Blush | Mid-Range | Lightweight, hydrating, buildable, beautiful range of shades. | Can be a bit pricey. |
| Rare Beauty Stay Vulnerable Melting Blush | Mid-Range | Creamy, blendable, long-lasting, dewy finish. | Some shades can be highly pigmented. |
| Flower Beauty Blush Bomb Color Drops | Affordable | Affordable, easy to blend, buildable, natural-looking. | Limited shade range. |
| MILK MAKEUP Lip + Cheek | Mid-Range | Multi-use, creamy, blendable, convenient for travel. | Can be a bit too emollient for oily skin. |
| Makeup by Mario Soft Pop Blush Stick | High-End | Luxurious formula, beautiful satin finish, long-wearing. | Expensive. |
Remember to choose a shade that complements your skin tone and undertone!
12. Practice Makes Perfect: Your Homework Assignment!
Congratulations! You’ve reached the end of the Jelly Essence Blush Stick Masterclass! You’re now armed with the knowledge and skills to achieve that perfect rosy glow.
But knowledge is only half the battle. Now it’s time to PRACTICE!
Your homework assignment:
- Choose a jelly blush stick that complements your skin tone and undertone.
- Prep and prime your skin properly.
- Experiment with different application techniques (dot, swipe, tap).
- Practice blending until you achieve a seamless, natural finish.
- Build the intensity to your liking.
- Set your blush with powder and setting spray.
- Take a selfie and show off your rosy cheeks!
Final Thoughts:
Don’t be afraid to experiment and have fun with your jelly blush stick! Makeup is all about self-expression, so find what works best for you and rock that rosy glow with confidence! Remember, even the most experienced makeup artists started somewhere. With a little practice, you’ll be a blush blending pro in no time.
Now go forth and conquer the world, one rosy cheek at a time! 💖
For detailed product specifications and purchases, please go to :https://zenamakeup.com/products/jelly-essence-blush-stick
Leave a Reply