Lecture: Glitterati 101 – Mastering the Shimmery Glitter Cream Eyeshadow Stick
(Professor Sparkle, D.G.S. – Doctor of Glittering Sciences – adjustes her oversized, glitter-encrusted glasses and beams at the class. Her lab coat, predictably, is also adorned with strategically placed rhinestones.)
Alright, aspiring makeup maestros and glitter gurus! Welcome, welcome, to Glitterati 101! Today, we’re diving headfirst into the shimmering, dazzling, and sometimes slightly terrifying world of glitter cream eyeshadow sticks. 🤩 Specifically, we’re tackling the art of applying these little tubes of joy (or despair, depending on your technique) smoothly. Forget chalky powders and fallout frenzy – we’re aiming for seamless, sophisticated sparkle that says "I woke up like this…radiant!" not "I just wrestled a unicorn."
(Professor Sparkle gestures dramatically with a glitter-covered pointer.)
So, grab your notebooks, charge your phones for optimal selfie-taking, and let’s get glittering!
I. The Glitter Cream Eyeshadow Stick: An Introduction to the Sparkle Spectrum
(A slide appears on the screen behind Professor Sparkle featuring a rainbow of glitter cream eyeshadow sticks.)
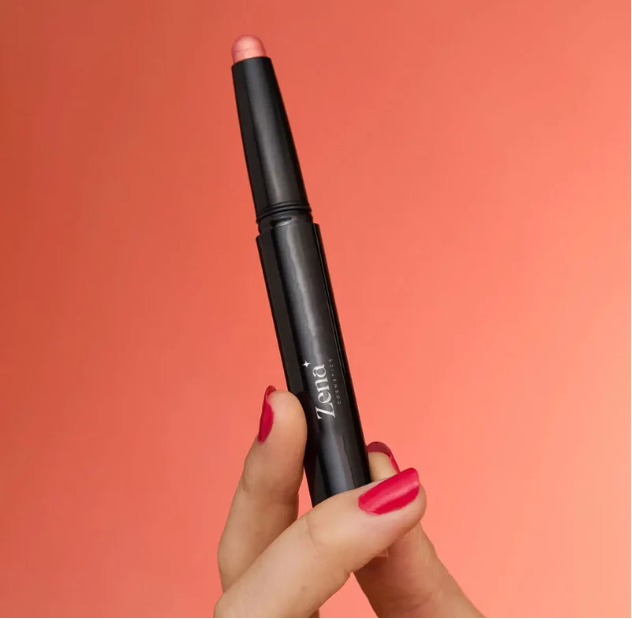
First things first, what ARE these magical sticks of shimmer? A glitter cream eyeshadow stick is essentially a cream eyeshadow infused with varying degrees of glitter. They come in a convenient, twist-up format, making them portable and relatively mess-free (keyword: relatively).
Think of them as the lazy girl’s answer to a full-on glitter eyeshadow application. They promise easy application, buildable intensity, and a touch of glamour without the commitment of loose glitter (unless you really mess up, then all bets are off).
But! (Professor Sparkle’s voice takes on a slightly ominous tone) Not all glitter cream eyeshadow sticks are created equal.
| Factor | Good Stick | Bad Stick |
|---|---|---|
| Texture | Creamy, blendable, not too dry | Dry, tugs on the eyelid, feels chunky |
| Glitter | Finely milled, evenly distributed, subtle sheen to intense sparkle | Chunky, unevenly distributed, looks like craft glitter |
| Pigmentation | Rich color payoff, buildable opacity | Sheer, requires multiple layers for visible color |
| Longevity | Crease-resistant, long-lasting color | Creases easily, fades quickly, glitter fallout |
| Packaging | Sturdy, doesn’t break easily | Flimsy, prone to breakage, cap doesn’t seal properly |
(Professor Sparkle taps the table with her pointer.)
The key is to find a stick that plays nicely with your eyelids. A good glitter cream eyeshadow stick should glide on smoothly, blend effortlessly, and stay put without turning your eyelids into a shimmering, creased mess.
II. Prep Work: Laying the Foundation for Sparkle Success
(A slide appears with a close-up of a perfectly prepped eyelid.)
Before you even think about touching that glitter stick, you need to prep your eyelids. This is crucial! Imagine trying to paint a masterpiece on a dusty canvas – it’s just not going to work.
A. Cleansing & Hydration:
- Cleanse: Start with a clean slate. Gently cleanse your eyelids to remove any oil, dirt, or leftover makeup.
- Hydrate: Dry eyelids are not happy eyelids. Apply a lightweight, hydrating eye cream. Let it absorb completely before moving on. This will create a smooth canvas for the glitter to adhere to.
(Professor Sparkle pulls out a tiny, bejeweled spritzer bottle and mists her face.)
B. Priming for Perfection:
Eye primer is your best friend in the fight against creasing and fading. It creates a grippy surface for the eyeshadow, helping it stay put all day (or night!).
- Choose wisely: Opt for an eye primer that’s specifically designed for cream shadows. Some primers can actually repel cream formulas, leading to a patchy, uneven application.
- Apply sparingly: A little goes a long way. Apply a thin layer to your entire eyelid, from lash line to brow bone.
- Let it set: Give the primer a minute or two to dry down before applying your glitter stick.
C. Conceal & Correct (Optional):
If you have any discoloration or dark circles, now’s the time to address them. A touch of concealer can even out your skin tone and create a brighter base for the glitter to pop.
(Professor Sparkle winks.)
Think of it as Photoshop for your eyelids!
III. Application Techniques: From Subtle Sheen to Maximum Sparkle
(A slide appears with various application techniques illustrated step-by-step.)
Now for the fun part! There are several ways to apply a glitter cream eyeshadow stick, depending on the look you’re going for.
A. The Single Swipe: Effortless Elegance
This is the easiest and quickest method, perfect for a subtle, everyday sparkle.
- Apply directly: Gently swipe the glitter stick across your eyelid, close to the lash line.
- Blend, blend, blend: Use your finger, a brush, or a sponge applicator to blend the edges of the eyeshadow. This will soften the line and prevent harsh edges.
- Build (optional): For more intensity, add another layer of the glitter stick and blend again.
(Professor Sparkle demonstrates on her own eyelid, creating a soft, shimmering effect.)
B. The Pop of Sparkle: Inner Corner Magic
This technique is perfect for adding a touch of brightness and dimension to your eyes.
- Apply to the inner corner: Dab the glitter stick onto the inner corner of your eye.
- Blend outwards: Use a small, precise brush to blend the glitter outwards, towards the center of your eyelid.
- Combine with other shadows: This technique works beautifully with matte or satin eyeshadows. Apply your base shadow first, then add the glitter to the inner corner for a pop of sparkle.
(Professor Sparkle adds a touch of gold glitter to the inner corner of her eye, instantly brightening her face.)
C. The Smoky Eye with a Shimmering Twist: Glitter Glam
This technique is for those who want to take their smoky eye to the next level.
This technique is for those who want to take their smoky eye to the next level.
- Create your smoky base: Apply your dark eyeshadows as usual, blending them seamlessly.
- Add the glitter: Apply the glitter stick to the center of your eyelid.
- Blend: Use a blending brush to blend the glitter into the dark eyeshadows, creating a seamless transition.
- Intensify (optional): Add a touch of black eyeshadow to the outer corner of your eye for a more dramatic effect.
(Professor Sparkle transforms a classic smoky eye into a glittering masterpiece.)
D. The Cut Crease with Glitter Accent: Precision Sparkle
This technique requires a bit more skill, but the results are stunning.
- Create your cut crease: Use a concealer or light eyeshadow to carve out a sharp cut crease.
- Apply the glitter: Apply the glitter stick to the area above the crease, creating a shimmering accent.
- Blend (carefully): Use a small, precise brush to blend the edges of the glitter, ensuring a clean and defined line.
(Professor Sparkle showcases a flawless cut crease with a dazzling glitter accent.)
IV. Blending Techniques: The Key to Seamless Sparkle
(A slide appears with diagrams illustrating various blending techniques.)
Blending is the secret weapon in your glitter arsenal. A well-blended glitter cream eyeshadow will look polished and sophisticated, while a poorly blended one will look patchy and uneven.
A. Finger Blending:
- Pros: Warm, natural, great for softening edges and creating a diffused effect.
- Cons: Can be messy, not ideal for precise application.
- Technique: Gently tap and pat the eyeshadow with your fingertip, blending the edges outwards.
B. Brush Blending:
- Pros: Precise, controlled, great for blending different colors together.
- Cons: Requires the right brushes, can be time-consuming.
- Technique: Use a soft, fluffy blending brush to blend the edges of the eyeshadow in small, circular motions.
C. Sponge Applicator Blending:
- Pros: Easy to use, great for creating a smooth, even finish.
- Cons: Can absorb a lot of product, not ideal for blending different colors together.
- Technique: Gently dab and blend the eyeshadow with the sponge applicator, ensuring a smooth, even finish.
(Professor Sparkle emphasizes the importance of using the right blending tool for the desired effect.)
V. Troubleshooting: Conquering the Glitter Gremlins
(A slide appears with common glitter eyeshadow stick problems and their solutions.)
Let’s face it, even the most skilled makeup artists encounter challenges when working with glitter. Here are some common problems and how to fix them:
| Problem | Solution |
|---|---|
| Creasing | Use a good eye primer, apply a thin layer of eyeshadow, set with a translucent powder. |
| Fading | Use a good eye primer, layer the glitter stick over a base eyeshadow, set with a setting spray. |
| Patchy application | Exfoliate your eyelids regularly, use a hydrating eye cream, apply the glitter stick in thin layers. |
| Glitter fallout | Use a glitter glue or primer, tap off excess glitter from the brush, apply eyeshadow before foundation. |
| Dry, tugging texture | Warm the stick slightly before applying, apply over a hydrating base, use a creamier formula. |
(Professor Sparkle offers a reassuring smile.)
Remember, practice makes perfect! Don’t be discouraged if you don’t get it right the first time. Keep experimenting with different techniques and products until you find what works best for you.
VI. Setting for Success: Locking in the Sparkle
(A slide appears with images of various setting sprays.)
Once you’ve achieved your desired glitter look, it’s time to set it in place. This will help prevent creasing, fading, and glitter fallout.
- Setting Spray: A setting spray will lock in your eyeshadow and keep it looking fresh all day (or night!). Choose a setting spray that’s specifically designed for long-lasting wear.
- Translucent Powder: A light dusting of translucent powder can help to set the eyeshadow and prevent creasing. Use a fluffy brush to apply the powder sparingly.
(Professor Sparkle mists her face with a generous amount of setting spray.)
VII. Removal: Sparkle’s Not Forever (Thankfully!)
(A slide appears with images of various makeup removers.)
At the end of the day, it’s time to remove your glitter eyeshadow. This is important to prevent irritation and clogged pores.
- Oil-Based Makeup Remover: An oil-based makeup remover is the most effective way to remove glitter. It will dissolve the glitter and gently cleanse your eyelids.
- Micellar Water: Micellar water can also be used to remove glitter, but it may require a bit more effort.
- Gentle Cleansing: After removing the glitter, cleanse your eyelids with a gentle cleanser to remove any remaining residue.
(Professor Sparkle emphasizes the importance of gentle makeup removal to protect the delicate skin around the eyes.)
VIII. Glitter Cream Eyeshadow Stick: The Final Verdict
(Professor Sparkle strikes a dramatic pose, holding up a glittering eyeshadow stick.)
Glitter cream eyeshadow sticks are a fantastic way to add a touch of sparkle to your makeup look. With the right techniques and products, you can achieve a smooth, seamless, and long-lasting glitter finish.
Key Takeaways:
- Prep is paramount: Cleanse, hydrate, and prime your eyelids.
- Blending is key: Master different blending techniques for seamless sparkle.
- Troubleshoot like a pro: Know how to fix common glitter eyeshadow problems.
- Set it and forget it: Use a setting spray to lock in your look.
- Remove gently: Protect your delicate eyelids with a gentle makeup remover.
(Professor Sparkle beams at the class.)
Now go forth, my glitterati, and conquer the world, one shimmering eyelid at a time! ✨
(Class dismissed! Professor Sparkle leaves the stage, leaving a trail of glitter in her wake.)
For detailed product specifications and purchases, please go to :https://zenamakeup.com/products/glitter-cream-eyeshadow-stick-shimmer-for-all-eyes-colors
Leave a Reply