The Hairline Houdini: Mastering Hairline Dye Powder for Root Touch-Up (A Lecture in Levitation)
Alright, settle in, settle in! Welcome, my follicular friends, to the most exciting lecture this side of the salon – The Hairline Houdini: Mastering Hairline Dye Powder for Root Touch-Up! 🎩✨
Forget those frantic calls to your stylist when your roots peek through like little grey ninjas. We’re about to arm you with the knowledge and skills to become your own root-touch-up superheroes! 🦸♀️🦸♂️ No more hiding under hats, no more strategically placed headbands, no more awkward zoom calls with the camera angled just so.
This isn’t your grandma’s hair dye (unless your grandma is a total hair-dyeing ninja, in which case, Grandma, you’re my inspiration!). We’re talking about hairline dye powder – the quick, easy, and frankly, rather magical solution to those pesky root problems.
Today’s Agenda: Operation Root Camouflage
We’ll cover everything from choosing the right shade to applying it like a pro, complete with tips, tricks, and troubleshooting advice. Buckle up, because we’re about to dive deep into the wonderfully powdery world of hairline root cover-up.
I. The Problem: Root Awakening (and Not the Good Kind) 😩
Let’s face it: roots happen. They’re an unavoidable part of having colored hair. Like taxes and Mondays, they’re just a fact of life. But unlike taxes (ugh), we can do something about them quickly and effectively.
- The Root of the Problem: Why do roots appear so fast? Hair grows, duh! Average hair growth is around ½ inch per month. Depending on how much your hair color contrasts with your natural color, you’ll start seeing those roots pretty quickly.
- The Emotional Toll: Let’s be honest, seeing those roots can be a bit of a downer. It can make you feel less polished, less confident, and maybe even a little…old? (Don’t worry, you’re not! Just a little… root-y.)
- The Time and Money Sinkhole: Constantly running to the salon for touch-ups is time-consuming and expensive. Hairline dye powder offers a fantastic (and wallet-friendly!) alternative.
II. The Solution: Hairline Dye Powder – Your Secret Weapon! 🤫
Hairline dye powder is essentially a pigmented powder designed to temporarily cover up roots, blending them seamlessly with your existing hair color. Think of it as concealer for your hair.
- Why Powder Power?
- Fast & Easy: Application takes minutes, not hours. Perfect for those last-minute Zoom meetings or unexpected date nights.
- Non-Permanent: Washes out with shampoo, so you’re not committed to a permanent color change. Great for trying new shades or covering up grey just for a special occasion.
- Gentle on Hair: Less harsh than permanent dyes, so less damage to your precious locks.
- Portable: Small and compact, perfect for travel or keeping in your purse for touch-ups on the go. ✈️
- Cost-Effective: Significantly cheaper than salon visits or even box dyes. Cha-ching! 💰
- How Does it Work? The powder adheres to the hair shaft, coating it with pigment and effectively camouflaging the root. It works best on dry hair.
- Different Formulations: You’ll find hairline dye powders in various forms:
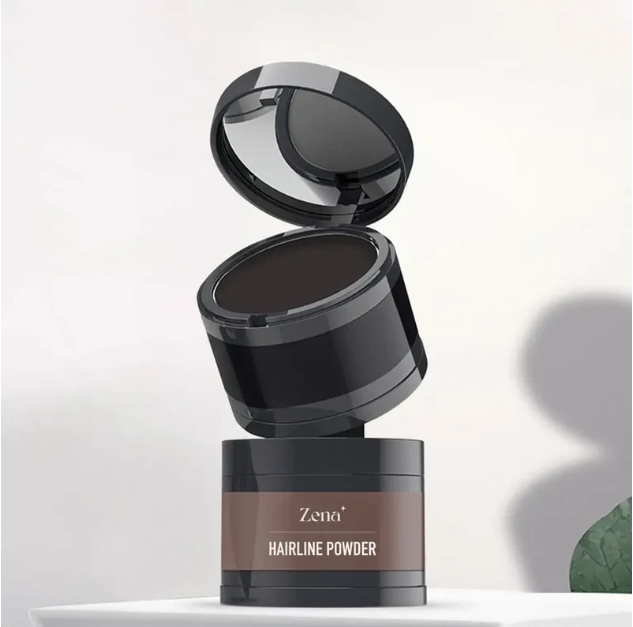
- Pressed Powder: Like eyeshadow, typically comes in a compact with a small applicator brush.
- Loose Powder: Requires a separate brush for application. Can be a little messier, but often offers more pigment.
- Stick/Crayon: Convenient for targeted application, especially around the hairline.
- Spray: While technically not a powder, root cover-up sprays serve the same purpose. They can be trickier to apply precisely.
- Ingredients to Look For: Look for powders with ingredients like:
- Pigments: These provide the color.
- Binding Agents: Help the powder adhere to the hair.
- Oils and Waxes: Can add shine and help the powder blend in.
- Avoid: Harsh chemicals like parabens, sulfates, and artificial fragrances, especially if you have sensitive skin.
III. Choosing Your Weapon: Selecting the Right Shade 🎨
This is arguably the most crucial step. Choose the wrong shade, and you’ll end up looking like you’ve accidentally dusted your hair with dirt (not a good look).
This is arguably the most crucial step. Choose the wrong shade, and you’ll end up looking like you’ve accidentally dusted your hair with dirt (not a good look).
- The Golden Rule: Match, Don’t Exceed. Aim for a shade that’s as close as possible to your existing hair color, or slightly lighter. Going darker can create a harsh, unnatural line.
- Consider Your Undertones: Is your hair color warm (golden, red) or cool (ashy, blue)? Choose a powder with similar undertones.
- Test, Test, Test! Before committing to an all-over application, test the powder on a small, inconspicuous section of your hair.
- Dealing with Grays: If you’re covering grays, choose a shade that’s slightly lighter than your existing hair color. This will help blend the grays more naturally.
- Layering is Key: If you’re unsure, start with a lighter shade and gradually build up the color until you achieve the desired coverage.
- Don’t Be Afraid to Mix! If you can’t find the perfect shade, consider mixing two similar shades to create a custom blend. Think of yourself as a hair color artist! 👩🎨
- A Handy Shade Guide Table:
| Hair Color | Recommended Powder Shade | Notes |
|---|---|---|
| Black | Black or Dark Brown | Start with Dark Brown and build up to Black if needed. |
| Dark Brown | Dark Brown or Medium Brown | Consider your undertones – warm or cool. |
| Medium Brown | Medium Brown or Light Brown | Opt for a shade slightly lighter if unsure. |
| Light Brown | Light Brown or Dark Blonde | Avoid shades that are too yellow or orange. |
| Dark Blonde | Dark Blonde or Medium Blonde | Be careful not to go too light, which can look unnatural. |
| Medium Blonde | Medium Blonde or Light Blonde | Focus on matching the tone of your blonde – golden, ash, etc. |
| Light Blonde | Light Blonde or Platinum Blonde | Platinum Blonde can sometimes look too ashy; consider a neutral Light Blonde. |
| Red/Auburn | Auburn, Red-Brown, or Copper | Matching the specific red tone is crucial – consider a variety pack for blending. |
| Grey/White | Silver, Grey, or Light Blonde | Avoid shades that are too dark or yellow. |
| Highlighted/Balayaged | Match the base color, or use a blend. | Focus on the roots’ predominant color. Blending can help create a seamless transition. |
IV. The Art of Application: Root Touch-Up Mastery! 🖌️
Now for the fun part! Get ready to transform those pesky roots into perfectly blended masterpieces.
- Gather Your Supplies:
- Hairline dye powder in your chosen shade.
- Applicator brush (usually included with the powder, or a small eyeshadow brush).
- Mirror (a magnifying mirror can be helpful for precision).
- Hair clips or bobby pins to section your hair.
- Old towel or cape to protect your clothing. (Because accidents happen!)
- Hair spray (optional, for extra hold).
- Prep Your Hair: Make sure your hair is clean, dry, and styled as usual. This will help the powder blend in seamlessly.
- Section and Conquer: Section your hair into small, manageable sections, starting at your hairline. Use clips to keep the other sections out of the way.
- Apply with Precision: Dip your brush into the powder and tap off any excess. Gently dab or brush the powder onto your roots, focusing on the areas where the roots are most visible.
- Blend, Blend, Blend! Use small, circular motions to blend the powder into your existing hair color. This will create a natural-looking transition.
- Work in Layers: Start with a light application and gradually build up the color until you achieve the desired coverage. This will help prevent the powder from looking cakey or unnatural.
- Don’t Forget the Part! Pay extra attention to your part, as this is often the most visible area.
- Around the Face: Be extra careful when applying powder around your face to avoid getting it on your skin. Use a cotton swab to clean up any stray powder.
- Hairline Hero Tips:
- Less is More: Start with a small amount of powder and build up gradually. It’s easier to add more than it is to remove too much.
- Focus on the Roots: Avoid applying the powder to the length of your hair, as this can make it look dull.
- Blend Towards the Scalp: Blend the powder towards your scalp to create a natural-looking transition.
- Use a Stippling Motion: Instead of brushing, try using a stippling motion (lightly tapping the brush onto the roots) for better coverage.
- Angle the Brush: For fine lines, angle the brush to get a more precise application.
- Use a Toothbrush: A clean toothbrush can be surprisingly effective for blending the powder around your hairline.
- Hair Spray Seal: If desired, lightly spritz your hair with hair spray to help hold the powder in place.
- Application Table for Different Hairlines:
| Hairline Type | Application Technique | Brush Type Recommendation | Special Notes |
|---|---|---|---|
| Straight Hairline | Apply powder in a straight line, blending upwards towards the existing hair color. | Flat Shader Brush | Ensure even distribution to avoid a stark line. |
| Widow’s Peak | Focus on covering the peak area, blending the powder outwards to soften the point. | Angled Brush | Use a light hand to avoid creating a harsh, unnatural peak. |
| Receding Hairline | Apply powder to the receding areas, blending it into the surrounding hair. Create a soft, natural-looking hairline. | Small Detail Brush | Concentrate on blending the powder seamlessly with the existing hair. Avoid creating a hard line that accentuates the recession. |
| Uneven Hairline | Address areas with noticeable root growth, blending the powder to create a uniform color. Pay attention to areas where the hairline is particularly sparse. | Tapered Blending Brush | Focus on areas requiring more coverage, blending into areas with less visible growth. |
| Frizzy Hairline | Ensure powder is applied evenly to avoid accentuating frizz. Use a light touch and a gentle blending motion. | Stiff Bristled Brush | Avoid using too much powder, which can make frizz more noticeable. Use a hair serum or smoothing product beforehand to tame frizz and create a smoother base. |
| Grey Hairline Coverage | Apply the powder liberally to cover grey roots. Blend thoroughly to prevent a patchy appearance. | Dense Application Brush | Choose a shade that matches the base color of the hair. Consider using a slightly lighter shade for grey coverage to blend naturally. |
V. Troubleshooting: When Things Go Powdery Wrong 😱
Even the best of us can have a root-touch-up mishap. Here are some common problems and how to fix them:
- Powder Looks Too Dark: Use a clean brush to gently brush away some of the excess powder. You can also try blending it with a lighter shade of powder.
- Powder Looks Too Light: Apply another layer of powder, building up the color until you achieve the desired coverage.
- Powder Looks Cakey: You’ve probably applied too much powder. Use a clean brush to gently brush away the excess. You can also try using a damp sponge to blend the powder into your hair.
- Powder is Rubbing Off: This can happen if you’re touching your hair a lot or if you’re sweating. Lightly spritz your hair with hair spray to help hold the powder in place.
- Powder is Getting on My Clothes: Be careful when applying the powder and wear an old towel or cape to protect your clothing. If you do get powder on your clothes, try brushing it off with a soft brush.
- Scalp Irritation: If you experience any scalp irritation, discontinue use and consult a dermatologist. Choose powders with natural ingredients and avoid harsh chemicals.
VI. Beyond the Basics: Pro Tips for Root-Touch-Up Royalty! 👑
Want to take your root-touch-up game to the next level? Here are some advanced techniques and tips:
- Contouring Your Hairline: Just like you can contour your face, you can contour your hairline! Use a slightly darker shade of powder around the edges of your hairline to create a more defined and sculpted look.
- Highlighting Your Roots: Use a slightly lighter shade of powder to highlight your roots and add dimension to your hair.
- Creating a Shadow Root: Apply a slightly darker shade of powder to your roots and blend it downwards to create a shadow root effect. This can add depth and dimension to your hair color.
- Using Dry Shampoo with Tint: Many dry shampoos now come with a tint that can help cover up roots. This is a great option for a quick and easy touch-up.
- Investing in a Quality Brush: A good quality brush can make all the difference in the application of your hairline dye powder. Look for a brush with soft, dense bristles that will allow you to blend the powder seamlessly into your hair.
- Practice Makes Perfect: The more you practice, the better you’ll become at applying hairline dye powder. Don’t be afraid to experiment and try new techniques.
VII. Conclusion: Unleash Your Inner Hairline Houdini! ✨
Congratulations, my follicular friends! You’ve officially graduated from Root-Touch-Up 101! You are now equipped with the knowledge and skills to conquer those pesky roots and maintain your gorgeous hair color with confidence and style.
Remember, hairline dye powder is your secret weapon, your quick fix, your instant confidence booster. So go forth, embrace your inner Hairline Houdini, and never let those roots hold you back again! Now, go forth and conquer! And remember, good hair days are just a brushstroke away! 😉
For detailed product specifications and purchases, please go to :https://zenamakeup.com/products/hairline-dye-powder-for-root-touch-up
Leave a Reply