Glitterati 101: Mastering the Glitter Cream Eyeshadow Stick Cut Crease
(Lecture Hall Doors Burst Open with a Sparkle, Revealing a Glitter-Dusted Professor with a Mischievous Grin)
Alright, you dazzling diamonds! Welcome to Glitterati 101: Mastering the Glitter Cream Eyeshadow Stick Cut Crease! I’m Professor Sparkle, and I’ll be your guide on this shimmering journey to eyeshadow enlightenment. Forget everything you thought you knew about ‘subtle’ and prepare to unleash your inner glitter goddess!
(Professor Sparkle gestures dramatically)
Today, we’re diving deep into the magical realm of the cut crease, but with a twist! We’re ditching the powders (for now!) and embracing the glorious, goopy, and utterly captivating world of glitter cream eyeshadow sticks! Why? Because frankly, life’s too short for boring eyeshadow.
(Professor Sparkle adjusts their sparkly glasses)
This isn’t just some makeup tutorial. This is a transformation. This is art! This is… well, it’s eyeshadow, but with extra oomph.
(Professor Sparkle winks)
So, buckle up, grab your glitter sticks, and let’s get this show on the road!
I. Understanding the Cut Crease: A Crash Course
(Professor Sparkle points to a diagram on the whiteboard, featuring a dramatically cut-creased eye)
Before we dive into the glittery goodness, let’s understand the basics. What is a cut crease, you ask? Well, darling, it’s an eyeshadow technique where you create a sharp, defined line in your crease of your eyelid, visually separating your lid from your brow bone.
(Professor Sparkle taps the whiteboard with a sparkly pointer)
Think of it as architectural eyeshadow. We’re building structures on your eyelids! It’s dramatic, it’s bold, and it’s absolutely fabulous.
Why a Cut Crease?
| Reason | Explanation | Emoji |
|---|---|---|
| Definition | Makes your eyes appear larger and more defined. Think of it as a mini-eye lift! | 👁️ |
| Drama | It’s a statement look. Perfect for parties, photoshoots, or just feeling extra fabulous on a Tuesday. | ✨ |
| Versatility | Can be adapted to suit any eye shape and style, from subtle to outrageously glamorous. | 🎨 |
| Fun! | Seriously, playing with makeup is fun! Embrace your inner artist and experiment! | 🎉 |
Traditional Cut Crease vs. Glitter Cream Stick Cut Crease:
| Feature | Traditional Cut Crease (Powder) | Glitter Cream Stick Cut Crease |
|---|---|---|
| Base | Matte eyeshadow base | Eyeshadow primer or a light, neutral cream eyeshadow base |
| Crease Color | Matte eyeshadow | Glitter cream eyeshadow stick |
| Application | Small, precise brushes for blending and definition | Direct application from the stick, followed by blending with fingers/brush |
| Finish | Matte, defined | Glittery, dimensional, and often bolder |
| Difficulty | Can be challenging for beginners, requires precise blending | More forgiving, easier to blend and build up color |
II. The Glitter Cream Stick Advantage: Why They’re Your New Best Friend
(Professor Sparkle dramatically gestures to a collection of glitter cream eyeshadow sticks)
Okay, so why are we ditching the powders and embracing the sticks? Let me tell you!
(Professor Sparkle holds up a glitter cream eyeshadow stick like a prized possession)
- Easy Peasy Lemon Squeezy: These babies are incredibly user-friendly. No complicated blending techniques required (mostly!). Just swipe, blend, and shine!
- Pigment Powerhouse: Glitter cream sticks often pack a serious pigment punch. One swipe and you’re instantly transformed into a disco ball.
- One-Stop-Shop: Many glitter cream sticks can be used as eyeshadow, eyeliner, or even highlighter. Talk about multi-tasking!
- Creamy Dreamy Texture: The creamy texture blends seamlessly into the skin, creating a smooth, even finish.
- Less Fallout, More Fabulous: Unlike powder eyeshadows, glitter cream sticks have minimal fallout, meaning less glitter on your cheeks and more on your lids where it belongs! Hallelujah!
But, a word of caution, my darlings! Not all glitter cream sticks are created equal. Some are chunky, some are dry, and some just don’t sparkle enough (the horror!).
(Professor Sparkle shudders dramatically)
Choosing the Right Glitter Cream Stick:
| Factor | Considerations | Icon |
|---|---|---|
| Texture | Should be creamy, smooth, and easy to blend. Avoid anything that feels dry or gritty. | 🍦 |
| Pigmentation | Look for a stick with strong color payoff. You want that glitter to POP! | 💥 |
| Longevity | Check reviews to see how long the product lasts without creasing or fading. | ⏳ |
| Glitter Quality | The glitter should be finely milled and evenly distributed. Avoid large, chunky glitter that can be irritating. | ✨ |
| Color Range | Choose a color that complements your skin tone and eye color. The possibilities are endless! | 🌈 |
(Professor Sparkle pulls out a few of their favorite glitter cream eyeshadow sticks)
Professor Sparkle’s Top Picks (Subject to change based on my ever-evolving glitter obsession):
- (Insert Brand Name Here) Glitter Bomb Stick: For intense, blinding glitter.
- (Insert Brand Name Here) Creamy Dream Stick: For a more subtle, sophisticated shimmer.
- (Insert Brand Name Here) Dual-Ended Glitter Duo: For ultimate versatility.
III. The Tools of the Trade: Arming Yourself for Glittery Victory
(Professor Sparkle points to a table laden with makeup brushes and tools)
Alright, soldiers! Before we go into battle (against boring eyelids!), let’s arm ourselves with the right tools.
(Professor Sparkle picks up a blending brush)
- Eyeshadow Primer: This is crucial for creating a smooth base and preventing creasing. Think of it as the foundation for your glitter empire.
- Neutral Cream Eyeshadow (Optional): This can be used as a base to help your glitter cream stick blend more easily and create a more even color.
- Blending Brush: A fluffy blending brush is essential for softening the edges of your cut crease and creating a seamless transition.
- Small, Angled Brush: This is your secret weapon for creating a sharp, precise cut crease line.
- Concealer: For cleaning up any mistakes and creating an even sharper line.
- Cotton Swabs/Q-Tips: For cleaning up any glitter fallout.
- Setting Spray: To lock in your look and prevent creasing.
- Glitter Glue (Optional): For extra staying power, especially with chunkier glitters.
(Professor Sparkle winks)
Pro Tip: Don’t be afraid to experiment with different brushes! What works for me might not work for you. Find the tools that feel comfortable and give you the best results.
IV. The Step-by-Step Guide: Glitter Cut Crease Domination
(Professor Sparkle claps their hands together)
Okay, everyone, pay attention! We’re about to embark on the actual cut crease journey. Prepare to be amazed!
(Professor Sparkle dramatically unveils a mannequin head with a bare eye)
Step 1: Prime Time!
(Professor Sparkle applies eyeshadow primer to the mannequin’s eyelid)
Apply a thin layer of eyeshadow primer to your entire eyelid, from lash line to brow bone. This will create a smooth base for your eyeshadow and prevent creasing. Let it dry for a minute or two before moving on.
(Professor Sparkle nods approvingly)
Step 2: Base Layer (Optional)
(Professor Sparkle applies a neutral cream eyeshadow to the mannequin’s eyelid)
If you’re using a neutral cream eyeshadow as a base, apply it all over your lid and blend it out with your finger or a brush. This will help your glitter cream stick blend more easily and create a more even color.
(Professor Sparkle points to the mannequin’s eye)
Step 3: Finding Your Crease
(Professor Sparkle gently touches the mannequin’s eye socket)
This is the most important step! Locate your crease. It’s the fold in your eyelid where your lid meets your brow bone. Look straight ahead in a mirror and tilt your head back slightly to make your crease more visible.
(Professor Sparkle emphasizes this point)
Pro Tip: If you have hooded eyes, you’ll need to create a "faux crease" slightly above your natural crease. This will make your eyes appear larger and more defined.
(Professor Sparkle grabs the glitter cream eyeshadow stick)
Step 4: The Glitter Crease Line
Step 4: The Glitter Crease Line
(Professor Sparkle carefully draws a line in the mannequin’s crease with the glitter cream eyeshadow stick)
This is where the magic happens! Using your glitter cream eyeshadow stick, carefully draw a line in your crease, following the natural curve of your eye.
(Professor Sparkle pauses for dramatic effect)
Important Considerations:
- Pressure: Use light pressure to avoid dragging or skipping.
- Thickness: Start with a thin line and build it up as needed.
- Shape: Follow the natural shape of your crease, but you can also slightly exaggerate it to create a more dramatic effect.
- Mirror Placement: Use a magnifying mirror for extra precision.
(Professor Sparkle blends the glitter cream eyeshadow stick line with a blending brush)
Step 5: Blending is Your Friend!
Using a small, fluffy blending brush, gently blend the edges of your glitter cream eyeshadow stick line. This will soften the line and create a seamless transition.
(Professor Sparkle demonstrates the blending technique)
Pro Tip: Use small, circular motions to blend the edges of the line. Avoid dragging the brush across your lid, as this can smudge the glitter.
(Professor Sparkle picks up a small, angled brush)
Step 6: Sharpen the Line (Optional)
For an extra sharp cut crease, use a small, angled brush dipped in concealer to clean up the line and create a more defined edge.
(Professor Sparkle carefully applies concealer along the edge of the glitter cream eyeshadow stick line)
Step 7: Lid Color
(Professor Sparkle applies a lighter glitter cream eyeshadow stick to the mannequin’s eyelid)
Now it’s time to add some color to your lid! You can use a lighter shade of glitter cream eyeshadow stick, a powder eyeshadow, or even just leave it bare.
(Professor Sparkle winks)
Pro Tip: Experiment with different colors and textures to create unique and interesting looks.
(Professor Sparkle applies mascara and eyeliner to the mannequin’s eye)
Step 8: Finishing Touches
Apply mascara and eyeliner to complete your look. You can also add some highlighter to your brow bone to further accentuate your eyes.
(Professor Sparkle admires their handiwork)
Step 9: Setting the Stage (Setting Spray, That Is!)
To ensure your glitter masterpiece lasts all day (or night!), finish with a generous spritz of setting spray.
(Professor Sparkle sprays the mannequin’s face with setting spray)
V. Troubleshooting: Glitter Glitches and How to Fix Them
(Professor Sparkle puts on their "serious professor" face)
Okay, class, let’s be real. Things don’t always go according to plan. Sometimes your glitter cream stick is too dry, sometimes your line is too thick, and sometimes you just end up looking like you rolled around in a craft store. Don’t panic! I’m here to help.
(Professor Sparkle unveils a chart of common glitter cut crease problems and solutions)
Common Glitter Cut Crease Problems and Solutions:
| Problem | Solution | Emoji |
|---|---|---|
| Glitter Fallout | Use a glitter glue or a sticky eyeshadow base. Apply in thin layers. Gently tap away any fallout with a clean brush or cotton swab. | 🧹 |
| Creasing | Use an eyeshadow primer. Set your eyeshadow with a translucent powder. Avoid applying too much product to your crease. | 🚫 |
| Uneven Line | Use a small, angled brush to clean up the line with concealer. Practice makes perfect! | 📏 |
| Dry Glitter Cream Stick | Warm the stick up slightly by rubbing it between your fingers. You can also try applying it over a cream eyeshadow base. | 🔥 |
| Line Too Thick | Use a cotton swab dipped in makeup remover to carefully thin out the line. | ✏️ |
| Blending Issues | Use a clean, fluffy blending brush and small, circular motions. Take your time and be patient! | 🔄 |
| Glitter Overload | Less is more! Start with a small amount of product and build up as needed. You can always add more glitter, but it’s harder to take it away. | ⬇️ |
| Hooded Eye Challenges | Create a "faux crease" slightly above your natural crease. Use a matte shade in the crease before applying glitter to create depth. Keep your eyes open while applying to see the placement. | 👀 |
VI. Unleash Your Creativity: Glitter Cut Crease Variations
(Professor Sparkle’s eyes sparkle with excitement)
Now that you’ve mastered the basic glitter cut crease, it’s time to unleash your creativity! The possibilities are endless!
(Professor Sparkle shows examples of different glitter cut crease variations)
Glitter Cut Crease Variations:
- Halo Eye: Apply a lighter shade of glitter to the center of your lid to create a halo effect.
- Double Cut Crease: Create two cut crease lines for extra drama.
- Ombre Cut Crease: Use two different shades of glitter cream eyeshadow stick to create an ombre effect in your crease.
- Graphic Liner Cut Crease: Extend your cut crease line into a graphic liner wing.
- Color Blocking Cut Crease: Use contrasting colors on your lid and in your crease for a bold, statement look.
- Reverse Cut Crease: Apply the darker color to the lid and the lighter color to the crease.
- Subtle Glitter Cut Crease: Use a more subtle glitter cream eyeshadow stick and blend it out for a softer, more wearable look.
(Professor Sparkle encourages the class to experiment)
Don’t be afraid to experiment with different colors, textures, and techniques to create your own unique glitter cut crease looks. The only limit is your imagination!
(Professor Sparkle winks)
VII. Conclusion: Go Forth and Sparkle!
(Professor Sparkle beams at the class)
Congratulations, my dazzling diamonds! You’ve officially completed Glitterati 101! You are now armed with the knowledge and skills to create your own stunning glitter cream eyeshadow stick cut crease looks.
(Professor Sparkle throws glitter into the air)
Go forth and sparkle! Embrace your inner glitter goddess! And remember, makeup is all about having fun and expressing yourself. Don’t be afraid to experiment, make mistakes, and most importantly, shine bright!
(The Lecture Hall Doors Burst Open Again, Revealing a Glitter-Covered Stage and a Disco Ball. Music Starts Playing)
Now, class dismissed! Time for a glitter-filled celebration!
(Professor Sparkle winks and heads towards the stage, ready to dance the night away)
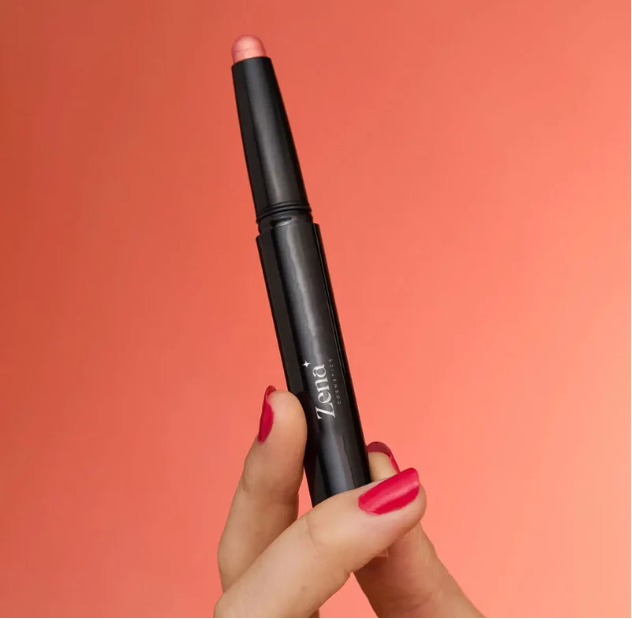
For detailed product specifications and purchases, please go to :https://zenamakeup.com/products/glitter-cream-eyeshadow-stick-shimmer-for-all-eyes-colors
Leave a Reply