Lecture Hall: Glitterati 101 – Mastering the Art of Effortless Glitter Cream Eyeshadow Stick Blending
(Professor Glitterbomb, PhD, strides to the podium, adjusting her sequined spectacles. A trail of biodegradable glitter follows in her wake.)
Alright, darling glitterbugs! Welcome, welcome to Glitterati 101! Today, we’re tackling a topic near and dear to my sequined heart: effortlessly blending glitter cream eyeshadow stick edges. We’re not just talking about smearing some sparkle on and hoping for the best. Oh no, we’re aiming for glittery perfection. We’re talking about looks so seamless, so effortlessly dazzling, that people will suspect you were born with shimmering eyelids.
(Professor Glitterbomb gestures dramatically.)
Forget harsh lines, patchy applications, and the dreaded glitter fallout apocalypse. We’re going to unlock the secrets to blending these creamy, glittery wonders like true artists. So, grab your notebooks, your favorite glitter cream eyeshadow sticks, and prepare to be enlightened!
(A slide appears on the projector: a picture of a poorly blended glitter eyeshadow look with the caption "The Nightmare We’re Avoiding!")
I. The Glitter Cream Eyeshadow Stick: A Love Affair
Let’s start with the basics. What is a glitter cream eyeshadow stick?
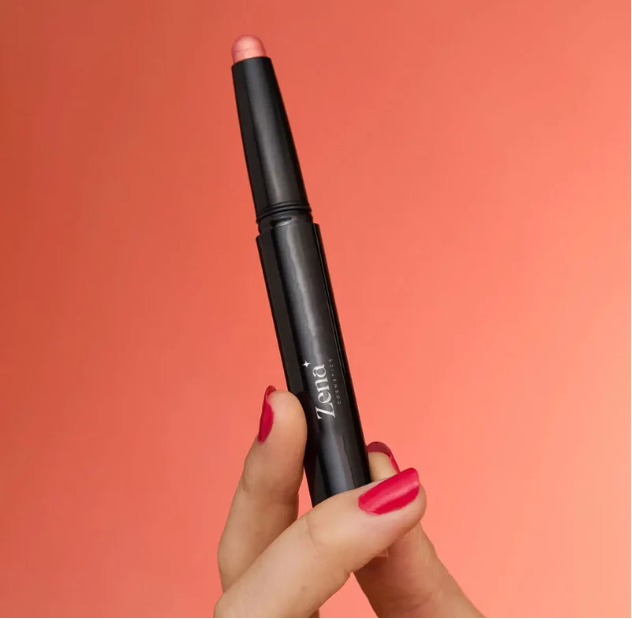
(Professor Glitterbomb clicks to the next slide: a close-up of several different glitter cream eyeshadow sticks.)
A glitter cream eyeshadow stick is essentially a creamy eyeshadow formula infused with glitter particles, conveniently packaged in a stick format. Think of it as a crayon, but for your eyelids, and instead of coloring book drawings, you’re creating masterpieces.
Why are they so amazing?
- Convenience: Swipe and go! Perfect for on-the-go glitter glamour. 🏃♀️
- Pigmentation: Many offer impressive color payoff in a single swipe. 🎨
- Ease of Use: Generally beginner-friendly, especially compared to loose glitter. 👍
- Less Fallout: Cream formulas tend to hold glitter better than powder shadows. ✨
However, (a dramatic pause), there are challenges:
- Blending Time Sensitivity: Cream shadows tend to set quickly, requiring speedy blending. ⏱️
- Potential for Creasing: Especially on oily lids, proper priming is crucial. 🥺
- Patchiness: Uneven application can lead to a less-than-stellar look. 😬
(Professor Glitterbomb winks.)
But fear not! These challenges are merely opportunities for us to showcase our glitter-blending prowess!
II. The Prep Work: Laying the Foundation for Glittery Greatness
Before we even think about swiping on that glitter goodness, we need to prepare the canvas. Think of it like painting – you wouldn’t just slap paint onto a dirty, uneven wall, would you? (Unless you’re going for that "distressed" look, which, honestly, doesn’t suit glitter very well).
A. Priming is Paramount:
- Why Prime? Primers create a smooth, even surface, prevent creasing, and enhance color payoff. They’re the glue that holds your glittery dreams together!
- Choosing the Right Primer:
- For Oily Lids: Opt for a mattifying, long-wearing primer. Think of it as a shield against the oil slicks! 🛡️
- For Dry Lids: Choose a hydrating primer that won’t accentuate dryness. We want dewy, not flaky!💧
- For All Skin Types: A good all-arounder is a blurring primer that smooths texture and provides a grip for the eyeshadow.
- Application: Apply a thin, even layer of primer to your entire eyelid, from lash line to brow bone. Let it set for a minute or two before proceeding.
B. Setting the Stage (Optional but Recommended):
- Neutral Base Shadow: Applying a neutral eyeshadow that matches your skin tone all over the lid after priming can create an even smoother surface and help the glitter cream eyeshadow blend seamlessly. Think of it as a blank canvas, ready for its masterpiece!
- Why Bother? It helps prevent the glitter stick from grabbing onto any uneven texture on your lid, making blending much easier.
(Professor Glitterbomb points to a table on the screen.)
Table 1: Primer Selection Guide
| Skin Type | Primer Recommendation | Why? |
|---|---|---|
| Oily | Mattifying, long-wearing, oil-control | Prevents creasing and helps the eyeshadow stay put for longer. |
| Dry | Hydrating, smoothing, moisturizing | Prevents the eyeshadow from clinging to dry patches and looking cakey. |
| Normal | Blurring, smoothing, color-enhancing | Creates an even base for application and enhances the vibrancy of the color. |
| Sensitive | Fragrance-free, hypoallergenic, gentle formulation | Minimizes the risk of irritation and allergic reactions. |
III. Application Techniques: The Swipe & Blend Symphony
Now, for the main event! Applying and blending your glitter cream eyeshadow stick. Remember, patience is a virtue, and practice makes perfect. Don’t be discouraged if your first attempt isn’t flawless. Even Michelangelo needed to practice his sculpting!
A. The Swipe:
- Less is More: Start with a thin layer of product. You can always build up the intensity, but it’s much harder to take away excess product. Think of it like salt – you can always add more, but you can’t un-salt the soup! 🧂
- Placement Matters: Apply the glitter cream eyeshadow stick directly to your eyelid, focusing on the area where you want the most color. You can apply it all over the lid, just on the outer corner, or even as a glittery eyeliner. Experiment and find what works best for your eye shape and desired look.
- Don’t Be Afraid to Layer: If you want a more intense glitter effect, apply a second or even third thin layer of the glitter cream eyeshadow stick, blending after each application.
B. The Blend:
This is where the magic happens! We want seamless transitions, no harsh lines, just pure, unadulterated glittery goodness.
(Professor Glitterbomb dramatically pulls out a variety of blending tools.)
1. The Finger Tap:
1. The Finger Tap:
- Pros: Free, readily available, and provides warmth that helps blend the cream formula. 🤌
- Cons: Can be messy, especially with darker colors. May not be precise enough for detailed work.
- How-To: Gently tap your ring finger along the edges of the eyeshadow, blending outwards. Use light, feathery motions.
2. The Brush Brigade:
- The Fluffy Blending Brush: A must-have! Use a soft, fluffy brush with tapered bristles to gently blend the edges of the eyeshadow. Think of it as a feather duster for your eyelids. 🪶
- The Small Shader Brush: Great for more precise blending, especially in the inner corner of the eye.
- The Angled Brush: Perfect for creating a winged glitter effect.
3. The Cotton Swab Cavalry:
- Pros: Ideal for cleaning up edges and correcting mistakes.
- Cons: Can remove too much product if used too aggressively.
- How-To: Use a clean cotton swab to gently clean up any stray glitter or smudges.
(Professor Glitterbomb clicks to the next slide, showcasing various blending techniques.)
Table 2: Blending Techniques & Tools
| Technique | Tool(s) | Best For | How-To |
|---|---|---|---|
| Finger Tapping | Ring Finger | Softening edges, blending quickly, sheer washes of color | Gently tap your ring finger along the edges of the eyeshadow, blending outwards in light, feathery motions. |
| Fluffy Brush Blending | Fluffy Brush | Seamless transitions, blending multiple colors, diffused glitter effect | Use a soft, fluffy brush to gently blend the edges of the eyeshadow, working in small, circular motions. |
| Precise Blending | Small Shader Brush | Inner corner blending, detailed work, precise color placement | Use a small shader brush to blend the eyeshadow in targeted areas, using small, controlled strokes. |
| Edge Cleanup | Cotton Swab | Correcting mistakes, sharpening edges, removing stray glitter | Dip a cotton swab in makeup remover (optional) and gently clean up any stray glitter or smudges. |
C. The Golden Rules of Glitter Blending:
- Work Quickly: Cream shadows set fast! Don’t dilly-dally. Blend, blend, blend!
- Light Pressure: Use a light hand when blending. Too much pressure can remove the product or create harsh lines.
- Small Circular Motions: This helps to blend the edges seamlessly.
- Go Back and Forth: Blend the edges back and forth until you achieve the desired effect.
- Clean Your Brush: Use a clean brush for each color to avoid muddying the shades.
IV. Troubleshooting: When Glitter Goes Wrong
Even the most skilled glitterati face challenges. Here’s how to handle common glitter cream eyeshadow stick woes:
A. Creasing:
- Cause: Oily eyelids, too much product, improper priming.
- Solution:
- Use a mattifying primer.
- Apply a thin layer of eyeshadow.
- Set the eyeshadow with a translucent powder.
- Carry blotting papers for touch-ups.
B. Patchiness:
- Cause: Uneven application, dry eyelids, not enough blending.
- Solution:
- Exfoliate your eyelids gently.
- Use a hydrating primer.
- Apply a neutral base shadow.
- Blend thoroughly.
C. Glitter Fallout:
- Cause: Loose glitter particles, dry skin.
- Solution:
- Use a glitter primer or adhesive.
- Apply the eyeshadow with a damp brush.
- Tap off excess glitter before applying.
- Use a glitter-catching shield.
(Professor Glitterbomb points to a final table.)
Table 3: Troubleshooting Guide
| Problem | Possible Cause(s) | Solution(s) |
|---|---|---|
| Creasing | Oily eyelids, too much product, inadequate priming | Use a mattifying primer, apply a thin layer, set with powder, blot excess oil. |
| Patchiness | Uneven application, dry skin, poor blending | Exfoliate eyelids, use a hydrating primer, apply a neutral base shadow, blend thoroughly, build color gradually. |
| Glitter Fallout | Loose glitter, dry skin | Use a glitter primer, apply with a damp brush, tap off excess glitter, apply eyeshadow before foundation to easily clean up fallout. |
| Harsh Lines | Insufficient blending, quick setting formula | Blend immediately after application, use a fluffy brush with light pressure, work in small circular motions, try a creamier formula. |
V. Advanced Glitter Grad: Taking Your Sparkle to the Next Level
(Professor Glitterbomb beams.)
Now that you’ve mastered the basics, let’s explore some advanced techniques to truly unleash your inner glitter goddess!
A. Glitter Cut Crease:
- Use a concealer and a small, flat brush to carve out a crisp cut crease.
- Apply the glitter cream eyeshadow stick to the lid space, being careful not to get any on the crease.
- Blend the edges of the glitter eyeshadow with a fluffy brush.
B. Glitter Winged Liner:
- Use an angled brush to create a winged liner with the glitter cream eyeshadow stick.
- You can create a subtle, shimmering wing or a bold, statement wing.
C. Layering Glitters:
- Experiment with layering different shades and textures of glitter for a multidimensional effect.
- Start with a base of cream eyeshadow and then layer different glitter shades on top.
D. Combining with Other Eyeshadows:
- Use the glitter cream eyeshadow stick as an accent shade to highlight the inner corner of the eye or the center of the lid.
- Combine it with matte eyeshadows for a contrasting look.
VI. The Grand Finale: Remember, Glitter is a Feeling!
(Professor Glitterbomb steps away from the podium, her sequined skirt shimmering.)
My dear students, you’ve now graduated from Glitterati 101! You’re equipped with the knowledge and skills to effortlessly blend glitter cream eyeshadow sticks and create dazzling looks that will turn heads and spread joy.
Remember, glitter is more than just makeup; it’s a feeling. It’s about confidence, creativity, and embracing your inner sparkle. So, go forth, experiment, have fun, and let your glitter shine!
(Professor Glitterbomb throws a handful of biodegradable glitter into the air as the lecture hall erupts in applause.)
Class dismissed! Now go forth and glitter! ✨💖🎉
For detailed product specifications and purchases, please go to :https://zenamakeup.com/products/glitter-cream-eyeshadow-stick-shimmer-for-all-eyes-colors
Leave a Reply