Lecture: Sexy Stained Lip Tint – Mastering the Art of the Defined Pout (with a Wink!)
Welcome, Glamazons, to Lipstick 101! 💋 Today, we’re diving headfirst into the luscious world of lip tints, specifically those blessed with a precise marker tip and a formula that clings to your lips like a lovesick octopus. We’re talking about achieving that perfectly defined, long-lasting pout that screams, "I woke up like this… fabulous!" (Even if you actually woke up looking like you wrestled a badger.)
Forget the messy lipstick smears, the constant reapplication anxiety, and the existential dread of leaving lipstick stains on your coffee cup (we’ve all been there!). We’re here to unlock the secrets of the Sexy Stained Lip Tint: a game-changer for anyone craving effortless, all-day gorgeousness.
Lecture Outline:
- The Anatomy of a Sexy Stained Lip Tint: Why Marker Tip & Long-Lasting Formula? (Why these features are your new BFFs)
- Marker Tip Magic: Achieving the Perfect Definition (Techniques, Tips, & Tricks for a Flawless Application)
- The Long-Lasting Legacy: Unveiling the Secrets of Tint Longevity (Ingredients, Application Hacks, & Maintenance)
- Choosing Your Weapon: Selecting the Right Shade for Your Skin Tone (Decoding the Color Wheel & Finding Your Perfect Match)
- Lip Tint SOS: Troubleshooting Common Problems (Dryness, Bleeding, Uneven Application – We’ve Got You Covered!)
- Beyond the Basics: Elevating Your Lip Tint Game (Layering, Ombre Effects, & Creative Applications)
- The Ethical Angle: Considering Cruelty-Free & Sustainable Options (Looking Good and Feeling Good)
- Q&A: Your Lip Tint Conundrums Answered! (Get Ready to Ask!)
1. The Anatomy of a Sexy Stained Lip Tint: Why Marker Tip & Long-Lasting Formula?
Let’s be honest, we’ve all experienced the lipstick struggle. The uneven application, the constant feathering, the dreaded "lipstick on the teeth" moment. Shudders. This is where the Sexy Stained Lip Tint swoops in like a superhero in a tube.
The Dynamic Duo: The secret weapon lies in its perfect pairing:
-
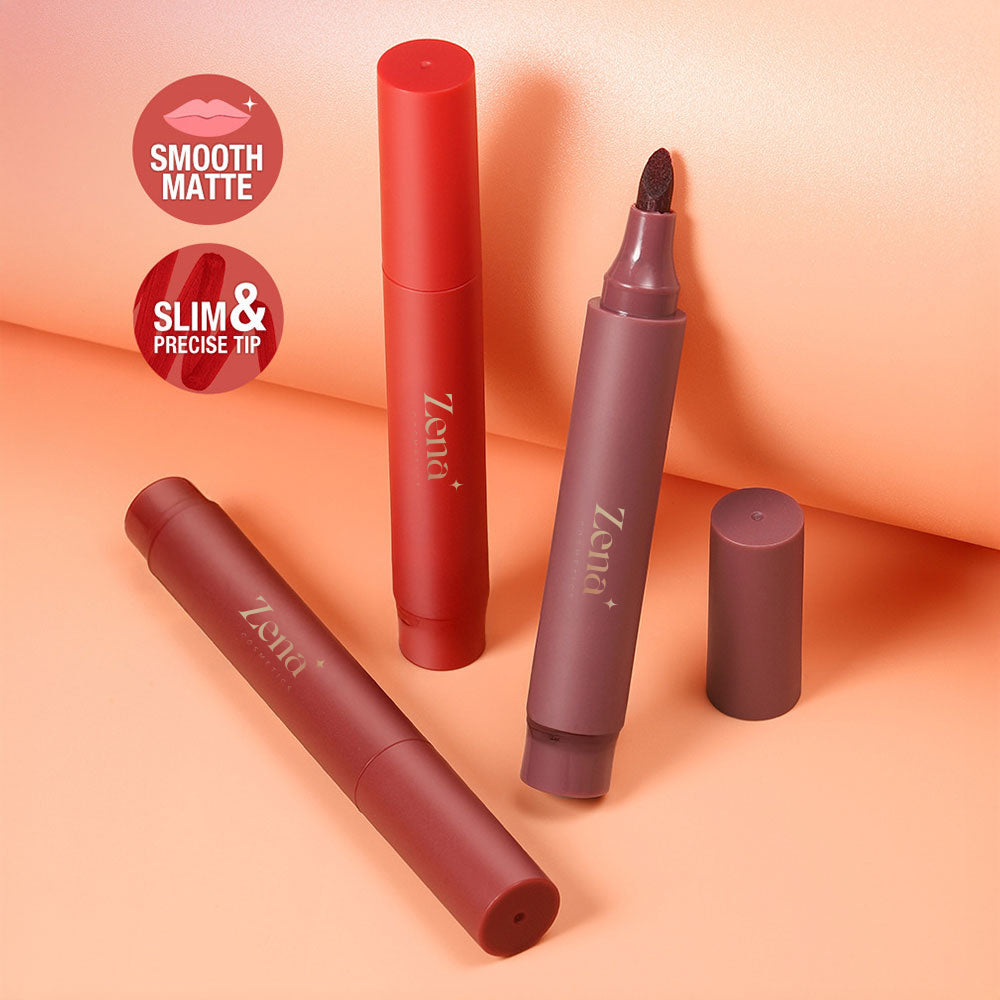
Precise Marker Tip: Imagine a calligraphy pen designed for your lips. This isn’t your grandma’s clunky lipstick bullet. The fine, pointed tip allows for unparalleled precision. We’re talking sharp cupid’s bows, defined lip lines, and the ability to finally overline your lips without looking like a clown 🤡. This feature is especially crucial for those of us blessed (or cursed, depending on your perspective) with uneven lip shapes.
-
Long-Lasting Formula: This isn’t your average lip gloss that vanishes after a single sip of coffee. We’re talking about a formula that’s designed to stay put, through meals, meetings, and even (dare we say it?) makeout sessions. The magic often lies in ingredients that bind to the lip’s surface, creating a stain that lasts for hours, leaving a natural-looking flush of color.
Why are these features essential?
| Feature | Benefit | Problem Solved |
|---|---|---|
| Marker Tip | Precise application, defined lip lines, easy overlining/underlining | Messy lipstick application, feathering, uneven lip shape correction |
| Long-Lasting | Reduced need for reapplication, all-day color, smudge-proof and transfer-resistant | Frequent lipstick checks, embarrassing lipstick stains, faded lip color |
In short: These features are about convenience, confidence, and looking effortlessly polished. Think of it as the "lazy girl’s guide" to a perfect pout. 💅
2. Marker Tip Magic: Achieving the Perfect Definition
Alright, rookies, time for some hands-on training! The marker tip is your key to unlocking lip perfection, but it requires a bit of finesse.
The Application Process:
-
Prep Your Canvas: Exfoliate your lips! Chapped lips are the enemy of a smooth application. Use a lip scrub (sugar and honey work wonders!) or a soft toothbrush to gently buff away dead skin. Follow with a hydrating lip balm. Think of it as prepping a painter’s canvas – a smooth surface is crucial.
-
Outline the Border: Start by outlining your natural lip line with the marker tip. Remember, precision is key! Use short, light strokes, working from the center of your cupid’s bow outwards. For the lower lip, start at the center and work towards the corners.
-
Fill It In: Once you have your outline, fill in the rest of your lips with the marker tip. You can use short strokes or a more sweeping motion, depending on your preference.
-
Blot & Build (Optional): For a more subtle look, blot your lips with a tissue after the first application. To build intensity, apply another layer.
Pro Tips & Tricks:
-
The "X" Marks the Spot: For a defined cupid’s bow, start by drawing an "X" just below the center of your upper lip. This creates a natural-looking peak.
-
Oversharing (But in a Good Way!): If you want to subtly overline your lips, focus on the center of your upper and lower lips. Avoid overlining the corners, as this can look unnatural.
-
The "Q-Tip Savior": Made a mistake? Fear not! A Q-tip dipped in micellar water is your best friend for cleaning up any stray lines.
-
Practice Makes Perfect: Don’t be discouraged if your first attempt isn’t flawless. Practice in front of a mirror, and you’ll be a lip-lining pro in no time.
Visual Aid:
Imagine your lips as a map. The marker tip is your GPS, guiding you to the perfect pout!
     /
    /  <- Cupid's Bow (Start here!)
   ____
  /      <- Upper Lip
 |      |
 |______| <- Lower Lip
      /
   /
Remember: A steady hand and a well-sharpened marker tip (metaphorically speaking, of course – don’t try sharpening your lip tint!) are your greatest allies.
3. The Long-Lasting Legacy: Unveiling the Secrets of Tint Longevity
So, you’ve applied your lip tint with the precision of a brain surgeon. Now, how do you ensure it stays put all day long? Let’s delve into the science (sort of) behind long-lasting lip tints.
The Ingredients that Matter:
- Polymers: These are the unsung heroes of long-lasting formulas. They form a film on your lips, helping the pigment adhere and resist smudging.
- Pigments: The type of pigment used can also impact longevity. Highly pigmented formulas tend to last longer.
- Volatile Oils: These oils evaporate after application, leaving behind the pigment and polymers for a long-lasting stain.
- Humectants (e.g., Hyaluronic Acid, Glycerin): While these provide hydration, they can sometimes compromise longevity. Look for formulas that strike a balance between hydration and staying power.
Application Hacks for Maximum Longevity:
- Layering is Key: Apply a thin layer of lip tint, blot with a tissue, and then apply another layer. This creates a stronger stain.
- The Powder Power Play: After applying your lip tint, lightly dust your lips with translucent powder. This helps to set the color and prevent transfer.
- Lip Liner Lockdown: Use a lip liner in a similar shade to your lip tint to create a base that the tint can cling to.
Maintenance is Mandatory:
- Avoid Oily Foods: Oily foods can break down the lip tint formula and cause it to fade faster.
- Resist the Urge to Lick: Licking your lips can also compromise longevity.
- Reapply Strategically: While long-lasting, even the best lip tints will eventually fade. Keep your lip tint handy for touch-ups throughout the day.
The Longevity Ladder:
Here’s a handy guide to understanding the longevity of different lip products:
| Lip Product | Longevity | Pros | Cons |
|---|---|---|---|
| Lip Balm | Short | Hydrating, comfortable | Minimal color payoff, fades quickly |
| Lip Gloss | Medium | Shiny, plumping effect | Can be sticky, prone to transfer |
| Lipstick | Medium to Long | Wide range of colors and finishes | Can be drying, requires frequent reapplication |
| Lip Stain/Lip Tint | Long to Very Long | Natural-looking color, long-lasting, transfer-resistant | Can be drying, may require touch-ups |
| Liquid Lipstick | Very Long | Highly pigmented, long-lasting, often matte finish | Can be very drying, may feel heavy |
The Bottom Line: Long-lasting lip tints are a commitment. Follow these tips, and you’ll be rewarded with a pout that stays put, no matter what life throws your way (within reason, of course – avoid eating a bucket of fried chicken with bright red lip tint… just trust me on this one).
4. Choosing Your Weapon: Selecting the Right Shade for Your Skin Tone
Finding the perfect lip tint shade is like finding the perfect pair of jeans – it can take some trial and error, but once you find "the one," it’s pure bliss.
Understanding Your Undertones:
The first step is to determine your skin’s undertone. Are you cool, warm, or neutral?
- Cool Undertones: Tend to have pink, red, or bluish hues. Look best in shades with blue or purple undertones (e.g., berry shades, cool reds, plums).
- Warm Undertones: Tend to have yellow, golden, or peachy hues. Look best in shades with yellow or orange undertones (e.g., corals, warm reds, peaches, nudes with a hint of warmth).
- Neutral Undertones: Have a balance of cool and warm hues. Can wear a wider range of shades, but often look best in muted or rosy tones.
The Color Wheel Connection:
The color wheel can be your guide to finding complementary shades.
- Fair Skin: Light pinks, peaches, and nudes will enhance your natural complexion without being overwhelming. Avoid dark or overly bright shades, as they can make you look washed out.
- Medium Skin: Rose, berry, and coral shades will add a pop of color without being too dramatic.
- Olive Skin: Oranges, reds with a warm undertone, and berry shades with a hint of brown will complement your complexion beautifully.
- Dark Skin: Deep reds, plums, and berry shades will create a stunning contrast. Don’t be afraid to experiment with bold colors!
The "Nude" Conundrum:
Finding the perfect nude lip tint can be tricky. Choose a shade that’s slightly deeper than your natural lip color and has the same undertone as your skin. Avoid shades that are too pale or too brown, as they can make you look washed out or sickly.
The "Red" Revolution:
Every woman needs a red lip tint in her arsenal. A classic red is always a winner, but consider your undertones when choosing a shade. Cool undertones look great in blue-based reds, while warm undertones shine in orange-based reds.
Every woman needs a red lip tint in her arsenal. A classic red is always a winner, but consider your undertones when choosing a shade. Cool undertones look great in blue-based reds, while warm undertones shine in orange-based reds.
The "Try Before You Buy" Rule:
Whenever possible, test out lip tint shades in person before buying them. Swatch the colors on your hand or arm to see how they look against your skin. Keep in mind that the color may look slightly different on your lips.
The Shade Selection Cheat Sheet:
| Skin Tone | Undertone | Recommended Shades | Shades to Avoid |
|---|---|---|---|
| Fair | Cool | Light pinks, mauves, cool-toned nudes | Dark browns, oranges, very bright shades |
| Fair | Warm | Peaches, corals, warm-toned nudes | Plums, berries, cool-toned pinks |
| Medium | Cool | Rose, berry, mauve | Bright oranges, neon colors |
| Medium | Warm | Coral, peach, warm-toned reds | Cool-toned pinks, very dark berries |
| Olive | Neutral | Terracotta, burnt orange, berry with brown undertones | Very pale shades, neon colors |
| Dark | Cool | Deep reds, plums, berry shades with blue undertones | Pale pinks, pastel shades |
| Dark | Warm | Deep reds, berry shades with orange undertones, browns | Light nudes, very bright shades |
Remember: Confidence is the best accessory. Don’t be afraid to experiment and find shades that make you feel fabulous! 💖
5. Lip Tint SOS: Troubleshooting Common Problems
Even with the best lip tint and the most skilled application, problems can arise. Let’s address some common lip tint woes and their solutions.
Problem 1: Dryness & Flaking:
- Cause: Many long-lasting lip tints can be drying, especially those with a matte finish.
- Solution:
- Exfoliate regularly.
- Apply a hydrating lip balm before applying your lip tint.
- Look for lip tints with moisturizing ingredients like hyaluronic acid or vitamin E.
- Avoid licking your lips.
- Apply a thin layer of lip balm over your lip tint if needed (but be aware this might reduce longevity).
Problem 2: Bleeding & Feathering:
- Cause: Fine lines around the lips can cause lip tint to bleed and feather.
- Solution:
- Use a lip liner to create a barrier around your lips.
- Apply a thin layer of lip tint and blot with a tissue.
- Avoid over-applying lip tint.
- Use a lip primer to smooth out fine lines.
Problem 3: Uneven Application:
- Cause: Uneven lip texture or using too much product can lead to an uneven application.
- Solution:
- Exfoliate your lips to create a smooth surface.
- Apply lip tint in thin layers, building up the color gradually.
- Use a lip brush to blend the color evenly.
Problem 4: Fading & Patchiness:
- Cause: Eating oily foods or not properly prepping your lips can cause lip tint to fade unevenly.
- Solution:
- Avoid oily foods.
- Exfoliate and hydrate your lips before applying lip tint.
- Reapply lip tint throughout the day as needed.
Problem 5: Stain on Skin Around Lips:
- Cause: Applying the tint outside your lip line without precision or having it bleed.
- Solution:
- Apply with precision using the marker tip.
- Use a lip liner as a barrier.
- Quickly remove any stray marks with a makeup wipe or a Q-tip dipped in micellar water.
The Troubleshooting Table:
| Problem | Cause | Solution |
|---|---|---|
| Dryness | Drying formula, lack of hydration | Exfoliate, apply lip balm, choose moisturizing formulas, avoid licking lips |
| Bleeding | Fine lines around lips | Use lip liner, apply thin layers, use lip primer |
| Uneven Application | Uneven lip texture, too much product | Exfoliate, apply thin layers, use lip brush |
| Fading | Oily foods, improper prep | Avoid oily foods, exfoliate and hydrate lips, reapply as needed |
| Stain on Skin | Imprecise application | Apply with precision, use lip liner, quickly remove stray marks with a makeup wipe or Q-tip dipped in micellar water. |
Remember: A little bit of troubleshooting can go a long way in achieving lip tint perfection! Don’t give up – practice makes perfect.
6. Beyond the Basics: Elevating Your Lip Tint Game
You’ve mastered the basics, now it’s time to get creative! Let’s explore some advanced techniques to take your lip tint game to the next level.
Layering for Dimension:
- Ombre Lips: Apply a darker shade of lip tint to the outer edges of your lips and a lighter shade to the center. Blend the colors together for a seamless ombre effect.
- Gradient Lips: Similar to ombre lips, but with a more subtle transition between the colors.
- Top Coat Magic: Apply a clear lip gloss over your lip tint for a glossy, plumping effect.
Creative Applications:
- Blush Tint: Dab a small amount of lip tint onto the apples of your cheeks and blend for a natural-looking flush.
- Eye Shadow Base: Use a neutral-toned lip tint as a base for your eyeshadow to help it last longer and intensify the color.
Combining with Other Lip Products:
- Lip Liner & Lip Tint: Use a lip liner to define your lips and then fill them in with lip tint for a long-lasting, defined pout.
- Lipstick & Lip Tint: Apply a lipstick in a similar shade to your lip tint for added color intensity and longevity.
The Creative Lip Table:
| Technique | Description | Pro Tip |
|---|---|---|
| Ombre Lips | Darker shade on the outer edges, lighter shade in the center, blended together | Use a lip brush to blend the colors seamlessly. |
| Gradient Lips | Subtle transition between colors | Choose shades that are close in tone. |
| Top Coat Magic | Clear lip gloss over lip tint | Choose a non-sticky lip gloss. |
| Blush Tint | Dab lip tint on cheeks and blend | Use a small amount of lip tint and blend quickly to avoid staining. |
| Eyeshadow Base | Apply neutral lip tint to eyelids before eyeshadow | Choose a shade that is close to your skin tone. |
| Liner & Tint | Define lips with liner, fill in with tint | Match the liner to the lip tint or choose a slightly darker shade. |
| Lipstick & Tint | Apply lipstick over lip tint | Choose a lipstick and lip tint in similar shades for a cohesive look. |
Remember: Experimentation is key! Don’t be afraid to try new things and find what works best for you.
7. The Ethical Angle: Considering Cruelty-Free & Sustainable Options
Looking good shouldn’t come at the expense of animal welfare or the environment. Let’s discuss the importance of choosing cruelty-free and sustainable lip tints.
Cruelty-Free:
- What it means: Products that are not tested on animals at any stage of development or production.
- How to identify: Look for certifications like Leaping Bunny or PETA’s "Beauty Without Bunnies" logo.
- Why it matters: Animals should not suffer for our beauty.
Sustainable:
- What it means: Products that are made with environmentally responsible practices, such as using sustainable ingredients, minimizing waste, and using eco-friendly packaging.
- How to identify: Look for brands that use recycled or recyclable packaging, source ingredients sustainably, and have a commitment to reducing their environmental impact.
- Why it matters: We have a responsibility to protect our planet.
Finding Ethical Options:
- Research brands: Look for brands that are transparent about their ingredients and manufacturing processes.
- Read reviews: See what other customers have to say about the brand’s ethics.
- Support ethical companies: Choose to buy from companies that align with your values.
The Ethical Lip Tint Checklist:
- ✅ Cruelty-free certification
- ✅ Sustainable ingredients
- ✅ Recycled or recyclable packaging
- ✅ Commitment to reducing environmental impact
Remember: Your purchasing power can make a difference. By choosing ethical lip tints, you can look good and feel good about your choices. 🌎
8. Q&A: Your Lip Tint Conundrums Answered!
Alright, Glamazons, it’s time for your burning lip tint questions! Fire away! I’ll do my best to answer them with wit, wisdom, and maybe a dash of sass.
(This section would be interactive, where you, the "students," would ask questions and I would provide answers based on the information presented in the lecture. I can’t simulate that directly, but here are some common questions and answers that might arise.)
Q: My lip tint always ends up on my teeth! What am I doing wrong?
A: Ah, the dreaded lipstick-on-teeth moment! Classic! The culprit is often overapplication. Try applying thinner layers and blotting after each application. You can also use your finger to gently blot the inside of your lips to remove any excess product. And, you know, occasionally check a mirror!
Q: How do I make my lip tint last through a greasy burger?
A: Okay, let’s be realistic. A greasy burger is basically kryptonite to any lip product. However, you can improve your chances by using a lip liner as a base, applying multiple thin layers of lip tint, and blotting between each layer. And maybe… just maybe… consider a less greasy side dish. 😉
Q: My lips are always so dry, I can’t wear lip tint without looking like a cracked desert landscape! Help!
A: This is a common problem! Hydration is key. Exfoliate your lips regularly, apply a hydrating lip balm before your lip tint (let it absorb for a few minutes), and consider a lip tint formula with moisturizing ingredients like hyaluronic acid. You can also try applying a tiny dab of lip balm over your lip tint, but be aware that this might reduce its longevity.
Q: Are all marker tip lip tints the same?
A: Absolutely not! The quality of the marker tip, the pigment concentration, and the formula itself can vary greatly. Look for brands with good reviews and consider trying a few different options to find your perfect match.
Q: Is it possible to overline my lips too much with a marker tip lip tint?
A: Oh honey, absolutely. The key is subtlety. Focus on the center of your lips and avoid overlining the corners, as this can look unnatural. Practice in front of a mirror and don’t be afraid to experiment. Remember, we’re aiming for "naturally enhanced," not "cartoon character."
(And so on… depending on the questions asked!)
Congratulations, Glamazons! You have successfully completed Lipstick 101: The Art of the Sexy Stained Lip Tint! Now go forth and conquer the world, one perfectly defined pout at a time! 💋🎉
For detailed product specifications and purchases, please go to :https://zenamakeup.com/products/sexy-stained-lip-marker-tint
Leave a Reply