Lecture: Conquer the Gray: Mastering Mess-Free Hairline Dye Powder Application
(Welcome music fades, spotlight shines on a slightly frazzled but enthusiastic speaker)
Alright, settle in, settle in! Grab your coffee ☕ (or wine 🍷 – no judgment here!), because today we’re tackling a topic near and dear to many of our hearts: the dreaded roots! 😱 Yes, those pesky silver strands that seem to sprout overnight, betraying our youthful facade and forcing us into a bi-weekly dance of dye and desperation.
But fear not, fellow follicular freedom fighters! We’re not resorting to full-blown salon appointments every other week (unless you’re rolling in dough, then by all means, treat yourself! 💅). Today, we’re diving deep into the art of mess-free hairline dye powder application. Forget the stained foreheads, the rogue streaks down your neck, and the general feeling that you’ve lost a battle with a box of coal dust. We’re going to conquer this, together!
(Speaker gestures dramatically)
Think of me as your Yoda, guiding you through the murky swamp of root touch-ups. I’ve been there, I’ve done that, I’ve probably worn the t-shirt (stained with dye, naturally). So, buckle up, because we’re about to become hairline dye powder ninjas! 🥷
I. Understanding the Hairline Dye Powder Landscape
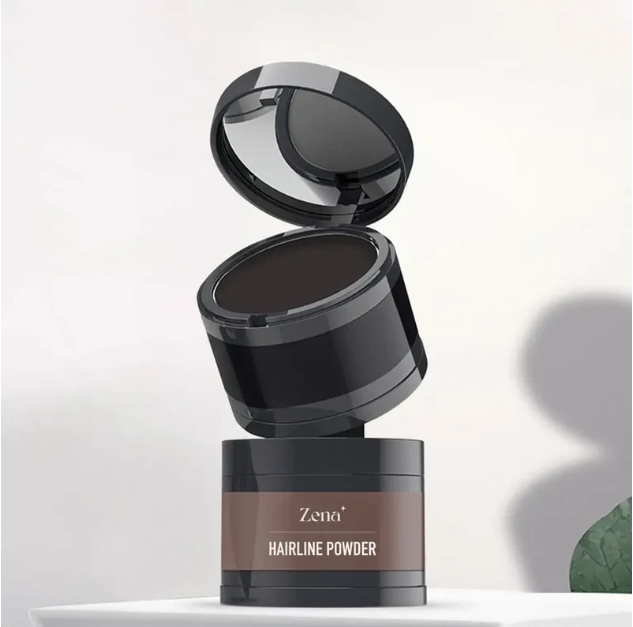
First things first, let’s understand our weapon of choice. Hairline dye powders are essentially finely milled pigments designed to adhere to your hair and camouflage those unwelcome roots. They come in a dazzling array of shades, textures, and application methods.
(Speaker projects a slide showcasing various types of hairline dye powders)
A. Types of Powders:
| Type of Powder | Texture | Longevity | Best For | Potential Mess Factor |
|---|---|---|---|---|
| Pressed Powder | Compact, similar to eyeshadow | Short-term (until next wash) | Light coverage, quick touch-ups | Low (minimal fallout) |
| Loose Powder | Fine, easily dispersed | Short-term (until next wash) | Buildable coverage, larger areas | Medium (requires careful application) |
| Stick/Crayon | Creamy, wax-based | Short-term (until next wash) | Precise application, smaller areas | Low (but can be greasy if overapplied) |
| Fiber-Based | Contains hair-like fibers | Short-term (until next wash) | Adding volume, concealing thinning areas | Medium (fibers can scatter) |
B. Choosing the Right Shade:
This is crucial! 🚨 You want a shade that blends seamlessly with your existing hair color. A common mistake is going too dark. Aim for a shade that’s either an exact match or slightly lighter. It’s always easier to build coverage than to try and lighten a too-dark application.
(Speaker uses a color wheel analogy, pointing to the importance of undertones)
Think about your hair’s undertones! Is it warm (golden, reddish) or cool (ashy, bluish)? Choosing a powder with similar undertones will result in a more natural-looking blend. Don’t be afraid to experiment with a few different shades to find your perfect match. Sephora employees are your friends! Use them! 🤝
C. Ingredients to Watch Out For:
Just like with any cosmetic product, pay attention to the ingredients list. Look for powders that are:
- Talc-free: Talc has been linked to some health concerns.
- Paraben-free: Parabens are preservatives that can be irritating to sensitive skin.
- Fragrance-free: Added fragrances can also cause irritation.
(Speaker points to a slide showcasing a sample ingredients list, highlighting potential irritants)
II. The Golden Rules of Mess-Free Application: Preparing for Battle
Okay, so we understand the battlefield. Now, let’s prepare for war! Applying hairline dye powder mess-free is all about preparation, technique, and a healthy dose of patience.
(Speaker dons an imaginary helmet)
A. The Sanctuary: Creating a Clean Workspace:
Imagine your bathroom counter as a crime scene. 🕵️♀️ We need to protect the evidence!
-
Cover Everything: Lay down a towel, newspaper, or even a plastic tablecloth over your counter. This will catch any stray powder fallout. Consider using a dedicated "dye powder application" towel that you don’t mind staining.
-
Protect Your Clothes: Wear an old t-shirt or a salon cape. Trust me, you don’t want to be scrubbing dye powder out of your favorite blouse. 👚➡️🗑️ (That’s blouse to trash can, just in case the emoji wasn’t clear!)
-
Gather Your Supplies: Have everything you need within reach:
- Your chosen hairline dye powder
- A small, angled brush (more on this later!)
- A clean makeup sponge or cotton pad
- A hair dryer (optional, for setting the powder)
- Hair clips or ties
- A mirror (obviously!)
B. The Hair Prep: Setting the Stage for Success:
-
Dry Hair is Key: Never apply dye powder to wet or damp hair. The powder will clump and create a muddy mess.
-
Style First, Dye Later: Style your hair as you normally would. This will give you a better idea of where your roots are most visible.
-
Parting Matters: Experiment with different partings to see which exposes the most root. A slightly deeper or different parting can often make a huge difference.
-
The "Baby Hair" Taming Technique: Those wispy little hairs around your hairline can be tricky. Use a tiny bit of hairspray or gel to smooth them down before applying the powder. This prevents the powder from clinging to them and creating a harsh, unnatural line.
(Speaker demonstrates the "Baby Hair" technique on a mannequin head)
C. Skin Shielding: Protecting Your Forehead (and More!)
This is where we separate the amateurs from the pros! Prevention is key to avoiding the dreaded "dye forehead."
-
Vaseline or Lip Balm Barrier: Apply a thin layer of Vaseline or lip balm along your hairline, ears, and the back of your neck. This creates a barrier that prevents the dye powder from staining your skin.
-
Cotton Pad Defense: Tuck a cotton pad or tissue along your hairline as you apply the powder. This acts as a shield against fallout.
-
Stay Vigilant: Wipe away any stray powder immediately with a damp cotton swab. Don’t let it sit and stain!
(Speaker holds up a tube of Vaseline and winks)
III. Mastering the Application Techniques: Brush Strokes of Genius
Now for the fun part! Let’s get those roots covered!
(Speaker picks up an angled brush with a flourish)
A. The Brush is Your Weapon:
Choosing the right brush is crucial. A small, angled brush with firm bristles is your best friend. This allows for precise application and prevents the powder from scattering.
- Avoid large, fluffy brushes: These will distribute the powder too widely and create a messy, unnatural look.
- Consider a dual-ended brush: One end for application, the other for blending.
(Speaker showcases different brush types, highlighting the benefits of an angled brush)
B. The "Dab and Tap" Method:
This is the golden rule of mess-free application!
- Dip: Dip your brush lightly into the dye powder.
- Tap: Tap the brush on the edge of the container to remove excess powder. This is the most important step! Too much powder on the brush is a recipe for disaster.
- Dab: Gently dab the brush onto your roots, starting at the hairline and working your way back.
- Repeat: Repeat the process until you achieve the desired coverage.
(Speaker demonstrates the "Dab and Tap" method on the mannequin head)
C. Layering is Key:
Don’t try to cover everything in one go. Apply the powder in thin, even layers. This allows you to build coverage gradually and avoid a heavy, unnatural look.
D. Blending is Your Secret Weapon:
D. Blending is Your Secret Weapon:
Once you’ve applied the powder, use a clean makeup sponge or cotton pad to gently blend it into your existing hair color. This softens the line between your roots and your dyed hair and creates a more seamless transition.
(Speaker blends the powder on the mannequin head with a sponge)
E. Addressing Specific Areas:
- Temples: The temples are often the first place where roots become visible. Use a light hand and focus on blending the powder into your hairline.
- Part Line: The part line is another critical area. Use the angled brush to carefully apply the powder along the part, being sure to blend it well.
- Back of the Neck: If you have short hair or a visible hairline at the back of your neck, use the same techniques to cover any roots in that area.
F. The Hair Dryer Hack (Optional):
For extra staying power, you can lightly blast your hairline with a cool setting on your hair dryer after applying the powder. This helps to set the powder and prevent it from transferring.
(Speaker mimes using a hair dryer on the mannequin head)
IV. Troubleshooting Common Problems: Rescue Missions for Root Emergencies
Even with the best preparation, things can sometimes go wrong. But don’t panic! We’ve got you covered.
(Speaker puts on a pair of imaginary spectacles and adopts a "doctor" persona)
A. The "Too Much Powder" Panic:
If you accidentally apply too much powder, don’t try to wipe it away with your hand! This will only smear it. Instead:
- Use a clean brush: Use a clean, dry brush to gently dust away the excess powder.
- Damp cotton swab: Use a slightly damp cotton swab to carefully remove the excess powder.
B. The "Uneven Coverage" Conundrum:
If you notice areas where the coverage is uneven, simply apply another thin layer of powder to those areas and blend well.
C. The "Stained Forehead" Fiasco:
If you accidentally stain your forehead, don’t despair!
- Makeup remover: Use a gentle makeup remover to wipe away the stain.
- Micellar water: Micellar water is also effective at removing dye stains.
- Baby wipes: Baby wipes are a great option for removing dye stains from your skin.
D. The "Powder Fallout" Nightmare:
If you notice powder fallout on your clothes or counter, use a damp cloth or vacuum cleaner to clean it up.
(Speaker lists these troubleshooting tips on a slide, complete with humorous illustrations)
V. Maintenance and Longevity: Keeping the Gray at Bay
So, you’ve conquered the gray! Now, how do you keep it at bay for as long as possible?
(Speaker strikes a heroic pose)
A. Gentle Hair Care:
Avoid harsh shampoos and styling products that can strip the color from your hair. Opt for sulfate-free shampoos and gentle styling products.
B. Avoid Excessive Washing:
The more you wash your hair, the faster the dye powder will fade. Try to stretch out the time between washes as much as possible. Dry shampoo is your friend!
C. Protective Styling:
When possible, wear your hair in styles that protect your hairline from friction and rubbing. Braids, buns, and ponytails can all help to extend the life of your dye powder application.
D. Touch-Up as Needed:
Depending on how quickly your roots grow, you may need to touch up your hairline every few days. Don’t wait until your roots are glaringly obvious!
(Speaker holds up a bottle of dry shampoo)
VI. Advanced Techniques: Level Up Your Root Touch-Up Game
For those of you who are feeling adventurous, let’s explore some advanced techniques!
(Speaker pulls out a magnifying glass)
A. Custom Color Blending:
Don’t be afraid to mix and match different shades of dye powder to create a custom color that perfectly matches your hair.
B. Highlighting and Lowlighting with Powder:
Use a lighter shade of dye powder to create subtle highlights around your face or a darker shade to add depth and dimension.
C. Using Powder to Fill in Sparse Areas:
Hairline dye powder can also be used to fill in sparse areas around your hairline, creating the illusion of thicker, fuller hair.
(Speaker demonstrates these advanced techniques on the mannequin head)
VII. Conclusion: Embrace the Power of the Powder!
(Speaker steps forward, smiling)
Congratulations, my follicular friends! You are now armed with the knowledge and skills to conquer your roots and embrace the power of hairline dye powder. Remember, practice makes perfect. Don’t be afraid to experiment and find what works best for you.
And most importantly, don’t stress about it! Hair is meant to be fun. So go forth, conquer those grays, and rock your gorgeous hair with confidence! 💃
(Speaker bows as the audience applauds and upbeat music plays)
(Final slide appears: "May your roots always be covered and your hairline always be fabulous!")
For detailed product specifications and purchases, please go to :https://zenamakeup.com/products/hairline-dye-powder-for-root-touch-up
Leave a Reply