Lecture: The Art of Vanishing Act: Conquering Cake with Your Traceless Matte Foundation Repair Stick
(Opening slide: A picture of a beautifully blended face next to a comically cracked and cakey face. Text: "Which side are YOU on?")
Alright, settle in, beauty aficionados! Today, we’re diving deep into a topic that plagues even the most seasoned makeup artists: cake face. Specifically, we’re tackling the tricky but oh-so-rewarding realm of the Traceless Matte Foundation Repair Stick and how to wield its power WITHOUT ending up looking like you’ve just emerged from a particularly dusty archaeological dig.
(Slide: Title of the lecture with a picture of the Traceless Matte Foundation Repair Stick. A little emoji of a painter’s palette and brush is floating next to it.)
Let’s be honest, that "Traceless" part is a HUGE selling point, right? But "Traceless" doesn’t magically happen. It requires technique, understanding, and a healthy dose of preventative measures. Think of this lecture as your anti-cake bootcamp. We’re going to whip your application skills into shape so you can rock that matte finish with confidence.
(Slide: A single word in large, bold font: CAKE. Below it, smaller text: The Enemy.)
First, let’s identify the enemy. What is cake face, exactly?
(Slide: Bullet points defining "Cake Face" with humorous descriptions and emojis.)
- The Desert Landscape: Fine lines and wrinkles become magnified canyons. 🏜️
- The Mask Effect: A thick, unnatural layer of product sits on top of the skin, completely obscuring its texture. 🎭
- The Crease Monster: Product settles into every crease and pore, highlighting imperfections you didn’t even know you had. 👾
- The Unnatural Glow: The face appears unnaturally matte and flat, lacking dimension and radiance. 💀
- The Patchwork Quilt: Uneven application leads to visible patches of product, especially around the nose and mouth. 🧶
Essentially, cake face is when your makeup becomes more noticeable than your actual skin. And nobody wants that! We want that "I woke up like this" vibe, even if it took an hour and a small fortune in products.
(Slide: A picture of a construction site with warning signs. Text: "Cake Face Hazard Zone: Common Culprits")
So, what are the usual suspects behind this makeup mishap? Let’s break down the common causes of cake face, specifically when using a matte foundation stick:
(Table: Causes of Cake Face with explanations and solutions)
| Cause | Explanation | Solution |
|---|---|---|
| Dry Skin is Thirsty Skin | Matte formulas tend to cling to dry patches, exaggerating texture and creating a flaky, cakey appearance. 🌵 | Hydrate, Hydrate, HYDRATE! Use a rich moisturizer and a hydrating primer. Consider a facial oil under your makeup. Exfoliate regularly to remove dead skin cells. |
| Too Much Product (The "More is More" Myth) | Overapplying foundation is a surefire way to create a thick, heavy layer that settles into lines and pores. 🚨 | Less is MORE! Start with a thin layer and build coverage only where needed. Remember, you can always add more, but it’s much harder to take away. |
| Incorrect Application Technique (The "Paint Roller" Approach) | Applying foundation with a heavy hand or using the wrong tools can lead to uneven distribution and caking. 🖌️ | Dab, Blend, and Buff! Use a damp sponge, a stippling brush, or your fingers to gently apply and blend the foundation. Focus on pressing the product into the skin rather than dragging it across. |
| Incompatible Products (The "Chemical Reaction" Nightmare) | Using products that don’t play well together can cause the foundation to separate, pill, or cake. 🧪 | Product Compatibility Test! Test new products on a small area of your face before applying them all over. Look for water-based primers and foundations to pair together, or silicone-based with silicone-based. |
| Setting Powder Overkill (The "Baking Disaster") | Excessive setting powder can dry out the skin and create a matte, cakey finish, especially under the eyes. 🍚 | Set Strategically! Use a light hand when applying setting powder. Focus on areas that tend to get oily, such as the T-zone. Consider using a hydrating setting spray instead of powder in dry areas. |
| Lack of Primer (The "Foundation Slip-n-Slide") | Primer creates a smooth canvas for your foundation, preventing it from sinking into pores and fine lines. 🚧 | Prime Time! Choose a primer that addresses your specific skin concerns, such as hydration, pore minimizing, or oil control. |
| Expired Product (The "Zombie Makeup" Effect) | Expired makeup can change in texture and consistency, leading to uneven application and caking. 🧟♀️ | Check Expiration Dates! Regularly clean your makeup brushes and sponges to prevent bacteria buildup and product degradation. |
(Slide: Text: "The Traceless Matte Foundation Repair Stick: A Closer Look")
Now, let’s focus specifically on the Traceless Matte Foundation Repair Stick. This is a fantastic product – convenient, versatile, and capable of delivering a flawless matte finish. But its very nature requires a specific approach to avoid the dreaded cake.
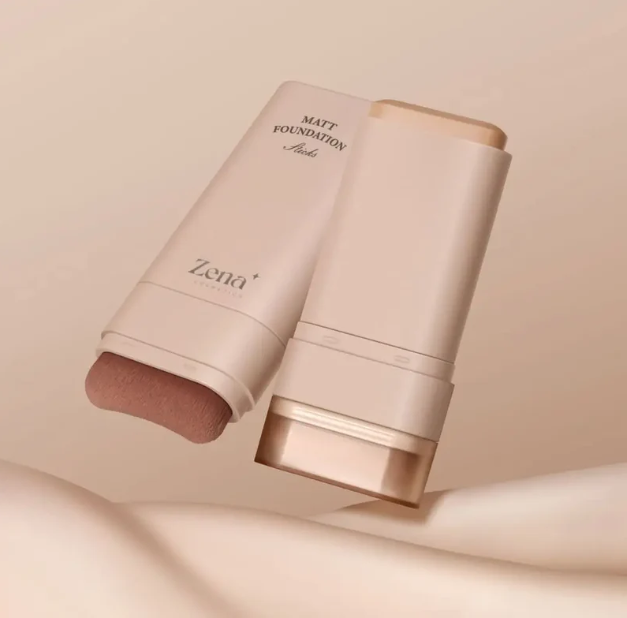
(Slide: A picture of the foundation stick with arrows pointing to its key features.)
Here’s what we need to consider:
- The Matte Finish: Matte formulas, by nature, tend to be drier and less forgiving than dewy formulas. They emphasize texture, so proper skin prep is crucial.
- The Stick Format: While convenient, a stick format can lead to over-application if you’re not careful. It’s easy to swipe on too much product without realizing it.
- The "Repair" Aspect: This stick is designed to repair and touch up, meaning it’s often used on top of existing makeup. This can exacerbate caking if not applied correctly.
(Slide: Text: "The Pre-emptive Strike: Skin Prep is Key!")
Okay, people, listen up! This is the MOST important part. You can have the most expensive foundation in the world, but if your skin isn’t properly prepped, you’re setting yourself up for cake-tastrophe.
(Slide: A step-by-step guide to skin prep with images and emojis.)
- Cleanse: Start with a clean slate. Remove all traces of makeup and impurities with a gentle cleanser. 🧼
- Exfoliate (1-2 times per week): Buff away dead skin cells to create a smooth surface. A gentle scrub or chemical exfoliant works wonders. ✨
- Hydrate: This is non-negotiable! Apply a hydrating serum or essence followed by a rich moisturizer. Allow it to fully absorb before moving on. 💧
- Eye Cream: Don’t forget your delicate under-eye area! Apply a hydrating eye cream to plump up fine lines and prevent creasing. 👀
- Lip Balm: Chapped lips are a no-no. Apply a hydrating lip balm to keep them smooth and moisturized. 💋
- Primer: Choose a primer that addresses your specific skin concerns. A hydrating primer will add extra moisture, while a pore-minimizing primer will create a smooth, even canvas. 🧴
(Slide: A visual representation of different types of primers and their benefits.)
| Primer Type | Benefits | Suitable for |
|---|---|---|
| Hydrating Primer | Adds moisture, plumps up fine lines, creates a dewy base. | Dry, dehydrated, and mature skin. |
| Pore-Minimizing Primer | Fills in pores and fine lines, creates a smooth, even surface. | Oily and combination skin with enlarged pores. |
| Mattifying Primer | Controls oil production, creates a matte finish, extends the wear of makeup. | Oily skin. |
| Color-Correcting Primer | Neutralizes redness, brightens dullness, corrects uneven skin tone. | Skin with redness, hyperpigmentation, or dullness. |
| Illuminating Primer | Adds radiance and luminosity to the skin, creates a healthy glow. | Dull and tired-looking skin. |
(Slide: Text: "Application Technique: The Art of the Dab")
Now that your skin is prepped and ready, let’s talk about application. This is where the "Traceless" magic happens (or doesn’t).
(Slide: Step-by-step guide to applying the foundation stick with pictures and diagrams.)
- Prime and Conceal (Optional): If you have any specific areas of concern, like redness or dark circles, apply a primer and concealer before foundation. Remember, less is more!
- Dot, Don’t Swipe: Instead of swiping the stick directly onto your face, apply small dots of foundation to your forehead, cheeks, nose, and chin. This gives you more control over the amount of product you’re using. 🤏
- Blend, Blend, Blend: Use a damp sponge, a stippling brush, or your fingertips to gently blend the foundation into your skin. Focus on pressing the product into the skin rather than dragging it across. 🧽
- Build Coverage: If you need more coverage, apply another thin layer of foundation to the areas that need it. Remember to blend thoroughly after each application. 🧱
- Spot Conceal (If Needed): After applying foundation, you can use the stick as a concealer to target any remaining blemishes or imperfections. 🎯
- Set Strategically: Use a light hand when applying setting powder. Focus on areas that tend to get oily, such as the T-zone. Consider using a hydrating setting spray instead of powder in dry areas. 🌬️
(Slide: Comparison of different blending tools with pros and cons.)
| Tool | Pros | Cons | Best For |
|---|---|---|---|
| Damp Sponge | Creates a natural, seamless finish, absorbs excess product, easy to clean. | Can be time-consuming, requires frequent cleaning. | Dry to normal skin, sheer to medium coverage. |
| Stippling Brush | Provides buildable coverage, creates a smooth, airbrushed finish, good for applying liquid and cream products. | Can be streaky if not used correctly, requires practice. | Normal to oily skin, medium to full coverage. |
| Foundation Brush | Offers precise application, good for building coverage, can be used with liquid, cream, and powder products. | Can leave brushstrokes if not blended properly, requires frequent cleaning. | All skin types, buildable coverage. |
| Fingertips | Warms up the product, melts it into the skin, provides a natural, skin-like finish, free! | Can be less hygienic, may not be suitable for oily skin. | Dry to normal skin, sheer to medium coverage, targeted application (e.g., under the eyes). |
(Slide: Text: "The Touch-Up Tango: Repairing Without Re-Caking")
The Traceless Matte Foundation Repair Stick is designed for touch-ups, but layering product on top of existing makeup can be a recipe for disaster. Here’s how to touch up without caking:
(Slide: Steps for touching up makeup without caking.)
- Blot, Don’t Rub: Before applying any additional product, blot away excess oil with blotting papers or a tissue. Rubbing will only smear your existing makeup and create a cakey mess. 🧻
- Hydrate First (If Needed): If your skin feels dry or tight, spritz a hydrating face mist before touching up. This will help to rehydrate the skin and prevent the foundation from clinging to dry patches. 💦
- Targeted Application: Apply the foundation stick only to the areas that need it. Don’t apply it all over your face. Focus on concealing blemishes, redness, or uneven skin tone. 🎯
- Blend Seamlessly: Use a damp sponge or your fingertips to gently blend the foundation into your existing makeup. Make sure there are no harsh lines or edges. 🪄
- Set Lightly (If Needed): If you’re touching up your T-zone, set the area with a light dusting of setting powder. Avoid over-powdering. 🍚
(Slide: Text: "The Ingredient Intel: Knowing Your Formulas")
Understanding the ingredients in your makeup is crucial for preventing caking.
(Slide: A table listing common ingredients that can contribute to or prevent cake face.)
| Ingredient | Effect | Why |
|---|---|---|
| Silicone (e.g., Dimethicone) | Creates a smooth, silky texture, fills in pores and fine lines. | Can create a barrier that prevents moisture from reaching the skin, potentially leading to dryness and caking. |
| Hyaluronic Acid | Attracts and retains moisture, plumps up the skin. | Helps to hydrate the skin and prevent it from drying out, reducing the risk of caking. |
| Glycerin | A humectant that draws moisture from the air into the skin. | Similar to hyaluronic acid, glycerin helps to keep the skin hydrated and prevent caking. |
| Alcohol | Can dry out the skin, leading to dehydration and caking. | Avoid products with high concentrations of alcohol, especially if you have dry skin. |
| Talc | Absorbs oil and creates a matte finish. | Can be drying if used in excess, potentially leading to caking. |
| Oils (e.g., Jojoba, Argan) | Nourish and hydrate the skin, prevent dryness. | Can help to balance oil production and prevent the skin from drying out, reducing the risk of caking. |
(Slide: Text: "The Humidity Factor: Adapting to Your Environment")
Your environment plays a significant role in how your makeup performs. In humid climates, your skin may produce more oil, while in dry climates, it may become dehydrated.
(Slide: Tips for adjusting your makeup routine based on the climate.)
- Humid Climate: Use a mattifying primer and a lightweight foundation. Set your makeup with a translucent powder. Carry blotting papers with you to absorb excess oil throughout the day. ☀️
- Dry Climate: Use a hydrating primer and a dewy foundation. Set your makeup with a hydrating setting spray. Apply a facial oil under your makeup to add extra moisture. ❄️
(Slide: Text: "The Final Verdict: Prevention is Better Than Cure")
The key to preventing cake face with the Traceless Matte Foundation Repair Stick is to focus on skin prep, application technique, and product selection. By following these tips, you can achieve a flawless, natural-looking matte finish without looking like you’ve been dipped in a vat of plaster.
(Slide: A picture of a perfectly blended face with the Traceless Matte Foundation Repair Stick. Text: "Traceless Success!")
Remember, makeup is an art, not a science. Experiment, practice, and find what works best for you. And don’t be afraid to embrace your natural skin texture! The goal is to enhance your beauty, not to mask it completely. Now go forth and conquer that cake face! You got this! 🏆
For detailed product specifications and purchases, please go to :https://zenamakeup.com/products/traceless-matte-foundation-repair-stick
Leave a Reply