Lecture Hall: The Art & Science of Camouflage: Repairing Uneven Skin Tone with the Traceless Matte Foundation Repair Stick 🦸♀️🎨
Welcome, class, to Cosmetology 101! Today, we’re diving deep into the wonderful world of skin tone perfection, specifically tackling that pesky problem of unevenness. Forget airbrushing (in the literal sense, please! ⚠️), we’re arming ourselves with a powerful weapon: the Traceless Matte Foundation Repair Stick.
Think of this lecture as a masterclass in subtle deception. We’re not hiding anything, darling. We’re correcting and harmonizing! 🎶 We’re turning chaotic canvases into masterpieces, one swipe at a time.
(Professor struts to the front of the room, dramatically adjusting her glasses and brandishing a Foundation Repair Stick like a magic wand.)
Alright, settle in, because we’re about to become skin tone whisperers!
I. Understanding the Enemy: What is Uneven Skin Tone Anyway? 🕵️♀️
Before we launch into the heroics, we need to understand our foe. Uneven skin tone isn’t just "slightly off." It’s a complex landscape of varying shades and textures, often telling a story of past battles. Let’s break down the usual suspects:
- Hyperpigmentation: This is the overachiever of melanin production. Think sunspots, age spots, melasma, and post-inflammatory hyperpigmentation (PIH – those annoying dark marks after a breakout). ☀️
- Hypopigmentation: The melanin slackers! This results in lighter patches of skin, often caused by scarring, eczema, or vitiligo. ☁️
- Redness: The fiery culprit, often linked to inflammation, rosacea, acne, or just good old-fashioned irritation. 🔥
- Dullness: The lack of radiance, making your skin look… well… lackluster. 😴 Often caused by dead skin cell buildup, dehydration, or poor circulation.
(Professor points to a slide showing a diverse range of skin tones with varying degrees of unevenness.)
See? It’s a whole symphony of color (or lack thereof!). Each requires a different approach, a different stroke of our foundation repair stick magic.
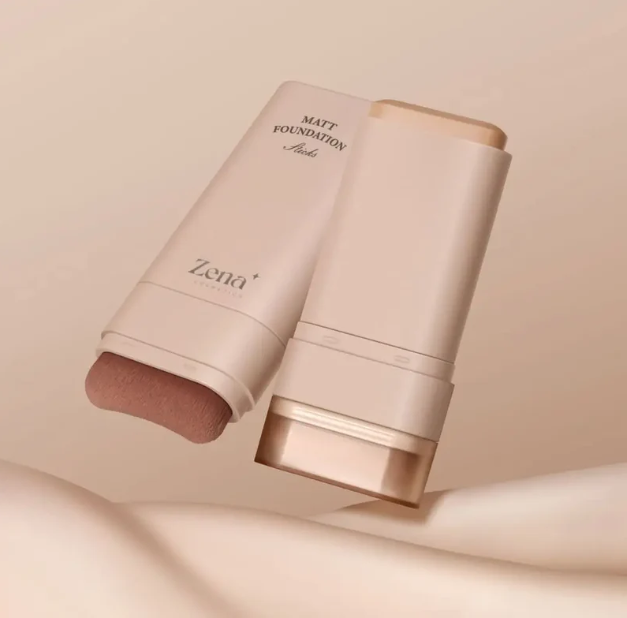
II. The Weapon of Choice: The Traceless Matte Foundation Repair Stick – A Deep Dive ⚔️
Okay, let’s talk about our star player. Why a foundation repair stick? Why matte? What makes it so darn special?
- Targeted Precision: Unlike liquid foundation applied all over, the stick allows for pinpoint accuracy. We’re not trying to paint the Mona Lisa with a garden hose, are we? 🙅♀️ We’re spot-treating like the pros!
- Buildable Coverage: Control is key! Whether you need a whisper of color correction or a more substantial coverage, the stick allows you to layer and blend to your heart’s content. 🎨
- Matte Finish: This is crucial for a seamless, natural look. Matte formulas absorb excess oil, preventing shine and ensuring the corrected areas blend flawlessly with the rest of your skin. Think of it as the Photoshop of the real world! ✨
- Traceless (Hopefully!): The goal is to make it invisible. A good formula will melt into the skin, leaving no tell-tale signs of your corrective efforts. This requires a blendable formula and a good technique (more on that later!).
- Portability and Convenience: Let’s face it, sometimes uneven skin tone strikes at the worst moments! Having a repair stick in your bag is like having a beauty emergency kit always within reach. 👜
III. Decoding the Formula: What to Look For in a Stellar Repair Stick 🧪
Not all foundation repair sticks are created equal. Here’s your checklist for choosing the perfect weapon:
| Feature | Description | Why It Matters |
|---|---|---|
| Pigment Load | The amount of color in the formula. | More pigment means better coverage, but also requires more skillful blending to avoid looking cakey. |
| Texture | Smooth, creamy, and easy to blend. | A gritty or dry formula will be difficult to work with and can emphasize texture. |
| Ingredients | Look for beneficial ingredients like hyaluronic acid (hydration), antioxidants (protection), and soothing agents (anti-inflammation). | Why not treat your skin while you’re correcting it? Bonus points for SPF! |
| Shade Range | A wide range of shades ensures you can find a perfect match for your skin tone. | Essential for a seamless, natural look. A mismatch will only highlight the problem. |
| Long-Wearing | A formula that stays put throughout the day without fading or transferring. | Nobody wants their camouflage to disappear by lunchtime! 🙅♀️ |
| Non-Comedogenic | Formulated not to clog pores. | Crucial for acne-prone skin. The last thing you want is to fix one problem and create another! |
IV. The Color Correction Cheat Sheet: Your Secret Weapon 🌈
Alright, things are about to get colorful! Color correction is the art of using opposing colors to neutralize imperfections. Here’s your handy guide:
| Imperfection | Color Corrector | Explanation |
|---|---|---|
| Redness | Green | Green neutralizes red. Think of it like canceling out the angry vibes. 💚 |
| Dark Circles (Blue/Purple) | Peach/Orange | Peach/Orange pigments cancel out the blue/purple tones under the eyes. This is especially helpful for deeper skin tones. 🍑 |
| Dullness | Lavender/Lilac | Lavender/Lilac brightens the skin and adds a subtle radiance. Use sparingly! 💜 |
| Sallowness | Pink | Pink adds warmth and liveliness to sallow skin tones. Think of it as a little pick-me-up for your face! 💖 |
(Professor displays a color wheel and points out the complementary colors.)
Remember, this isn’t about painting your face like a clown. It’s about subtle adjustments, creating a harmonious base for your foundation.
Remember, this isn’t about painting your face like a clown. It’s about subtle adjustments, creating a harmonious base for your foundation.
V. The Application Technique: Master the Art of Camouflage 🖌️
Now for the main event! Here’s your step-by-step guide to flawless foundation repair stick application:
- Prep Your Skin: Cleanse, moisturize, and prime! A smooth, hydrated canvas is essential for a seamless application. Think of it as preparing your wall before painting! 🏠
- Identify the Problem Areas: Stand in natural light and pinpoint the areas that need correction. Be honest with yourself! We’re going for realism, not fantasy. 👀
- Apply Color Corrector (If Needed): Using a small brush or your fingertip, apply a thin layer of the appropriate color corrector to the problem areas. Blend well! Remember, less is more! 🤏
- Apply the Foundation Repair Stick: Gently swipe the stick directly onto the areas needing coverage. Start with a light layer and build up as needed.
- Blend, Blend, Blend! This is the most crucial step! Use a damp beauty sponge, a foundation brush, or your fingertips to blend the product seamlessly into your skin. Pay attention to the edges!
- Set with Powder (Optional): If you have oily skin or want extra long-lasting coverage, set the corrected areas with a light dusting of translucent powder.
- Assess and Adjust: Step back and take a look in the mirror. Do you need more coverage? More blending? Make any necessary adjustments until you’re satisfied with the results.
- Continue with Your Makeup Routine: Apply your foundation, concealer, blush, etc., as usual.
(Professor demonstrates the application technique on a volunteer student.)
Pro-Tips for Perfection:
- Use a Light Hand: Over-application is the enemy! Start with a small amount of product and build up as needed.
- Warm Up the Product: If the stick feels stiff, warm it up slightly by rubbing it on the back of your hand before applying it to your face.
- Use a Damp Beauty Sponge: A damp sponge will help blend the product seamlessly into the skin and prevent it from looking cakey.
- Clean Your Tools Regularly: Dirty brushes and sponges can harbor bacteria and lead to breakouts.
- Practice Makes Perfect: Don’t get discouraged if you don’t get it right the first time. Keep practicing, and you’ll become a pro in no time!
VI. Troubleshooting: Common Mistakes and How to Fix Them 🚑
Even the best makeup artists encounter hiccups. Here’s how to tackle some common foundation repair stick woes:
| Problem | Solution |
|---|---|
| Cakey Appearance | You’ve probably used too much product. Try using a damp beauty sponge to blend the product more thoroughly. You can also spritz your face with a hydrating mist to help melt the product into your skin. |
| Patchy Application | Your skin may be dry or unevenly textured. Exfoliate and moisturize your skin regularly. Use a primer to create a smooth base for your foundation. |
| Color Mismatch | You’ve chosen the wrong shade. Go back to the store and get shade matched by a professional. Don’t be afraid to mix two shades together to create a custom blend. |
| Product Settling into Fine Lines | Use a lightweight formula and apply it sparingly. Avoid applying the product directly to fine lines. Instead, apply it around the lines and blend outwards. Set with a fine-milled powder. |
| Foundation Separating/Looking Oily | Your skin may be producing too much oil. Use an oil-absorbing primer and set your foundation with a mattifying powder. Blot your skin throughout the day to remove excess oil. |
VII. Beyond the Basics: Advanced Techniques and Considerations 🎓
Once you’ve mastered the basics, you can explore more advanced techniques:
- Highlighting and Contouring: Use a foundation repair stick that’s a few shades lighter than your skin tone to highlight your high points and a few shades darker to contour your cheekbones, jawline, and nose.
- Concealing Blemishes: Use a small brush to apply the foundation repair stick directly to the blemish. Set with powder to prevent it from smudging.
- Creating a Natural Look: Use a lightweight formula and apply it sparingly. Focus on correcting imperfections rather than covering your entire face.
- Adapting to Different Skin Types: Adjust your technique based on your skin type. For example, if you have dry skin, use a hydrating primer and a creamy formula. If you have oily skin, use an oil-absorbing primer and a matte formula.
VIII. The Ethical Considerations: Remember, It’s About Enhancement, Not Erasure! 🙏
As with any cosmetic procedure, it’s important to remember that makeup is about enhancing your natural beauty, not erasing it. Uneven skin tone is a common and normal occurrence. While using a foundation repair stick can help you achieve a more even complexion, it’s important to embrace your unique features and love the skin you’re in! 💖
(Professor smiles warmly.)
IX. Conclusion: Go Forth and Conquer! 🌍
Congratulations, class! You’ve officially graduated from Foundation Repair Stick 101! You now possess the knowledge and skills to tackle uneven skin tone with confidence and finesse. Remember to practice, experiment, and most importantly, have fun!
(Professor bows dramatically.)
Now go forth and conquer those imperfections! And remember, a little bit of camouflage can go a long way! 😉
For detailed product specifications and purchases, please go to :https://zenamakeup.com/products/traceless-matte-foundation-repair-stick
Leave a Reply