The Traceless Matte Foundation Repair Stick: Your Morning Makeup Savior (aka, Goodbye "Oops, I Overslept!")
(Lecture Hall Doors Burst Open, You Stride Confidently to the Podium)
Alright, settle down, settle down! Good morning, future makeup maestros! Today, we’re tackling a common enemy: The Panic-Inducing Morning Makeup Routine. You know the one. The alarm clock betrayed you, your coffee decided to stage a dramatic rebellion on your favorite shirt, and now you’re staring into the mirror with the horror of realizing you have approximately 3 minutes to transform from “zombie extra in a low-budget horror flick” to “polished professional ready to conquer the world.”
Fear not, my friends! For I bring you tidings of great joy (and expertly concealed blemishes): The Traceless Matte Foundation Repair Stick!
(Dramatic drumroll sounds)
This isn’t just another makeup product. This is a lifestyle. This is your Emergency Beauty Broadcast System. This is the difference between showing up to that important meeting looking like you wrestled a badger (and lost) and showing up looking like you spent a leisurely hour perfecting your face.
(Slide appears on the screen: A split image – one side a frazzled person with dark circles, the other a beaming, flawless individual. Caption: "Choose Your Destiny.")
So, grab your notebooks (or, you know, your phones – this IS the 21st century), and let’s dive deep into the glorious world of the Traceless Matte Foundation Repair Stick.
I. Understanding the Morning Makeup Mayhem: A Diagnostic Overview
First, we need to diagnose the problem. Why are mornings so… chaotic? Let’s break it down:
| Problem | Contributing Factors | Symptoms |
|---|---|---|
| Time Crunch ⏰ | Oversleeping, Snooze Button Addiction, Unexpected Catastrophes (e.g., spilled coffee, wardrobe malfunctions), Unrealistic Expectations (attempting a full glam look in 5 minutes) | Rushed Application, Uneven Coverage, Unblended Lines, General Air of Desperation |
| Product Overload 💄 | Too many steps, Complex layering techniques, Products that require specialized tools or application methods | Product Build-up, Cakey Appearance, Difficulty Matching Skin Tone, Feeling Overwhelmed and Abandoning the Entire Effort |
| Lack of Skill (or Patience) 😫 | Insufficient knowledge of makeup techniques, Unfamiliarity with specific products, Frustration with achieving desired results | Patchy Coverage, Incorrect Color Matching, Difficulty Concealing Imperfections, Increased Stress Levels and Potential Existential Crisis |
| Environmental Factors ☀️ | Poor lighting, Limited workspace, Distractions (e.g., family members, pets, the siren call of social media) | Difficulty Seeing Imperfections, Inability to Apply Product Accurately, Constant Interruptions Leading to Increased Frustration and Potential Makeup-Related Injuries |
(Icon: A frazzled emoji wearing a smeared lipstick)
These are the enemies we face, the dragons we must slay! And our trusty sword in this battle? You guessed it: The Traceless Matte Foundation Repair Stick.
II. The Traceless Matte Foundation Repair Stick: A Deep Dive into its Awesomeness
So, what makes this little stick so special? Let’s explore its key features and benefits:
- Traceless Finish: This isn’t your grandma’s heavy, cakey foundation. The formula is designed to melt seamlessly into the skin, providing a natural, airbrushed finish that looks like… well, like you woke up looking flawless. ✨
- Matte Perfection: Goodbye, shine! Hello, controlled radiance! The matte finish minimizes the appearance of pores and keeps oil at bay, ensuring your makeup lasts all day (or at least until your afternoon coffee break).
- Repair Power: The "Repair" in the name isn’t just marketing fluff. This stick is your secret weapon against:
- Blemishes: Strategically conceal those pesky spots without looking like you’re wearing a plaster cast.
- Redness: Calm down irritated skin and neutralize redness for an even complexion.
- Dark Circles: Banish those under-eye shadows and look like you actually got 8 hours of sleep (even if you only got 4). 🐼
- Stick Format: The Epitome of Convenience: This isn’t a messy liquid, a finicky powder, or a temperamental cream. This is a stick! Direct application means no brushes, no sponges, no fuss. Just swipe, blend, and go! 🚀
- Portability Powerhouse: Small enough to fit in your purse, your gym bag, or even your pocket (though we don’t recommend that), this stick is your on-the-go beauty emergency kit.
- Buildable Coverage: Whether you need a light touch-up or full-on camouflage, the buildable formula allows you to customize your coverage to suit your needs.
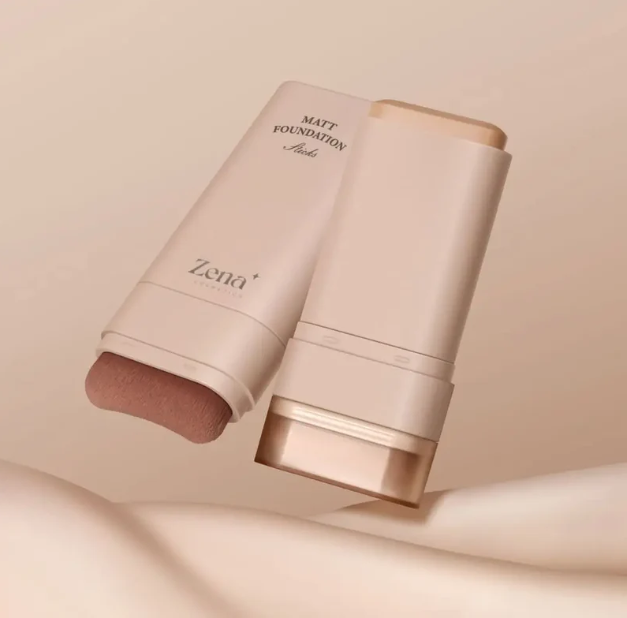
(Slide appears on the screen: A close-up of the foundation stick with labels pointing to its key features.)
III. Application Techniques: From Novice to Ninja in 5 Minutes (or Less!)
Okay, now for the fun part! Let’s learn how to wield this magical stick like a pro.
A. The Quick Touch-Up:
- Target Zone Identification: Identify the areas that need the most attention (blemishes, redness, dark circles).
- Direct Application: Gently swipe the stick directly onto the target areas. Think of it like spot-treating your skin.
- Blending is Key: Use your fingertips, a damp beauty sponge, or a small brush to blend the edges seamlessly into your skin. Remember, the goal is to make it look like the product disappeared into your skin, not like you drew a stripe on your face.
- Pat, Don’t Rub: Patting motions will help the product adhere to the skin and prevent streaking.
(Icon: A hand gently patting the skin)
B. The All-Over Base:
- Strategic Placement: Apply the stick in key areas: forehead, cheeks, chin, and nose. Think of it as creating a "foundation map" on your face.
- Blending Bonanza: Use a damp beauty sponge or a foundation brush to blend the product outwards, ensuring even coverage across your entire face.
- Build as Needed: If you need more coverage in certain areas, apply another thin layer and blend again.
C. Concealing Dark Circles (Operation: Bye-Bye Bags!)
- The Triangle Technique: Draw an inverted triangle under your eyes with the foundation stick, extending down to your cheekbones. This will brighten the entire under-eye area and create a lifting effect.
- Gentle Blending: Use your ring finger (it has the lightest touch) to gently pat the product into your skin. Avoid rubbing, as this can irritate the delicate skin around your eyes.
- Set with Powder (Optional): If you have oily skin or want to prevent creasing, lightly dust a translucent setting powder over the area.
(Slide appears on the screen: Step-by-step diagrams of each application technique.)
IV. Choosing the Right Shade: The Foundation Shade Matching Olympics
Finding the right shade is crucial. A shade too light will make you look ghostly, while a shade too dark will make you look like you’ve been rolling around in dirt (not a good look for that important meeting).
Here are some tips for finding your perfect match:
- Know Your Undertone: Are you warm, cool, or neutral? This will determine which shades will complement your skin.
- Warm: Yellow, golden, or peachy undertones.
- Cool: Pink, red, or blue undertones.
- Neutral: A mix of warm and cool undertones.
- Test in Natural Light: Artificial lighting can distort colors, so always test foundation shades in natural light.
- Test on Your Jawline: Apply a small amount of the foundation to your jawline and blend it in. The shade that disappears into your skin is the winner! 🏆
- Don’t Be Afraid to Mix: If you can’t find an exact match, you can always mix two shades together to create your perfect custom color.
(Table: A guide to understanding undertones and choosing the right foundation shade.)
| Undertone | Characteristics | Best Foundation Shades |
|---|---|---|
| Warm | Yellow, golden, or peachy undertones | Foundations with yellow or golden hues |
| Cool | Pink, red, or blue undertones | Foundations with pink or red hues |
| Neutral | A mix of warm and cool undertones | Foundations with a balance of warm and cool tones, or foundations specifically formulated for neutral undertones |
V. Maintenance and Storage: Keeping Your Stick in Tip-Top Shape
To ensure your Traceless Matte Foundation Repair Stick stays in perfect working order, follow these simple tips:
- Keep it Clean: Wipe the stick with a clean tissue after each use to prevent the buildup of bacteria.
- Store it Properly: Store the stick in a cool, dry place away from direct sunlight.
- Don’t Share: Sharing makeup can spread bacteria and lead to skin infections. Keep your stick to yourself! (Sharing is caring, but not when it comes to germs).
- Know When to Replace: Foundation sticks have a limited shelf life. If the texture changes, the color fades, or it starts to smell funny, it’s time to say goodbye. 🗑️
VI. Troubleshooting: Common Problems and Solutions
Even with the best product, things can sometimes go awry. Here are some common problems and how to fix them:
| Problem | Possible Cause | Solution |
|---|---|---|
| Cakey Appearance | Applying too much product, Using a drying formula, Dry skin | Exfoliate regularly, Use a hydrating primer, Apply the foundation in thin layers, Use a damp beauty sponge |
| Streaky Application | Not blending properly, Using a dry beauty sponge or brush, Applying too much pressure | Use a damp beauty sponge or brush, Blend in circular motions, Apply light pressure |
| Foundation Sliding Off | Oily skin, Not using a primer, Using a moisturizer that’s too heavy | Use an oil-absorbing primer, Set with a translucent powder, Blot excess oil throughout the day |
| Color Doesn’t Match | Incorrect shade selection, Foundation oxidizing on the skin | Test foundation shades in natural light, Choose a shade slightly lighter than your skin tone, Set with powder |
| Blemishes Not Fully Concealed | Applying too little product, Not using a concealer | Apply multiple thin layers of foundation, Use a dedicated concealer for stubborn blemishes |
(Icon: A lightbulb lighting up – symbolizing a solution)
VII. Beyond the Basics: Advanced Techniques and Tips
Once you’ve mastered the basics, you can start experimenting with advanced techniques to take your makeup game to the next level:
- Contouring and Highlighting: Use a foundation stick that’s a few shades darker than your skin tone to contour your cheekbones, jawline, and nose. Use a foundation stick that’s a few shades lighter than your skin tone to highlight your cheekbones, brow bone, and the bridge of your nose.
- Creating a Custom Tinted Moisturizer: Mix a small amount of the foundation stick with your favorite moisturizer to create a sheer, natural-looking base.
- Using as a Primer: Apply a thin layer of the foundation stick all over your face before applying your regular foundation to create a smooth, even base and help your makeup last longer.
VIII. Conclusion: Embrace the Power of the Stick!
(You step away from the podium, a confident smile on your face.)
And there you have it! The Traceless Matte Foundation Repair Stick: your secret weapon against the morning makeup mayhem. It’s quick, easy, effective, and portable – everything you need to conquer your day with confidence (and a flawless complexion).
So, go forth, my friends! Armed with your newfound knowledge and your trusty foundation stick, you are ready to face any makeup challenge that comes your way. Remember to practice, experiment, and most importantly, have fun!
(You give a final wave as the lecture hall erupts in applause.)
(Slide appears on the screen: "Thank You! Now go forth and conquer! 😉")
For detailed product specifications and purchases, please go to :https://zenamakeup.com/products/traceless-matte-foundation-repair-stick
Leave a Reply