SOS! My Traceless Matte Foundation Repair Stick is Misbehaving! 🚨 A Troubleshooting Lecture
Alright, everyone, settle down, settle down! Grab your coffee (or your concealer, no judgment here), because we’re about to dive deep into the glamorous (and sometimes frustrating) world of the Traceless Matte Foundation Repair Stick. Yes, that little miracle worker that promises to banish blemishes and imperfections into oblivion. But what happens when it… doesn’t?
You’re staring at a streaky mess in the mirror, feeling more like a clown 🤡 than a cover girl. Don’t panic! We’ve all been there. Today, we’re going to dissect the common culprits behind your Repair Stick woes and equip you with the knowledge to conquer them. Think of me as your makeup therapist, here to guide you through the emotional rollercoaster of foundation application.
This isn’t just a blog post, darlings. This is a lecture. We’re going to break down the problem, diagnose the symptoms, and prescribe the cure. So, let’s get started!
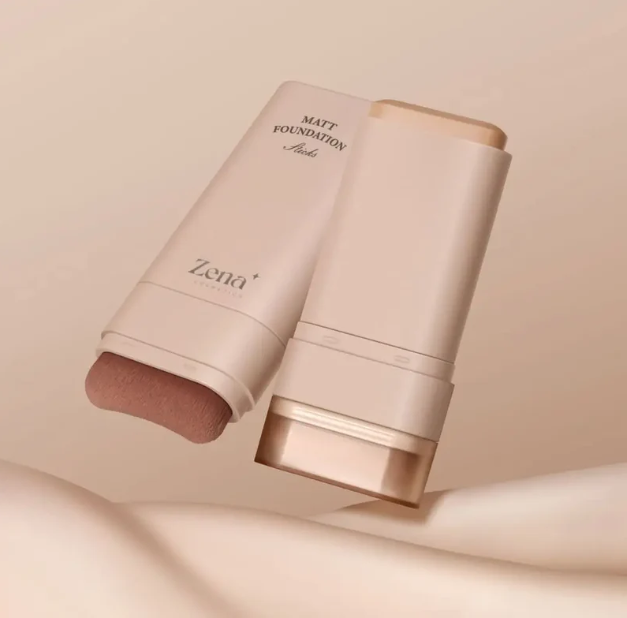
I. The Premise: Understanding Your Partner in Crime (The Repair Stick)
First things first, let’s understand what we’re working with. The Traceless Matte Foundation Repair Stick is designed to be a targeted solution for:
- Spot Concealing: Zapping those pesky pimples 💥, dark spots, and redness.
- Touch-Ups: On-the-go perfection for makeup meltdowns.
- Light Coverage: For a quick, natural-looking base.
- Blending Edges: Smoothing out harsh lines around foundation or concealer.
It’s typically formulated with a matte finish, designed to control shine and create a flawless canvas. But like any relationship, understanding its nuances is key to making it work.
II. The Suspects: Identifying Common Issues
Now, let’s get down to the nitty-gritty. What are the common complaints we hear about this little stick of potential magic?
| Issue | Description | Likely Cause(s) | Emoji Clue |
|---|---|---|---|
| Streaking/Patchiness | The product applies unevenly, leaving noticeable streaks or patchy areas. | Dry skin, incorrect application technique, product not blending well with existing makeup, using too much product. | 🚧 |
| Caking/Creasing | The product settles into fine lines and wrinkles, emphasizing them and creating a cakey appearance. | Dry skin, too much product, incorrect application technique, product not compatible with skincare/primer. | 🎂 |
| Not Blending | The product sits on top of the skin and doesn’t seamlessly integrate with the surrounding makeup. | Dry skin, incorrect application technique, product not compatible with existing makeup, using too little product. | 🤝❌ |
| Color Mismatch | The shade of the Repair Stick doesn’t match your skin tone, resulting in an obvious spot. | Incorrect shade selection. | 🎨 |
| Product Drying Out/Crumbling | The Repair Stick becomes dry, hard, and difficult to apply. It might even crumble upon application. | Improper storage, product past its expiration date, exposure to air. | 🏜️ |
| Breakouts/Irritation | Using the Repair Stick causes breakouts, redness, or irritation. | Sensitivity to ingredients, clogged pores, using a dirty applicator. | 😡 |
| Product Pulling/Dragging Skin | The stick tugs and pulls at your skin during application, especially in delicate areas like under the eyes. | Dry skin, stick too dry, applying too much pressure. | 🤕 |
| Shine Peeking Through | Despite being a "matte" product, shine reappears quickly after application. | Oily skin, improper preparation, using too little product in oily areas, product not matte enough. | ✨ |
| Oxidation (Color Change) | The product darkens or changes color significantly after being applied to the skin. | Product reacting with skin’s oils or pH, product formulation prone to oxidation. | 🍂 |
III. Interrogation Time: Diagnosing the Root Cause
Now that we know the suspects, let’s play detective. We need to identify why your Repair Stick is acting up.
A. The Skin Condition Confession:
Your skin is the foundation (pun intended!) of your makeup application.
- Dry Skin: Dry skin is like a desert. It sucks up moisture, causing the Repair Stick to cling to dry patches, creating streaks and caking. It also makes it harder to blend.
- Oily Skin: Oily skin can cause the Repair Stick to slide around, melt away, and lose its matte finish. Excess oil can also interfere with the product’s ability to adhere properly.
- Combination Skin: The tricky middle ground! You have dry areas (usually cheeks) and oily areas (usually the T-zone). You’ll need a tailored approach.
- Sensitive Skin: Sensitive skin reacts easily to certain ingredients, leading to redness, irritation, and breakouts.
Solution:
- Dry Skin: EXFOLIATE gently! Then, hydrate, hydrate, hydrate! Use a rich moisturizer before applying any makeup. Consider a hydrating primer.
- Oily Skin: Use an oil-free moisturizer, followed by a mattifying primer. Blotting papers are your best friend. Consider a setting powder.
- Combination Skin: Spot treat! Use a hydrating moisturizer on dry areas and a lighter, oil-free moisturizer on oily areas.
- Sensitive Skin: Patch test EVERYTHING! Look for hypoallergenic and fragrance-free formulas.
B. The Application Technique Testimony:
How you apply the Repair Stick makes a HUGE difference.
- Too Much Product: Less is more! Applying too much product is a recipe for caking, creasing, and a generally unnatural look.
- Too Little Product: You might not get enough coverage, or the product might not blend properly.
- Dragging/Pulling: This can cause irritation and premature wrinkles. Ouch!
- Incorrect Tools: Using the wrong brushes or sponges can lead to streaking and uneven application.
- Hasty Application: Rushing the process can result in a sloppy, unfinished look.
Solution:
- Start with a thin layer: Build up coverage gradually.
- Dab, don’t swipe: Use a dabbing motion to apply the product to the desired area. This helps to prevent streaks and drag.
- Use the right tools: A small, dense brush or a makeup sponge (dampened!) are ideal for blending.
- Take your time: Patience is key to a flawless finish.
- Warm the product (slightly): If you feel like the stick is too hard, warm it up by rubbing it gently on the back of your hand before applying it.
C. The Product Compatibility Conspiracy:
Your Repair Stick isn’t working in isolation. It’s interacting with your skincare, primer, and other makeup products.
- Incompatible Formulas: Water-based products don’t always play nicely with silicone-based products. This can lead to separation and a patchy finish.
- Heavy Skincare: Rich creams and serums can interfere with the Repair Stick’s ability to adhere to the skin.
- Dirty Applicators: Bacteria buildup on your brushes and sponges can cause breakouts and irritation.
Solution:
- Match your formulas: Research the ingredients in your skincare, primer, and Repair Stick to ensure they’re compatible.
- Allow skincare to absorb: Give your skincare products time to fully absorb before applying makeup.
- Clean your applicators regularly: Wash your brushes and sponges at least once a week with a gentle cleanser.
D. The Environmental Evidence:
The environment can also affect your Repair Stick.
- Temperature: Extreme temperatures can alter the product’s consistency and performance.
- Humidity: High humidity can cause the product to melt and lose its matte finish.
- Sunlight: Direct sunlight can damage the product and cause it to degrade.
Solution:
- Store your Repair Stick in a cool, dry place.
- Avoid leaving it in direct sunlight.
- If you live in a humid climate, consider using a setting spray to lock in your makeup.
IV. The Verdict: Prescribing the Right Remedy
Okay, we’ve identified the suspects and interrogated the evidence. Now, it’s time to prescribe the right remedy for your Repair Stick woes!
Let’s revisit our table and add the solutions!
| Issue | Description | Likely Cause(s) | Emoji Clue | Solution |
|---|---|---|---|---|
| Streaking/Patchiness | The product applies unevenly, leaving noticeable streaks or patchy areas. | Dry skin, incorrect application technique, product not blending well with existing makeup, using too much product. | 🚧 | Exfoliate and moisturize thoroughly. Apply in thin layers using a dabbing motion. Blend well with a damp makeup sponge or a small, dense brush. Use a hydrating primer if needed. Avoid applying too much product at once. |
| Caking/Creasing | The product settles into fine lines and wrinkles, emphasizing them and creating a cakey appearance. | Dry skin, too much product, incorrect application technique, product not compatible with skincare/primer. | 🎂 | Exfoliate and moisturize thoroughly. Apply a lightweight moisturizer. Use a hydrating primer. Apply the Repair Stick sparingly, using a dabbing motion. Blend well with a damp makeup sponge. Set with a light dusting of translucent powder. Avoid using heavy creams or serums underneath. |
| Not Blending | The product sits on top of the skin and doesn’t seamlessly integrate with the surrounding makeup. | Dry skin, incorrect application technique, product not compatible with existing makeup, using too little product. | 🤝❌ | Exfoliate and moisturize thoroughly. Apply in thin layers. Use a damp makeup sponge or a small, dense brush to blend. Ensure the product is compatible with your existing makeup. Warm up the product slightly before application. Consider using a blending oil or spray to help the product meld with your skin. |
| Color Mismatch | The shade of the Repair Stick doesn’t match your skin tone, resulting in an obvious spot. | Incorrect shade selection. | 🎨 | Find the right shade! Test shades in natural light. Consider getting color matched at a makeup counter. If you’re between shades, it’s usually better to go slightly lighter. You can also mix two shades to create a custom match. |
| Product Drying Out/Crumbling | The Repair Stick becomes dry, hard, and difficult to apply. It might even crumble upon application. | Improper storage, product past its expiration date, exposure to air. | 🏜️ | Store the product properly in a cool, dry place. Keep the cap tightly closed. Check the expiration date. If the product is expired, discard it. You can try warming it up slightly before application, but if it’s too far gone, it’s time for a replacement. |
| Breakouts/Irritation | Using the Repair Stick causes breakouts, redness, or irritation. | Sensitivity to ingredients, clogged pores, using a dirty applicator. | 😡 | Discontinue use immediately. Identify potential allergens. Use a clean applicator. Avoid using the product on broken or irritated skin. Patch test new products before applying them to your entire face. Consider using a non-comedogenic product. See a dermatologist if the problem persists. |
| Product Pulling/Dragging Skin | The stick tugs and pulls at your skin during application, especially in delicate areas like under the eyes. | Dry skin, stick too dry, applying too much pressure. | 🤕 | Moisturize thoroughly before application. Use a hydrating eye cream. Warm up the product slightly before application. Apply with a light touch, using a dabbing motion. Use a damp makeup sponge to blend. Avoid applying too much pressure. |
| Shine Peeking Through | Despite being a "matte" product, shine reappears quickly after application. | Oily skin, improper preparation, using too little product in oily areas, product not matte enough. | ✨ | Use an oil-free moisturizer and a mattifying primer. Apply the Repair Stick liberally to oily areas. Set with a translucent powder. Use blotting papers throughout the day. Consider using a more matte foundation. Avoid using hydrating or dewy products underneath. |
| Oxidation (Color Change) | The product darkens or changes color significantly after being applied to the skin. | Product reacting with skin’s oils or pH, product formulation prone to oxidation. | 🍂 | Choose a shade that is slightly lighter than your skin tone. Use a primer to create a barrier between your skin and the product. Set with a translucent powder. Avoid touching your face throughout the day. Unfortunately, some products are just prone to oxidation, so you might need to switch to a different brand or formula. |
V. Graduation: You’re Now a Repair Stick Pro!
Congratulations, graduates! You’ve successfully completed this crash course in Traceless Matte Foundation Repair Stick troubleshooting. You’re now armed with the knowledge and tools to conquer any makeup mishap and achieve a flawless, matte finish.
Remember these key takeaways:
- Know your skin type.
- Prep your skin properly.
- Use the right application technique.
- Choose compatible products.
- Store your Repair Stick correctly.
- Practice makes perfect!
Now go forth and conquer! May your blemishes be banished, your imperfections be invisible, and your makeup always be on point! 💄💖
And if all else fails? There’s always the "no makeup" makeup look. 😉 Just kidding… mostly. Now go get blending!
For detailed product specifications and purchases, please go to :https://zenamakeup.com/products/traceless-matte-foundation-repair-stick
Leave a Reply