Lecture: Unleashing the Smoky Glitter Goddess: Mastering the Deluxe Liquid Glitter Cream Eyeshadow Stick for Intense Drama
Welcome, my dazzling disciples, to the glittering sanctum of eyeshadow artistry! ✨ Today, we embark on a journey to conquer a look that’s both sophisticated and utterly captivating: the Intense Smoky Glitter Eye, achieved with the humble yet mighty Deluxe Liquid Glitter Cream Eyeshadow Stick.
Forget blending for hours with a million different powders! We’re embracing efficiency and maximum sparkle with this one-stick wonder. Think of this lecture as your cheat sheet to eyeshadow stardom. 🌟
Professor’s Note: I’m Professor SparklePants, and I’m here to guide you through this shimmering terrain. Don’t be afraid to experiment, and remember, mistakes are just opportunities for even more glitter!
I. Course Objectives:
By the end of this lecture, you will be able to:
- Understand the anatomy and advantages of a Deluxe Liquid Glitter Cream Eyeshadow Stick.
- Master the techniques for creating a smoky base using the stick.
- Apply and blend glitter effectively for maximum impact.
- Choose the right shade combinations for various eye colors and skin tones.
- Troubleshoot common challenges and achieve a flawless, long-lasting smoky glitter eye.
- Feel like a total rockstar.🤘
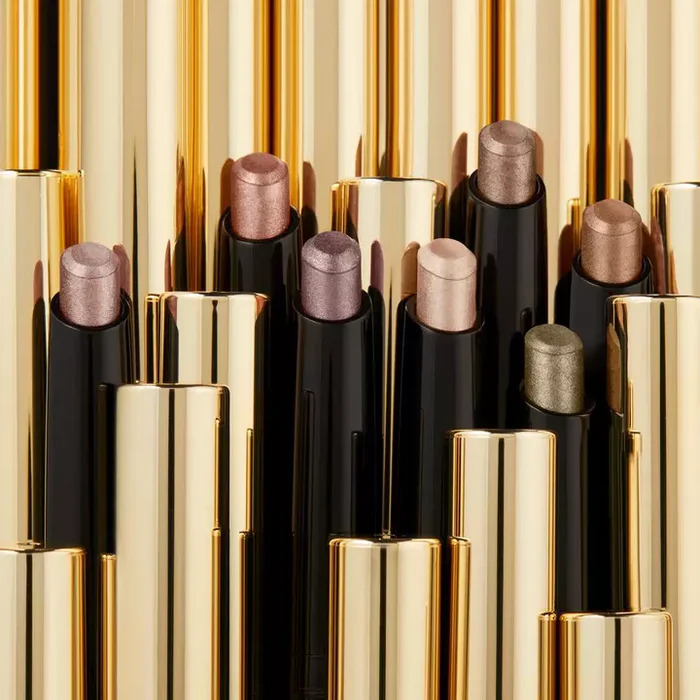
II. The Magnificent Liquid Glitter Cream Eyeshadow Stick: A Love Affair
Let’s face it: traditional eyeshadow palettes can be overwhelming. So many shades, so many brushes, so much potential for blending anxiety! Enter the Liquid Glitter Cream Eyeshadow Stick – your one-stop shop for effortless glamour.
(A) Anatomy of Awesomeness:
This magical wand typically consists of:
- The Creamy Pigment Core: This is where the color and the creaminess reside. It glides on smoothly, providing a base for the glitter to adhere to.
- The Glitter Infusion: The heart of the operation! This is where the shimmer and sparkle live, ready to transform your eyelids into celestial canvases. ✨
- The Applicator (Often a Twist-Up Stick): Think of it as your trusty paint brush, ready to deliver the goods with precision (or, you know, as much precision as you can muster after a double espresso).
- The Cap (Often a Source of Endless Mystery When Lost): Crucial for preventing the product from drying out and turning into a glittery fossil. Treat it with respect.
(B) Why Choose the Stick? (Besides the Obvious Glitter Factor):
| Benefit | Explanation | Professor’s Witty Remark |
|---|---|---|
| Ease of Use | Beginner-friendly application! Simply swipe and blend (more on this later). No fancy brush skills required. | "If you can draw a line, you can rock this look. If you can’t draw a line… well, just blend a lot!" 😂 |
| Speed | Saves precious time! Skip the elaborate blending routine of powder shadows. Perfect for those mornings when you’re running late (which is, let’s be honest, every morning). | "Sleep is important, but glitter is importanter. This stick lets you have both!" 😴✨ |
| Pigment Power | Often highly pigmented! Delivers intense color payoff with minimal effort. | "One swipe and BAM! You’re a walking, talking masterpiece." 🎨 |
| Travel-Friendly | Compact and mess-free! Toss it in your purse and sparkle on the go. No more shattered eyeshadows ruining your favorite handbag. | "Because looking fabulous shouldn’t be limited to your bathroom mirror." ✈️ |
| Long-Lasting | Many formulas are designed to be long-wearing and crease-resistant, keeping your glitter game strong all day (or night) long. | "Goodbye, eyeshadow fallout! Hello, all-day sparkle that lasts longer than my attention span!" 💫 |
III. The Smoky Canvas: Building the Foundation
The key to a successful smoky glitter eye lies in creating a solid, smoky base. This will not only enhance the glitter’s intensity but also provide depth and dimension to the look.
(A) Priming is Paramount:
- Why? Eyeshadow primer is your best friend. It creates a smooth, even surface for the eyeshadow to adhere to, prevents creasing, and intensifies the color payoff. Think of it as the magic glue that holds everything together.
- How? Apply a thin layer of eyeshadow primer to your entire eyelid, from lash line to brow bone. Allow it to dry for a minute or two before proceeding.
- Professor’s Tip: If you don’t have eyeshadow primer, a dab of concealer or foundation will do in a pinch. Just make sure to set it with a translucent powder.
(B) Laying Down the Smoky Color:
This is where the Deluxe Liquid Glitter Cream Eyeshadow Stick truly shines.
- Choose Your Shade: Select a shade that complements your eye color and skin tone. Deep browns, grays, blacks, purples, and even deep greens work beautifully for a smoky eye. (More on shade selection later!)
- Apply to the Lid: Swipe the eyeshadow stick directly onto your eyelid, focusing on the outer corner and crease. Don’t worry about being perfect at this stage; we’ll blend it out later.
- For a more intense look: Apply multiple layers, building up the color gradually.
- For a softer look: Apply a single layer and blend immediately.
- Blend, Blend, Blend!: This is the most crucial step. Use a blending brush (a fluffy, tapered brush is ideal) to soften the edges of the eyeshadow and create a seamless transition.
- Circular Motions: Use small, circular motions to blend the eyeshadow into the crease and along the outer corner of your eye.
- Windshield Wiper Motion: Use a back-and-forth motion to blend the eyeshadow along the lash line.
- Professor’s Tip: Don’t be afraid to go back and add more color if needed. It’s better to start with a little and build up the intensity gradually. Remember: Blend, blend, blend! It’s the secret to a professional-looking smoky eye.
(C) Deepening the Crease (Optional):
For added depth and dimension, you can use a darker eyeshadow (powder or stick) to define the crease.
- Choose a Deeper Shade: Select a shade that’s one or two shades darker than the base color.
- Apply to the Crease: Use a small, angled brush to apply the darker eyeshadow to the crease of your eye.
- Blend Thoroughly: Blend the darker eyeshadow into the base color, ensuring a seamless transition.
(D) Smudging the Lower Lash Line:
This step adds a touch of drama and completes the smoky look.
- Apply to the Lower Lash Line: Use the same eyeshadow stick (or a pencil eyeliner) to apply a thin line along your lower lash line.
- Smudge It Out: Use a small, smudging brush or a cotton swab to soften the line and create a smoky effect.
- Professor’s Tip: You can also use a powder eyeshadow in a similar shade to smudge the lower lash line.
IV. Glitter Glam: The Art of Sparkling
Now for the pièce de résistance! Applying the glitter is where the magic happens.
(A) Choosing Your Glitter Shade:
(A) Choosing Your Glitter Shade:
Consider these factors when selecting your glitter shade:
- Your Eye Color: Complementary colors will make your eyes pop!
- Your Skin Tone: Lighter skin tones can rock lighter glitters, while deeper skin tones can handle bolder, more saturated shades.
- The Occasion: A subtle shimmer is perfect for daytime, while a bolder glitter is ideal for evening events.
- Professor’s Tip: When in doubt, gold and silver glitter are universally flattering. ✨
(B) Applying the Glitter:
- Placement is Key: Decide where you want the glitter to be most concentrated. Typically, the center of the eyelid is a good starting point.
- Direct Application: Swipe the eyeshadow stick directly onto the desired area.
- Blending (Carefully!): Use your fingertip or a small, flat brush to gently blend the glitter into the smoky base.
- Professor’s Warning: Be careful not to over-blend the glitter, as this can dull the sparkle.
- Patting Motion: A patting motion is often more effective than a sweeping motion when applying glitter.
- Layering for Intensity: For a more dramatic look, apply multiple layers of glitter.
- Professor’s Tip: Applying a glitter glue underneath the eyeshadow stick can help the glitter adhere better and last longer.
(C) Glitter Variations:
- All-Over Glitter: Apply glitter to the entire eyelid for maximum sparkle.
- Glitter Liner: Use a thin brush to apply glitter along the lash line for a more subtle effect.
- Inner Corner Highlight: Apply a small amount of glitter to the inner corner of your eye to brighten the look.
- Professor’s Tip: Get creative! There are no rules when it comes to glitter. Experiment and find what works best for you.
V. Finishing Touches: Polishing the Masterpiece
The devil is in the details! These finishing touches will elevate your smoky glitter eye to the next level.
(A) Eyeliner (Optional):
- Why? Eyeliner can add definition and drama to the eyes.
- How? Apply a thin line of eyeliner along your upper lash line. Wing it out for a more dramatic look.
- Professor’s Tip: A gel eyeliner or liquid eyeliner is ideal for creating a sharp, precise line.
(B) Mascara: The Crowning Glory:
- Why? Mascara lengthens, thickens, and defines the lashes, making your eyes look bigger and brighter.
- How? Apply two or three coats of mascara to your upper and lower lashes.
- Professor’s Tip: Use an eyelash curler before applying mascara to curl your lashes and open up your eyes.
(C) Brow Power:
- Why? Well-groomed brows frame the face and enhance the eyes.
- How? Fill in your brows with a brow pencil, powder, or gel.
- Professor’s Tip: Use a brow gel to set your brows in place and keep them looking polished all day long.
(D) Highlight & Contour (Optional):
- Why? Defining the face with highlight and contour can amplify the look
- How? Use a light powder to highlight the brow bone, cheekbone, and nose. Use a shade or two darker than the skintone to contour the cheekbone, jawline, and forehead.
- Professor’s Tip: Blending is key.
(E) Setting Spray: The Grand Finale:
- Why? Setting spray locks in your makeup and keeps it looking fresh all day (or night) long.
- How? Hold the setting spray about 8-10 inches away from your face and mist it evenly.
- Professor’s Tip: Choose a setting spray that’s specifically designed for long-lasting wear.
VI. Troubleshooting: Conquering Common Challenges
Even the most seasoned makeup artists encounter challenges. Here’s how to overcome common issues:
| Problem | Solution | Professor’s Witty Remark |
|---|---|---|
| Creasing Eyeshadow | Use a good eyeshadow primer! Also, avoid applying too much product in one layer. Build up the color gradually. | "Creasing is the enemy! Primer is your weapon of choice. Go forth and conquer!" ⚔️ |
| Glitter Fallout | Use a glitter glue or a sticky base underneath the glitter. Apply the glitter with a patting motion rather than a sweeping motion. Use a soft brush to gently sweep away any fallout. | "Glitter fallout is a sparkly curse! But with the right techniques, you can banish it!" 🧙 |
| Uneven Blending | Take your time and blend thoroughly! Use a clean blending brush to soften the edges of the eyeshadow. Don’t be afraid to go back and add more color if needed. | "Blending is like therapy for your eyelids. Relax, breathe, and blend away your worries!" 🧘♀️ |
| Eyeshadow Fading | Use a long-wearing eyeshadow formula. Set your makeup with a setting spray. Avoid touching your eyes throughout the day. | "Fading eyeshadow is a tragedy! But with long-wearing formulas and setting spray, your sparkle will endure!" 😭➡️✨ |
| Smoky Eye Too Dark | Start with a lighter base color and build up the intensity gradually. Use a lighter hand when applying the darker eyeshadow. Blend thoroughly to soften the edges. | "Too much darkness can be overwhelming! Start light, and add intensity as needed. Think of it as a smoky gradient, not a black hole!" 🌌 |
| Glitter Looking Patchy | Apply a base of a similar eyeshadow color before applying the glitter. Use a glitter glue or sticky base to make sure the glitter adheres properly. Use a small, flat brush to press the glitter into place. | "Patchy glitter is a glittery crime! Ensure that every particle is in its place and shimmering to its full potential. Like a tiny sparkling army!" 🪖 |
VII. Shade Selection: A Guide to Glittery Harmony
Choosing the right shade is crucial for creating a flattering and impactful look. Here’s a general guide based on eye color and skin tone:
(A) Eye Color Recommendations:
| Eye Color | Recommended Shades | Professor’s Recommendation |
|---|---|---|
| Blue Eyes | Bronze, copper, gold, warm browns, peach, orange, terracotta. These warm shades create a beautiful contrast with blue eyes, making them appear brighter and more vibrant. | "Blue eyes are like sapphires! Enhance their brilliance with warm, earthy tones." 💎 |
| Green Eyes | Purples, plums, mauves, browns with reddish undertones, emerald green, gold. These shades complement the green in your eyes, making them appear more intense and mesmerizing. | "Green eyes are like emeralds! Embrace their mystique with rich, jewel-toned shades." 💚 |
| Brown Eyes | Almost any shade! Brown eyes are incredibly versatile and can pull off a wide range of colors. Experiment with different shades to find what you love. Deep blues, greens, purples, golds, coppers, and bronzes all look stunning on brown eyes. | "Brown eyes are like chameleons! They can rock any color under the sun. Don’t be afraid to experiment!" 🤎 |
| Hazel Eyes | Greens, golds, browns, purples. Hazel eyes are a mix of colors, so you can play around with different shades to bring out the green, gold, or brown tones. | "Hazel eyes are like magical portals! Use different shades to unlock their hidden colors." ✨ |
(B) Skin Tone Recommendations:
| Skin Tone | Recommended Shades | Professor’s Recommendation |
|---|---|---|
| Fair Skin | Light browns, taupes, soft grays, champagne, rose gold, pastel shades. Avoid shades that are too dark or heavy, as they can overwhelm fair skin. | "Fair skin is like a delicate canvas! Use light and airy shades to create a soft and ethereal look." 🕊️ |
| Medium Skin | Warm browns, bronzes, golds, coppers, jewel tones (emerald, sapphire, amethyst). Medium skin tones can handle a wider range of colors than fair skin. | "Medium skin is like a golden sunset! Embrace its warmth with rich and vibrant shades." 🌅 |
| Olive Skin | Greens, golds, bronzes, warm browns, purples, berries. Olive skin tones often have yellow undertones, so warm shades tend to look best. | "Olive skin is like a sun-kissed goddess! Enhance its natural radiance with earthy and jewel-toned shades." ☀️ |
| Dark Skin | Deep browns, blacks, golds, bronzes, coppers, jewel tones (sapphire, ruby, emerald), vibrant colors (fuchsia, turquoise). Dark skin tones can handle bold, saturated colors with ease. | "Dark skin is like a midnight sky! Embrace its depth and richness with bold and dazzling shades." 🌃 |
VIII. Conclusion: Go Forth and Glitter!
Congratulations, my shimmering students! You have now been equipped with the knowledge and techniques to create a dazzling and sophisticated Intense Smoky Glitter Eye using the magic of the Deluxe Liquid Glitter Cream Eyeshadow Stick.
Remember, makeup is about self-expression and having fun! Don’t be afraid to experiment, break the rules, and let your inner sparkle shine. ✨
Professor’s Final Words of Wisdom:
- Practice Makes Perfect: The more you practice, the better you’ll become at applying and blending eyeshadow.
- Don’t Be Afraid to Experiment: Try different shades, techniques, and styles to find what you love.
- Have Fun!: Makeup should be enjoyable. If you’re not having fun, you’re doing it wrong.
- Always Clean Your Brushes: Your brushes will thank you (and your skin will too!).
- And most importantly… Never underestimate the power of glitter!
Now go forth and glitter the world! 💖
For detailed product specifications and purchases, please go to :https://zenamakeup.com/products/liquid-glitter-waterproof-eyeshadow-stick
Leave a Reply