Lecture: Illuminating the Canvas: A Deep Dive into Glittering Shimmer Highlighting & Setting Powder Application
(🛎️ Bell rings, indicating the start of the lecture. A spotlight shines on a slightly eccentric professor with a shimmering lab coat.)
Good morning, beauty scholars! Welcome, welcome! Settle down, settle down! Today, we embark on a journey – a shimmering, sparkling, downright radiant journey! We’re diving deep into the captivating world of Glittering Shimmer Highlighting & Setting Powder, specifically, how to wield its power on the high points of the face.
Forget your dusty textbooks; this isn’t your grandma’s beauty lesson! We’re talking about transforming ordinary faces into glowing masterpieces. Prepare for enlightenment, hilarity, and maybe a few glitter-related mishaps along the way. Safety goggles are optional, but a healthy dose of self-deprecating humor is mandatory. Let’s get glowing! ✨
I. Course Introduction: What’s the Fuss About Shimmer?
Before we get our brushes dirty, let’s understand why highlighting is more than just a fleeting trend. It’s about sculpting light, accentuating your best features, and subtly screaming, "Yes, I woke up like this…flawless!" (Even if you wrestled with your alarm clock and haven’t seen caffeine yet.)
-
The Power of Light: Highlighting mimics how light naturally hits the face, bringing forward certain areas and creating dimension. Think of it as strategically placing tiny spotlights on your best assets.
-
The Art of Illusion: Used correctly, highlighter can make cheekbones appear higher, noses appear slimmer, and eyes appear brighter. It’s the makeup equivalent of a magician pulling rabbits out of a hat, except instead of rabbits, it’s cheekbones you never knew you had. 🪄
-
The Confidence Boost: Let’s be honest, who doesn’t feel a little more fabulous with a touch of shimmer? It’s a subtle confidence booster that can make you feel ready to conquer the world, or at least survive a particularly brutal Monday morning.
-
The Glitter Factor: While we’re discussing the confidence boost, it’s important to mention that a little shimmer can go a long way. With the right product, it can give you the ethereal glow of an otherworldly being. Too much, and you could end up looking like a disco ball. 🪩
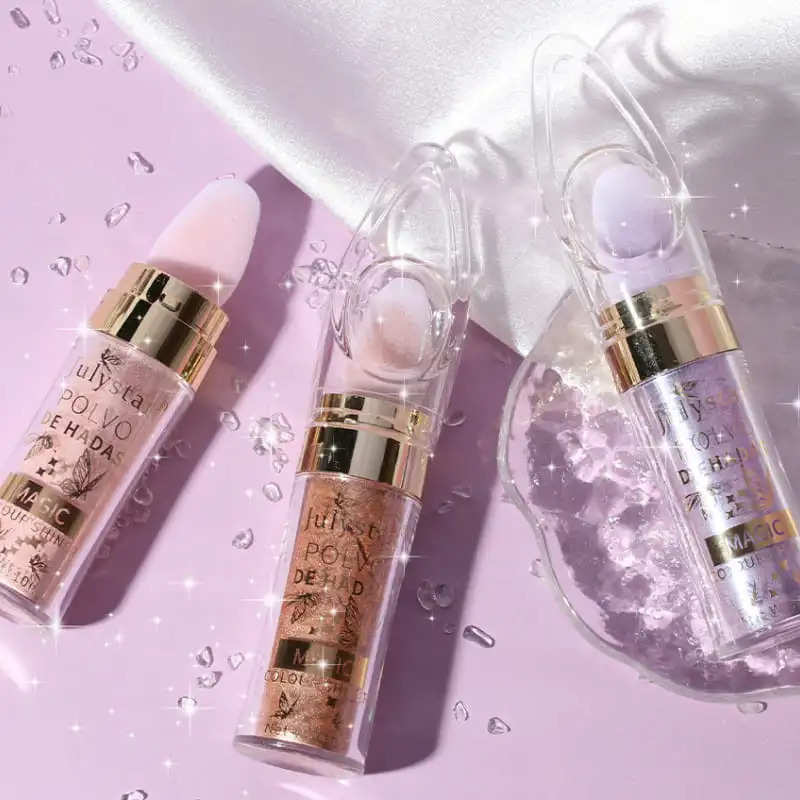
II. Understanding the Glittering Shimmer Highlighting & Setting Powder
Not all shimmers are created equal! Let’s dissect our subject of study: Glittering Shimmer Highlighting & Setting Powder. This isn’t just a powder; it’s a delicate balance of light reflection, pigment, and skin-loving ingredients (hopefully!).
-
What Makes it "Glittering"? The presence of fine, light-reflecting particles. These particles can range from subtle shimmer to full-blown glitter. The key is to find a balance that complements your skin and the occasion.
-
Why "Highlighting"? Because it’s designed to draw attention to specific areas of the face. It’s about creating contrast and defining features.
-
The "Setting" Element: Some (but not all) shimmering highlighters also possess setting properties. This means they can help lock in your makeup and prevent it from creasing or fading throughout the day. Think of it as the bodyguard for your foundation. 🛡️
-
Ingredients to Consider: Look for powders containing:
- Light-reflecting pigments (Mica, Silica): These are your shimmer superstars.
- Soothing agents (Vitamin E, Aloe Vera): To keep your skin happy and hydrated.
- Oil-absorbing ingredients (Clay, Tapioca Starch): If you have oily skin, these will be your best friends.
- Avoid: Harsh chemicals, parabens, and fragrances that can irritate the skin.
III. The High Points: Mapping Your Radiant Landscape
Now, for the geographical tour! Knowing where to apply highlighter is crucial. We’re aiming for the "high points" – the areas that naturally catch the light. Think of them as your facial real estate, and highlighter is the luxury condo you’re building.
| High Point | Description | Impact | Application Technique |
|---|---|---|---|
| Cheekbones | The upper curve of your cheekbone, just above where you apply blush. | Lifts and defines the cheekbones, creating a more sculpted appearance. | Apply in a C-shape from the temple down to the top of the cheekbone, blending well. |
| Brow Bone | The area directly beneath your eyebrow. | Lifts the brow, opens up the eyes, and creates a more awake appearance. | Apply a small amount directly under the brow bone, focusing on the arch. |
| Inner Corner of Eye | The innermost corner of your eye, near the bridge of your nose. | Brightens the eyes, making them appear larger and more awake. | Use a small brush to apply a tiny dot of highlighter to the inner corner. |
| Bridge of Nose | The center of your nose, from the top to just above the tip. | Creates the illusion of a slimmer, more defined nose. | Apply a thin line down the bridge of the nose, blending well to avoid looking like you have a stripe of glitter. |
| Cupid’s Bow | The small dip in the center of your upper lip. | Accentuates the lips, making them appear fuller and more defined. | Apply a small amount to the cupid’s bow to create a subtle pout. |
| Chin (optional) | The center of your chin. | Adds dimension and can make the lower face appear more balanced. (Use sparingly, especially if you have a round face) | Apply a small amount to the center of the chin, blending well. |
(Professor points to a diagram of a face with highlighted areas.)
See? It’s like a treasure map, but instead of gold, we’re digging for glow!
IV. Tools of the Trade: Brushes and Beyond
You wouldn’t paint the Mona Lisa with a toothbrush, would you? (Okay, maybe someone has, but let’s stick to professional tools for now.) Choosing the right brush is crucial for achieving a flawless highlight.
- Fan Brush: Ideal for a soft, diffused glow. Think of it as the whisper of highlighter.
- Tapered Brush: Perfect for precise application on the cheekbones, brow bone, and bridge of the nose. It’s the sculptor’s chisel of the highlighting world.
- Small Detail Brush: For pinpoint accuracy on the inner corner of the eye and cupid’s bow. Think of it as the surgeon’s scalpel, but for shimmer.
- Fluffy Blending Brush: Essential for blending out harsh lines and creating a seamless finish. This is your safety net!
- Fingertips (For Cream Products): For cream or liquid highlighters, your fingertips can be your best tool. The warmth of your fingers helps to melt the product into the skin.
(Professor holds up various brushes, dramatically.)
Choose your weapon wisely, my friends!
V. The Application Process: From Dull to Dazzling
V. The Application Process: From Dull to Dazzling
Alright, let’s get down to business! Here’s a step-by-step guide to applying Glittering Shimmer Highlighting & Setting Powder like a pro.
-
Prep Your Canvas: Start with a clean, moisturized face. Apply your foundation, concealer, and any other base makeup you typically use. Think of your face as a blank canvas ready to be painted.
-
Set Your Base (Optional): If you have oily skin, consider setting your foundation with a translucent powder before applying highlighter. This will prevent the highlighter from clinging to excess oil and creating a patchy appearance.
-
Choose Your Shade: Select a highlighter shade that complements your skin tone.
- Fair Skin: Opt for champagne, pearl, or icy shades.
- Medium Skin: Gold, rose gold, and bronze shades work beautifully.
- Dark Skin: Copper, bronze, and deep gold shades will create a stunning glow.
-
Load Your Brush: Lightly tap your brush into the highlighter pan, and tap off any excess powder. Remember, you can always add more, but it’s much harder to take away!
-
Apply to High Points: Using your chosen brush, apply the highlighter to the high points of your face, as outlined in Section III. Start with a light layer and build up the intensity as desired.
-
Blend, Blend, Blend!: This is the most important step! Use a fluffy blending brush to soften any harsh lines and create a seamless transition between the highlighter and your base makeup. Think of it as smoothing out the rough edges of your masterpiece.
-
Set (If Necessary): If your highlighter doesn’t have setting properties, you can lightly dust a translucent powder over your entire face to lock everything in place.
-
Admire Your Glow!: Step back, take a look in the mirror, and admire your radiant complexion. You’ve officially transformed yourself into a glowing goddess! 🌟
VI. Troubleshooting: Avoiding Common Highlighting Pitfalls
Even the best artists make mistakes. Here are some common highlighting blunders and how to avoid them:
| Problem | Solution |
|---|---|
| Too Much Shimmer: | Tone it down! Use a clean brush to gently buff away excess product. You can also apply a light layer of foundation or concealer over the highlighted area to dull the shimmer. |
| Harsh Lines: | Blend, blend, blend! Use a fluffy blending brush to soften the edges of the highlighter and create a seamless finish. |
| Patchy Application: | Exfoliate your skin regularly to remove dead skin cells. Also, make sure your skin is properly moisturized before applying makeup. |
| Highlighter Clashing with Skin Tone: | Experiment with different shades until you find one that complements your complexion. |
| Highlighting Imperfections: | Be mindful of areas with texture or imperfections. Applying highlighter to these areas can accentuate them. |
| Looking Like a Disco Ball: | Choose a more subtle highlighter with a finer shimmer. Less is more! |
(Professor shakes a finger, knowingly.)
Remember, practice makes perfect! Don’t be afraid to experiment and find what works best for you.
VII. Advanced Techniques: Beyond the Basics
Once you’ve mastered the basics, you can start experimenting with more advanced highlighting techniques.
- Layering: Layer different types of highlighter (powder, cream, liquid) to create a custom glow.
- Color Correcting: Use a subtle highlighter with a peach or lavender undertone to neutralize dark circles or discoloration.
- Body Highlighting: Extend the glow beyond your face by applying highlighter to your collarbones, shoulders, and décolletage.
- "Inner Glow" Technique: Mix a small amount of liquid highlighter into your foundation for an all-over radiant complexion.
(Professor winks.)
The possibilities are endless! Let your creativity shine!
VIII. Conclusion: Embrace the Glow!
Congratulations, beauty scholars! You’ve officially completed your crash course in Glittering Shimmer Highlighting & Setting Powder application. You’re now equipped with the knowledge and skills to transform your face into a radiant masterpiece.
Remember, highlighting is more than just a makeup technique; it’s a form of self-expression. So, embrace the glow, experiment with different techniques, and most importantly, have fun!
(Professor bows as the lecture hall erupts in applause. Confetti rains down, sparkling with glitter.)
Class dismissed! Go forth and illuminate the world! And don’t forget to clean up your glitter! 😉
For detailed product specifications and purchases, please go to :https://zenamakeup.com/products/glittering-shimmer-highlighting-setting-powder
Leave a Reply