Lecture: ✨Shine Bright, Hide Dark Circles: Mastering Under-Eye Setting with Glittering Shimmer Powder✨
(Professor emerges from behind a shimmering curtain, wearing oversized sunglasses and holding a gigantic powder brush. Dramatic music fades.)
Good morning, class! Or should I say, good GLOWING morning! Welcome to Advanced Concealer Setting 101, where we’ll tackle the age-old question: how do we banish those pesky under-eye shadows and look like we actually slept last night, even if we spent it binge-watching cat videos?
(Professor dramatically removes sunglasses, revealing perfectly bright under-eyes.)
The answer, my luminous lovelies, lies in the strategic and artful application of… drumroll please… Glittering Shimmer Highlighting & Setting Powder! 🤯
(Confused murmurs ripple through the class.)
"But Professor!" I hear you cry, "Isn’t shimmer… scary under the eyes? Won’t it accentuate every fine line and crinkle like a disco ball in a retirement home?"
(Professor chuckles, a sound like wind chimes in a gentle breeze.)
Ah, my dear students, that’s where the art comes in! We’re not aiming for a full-on glitter bomb explosion under the eyes. We’re aiming for a subtle, sophisticated glow that reflects light and blurs imperfections. Think of it as a strategic shimmer hug for your under-eyes, not a full-on glitter assault.
(Professor gestures with the powder brush.)
So, buckle up, buttercups! We’re about to embark on a journey into the shimmering wonderland of under-eye perfection.
I. The Under-Eye Battlefield: Understanding the Terrain
Before we unleash the shimmer, we must understand the landscape we’re working with. The under-eye area is a delicate beast, prone to:
- Dark Circles: These pesky shadows are caused by a variety of factors, including genetics, lack of sleep, thin skin, and allergies. They can range from a subtle bluish hue to a deep, purplish nightmare.
- 😩 Dealing with Dark Circles Tip: Prioritize sleep (easier said than done, I know!), stay hydrated, and consider using a color-correcting concealer to neutralize the darkness.
- Fine Lines and Wrinkles: The under-eye area is one of the first places to show signs of aging. The skin is thin and delicate, making it susceptible to wrinkles and fine lines.
- 👵 Dealing with Fine Lines Tip: Hydrate! Hydrate! Hydrate! Use a good quality eye cream and avoid rubbing the area aggressively.
- Puffiness: Fluid retention and allergies can lead to puffy under-eyes, making you look tired and slightly resembled a grumpy pufferfish.
- 🐡 Dealing with Puffiness Tip: Try using a cold compress, jade roller, or caffeine-infused eye cream to reduce swelling.
- Creasing: Concealer settling into fine lines and wrinkles is a common problem. The under-eye area is naturally mobile, which can cause concealer to shift and crease.
- 😫 Dealing with Creasing Tip: Use a lightweight concealer, set it immediately with powder, and avoid applying too much product.
II. Choosing Your Weapon: Selecting the Right Shimmer Powder
Not all shimmers are created equal. For the under-eye area, we need a shimmer that is:
- Finely Milled: A finely milled powder will blend seamlessly into the skin and avoid looking chunky or glittery. Think of it as powdered fairy dust, not craft store glitter.
- 🔎 Look for: Words like "micro-fine," "finely milled," or "ultra-fine" on the product label.
- Subtle Shimmer: We want a shimmer that provides a soft, luminous glow, not a blinding highlight. Avoid powders with large glitter particles or overly intense shimmer.
- ✨ Think: "Soft focus" or "candlelit glow," not "strobe light."
- Color-Correcting Properties (Optional): Some shimmer powders have a slight tint that can help to brighten the under-eye area and neutralize darkness.
- 🎨 Consider: Peach or pink-toned powders for fair skin, yellow or banana-toned powders for medium skin, and orange-toned powders for deeper skin tones.
- Non-Comedogenic: This is crucial! We don’t want to clog our pores and end up with tiny white bumps around our eyes.
- 🚫 Look for: The phrase "non-comedogenic" on the product label.
Here’s a helpful table to guide your shimmer powder selection:
| Feature | Ideal Characteristics | Things to Avoid |
|---|---|---|
| Milling | Finely milled, almost undetectable particles | Chunky glitter, large shimmer particles, visible texture |
| Shimmer Intensity | Subtle, soft glow, reflects light without being too bright | Intense shimmer, disco ball effect, overly glittery |
| Color | Peach/Pink (Fair), Yellow/Banana (Medium), Orange (Deep) – Optional | Stark white, overly dark, or any color that clashes with your skin tone |
| Formulation | Non-comedogenic, talc-free (optional) | Contains comedogenic ingredients, irritating ingredients like fragrance or dyes |
| Example | Hourglass Ambient Lighting Powder, Laura Mercier Secret Brightening Powder | Any loose glitter, heavily glittered highlighters |
| Emoji Cheat Sheet | ✨ | 🚫 |
III. The Tools of the Trade: Brushes and Application Techniques
Now that we’ve chosen our shimmer powder, let’s talk about application. The right brush and technique are essential for achieving a flawless finish.
- The Brush: A small, fluffy brush is your best friend for applying shimmer powder under the eyes. Look for a brush with soft bristles and a slightly tapered shape.
- 🖌️ Recommendation: A small eyeshadow blending brush or a pointed powder brush works well.
- The Technique: The key is to use a light hand and build up the coverage gradually.
(Professor demonstrates the following steps on a volunteer student.)
- Prep the Under-Eye Area: Start by applying a hydrating eye cream to moisturize the skin and create a smooth canvas. Let it absorb for a few minutes before moving on to the next step.
- 💧 Hydration is Key! Dry skin will accentuate fine lines and wrinkles.
- Apply Concealer: Use a lightweight concealer that matches your skin tone to cover dark circles and imperfections. Blend it seamlessly into the skin using a damp beauty sponge or your finger.
- 🤫 Concealer Tip: Apply concealer in a V-shape under the eyes to brighten the entire area.
- Set with Translucent Powder (Optional): If you have oily skin or are prone to creasing, you can set your concealer with a light dusting of translucent powder before applying the shimmer powder. This will help to absorb excess oil and prevent the concealer from settling into fine lines.
- ☁️ Translucent Powder Tip: Use a small, fluffy brush to apply the powder in a tapping motion, avoiding dragging or rubbing.
- Apply Shimmer Powder: Dip your brush into the shimmer powder and tap off any excess. Gently apply the powder to the under-eye area, focusing on the inner corner and the area under the eye socket.
- 🤏 Less is More! Start with a small amount of powder and build up the coverage as needed.
- Blend, Blend, Blend! Use a clean brush to blend the shimmer powder seamlessly into the skin, ensuring there are no harsh lines or edges.
- 🔄 Blending is Crucial! Blending creates a natural and flawless finish.
- Check Your Work: Step back and take a look at your under-eye area in different lighting conditions. Make sure the shimmer is subtle and natural-looking, not overly glittery or harsh.
- 🧐 Lighting Matters! What looks good in your bathroom might not look so good in natural light.
Here’s a visual representation of the application zones:
       /
      /
     /      <--- Apply shimmer powder here (Inner corner & under eye socket)
    /_______
   |         | <--- Concealer application zone
   _________/
IV. Troubleshooting Shimmer Setbacks: Common Mistakes and Fixes
Even the most skilled makeup artists can encounter problems when working with shimmer powder. Here are some common mistakes and how to fix them:
- Mistake #1: Applying Too Much Shimmer: This is the most common mistake. Applying too much shimmer can make your under-eye area look overly glittery and accentuate fine lines and wrinkles.
- Fix: Use a light hand and build up the coverage gradually. If you apply too much, use a clean brush to gently blend away the excess.
- Mistake #2: Using the Wrong Brush: A brush that is too large or too dense can apply too much powder and make the shimmer look patchy.
- Fix: Use a small, fluffy brush with soft bristles.
- Mistake #3: Not Blending Properly: Failure to blend the shimmer powder properly can result in harsh lines and edges.
- Fix: Use a clean brush to blend the shimmer powder seamlessly into the skin.
- Mistake #4: Using the Wrong Shade of Shimmer: Using a shimmer that is too light or too dark can make your under-eye area look ashy or unnatural.
- Fix: Choose a shimmer shade that complements your skin tone. Peach or pink-toned shimmers work well for fair skin, yellow or banana-toned shimmers work well for medium skin, and orange-toned shimmers work well for deeper skin tones.
- Mistake #5: Creasing: Shimmer Powder can’t stop creasing entirely, but if the concealer underneath is already settling into fine lines, it will emphasize that.
- Fix: Use less concealer, use a light hand when applying the shimmer powder, blend, and consider a setting spray after makeup application.
V. Advanced Shimmer Techniques: Taking Your Glow to the Next Level
Once you’ve mastered the basics, you can experiment with some advanced techniques to take your shimmer game to the next level.
- Shimmer Layering: Try layering different shades of shimmer powder to create a custom glow. For example, you could apply a peach-toned shimmer to the inner corner of the eye and a champagne-toned shimmer to the outer corner.
- Shimmer Placement: Experiment with different shimmer placements to find what works best for your eye shape. You can try applying shimmer to the brow bone, the inner corner of the eye, or the center of the eyelid.
- Shimmer Mixing: Mix a small amount of shimmer powder with your eye cream or concealer to create a dewy, luminous base.
- Shimmer and Setting Spray: Setting spray will help to melt the shimmer powder into the skin and create a more natural-looking finish.
VI. The Shimmer Commandments: Rules to Live By
Before you venture forth and conquer the world with your shimmering under-eyes, let’s recap the Shimmer Commandments:
- Thou Shalt Not Over-Shimmer: Subtlety is key!
- Thou Shalt Blend, Blend, Blend: Blending is your best friend.
- Thou Shalt Choose Wisely: Select the right shimmer powder for your skin tone and concerns.
- Thou Shalt Hydrate Thyself: Hydrated skin is happy skin.
- Thou Shalt Experiment and Have Fun: Makeup is a form of self-expression!
(Professor smiles, revealing dazzlingly bright under-eyes.)
And there you have it, my shimmering scholars! You are now equipped with the knowledge and skills to conquer the under-eye battlefield and emerge victorious, with a subtle glow that rivals the sun. Now go forth and shine!
(Professor throws a handful of glitter into the air and dramatically exits.)
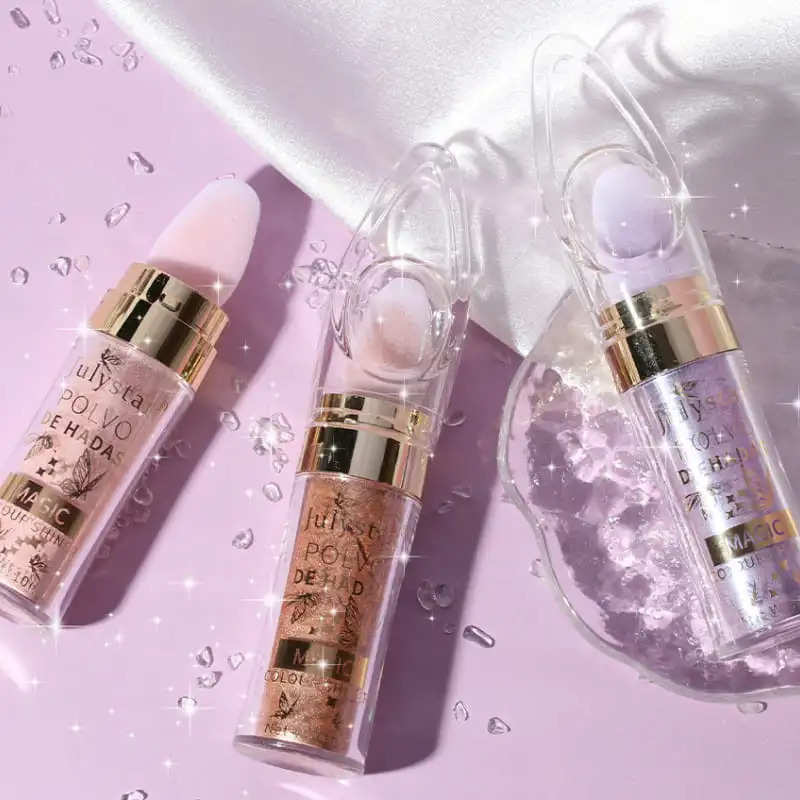
For detailed product specifications and purchases, please go to :https://zenamakeup.com/products/glittering-shimmer-highlighting-setting-powder
Leave a Reply