Lecture Hall: Hairline Heroics! Conquering the Thinning Front with Dye Powder Power! 💪
Alright, settle down, settle down! Class is in session! Today, we’re not dissecting frogs (thank goodness!), but tackling a far more pressing matter: the dreaded disappearing hairline! 😱 We’re diving deep into the surprisingly effective world of hairline dye powder for root touch-up to fill in those thinning areas and reclaim your crown!
Forget expensive salon visits, awkward comb-overs, and that baseball cap you’ve practically glued to your head. We’re going DIY, and we’re going to do it right.
Professor’s Note: I am not a licensed cosmetologist, but I am a seasoned veteran in the battle against thinning hair. I’ve experimented, I’ve learned, and now I’m sharing my hard-won wisdom with you!
Lecture Outline:
- The Case of the Vanishing Hairline: Why is this happening?! (Understanding the culprits)
- Dye Powder: Our Secret Weapon! (What it is, why it works, and different types)
- Choosing Your Shade: Avoiding the "Oompa Loompa" Effect! (Color matching mastery)
- Tools of the Trade: Brushes, Stencils, and the Quest for Precision! (Equipping yourself for success)
- Application Techniques: From Novice to Ninja! (Step-by-step guide with visual aids)
- Longevity & Maintenance: Keeping the Magic Alive! (Preventing premature fading and smudging)
- Troubleshooting: When Things Go Wrong (and How to Fix Them)! (Addressing common problems)
- Beyond the Hairline: Creative Uses for Dye Powder! (Eyebrows, beards, and more!)
- Product Recommendations: My Holy Grail List! (Tried, tested, and professor-approved!)
- Q&A: Ask the Expert (That’s me!) (Your chance to grill me on all things dye powder!)
1. The Case of the Vanishing Hairline: Why is this happening?! 🕵️♀️
Okay, let’s face it, a receding hairline is about as welcome as a surprise pop quiz on a Monday morning. But before we can fight the enemy, we need to understand it. Here’s a rundown of the usual suspects:
- Genetics: 🧬 (Thanks, Mom & Dad!) This is the big one. If your family tree looks like a barren wasteland on top, chances are you’re genetically predisposed to thinning hair.
- Age: 👵👴 Time marches on, and unfortunately, so does hair loss. Hair follicles naturally shrink with age, leading to finer, sparser hair.
- Hormones: 🤰 (Pregnancy, menopause, thyroid issues) Hormonal fluctuations can wreak havoc on your hair. Think of them as tiny, mischievous gremlins messing with your follicles.
- Stress: 🤯 Stress is a major hair killer. Chronic stress can disrupt the hair growth cycle, leading to shedding and thinning.
- Lifestyle: 🍔🍕 (Poor diet, smoking, excessive heat styling) What you put into your body and how you treat your hair directly impacts its health. Think of your hair as a plant – it needs nourishment and gentle care to thrive!
- Medical Conditions & Medications: 💊 Certain medical conditions (like alopecia areata) and medications (like chemotherapy) can cause hair loss.
The Takeaway: Understanding the root cause of your thinning hairline can help you tailor your approach to addressing it. While you can’t change your genes (yet!), you can manage stress, improve your diet, and treat your hair with kindness.
2. Dye Powder: Our Secret Weapon! ⚔️
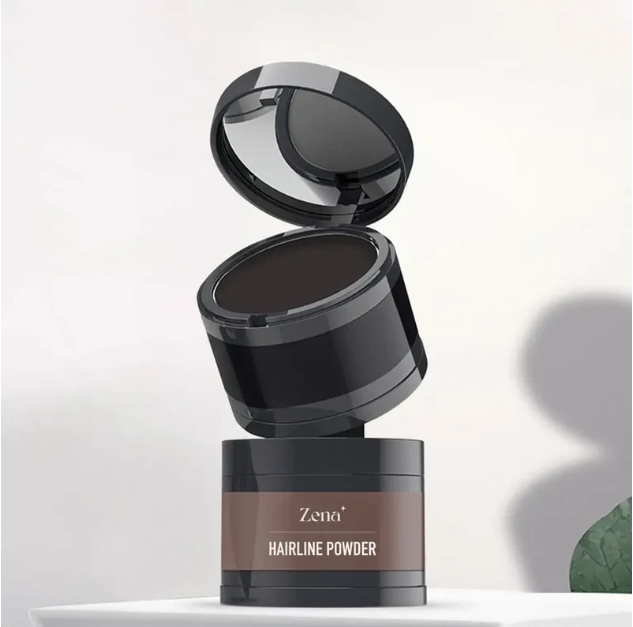
Now for the good stuff! Hairline dye powder, also known as root touch-up powder, is essentially a pigmented powder designed to temporarily conceal thinning areas and blend in with your existing hair color. Think of it as makeup for your hair! 💄
Why Dye Powder Works:
- Instant Coverage: It instantly fills in gaps and creates the illusion of a fuller hairline.
- Easy Application: It’s much quicker and easier to apply than traditional hair dye.
- Temporary & Washable: It washes out with shampoo, so you’re not committing to a permanent change.
- Versatile: It can be used on hairlines, part lines, eyebrows, and even beards!
- Affordable: It’s a budget-friendly alternative to salon treatments.
Types of Dye Powder:
| Type | Description | Pros | Cons | Best For |
|---|---|---|---|---|
| Powder Eyeshadow | Basic eyeshadow in a hair-matching color. Hey, don’t knock it ’til you try it. | Super inexpensive, readily available. | Might not stay in place as well, can be messy, limited color selection. | Desperate times, short-term fix, testing out the dye powder concept. |
| Root Touch-Up Powder | Specifically formulated for hair, often with a sponge applicator. | Easy to use, good color selection, often has a natural finish, usually waterproof. | Can be more expensive than eyeshadow, some formulas can be powdery and transfer easily, can feel drying to some. | Quick and easy touch-ups, travel-friendly, beginners. |
| Mineral Powder | Finely milled powder with mineral pigments, often oil-absorbing. | Natural-looking finish, good for sensitive scalps, can also absorb excess oil. | Can be less pigmented than other options, may require more layers for full coverage, some mineral makeup can be drying. | Oily scalps, sensitive skin, those seeking a natural look. |
| Stick Concealer | Creamy concealer stick that’s applied to the scalp. | Easy to use, good for dry scalps, can be built up for more coverage. | Can be messy, may require more layers for full coverage, some concealer can be oily. | Dry scalps, those seeking a natural look. |
Professor’s Pro-Tip: Experiment with different types of dye powder to find the one that works best for your hair type and preferences.
3. Choosing Your Shade: Avoiding the "Oompa Loompa" Effect! 🍊
Color matching is crucial! You want your hairline to blend seamlessly with your existing hair, not stand out like a sore thumb. Here are some tips for choosing the right shade:
- Match Your Roots: The goal is to blend with your roots, not your overall hair color (especially if you have highlights or balayage).
- Go Slightly Lighter: It’s better to go slightly lighter than darker. A darker shade can look harsh and unnatural.
- Test It Out: Before committing to a full application, test the color on a small, inconspicuous area.
- Mix & Match: Don’t be afraid to mix two shades together to create a custom color.
- Consider Undertones: Pay attention to your hair’s undertones (warm, cool, or neutral) and choose a dye powder with similar undertones.
Color Matching Cheat Sheet:
| Hair Color | Dye Powder Shade Recommendation |
|---|---|
| Black | Black or Dark Brown |
| Dark Brown | Dark Brown or Medium Brown |
| Medium Brown | Medium Brown or Light Brown |
| Light Brown | Light Brown or Dark Blonde |
| Dark Blonde | Dark Blonde or Medium Blonde |
| Medium Blonde | Medium Blonde or Light Blonde |
| Light Blonde | Light Blonde or Platinum Blonde |
| Red | Auburn, Copper, or Reddish-Brown |
| Gray/White | Light Gray, Silver, or White (depending on the shade of your hair) |
Professor’s Caution: Always err on the side of caution. Start with a small amount of product and build up the color gradually. You can always add more, but it’s much harder to take it away!
4. Tools of the Trade: Brushes, Stencils, and the Quest for Precision! 🛠️
Having the right tools is essential for a flawless application. Here’s a breakdown of my must-have items:
- Angled Eyeshadow Brush: This is my go-to brush for precise application along the hairline. The angled shape allows you to create a natural-looking edge.
- Small Blending Brush: Use this to blend the dye powder into your hairline for a seamless finish.
- Spoolie Brush: Perfect for blending the dye powder into your eyebrows (if you’re using it there).
- Stencils (Optional): If you’re struggling to create a clean hairline, stencils can be a helpful tool. You can find stencils specifically designed for hairlines, or you can even use a piece of paper or cardboard.
Tool Kit Essentials:
| Tool | Purpose | Why It’s Important |
|---|---|---|
| Angled Brush | Precise application along the hairline | Creates a natural-looking edge and prevents messy application. |
| Blending Brush | Blending the dye powder into the hairline | Ensures a seamless finish and eliminates harsh lines. |
| Spoolie Brush | Blending the dye powder into eyebrows (if applicable) | Creates a natural-looking brow shape and blends the color evenly. |
| Stencils (Optional) | Creating a clean hairline | Provides a guide for beginners and ensures a consistent shape. |
| Hair Clips | Sectioning off hair and keeping it out of the way | Allows for easier access to the hairline and prevents dye powder from getting on hair. |
| Mirror | Seeing what you’re doing! | So you can see what you’re doing! |
Professor’s Recommendation: Invest in high-quality brushes. They’ll make a world of difference in the application process and will last longer.
5. Application Techniques: From Novice to Ninja! 🥷
Alright, it’s showtime! Here’s a step-by-step guide to applying hairline dye powder like a pro:
- Prep Your Hair: Make sure your hair is clean and dry.
- Section Your Hair: Use hair clips to section off the hair around your hairline.
- Apply Dye Powder: Dip your angled eyeshadow brush into the dye powder and tap off any excess.
- Create a Hairline: Gently press the brush along your hairline, starting at the front and working your way back. Use short, feathery strokes to mimic the look of natural hair.
- Blend, Blend, Blend: Use your blending brush to blend the dye powder into your hairline. Pay close attention to the edges to avoid harsh lines.
- Repeat as Needed: Repeat steps 3-5 until you achieve the desired coverage.
- Set with Hairspray (Optional): If you want extra hold, you can lightly spritz your hairline with hairspray.
Visual Aid:
(Imagine a series of pictures here showing each step of the application process.)
Professor’s Insight: Practice makes perfect! Don’t be discouraged if you don’t get it right on the first try. Keep experimenting with different techniques and find what works best for you.
6. Longevity & Maintenance: Keeping the Magic Alive! ✨
Okay, you’ve conquered the hairline! Now, let’s talk about keeping it looking fabulous all day long:
- Avoid Touching Your Hair: The more you touch your hair, the more likely the dye powder is to transfer.
- Use Hairspray: Hairspray can help to set the dye powder and prevent it from smudging.
- Be Mindful of Rain: Rain can wash away the dye powder, so be prepared to reapply if necessary.
- Sleep Smart: Sleep on a satin pillowcase to prevent friction and keep the dye powder from transferring to your pillow.
Maintenance Tips:
- Reapply as Needed: You may need to reapply the dye powder throughout the day, especially if you’re active or sweat a lot.
- Clean Your Brushes Regularly: Dirty brushes can harbor bacteria and lead to breakouts. Clean your brushes with a mild shampoo or brush cleaner.
Professor’s Secret: A little goes a long way! Don’t overdo it with the dye powder. You want a natural-looking result, not a helmet of color.
7. Troubleshooting: When Things Go Wrong (and How to Fix Them)! 🚑
Even the best of us have bad hair days. Here are some common problems and how to fix them:
- Color Doesn’t Match: If the color is too light or too dark, try mixing it with another shade or applying a lighter/darker shade on top.
- Powder is Patchy: If the powder is patchy, try using a denser brush or applying more layers.
- Powder Transfers: If the powder transfers easily, try using a setting spray or avoid touching your hair.
- Powder Looks Unnatural: If the powder looks unnatural, try using a blending brush to soften the edges or applying a lighter shade on top.
- Powder is Irritating: If the powder is irritating, discontinue use and try a different formula or brand.
Emergency Kit:
| Problem | Solution |
|---|---|
| Wrong Color | Mix with a lighter/darker shade, apply a different shade on top, or remove and start over. |
| Patchy Application | Use a denser brush, apply more layers, or try a different application technique. |
| Transfer/Smudging | Use a setting spray, avoid touching your hair, or switch to a waterproof formula. |
| Unnatural Look | Blend the edges with a blending brush, apply a lighter shade on top, or try a different application technique. |
| Irritation/Allergy | Discontinue use, try a different formula or brand, or consult a dermatologist. |
| Over-Application | Use a clean brush to gently remove excess powder, or gently pat the area with a damp cloth. |
Professor’s Advice: Don’t panic! Most problems can be easily fixed. Just take a deep breath and follow the troubleshooting tips above.
8. Beyond the Hairline: Creative Uses for Dye Powder! 🎨
Hairline dye powder is a surprisingly versatile product! Here are some other ways you can use it:
- Eyebrows: Fill in sparse eyebrows and create a more defined shape.
- Beards: Fill in patchy beards and create a fuller, more even look.
- Root Touch-Up: Cover up gray roots between salon visits.
- Contouring: Use a darker shade to contour your face and create more definition.
- Eyeshadow: Use a shimmery shade as eyeshadow for a quick and easy makeup look.
Professor’s Inspiration: Get creative and experiment with different uses for dye powder! You might be surprised at what you can achieve.
9. Product Recommendations: My Holy Grail List! 🏆
After years of experimentation, I’ve compiled a list of my favorite hairline dye powders:
- For Quick & Easy Application: L’Oreal Root Cover Up Spray (Spray, but same idea!)
- For Natural Finish: Style Edit Root Concealer Touch Up Spray
- For Oily Scalps: Color Wow Root Cover Up
- For Budget-Friendly: Root Touch Up Hair Powder Color Stick
Disclaimer: These are just my personal recommendations. What works for me may not work for everyone. Do your own research and find products that are right for you.
10. Q&A: Ask the Expert (That’s me!) 🤔
Okay, class, it’s time for Q&A! Don’t be shy – ask me anything about hairline dye powder!
(This section would be interactive in a real lecture, with students asking questions and the professor providing answers. Here are some possible questions and answers to give you an idea:)
Q: "Professor, I have really dark hair. Will dye powder look too obvious on me?"
A: "Great question! Yes, it can be tricky with very dark hair. The key is to choose a shade that’s a very close match and to blend, blend, blend! Also, start with a small amount of product and build up the color gradually. Consider a matte finish powder, as shimmer can accentuate the powder."
Q: "I have sensitive skin. Are there any dye powders that are less likely to cause irritation?"
A: "Absolutely! Look for dye powders that are labeled as hypoallergenic, fragrance-free, and non-comedogenic. Mineral powders are often a good choice for sensitive skin. Always do a patch test on a small area of your skin before applying the powder to your hairline."
Q: "How long does dye powder typically last?"
A: "It depends on the formula and your activity level. Generally, it lasts until you wash your hair. Some formulas are more resistant to sweat and transfer than others. Using hairspray can also help to prolong the wear time."
Q: "Can I use hair dye instead of dye powder?"
A: "While you can, it’s not really recommended for daily hairline touch-ups. Hair dye is permanent (or semi-permanent) and can be damaging to your hair if used frequently. Dye powder is a much gentler and more convenient option for temporary coverage."
Q: "What’s the best way to clean dye powder off my forehead if I accidentally get it there?"
A: "A damp cotton swab or makeup wipe works wonders! Just gently wipe away the powder. You can also use a little bit of micellar water."
Conclusion:
And that, my friends, concludes our lecture on the art of hairline dye powder! I hope you’ve learned a thing or two about conquering the thinning front and reclaiming your confidence. Remember, a little dye powder can go a long way in creating the illusion of a fuller, more youthful hairline. Now go forth and conquer! And don’t forget to rock that newfound confidence! 👑
(Class Dismissed!) 🚪💨
For detailed product specifications and purchases, please go to :https://zenamakeup.com/products/hairline-dye-powder-for-root-touch-up
Leave a Reply