Lecture: Instant-Awaken Under Eye Brightener: Creating a Smooth Canvas Before Applying Concealer – The Ultimate Guide to Banish Those Under-Eye Blues (and Reds, Purples, and Greens!)
(Welcome music fades, spotlight shines on the presenter)
Good morning, good afternoon, good evening, and welcome, my beauty-obsessed brethren! Today, we’re diving deep into a topic that plagues us all, regardless of age, skin tone, or how many hours of sleep we swear we got last night: the dreaded under-eye circle. 🐼
But fear not! We’re not just going to whine about them. We’re going to conquer them! Specifically, we’re going to explore the magical world of Instant-Awaken Under Eye Brighteners and how they can transform your under-eye area into a smooth, radiant canvas, ready to receive the glorious gift that is concealer. Think of it as building a solid foundation for your under-eye empire. 👑
(Slide changes to a picture of a tired-looking individual with prominent under-eye circles, then quickly changes to a glamorous, wide-awake individual)
See the difference? That’s the power we’re talking about!
So, grab your favorite caffeinated beverage, settle in, and prepare to become under-eye brightening experts! We’ll cover everything from understanding the enemy (those dark circles!), to selecting the perfect weapon (the right brightener!), to mastering the application technique (the artistry!).
I. Understanding the Enemy: Decoding Dark Circles and Under-Eye Concerns
Before we unleash the power of brighteners, we need to understand why those pesky circles appear in the first place. Ignoring the root cause is like treating a symptom without addressing the disease. You might look better for a bit, but the problem will keep coming back.
(Slide changes to a diagram of the under-eye area, highlighting different anatomical features)
Think of your under-eye area as a delicate ecosystem. It’s got thin skin, blood vessels, and sometimes even shadows cast by bone structure. A lot can go wrong!
Here’s a breakdown of the usual suspects:
- Genetics: Blame your parents! Sometimes, dark circles are simply a genetic predisposition. You might have naturally thinner skin under your eyes, making blood vessels more visible.
- Sleep Deprivation: The classic culprit. When you’re tired, your blood vessels dilate, making them appear darker. Plus, fluid can accumulate, leading to puffiness and shadows. 😴
- Aging: As we age, our skin loses collagen and elasticity, becoming thinner and more translucent. This makes blood vessels and underlying structures more visible.
- Sun Exposure: UV rays break down collagen and elastin, contributing to thinning skin and hyperpigmentation (darkening of the skin). ☀️
- Allergies: Allergies can cause inflammation and histamine release, which dilates blood vessels and leads to puffiness and dark circles. 🤧
- Dehydration: When you’re dehydrated, your skin loses its plumpness and can appear dull, accentuating dark circles. 💧
- Medical Conditions: In rare cases, dark circles can be a symptom of an underlying medical condition like anemia or thyroid problems. If you’re concerned, consult a doctor.
(Table summarizing causes and corresponding circle colors)
| Cause | Circle Color(s) | Explanation |
|---|---|---|
| Genetics | Blue, Purple, Brown | Thinner skin, more visible blood vessels, pigmentation issues. |
| Sleep Deprivation | Blue, Purple, Red | Dilated blood vessels, fluid retention, puffiness. |
| Aging | Blue, Purple, Brown | Loss of collagen and elastin, thinner skin, more visible blood vessels, pigmentation issues. |
| Sun Exposure | Brown | Hyperpigmentation due to UV damage. |
| Allergies | Blue, Purple, Red | Inflammation, histamine release, dilated blood vessels, puffiness. |
| Dehydration | Dull, Enhanced Blue/Purple | Skin loses plumpness, making existing circles more prominent. |
| Medical Conditions | Varies | Can be a symptom of underlying health issues (consult a doctor). |
Key Takeaway: Understanding the cause of your dark circles is crucial for choosing the right solution! A brightener that masks blue circles won’t do much for brown hyperpigmentation.
II. Enter the Hero: Unveiling the Magic of Under Eye Brighteners
Now that we know our enemy, let’s introduce our hero: the Instant-Awaken Under Eye Brightener! But what is it, exactly? And how does it differ from concealer?
(Slide changes to a comparison of under-eye brighteners and concealers)
Think of a brightener as a color-correcting primer specifically designed for the under-eye area. It’s not meant to completely cover dark circles like a concealer, but rather to neutralize discoloration and brighten the area, creating a smooth, even base for your concealer to work its magic. 💫
Here’s a breakdown of the key benefits:
- Color Correction: Brighteners use complementary colors to counteract discoloration. For example, peach or orange tones neutralize blue or purple circles, while yellow tones can brighten dullness.
- Light Reflection: Many brighteners contain light-reflecting particles (like mica or silica) that bounce light away from the under-eye area, creating a brighter, more radiant appearance. ✨
- Hydration: Some brighteners are formulated with hydrating ingredients to plump up the skin and reduce the appearance of fine lines.
- Smoothing: Brighteners can fill in fine lines and wrinkles, creating a smoother surface for concealer application. This prevents concealer from settling into creases and accentuating imperfections.
- Longer-Lasting Concealer: By creating a smooth, even base, brighteners help your concealer apply more evenly and last longer throughout the day.
Brightener vs. Concealer: A Quick Comparison
| Feature | Under Eye Brightener | Concealer |
|---|---|---|
| Purpose | Color correction, brightening, smoothing, hydration | Coverage, hiding blemishes and imperfections |
| Coverage | Sheer to medium | Medium to full |
| Texture | Lightweight, often creamy or liquid | Creamy, liquid, or stick |
| Shade Range | Limited, typically peach, orange, yellow, or pink | Wide range of shades to match skin tone |
| Use | Applied before concealer | Applied after brightener (or on its own) |
(Example of a color wheel highlighting complementary colors)
Color Correction 101:
- Blue/Purple Circles: Peach, orange, or salmon-toned brighteners.
- Green Circles: Red-toned brighteners (less common, but can be effective).
- Brown Circles: Yellow or apricot-toned brighteners.
- Dullness: Pink or illuminating brighteners.
III. Choosing Your Weapon: Selecting the Perfect Under Eye Brightener
Now that you understand the magic of brighteners, it’s time to choose the right one for you. This is where things can get a little overwhelming, with so many options on the market. But fear not, I’m here to guide you!
(Slide changes to a variety of under-eye brighteners with different textures and shades)
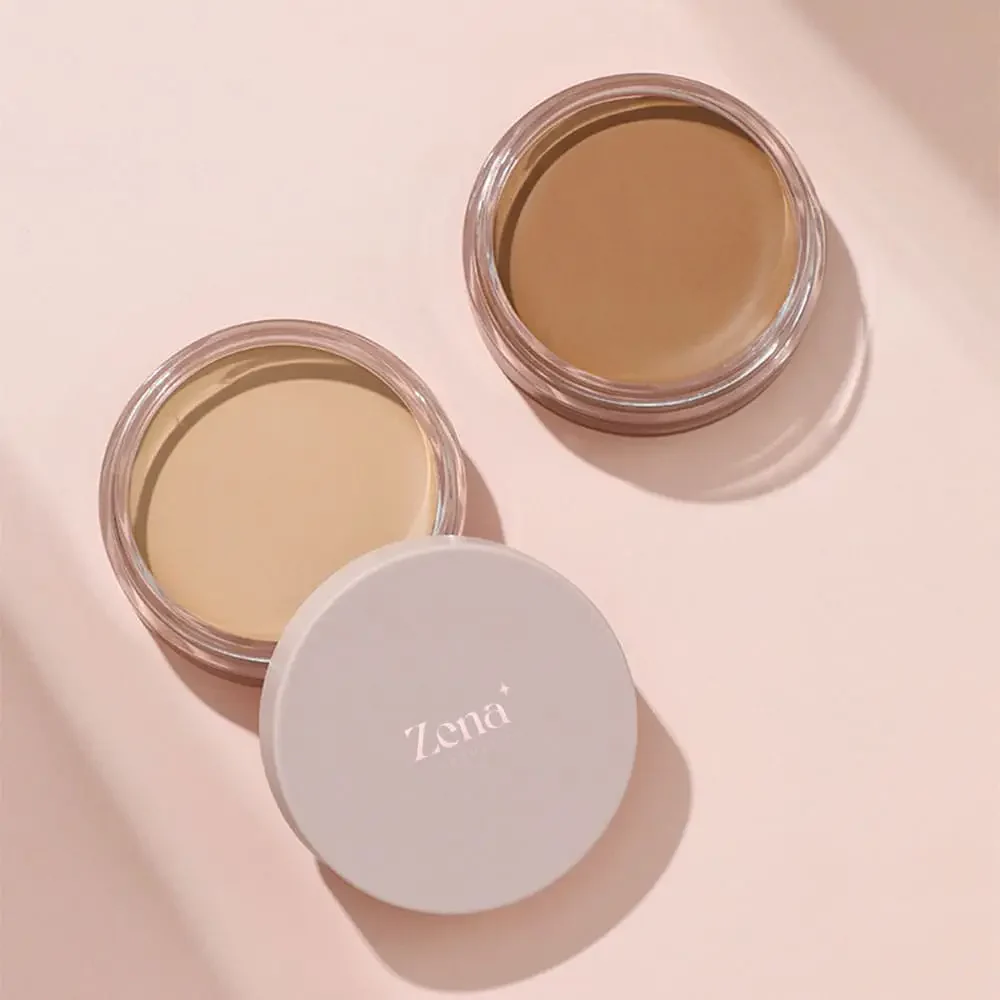
(Slide changes to a variety of under-eye brighteners with different textures and shades)
Here are the key factors to consider:
- Skin Tone:
- Fair Skin: Peach or pink-toned brighteners work well. Avoid anything too orange, which can look unnatural.
- Medium Skin: Salmon or apricot-toned brighteners are ideal.
- Olive Skin: Peach or yellow-toned brighteners will help neutralize darkness.
- Dark Skin: Orange or red-toned brighteners are necessary to effectively counteract blue or purple undertones.
- Undertones:
- Cool Undertones: Peach or pink-toned brighteners.
- Warm Undertones: Yellow or orange-toned brighteners.
- Neutral Undertones: You can experiment with a wider range of shades.
- Texture:
- Dry Skin: Creamy or hydrating brighteners are best. Look for ingredients like hyaluronic acid, glycerin, or shea butter.
- Oily Skin: Lightweight, oil-free formulas are ideal. Avoid anything too heavy or emollient, which can clog pores.
- Mature Skin: Look for brighteners with light-reflecting particles and anti-aging ingredients like peptides or antioxidants.
- Coverage:
- Sheer Coverage: Ideal for minimal dark circles or just adding a touch of brightness.
- Medium Coverage: Provides more noticeable color correction and brightening.
- Finish:
- Radiant: Creates a dewy, luminous look.
- Satin: Provides a soft, natural finish.
- Matte: Minimizes shine and creates a more even complexion. (Less common for brighteners)
- Ingredients:
- Hyaluronic Acid: Hydrates and plumps the skin.
- Vitamin C: Brightens and protects against free radical damage.
- Peptides: Support collagen production and reduce the appearance of fine lines.
- Antioxidants: Protect against environmental damage.
- Avoid: Fragrances, parabens, and sulfates, especially if you have sensitive skin.
(Table summarizing brightener types and their suitability for different skin types and concerns)
| Brightener Type | Best For | Notes |
|---|---|---|
| Peach | Fair to medium skin with blue or purple circles. | Can brighten and neutralize dark circles effectively. Choose a lighter peach for fair skin and a deeper peach for medium skin. |
| Salmon | Medium skin with more pronounced blue or purple circles. | Offers more coverage than peach and can effectively counteract deeper discoloration. |
| Orange | Dark skin with deep blue or purple circles. | Essential for correcting dark circles on darker skin tones. Start with a small amount and build as needed to avoid looking orange. |
| Yellow | Olive skin with brown circles or dullness. | Can brighten dullness and neutralize brown discoloration. Look for a yellow with a slight peachy undertone to avoid looking too sallow. |
| Pink | Fair skin with dullness or mild blue circles. | Adds a subtle brightness and can counteract mild discoloration. Choose a light, cool-toned pink to avoid looking too rosy. |
| Illuminating | All skin types for adding a radiant glow. | Contains light-reflecting particles that bounce light away from the under-eye area. Use sparingly to avoid looking too shimmery. |
| Hydrating | Dry or mature skin. | Formulated with hydrating ingredients to plump up the skin and reduce the appearance of fine lines. |
Pro Tip: Always test a brightener on your skin before purchasing to ensure it matches your skin tone and undertones.
IV. Mastering the Application: The Art of Under Eye Brightening
You’ve chosen your weapon, now it’s time to learn how to wield it like a pro! Proper application is key to achieving a flawless, natural-looking result.
(Slide changes to a step-by-step guide on applying under-eye brightener)
Here’s a step-by-step guide:
- Prep Your Skin: Start with a clean, moisturized under-eye area. A hydrating eye cream is essential to prevent creasing and dryness. Gently pat it in with your ring finger.
- Apply the Brightener: Use a small amount of brightener. Less is more! You can always add more if needed.
- Dotting Method: Use your finger or a small brush to dot the brightener along the darkest areas of your under-eye circle. Focus on the inner corner of your eye, where darkness tends to be most prominent.
- Triangle Method: Draw an inverted triangle from the outer corner of your eye to the side of your nose. Fill in the triangle with brightener. This method is great for brightening the entire under-eye area and creating a lifted effect.
- Blend, Blend, Blend! Use your ring finger, a damp makeup sponge, or a small brush to gently blend the brightener into your skin. Avoid dragging or pulling on the delicate skin under your eyes.
- Patting Motion: Use a patting motion to press the brightener into your skin. This will help it blend seamlessly and prevent creasing.
- Feather the Edges: Make sure to blend the edges of the brightener seamlessly into your surrounding skin.
- Set with Powder (Optional): If you have oily skin or if your brightener tends to crease, you can set it with a light dusting of translucent powder. Use a fluffy brush to apply the powder sparingly.
- Apply Concealer: Now it’s time for the star of the show! Apply your concealer over the brightener, focusing on any areas that still need coverage.
- Match Your Concealer to Your Skin Tone: Choose a concealer that matches your skin tone or is slightly lighter.
- Blend Well: Blend the concealer seamlessly into the brightener.
- Set Again (Optional): Set your concealer with another light dusting of translucent powder for extra staying power.
(Illustrations of the dotting and triangle methods)
Pro Tips for Flawless Application:
- Use the Right Tools: A small, precise brush or a damp makeup sponge can help you apply and blend the brightener evenly.
- Apply in Thin Layers: Avoid applying too much brightener at once. Build up the coverage gradually to prevent creasing and caking.
- Don’t Forget the Inner Corner: The inner corner of your eye is often the darkest area, so make sure to apply brightener there.
- Set with a Light Powder: Setting with a light powder will help prevent creasing and keep your concealer in place all day.
- Practice Makes Perfect: Don’t be discouraged if you don’t get it right the first time. Keep practicing and experimenting with different techniques until you find what works best for you.
V. Troubleshooting: Addressing Common Brightening Issues
Even with the best brightener and the most flawless application technique, you might encounter some common issues. Let’s troubleshoot them!
(Slide changes to a list of common brightening issues and their solutions)
- Creasing:
- Cause: Applying too much product, dry skin, or using a heavy formula.
- Solution: Use a smaller amount of product, hydrate your under-eye area with a good eye cream, and set with a light powder.
- Cakey Look:
- Cause: Applying too much product, using a dry formula, or not blending properly.
- Solution: Use a smaller amount of product, choose a hydrating formula, and blend thoroughly with a damp makeup sponge.
- Brightener Looks Too Orange/Peach/Pink:
- Cause: Choosing the wrong shade for your skin tone.
- Solution: Try a different shade that is closer to your skin tone or undertone.
- Brightener Doesn’t Cover Dark Circles:
- Cause: Using a brightener with sheer coverage or not applying enough product.
- Solution: Choose a brightener with medium coverage or apply a second layer. You may also need to use a concealer with more coverage on top.
- Brightener Accentuates Fine Lines:
- Cause: Using a dry formula or not hydrating your under-eye area.
- Solution: Choose a hydrating formula and apply a good eye cream. You can also try using a light-reflecting brightener to blur the appearance of fine lines.
VI. Beyond Brighteners: A Holistic Approach to Under-Eye Care
While brighteners are a fantastic tool, they’re not a magic bullet. A holistic approach to under-eye care involves addressing the root causes of dark circles and implementing healthy lifestyle habits.
(Slide changes to a list of holistic under-eye care tips)
Here are some additional tips for improving the appearance of your under-eye area:
- Get Enough Sleep: Aim for 7-8 hours of sleep per night.
- Stay Hydrated: Drink plenty of water throughout the day.
- Protect Your Skin from the Sun: Wear sunscreen and sunglasses.
- Eat a Healthy Diet: Focus on fruits, vegetables, and whole grains.
- Manage Allergies: Take antihistamines or avoid allergens if possible.
- Use a Cold Compress: Apply a cold compress to your under-eyes to reduce puffiness.
- Try a Caffeine Eye Cream: Caffeine can constrict blood vessels and reduce the appearance of dark circles.
- Consider Professional Treatments: If you’re concerned about persistent dark circles, consider talking to a dermatologist about professional treatments like laser therapy or chemical peels.
VII. Conclusion: Embrace the Brightness!
(Slide changes to a picture of a smiling, confident individual with bright, radiant under-eyes)
Congratulations! You’ve officially graduated from Under-Eye Brightening 101! You now have the knowledge and skills to conquer those dark circles and create a smooth, radiant canvas for your concealer.
Remember, finding the perfect brightener and mastering the application technique takes time and experimentation. Don’t be afraid to try different products and techniques until you find what works best for you.
And most importantly, embrace the brightness! A bright, radiant under-eye area can instantly make you look more awake, refreshed, and confident. So go forth and conquer those dark circles!
(Applause and music swell as the presenter bows)
Thank you! And now, for a Q&A session… Don’t be shy! Ask me anything! Just try to keep the questions under eye-related, unless you really want my opinion on the latest season of "Bridgerton." 😉
For detailed product specifications and purchases, please go to :https://zenamakeup.com/products/instant-awaken-under-eye-brightener
Leave a Reply