Lecture: Unleashing Your Inner Space Cadet: A Deep Dive into Metallic Eyes with the 9-Shade Glimmer Eyeshadow Palette 🚀✨
(Introduction – Cue Dramatic Space Music)
Alright, class! Settle in, grab your cosmic lattes ☕, and prepare for liftoff! Today, we’re embarking on a journey to the shimmering galaxies of metallic eyeshadow, specifically using the glorious 9-Shade Glimmer Eyeshadow Palette. Forget your basic beige – we’re talking high-impact, reflective, "did-you-see-that-comet?" level glam.
Now, I know what you’re thinking: "Metallic eyeshadow? Sounds intimidating!" Fear not, my aspiring makeup artists! We’re going to demystify the process, break down the techniques, and equip you with the knowledge to create stunning metallic eye looks that will have you feeling like a supernova. 🌟
This isn’t just about slapping on some sparkly powder and hoping for the best. We’re going to approach this with the precision of a NASA engineer and the artistry of a Van Gogh. Buckle up!
(Section 1: Understanding the Glimmer Galaxy – Palette Anatomy and Ingredient Intel)
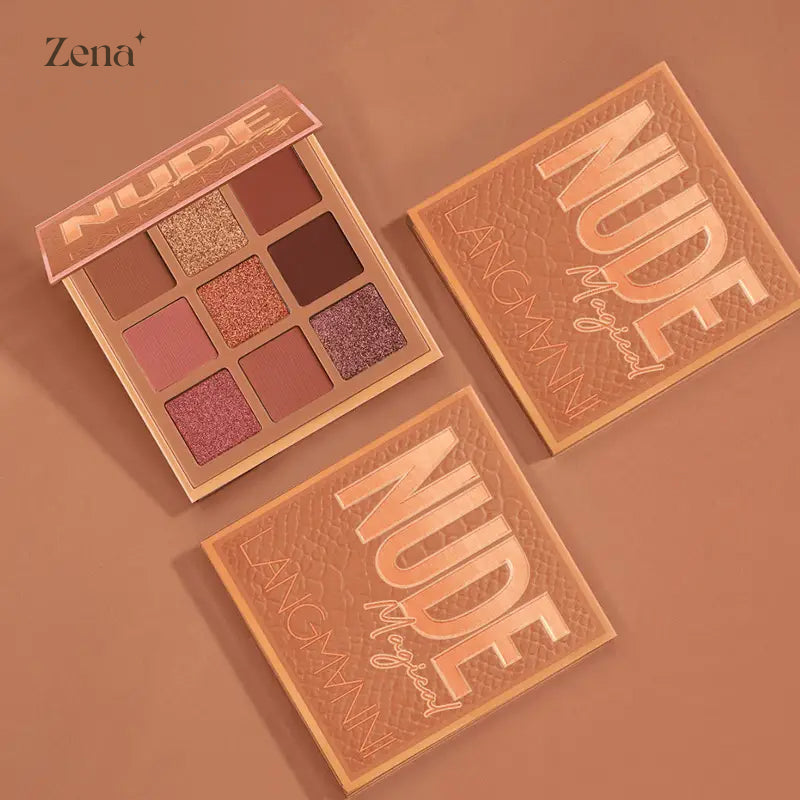
Before we launch, let’s familiarize ourselves with our spaceship – the 9-Shade Glimmer Eyeshadow Palette. Not all palettes are created equal, and understanding what you’re working with is crucial.
-
Palette Inspection: Take a moment to really look at your palette.
- Color Harmony: How do the shades work together? Are there warm tones, cool tones, or a mix of both? This will dictate the looks you can create.
- Texture: Are the shadows buttery smooth, finely milled, or a little chunky? This affects application and blendability.
- Pigmentation: How much color payoff do you get with a single swipe? A highly pigmented palette is your friend, but requires a lighter hand.
- Finish: Are they truly metallic? Or are they more shimmery? Knowing the difference will prevent disappointment.
-
Ingredient Investigation (a.k.a. Reading the Fine Print): I know, it’s tempting to skip this, but understanding the ingredients can help you avoid allergic reactions and appreciate the formulation.
- Look for common ingredients like mica (the source of the shimmer!), titanium dioxide (for opacity), and various binders and emollients (for texture).
- Be aware of potential allergens like certain dyes or preservatives.
- If you have sensitive skin, patch test a small area before applying to your entire eyelid. (Better safe than sorry, my friends!)
Table 1: Dissecting the Palette – Key Considerations
| Feature | Importance | Questions to Ask |
|---|---|---|
| Color Story | Dictates the range of looks you can create and the overall aesthetic. | Is it warm-toned, cool-toned, or neutral? Does it have a cohesive theme? |
| Pigmentation | Determines the intensity of the color on the lid. | How much product do you need to achieve the desired color payoff? Is it buildable? |
| Texture & Blendability | Affects ease of application and how well the shadows blend together. | Is it creamy, powdery, or chunky? Does it blend easily? Does it have fallout? |
| Longevity | How long the eyeshadow stays put on your lids without creasing or fading. | Does it require a primer? Does it crease easily? Does it fade throughout the day? |
| Metallic Finish | The level of reflectivity and shine. | Is it a true metallic with a high shine or a more subtle shimmer? |
(Section 2: Essential Tools for a Metallic Masterpiece – Brushes, Primers, and the Art of Application)
You can’t build a rocket with just your bare hands, and you can’t create a flawless metallic eye look without the right tools! Let’s gather our arsenal:
-
Brushes: Not all brushes are created equal. For metallic eyeshadow, you’ll need:
- Flat, dense brush: For packing color onto the lid. This maximizes the metallic effect. Think of it as your shovel for building a shimmer fort! 🏰
- Fluffy blending brush: For softening edges and creating a seamless transition. Essential for avoiding harsh lines. Your little fluffy cloud brush! ☁️
- Small detail brush: For inner corner highlights and lower lash line application. Think precision and pinpoint accuracy. 🎯
- Angled brush: For applying eyeshadow as eyeliner. Adds a touch of drama. 😈
-
Primer: The unsung hero of eyeshadow application. It:
- Creates a smooth canvas for eyeshadow application.
- Enhances color payoff and vibrancy.
- Prevents creasing and fading.
- Think of it as the sticky tape that keeps your glitter from falling off your face!
-
Setting Spray: To lock everything in place and add a final touch of luminosity. Think of it as the force field protecting your makeup from the harsh realities of the world. 🛡️
-
Cotton Swabs & Micellar Water: For cleaning up mistakes. Because even the best of us aren’t perfect. 🙈
Table 2: Tool Time – Essential Gear for Metallic Eyes
| Tool | Purpose | Alternative |
|---|---|---|
| Eyeshadow Primer | Creates a smooth base, enhances color payoff, and prevents creasing. | Concealer set with powder (but be careful, it can sometimes dull the shimmer) |
| Flat Shader Brush | Packs color onto the lid for maximum impact. | Your fingertip (seriously! Sometimes the best tool is already attached!) |
| Blending Brush | Blends out harsh lines and creates a seamless transition between colors. | A clean, dry eyeshadow brush |
| Detail Brush | Applies eyeshadow to the inner corner, lower lash line, and other small areas with precision. | A cotton swab |
| Setting Spray | Locks in the look and adds a final touch of luminosity. | None (but it’s HIGHLY recommended!) |
(Section 3: Metallic Eye Application Techniques – From Subtle Shimmer to Galactic Glam)
Now for the fun part! Let’s put our tools to work and create some dazzling metallic eye looks. Remember, practice makes perfect, so don’t be afraid to experiment!
Technique 1: The Subtle Shimmer (For Everyday Elegance)
This look is perfect for those who want to dip their toes into the metallic world without going full-on space cadet.
This look is perfect for those who want to dip their toes into the metallic world without going full-on space cadet.
- Prime: Apply your eyeshadow primer to your entire eyelid.
- Base Shade: Choose a neutral matte shade from the palette (a taupe or light brown works well) and apply it to your crease with a fluffy blending brush. This will create depth and definition.
- Metallic Lid: Using your flat shader brush, gently pat your chosen metallic shade onto your eyelid. Focus on the center of the lid for maximum impact.
- Blend: Use a clean blending brush to soften the edges of the metallic shade and blend it into the crease color.
- Highlight: Apply a small amount of a light, shimmering shade to the inner corner of your eye and under your brow bone. This will brighten the eyes and add a touch of sparkle.
- Mascara: Finish with a coat or two of your favorite mascara.
Technique 2: The Halo Eye (For Dimension and Drama)
The halo eye is a technique that creates a bright center on the lid, surrounded by darker shades, giving the illusion of a halo around the eye.
- Prime: Apply your eyeshadow primer.
- Outer V and Inner Corner: Apply a darker matte shade (a deep brown or black) to the outer V of your eye and blend it inwards. Repeat on the inner corner of your eye, leaving the center of your lid bare.
- Metallic Center: Using your flat shader brush, pat a bright metallic shade onto the center of your lid, where you left the space bare.
- Blend: Blend the edges of the metallic shade into the darker shades on the inner and outer corners.
- Highlight: Add a touch of shimmer to the inner corner.
- Eyeliner (Optional): Add a thin line of black eyeliner along your upper lash line for extra definition.
- Mascara: Apply mascara to your upper and lower lashes.
Technique 3: The Metallic Cut Crease (For Advanced Artistry)
This technique involves creating a sharp, defined crease with concealer and then filling the lid with a metallic shade. This is a more advanced technique, but the results are stunning.
- Prime: Apply your eyeshadow primer.
- Crease Definition: Use a matte shade that is a few shades darker than your skin tone to define your crease. Blend it well.
- Cut the Crease: Using a flat, thin brush and concealer, carefully carve out your crease, creating a sharp, defined line.
- Set the Concealer: Set the concealer with a translucent powder.
- Metallic Lid: Apply your chosen metallic shade to the lid, staying within the cut crease.
- Eyeliner (Optional): Add winged eyeliner for extra drama.
- Mascara: Apply mascara to your upper and lower lashes.
Technique 4: The Smoky Metallic (For Sultry Sophistication)
Combine the classic smoky eye with the captivating shimmer of metallics.
- Prime: Always, always, always prime!
- Base Shade: Apply a matte black or dark brown eyeshadow to the lid and blend it upwards into the crease. The darker the base, the more intense the shimmer.
- Metallic Layer: Pat your chosen metallic eyeshadow all over the dark base. The metallic will adhere better to the dark base and create a beautiful contrast.
- Smudge: Use a pencil brush to smudge the same dark eyeshadow along the lower lash line.
- Inner Corner Highlight: Add a pop of light metallic or a light matte shade to the inner corner to brighten the eyes.
- Blend, Blend, Blend: Use a clean blending brush to blend out any harsh lines and create a seamless smoky effect.
- Line and Mascara: Line your upper and lower lash lines with a black eyeliner and finish with several coats of mascara.
Table 3: Metallic Eye Technique Cheat Sheet
| Technique | Key Feature | Difficulty | Best Suited For |
|---|---|---|---|
| Subtle Shimmer | A touch of metallic on the lid for a daytime-appropriate look. | Beginner | Everyday wear, office, daytime events |
| Halo Eye | A bright center surrounded by darker shades for a dimensional effect. | Intermediate | Parties, evenings out, special occasions |
| Cut Crease | A sharp, defined crease with a metallic lid for a dramatic, artistic look. | Advanced | Photoshoots, special events, makeup enthusiasts |
| Smoky Metallic | Combines the classic smoky eye with the captivating shimmer of metallics. | Intermediate | Date night, evening events, adding a touch of edge |
(Section 4: Troubleshooting Your Metallic Mission – Common Issues and Solutions)
Even the most seasoned astronauts encounter hiccups on their missions. Let’s address some common metallic eyeshadow problems and how to solve them:
-
Fallout: Metallic eyeshadows can sometimes have fallout (loose pigment that falls onto your cheeks).
- Solution: Tap off excess product from your brush before applying. Use a damp brush to pick up the shadow. Apply eyeshadow before your foundation and concealer, so you can easily clean up any fallout. Use eyeshadow shields.
-
Creasing: Metallic eyeshadows can sometimes crease, especially on oily lids.
- Solution: Use a good eyeshadow primer. Set your primer with a translucent powder. Apply thin layers of eyeshadow. Avoid applying too much product to the crease.
-
Lack of Pigment: Sometimes, metallic eyeshadows don’t appear as vibrant on the lid as they do in the pan.
- Solution: Use a wet brush to apply the eyeshadow. Layer the eyeshadow over a base of a similar color. Use a white eyeshadow base to make the color pop.
-
Uneven Application: Metallic eyeshadows can sometimes look patchy or uneven.
- Solution: Use a flat, dense brush to pack the eyeshadow onto the lid. Blend the edges of the eyeshadow with a fluffy blending brush. Use a damp brush to smooth out any unevenness.
Table 4: Troubleshooting Time – Solving Metallic Mishaps
| Problem | Solution |
|---|---|
| Fallout | Tap off excess product, use a damp brush, apply eyeshadow before foundation, use eyeshadow shields. |
| Creasing | Use a good primer, set the primer, apply thin layers, avoid over-application. |
| Lack of Pigment | Use a wet brush, layer over a similar color, use a white eyeshadow base. |
| Uneven Application | Use a flat, dense brush to pack the color, blend the edges, use a damp brush to smooth. |
| Harsh Lines | Make sure to blend well! Use windshield wiper motions with a clean blending brush. Add a transition shade to help with blending. |
(Section 5: The Final Frontier – Mastering the Metallic Mindset)
You’ve now navigated the galaxy of metallic eyeshadow! Remember, confidence is key. Don’t be afraid to experiment with different colors, techniques, and looks. Embrace the shimmer, the sparkle, and the otherworldly glow.
- Embrace the Experimentation: Don’t be afraid to try new things! Mix and match different shades from the palette. Play with different techniques. The possibilities are endless!
- Practice Makes Perfect: The more you practice, the better you’ll get. Don’t be discouraged if your first attempt isn’t perfect. Keep practicing, and you’ll be creating stunning metallic eye looks in no time.
- Find Your Inspiration: Look to your favorite makeup artists, celebrities, and social media influencers for inspiration. See what looks they’re creating and try to recreate them using your own palette.
- Own Your Look: The most important thing is to own your look. Wear your metallic eyeshadow with confidence, and let your inner sparkle shine!
(Conclusion – Cue Triumphant Music)
Congratulations, graduates! You’ve successfully completed your metallic eyeshadow training. Now go forth and conquer the cosmos, one shimmering eyelid at a time! Remember to always prioritize blending, and never underestimate the power of a good primer. Now, if you’ll excuse me, I have a date with my glitter collection. 🚀✨🌟
(Final words: Don’t forget to clean your brushes! And may your shimmer always be on point.)
For detailed product specifications and purchases, please go to :https://zenamakeup.com/products/earth-heartbeat-9-shade-glimmer-eyeshadow-palette
Leave a Reply