Lecture: Mastering the Glass Skin Blush: Your Crystal Jelly Journey to Cheeky Radiance ✨
Welcome, beauty aficionados and makeup mavens! Today, we’re diving deep into a world of translucent, shimmering, and downright delicious cheek color. Forget the chalky powders and the harsh lines – we’re embarking on a journey to achieve the coveted "glass skin" blush effect using the star of our show: Crystal Jelly Clear Blush!
Think of this lecture as your personal cheat sheet to dewy, ethereal perfection. We’ll cover everything from understanding the glass skin trend to mastering the application techniques, troubleshooting common mishaps, and even exploring creative variations. So grab your brushes (or your fingers!), settle in, and prepare to unleash your inner radiant goddess.
(Disclaimer: May cause uncontrollable urges to selfie. Proceed with caution. 📸)
I. What in the Dewy World is Glass Skin? (And Why Should You Care?)
Before we even THINK about touching that glorious jelly blush, let’s understand the foundation of our quest: glass skin.
Imagine a perfectly polished, smooth pane of glass. That’s the goal. Glass skin isn’t just about being pale (although it often looks stunning on fair skin). It’s about achieving a hyper-hydrated, luminous complexion that reflects light like a dream. This translates to:
- Intense Hydration: Think plump, juicy skin.
- Even Texture: Smooth, blemish-free surface.
- Luminous Glow: A natural, lit-from-within radiance.
- Minimal Pores: A refined and polished appearance.
Why should you care? Because glass skin makes you look instantly younger, healthier, and utterly captivating! And the best part? You don’t need a complex skincare routine to achieve a hint of this effect with the right makeup. Enter: Crystal Jelly Clear Blush. 🎉
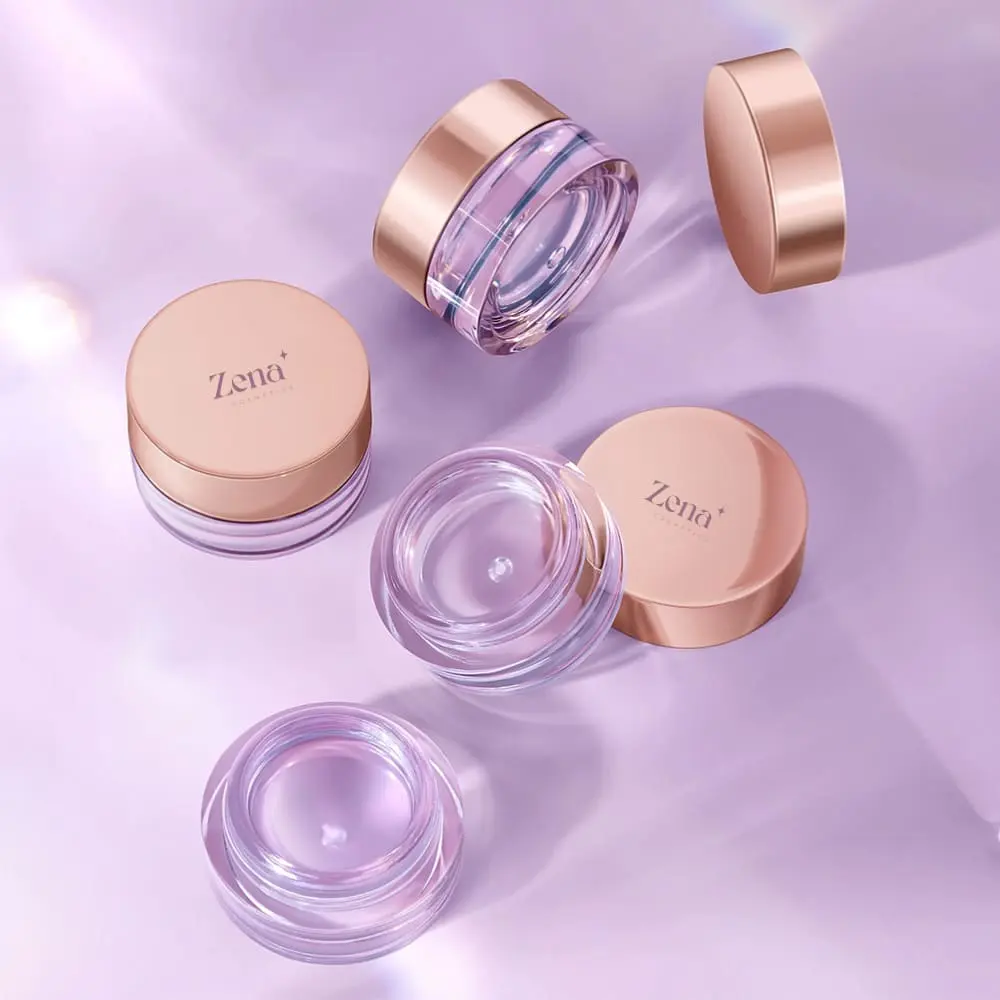
II. The Crystal Jelly Clear Blush: A Transparent Treasure
Forget everything you know about traditional blush formulas. Crystal Jelly Clear Blush is a game-changer. It’s typically a gel or balm-like consistency that’s:
- Translucent: Allowing your natural skin tone to shine through.
- Hydrating: Often infused with moisturizing ingredients.
- Buildable: Allowing for subtle to more noticeable color.
- User-Friendly: (Almost!) impossible to overdo.
Think of it as a tinted moisturizer for your cheeks. It imparts a wash of color while simultaneously plumping and hydrating the skin.
Think of it like this:
| Feature | Traditional Powder Blush | Crystal Jelly Clear Blush |
|---|---|---|
| Texture | Dry, Powdery | Gel, Balm, or Jelly |
| Finish | Matte, Satin, Shimmer | Dewy, Glass-like |
| Pigmentation | Highly Pigmented | Sheer to Medium, Buildable |
| Hydration | Often Drying | Hydrating, Plumping |
| Application | Requires precise application to avoid harsh lines. | Forgiving, Blends easily with fingers or a brush. |
| Best For | Defined cheekbones, long-lasting color, matte looks. | Natural, dewy looks, glass skin effect, hydrating skin. |
| Overall Vibe | Structured, Polished | Effortless, Radiant |
III. The Glass Skin Blush Application: A Step-by-Step Guide (With Giggles!)
Alright, let’s get our hands (and cheeks) dirty! Here’s a foolproof guide to achieving that coveted glass skin blush effect with your Crystal Jelly:
Step 1: Prep Your Canvas (aka Your Face!)
Step 1: Prep Your Canvas (aka Your Face!)
- Hydration is Key: Start with a well-hydrated base. Use a hydrating serum, moisturizer, and even a facial oil if your skin is feeling particularly parched. Think of your skin as a thirsty sponge – we need to quench its thirst before applying any color. 💧
- Lightweight Base: Opt for a lightweight foundation or tinted moisturizer. We want to enhance your natural skin, not cover it up completely. Think "barely there" coverage.
- Concealer (Optional): If you have any areas that need extra coverage (like under-eye circles or blemishes), use a lightweight concealer sparingly.
Step 2: Jelly Time! (Applying the Blush)
- Choose Your Weapon: You can apply Crystal Jelly Clear Blush with your fingers, a sponge, or a brush. Each method offers a slightly different finish:
- Fingers: Provides the most natural, seamless blend. The warmth of your fingers helps melt the product into the skin. (My personal favorite!)
- Sponge: Creates a soft, diffused look. Dampen your sponge for an even more sheer application.
- Brush: Offers more precision and buildability. Use a stippling brush or a duo-fiber brush for a natural finish.
- Less is More: Start with a tiny amount of product. You can always add more, but it’s much harder to take away. Remember, we’re aiming for a subtle flush, not a clown-like explosion of color. 🤡
- Placement is Everything: Smile! (Yes, really!). This will help you identify the apples of your cheeks. Apply the blush to the apples of your cheeks and blend upwards towards your temples. Avoid dragging the blush too far down, as this can make your face look droopy.
- Blend, Blend, Blend! This is crucial for achieving that glass skin effect. Blend the blush seamlessly into your skin, ensuring there are no harsh lines or edges. The goal is for the blush to look like it’s naturally emanating from within.
- Layer for Intensity: If you want a more intense color, layer the blush gradually. Wait a few seconds between applications to allow the product to set slightly.
Step 3: Seal the Deal (Setting and Highlighting)
- Setting Spray (Optional): If you have oily skin, you can use a setting spray to help prolong the wear of your blush. Choose a dewy or hydrating setting spray to maintain that glass skin effect.
- Highlight (Strategically): Apply a subtle, luminous highlighter to the high points of your cheekbones, brow bone, and Cupid’s bow. This will enhance the dewy, radiant effect. Avoid overly glittery or chunky highlighters, as they can detract from the natural look.
- Admire Your Handiwork: Step back and admire your radiant complexion! You’ve officially mastered the glass skin blush effect. ✨
IV. Troubleshooting: Common Jelly Blush Mishaps (and How to Fix Them!)
Even with the best intentions, things can sometimes go awry. Here are some common Crystal Jelly Clear Blush mishaps and how to fix them:
| Problem | Solution | Emoji |
|---|---|---|
| Blush is too pigmented | Use a damp sponge to blend out the blush and sheer it out. You can also apply a touch of foundation or tinted moisturizer over the blush to tone it down. | 💦 |
| Blush looks patchy | Make sure your skin is well-hydrated and exfoliated. Use a gentle exfoliating scrub or chemical exfoliant a few times a week to remove dead skin cells. | 🧽 |
| Blush fades too quickly | Use a primer before applying your foundation and blush. You can also set your blush with a light dusting of translucent powder. | 🔒 |
| Blush looks too shiny | Blot your skin with a blotting sheet to remove excess oil. You can also apply a light dusting of translucent powder to the areas that are too shiny. | 🧻 |
| Blush emphasizes pores | Use a pore-filling primer before applying your foundation and blush. Avoid applying too much blush to areas with large pores. | 🚫 |
| Blush clashes with skin tone | Experiment with different shades of blush to find the one that best complements your skin tone. Consider undertones (warm, cool, neutral). | 🎨 |
| "I look like a clown!" | Don’t panic! Grab a clean blending brush or sponge and gently buff out the excess color. Remember, start small and build up! | 😅 |
V. Creative Variations: Beyond the Basics
Now that you’ve mastered the basic glass skin blush application, let’s explore some creative variations:
- Monochromatic Magic: Use the same Crystal Jelly Clear Blush on your cheeks, lips, and eyelids for a cohesive, monochromatic look. This creates a soft, harmonious effect that’s perfect for everyday wear.
- Blush Draping: Apply the blush higher on your cheekbones and blend it towards your temples for a sculpted, lifted effect. This technique is great for accentuating your cheekbones and creating a more defined facial structure.
- Inner Corner Glow: Apply a tiny amount of the blush to the inner corners of your eyes to brighten your complexion and make your eyes look more awake. This is a great trick for faking a full night’s sleep. 😴
- Mix It Up: Mix your Crystal Jelly Clear Blush with a drop of liquid highlighter for an extra dose of radiance. This will create a custom, luminous blush that’s perfect for special occasions.
- Sun-Kissed Goddess: For a sun-kissed look, apply the blush across the bridge of your nose and on the apples of your cheeks. This will create a natural, healthy-looking flush.
VI. The Care and Keeping of Your Crystal Jelly (and Your Skin!)
- Storage: Store your Crystal Jelly Clear Blush in a cool, dry place away from direct sunlight. This will help prevent it from melting or changing consistency.
- Hygiene: Wash your hands before applying your blush to prevent the spread of bacteria. Clean your brushes and sponges regularly to keep them free of dirt and grime.
- Expiration: Check the expiration date on your blush and discard it if it’s expired. Expired makeup can harbor bacteria and cause skin irritation.
- Listen to Your Skin: If you experience any irritation or allergic reaction, discontinue use immediately.
VII. Final Thoughts: Embrace Your Inner Glow!
The glass skin trend is all about embracing your natural beauty and enhancing your skin’s radiance. Crystal Jelly Clear Blush is the perfect tool to achieve this look. It’s hydrating, buildable, and forgiving, making it a great option for all skin types.
Don’t be afraid to experiment with different shades and techniques to find what works best for you. And most importantly, have fun! Makeup should be a creative outlet, not a source of stress.
So go forth, my radiant beauties, and unleash your inner glow! Let your cheeks shine brighter than a disco ball (but in a subtle, sophisticated way, of course!). 🪩
This concludes our lecture. Class dismissed! (But don’t forget to tag me in your glass skin blush selfies! 😉)
For detailed product specifications and purchases, please go to :https://zenamakeup.com/products/crystal-jelly-clear-blush
Leave a Reply