Lecture: Unleashing Your Inner Picasso: Graphic Liner Looks with Deluxe Liquid Glitter Cream Eyeshadow Sticks
(Professor Stardust, PhD in Sparkle, stands before the class, adjusting her shimmering lab coat. A disco ball spins gently, casting rainbow patterns across the room.)
Good morning, my glitterati! Welcome to "Eye Artistry 301: Glitter Graphic Liner – From Zero to Hero!" Today, we’re ditching the boring beige and embracing the blindingly brilliant. We’re diving headfirst into the shimmering, swirling world of graphic liner, and our weapon of choice? The Deluxe Liquid Glitter Cream Eyeshadow Stick.
(Professor Stardust gestures dramatically towards a table laden with eyeshadow sticks in every color imaginable.)
These aren’t your grandma’s eyeshadow sticks, darlings. These are tubes of concentrated creativity, poised to transform your peepers into miniature masterpieces. Now, I know what you’re thinking: "Professor, graphic liner? Isn’t that, like, really hard?"
(Professor Stardust raises a perfectly sculpted eyebrow.)
Nonsense! With the right tools, a little practice, and a healthy dose of "I’m-fabulous-and-I-know-it" attitude, you can conquer graphic liner like a glitter-covered warrior. So, grab your notebooks, your brushes, and your courage – because we’re about to embark on a sparkling adventure!
I. Graphic Liner: Demystified
Before we unleash the glitter, let’s establish what graphic liner actually is. Forget your classic winged liner – that’s so last season. Graphic liner is all about bold shapes, unexpected angles, and using your eyelid as a canvas for artistic expression. Think of it as eyeliner’s rebellious, cooler, and far more sparkly cousin. ✨
(Professor Stardust clicks to a slide showing examples of graphic liner looks, ranging from simple geometric shapes to intricate floral designs.)
Key Characteristics of Graphic Liner:
- Boldness: It’s not subtle, darling. It’s a statement.
- Precision: While organic and abstract looks are welcome, clean lines are generally the name of the game.
- Creativity: The sky’s the limit! Experiment with shapes, colors, and placements.
- Individuality: It’s about expressing you. Don’t be afraid to break the rules!
II. Why Deluxe Liquid Glitter Cream Eyeshadow Sticks?
Why are we choosing these magical wands over traditional liquid liners? Because they offer a unique blend of benefits that make them perfect for both beginners and seasoned pros.
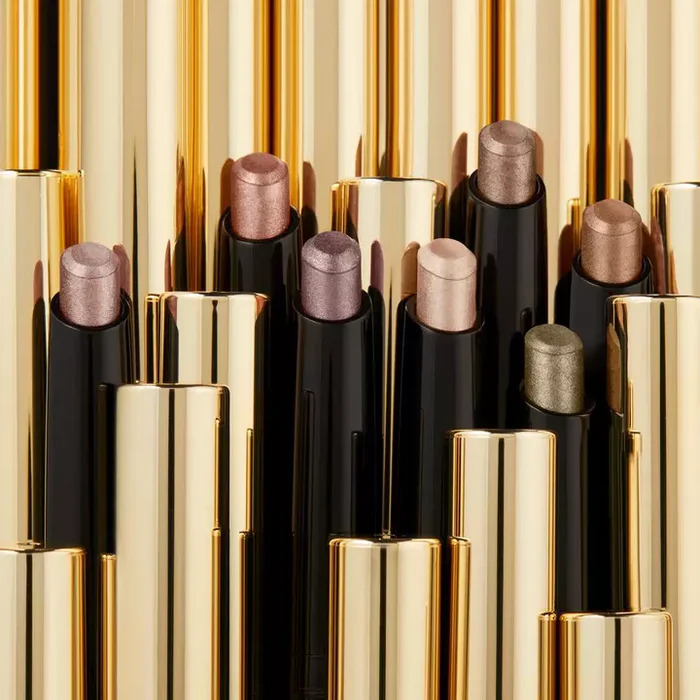
(Professor Stardust holds up a shimmering gold eyeshadow stick.)
Advantages of Deluxe Liquid Glitter Cream Eyeshadow Sticks for Graphic Liner:
| Feature | Benefit | Why It Matters for Graphic Liner |
|---|---|---|
| Creamy Texture | Glides smoothly onto the skin, allowing for easy blending and manipulation. | Easier to correct mistakes and create soft, blended edges. Less prone to skipping or dragging. |
| Glitter Infusion | Adds instant sparkle and dimension to your look. | Elevates your graphic liner from "cool" to "jaw-dropping." Adds a unique texture and catches the light beautifully. ✨ |
| Pigment Payoff | Delivers rich, vibrant color in a single swipe. | Ensures your graphic liner stands out and doesn’t fade throughout the day. You want that impact! |
| Blendability | Can be blended with other eyeshadows or used to create a soft wash of color. | Allows for versatility in your looks. You can create gradients, soften harsh lines, or blend multiple colors seamlessly. |
| Longevity | Often formulated to be long-wearing and crease-resistant. (Always check individual product claims.) | Keeps your masterpiece looking fresh and flawless for hours. No one wants a melting glitter disaster! 😱 |
| Beginner-Friendly | Easier to control than liquid liners, especially for creating sharp lines. | Provides a more forgiving application, making it perfect for those new to graphic liner. Less intimidating than a brush dipped in liquid liner. |
| Variety of Colors | Available in a rainbow of shades, from classic golds and silvers to bold blues, purples, and greens. | Allows for endless creative possibilities. You can match your outfit, your mood, or even your zodiac sign! ♈️ |
| Portability | Convenient and travel-friendly. Perfect for on-the-go touch-ups. | You never know when you might need to add a little extra sparkle to your life! 💫 |
III. Tools of the Trade (Besides the Obvious)
While the eyeshadow stick is our star player, a supporting cast of tools will help you achieve graphic liner greatness.
(Professor Stardust displays a selection of brushes, sponges, and other helpful items.)
Essential Tools:
- Angled Brush: For creating precise lines and sharp wings. A thin, firm brush is key!
- Small Detail Brush: For intricate details and filling in small areas. Think of it as your tiny paintbrush for tiny masterpieces.
- Flat Shader Brush: For blending and softening edges. Also great for packing on glitter for maximum impact.
- Cotton Swabs (Q-Tips): For cleaning up mistakes. Your best friend when you’re learning!
- Micellar Water/Makeup Remover: For erasing major blunders. Don’t be afraid to start over!
- Setting Spray: To lock your look in place and prevent smudging. A must-have for long-lasting sparkle!
- Eyelid Primer: Creates a smooth canvas and helps your eyeshadow stick adhere better. Prevents creasing and fading.
- Scotch Tape/Painter’s Tape: For creating sharp, clean lines. An oldie but a goodie! (Test on your hand first to ensure it doesn’t irritate your skin.)
- Mirror (Magnifying Optional): To see what you’re doing, obviously! 🔍
IV. Application Techniques: From Simple to Spectacular
Now for the fun part! Let’s explore some application techniques to get you started on your graphic liner journey.
(Professor Stardust begins demonstrating different techniques on a model.)
A. The Classic Winged Liner (But Make it Glitter!)
- Prime your eyelids: This is crucial for smooth application and long-lasting wear.
- Trace the wing: Using the eyeshadow stick, gently trace the outline of your desired wing shape. Don’t worry about perfection at this stage!
- Fill it in: Carefully fill in the wing with the eyeshadow stick, ensuring even coverage.
- Sharpen the edges: Use an angled brush dipped in micellar water to clean up any stray lines and create a crisp, sharp wing.
- Set it: Spritz with setting spray to lock it in place.
(Professor Stardust demonstrates the technique, emphasizing the importance of starting with a light hand and building up the color.)
Pro Tip: Use a piece of tape as a guide for creating a perfectly straight wing. Angle the tape from the outer corner of your eye towards the end of your eyebrow.
B. The Floating Crease Liner
This technique involves drawing a line in your crease, creating a bold and graphic effect.
This technique involves drawing a line in your crease, creating a bold and graphic effect.
- Prime your eyelids: Again, crucial!
- Locate your crease: With your eye open, identify the natural crease of your eyelid.
- Draw the line: Using the eyeshadow stick, draw a line in your crease, following its natural curve. You can make the line as thick or as thin as you like.
- Extend the line (Optional): You can extend the line beyond the outer corner of your eye for a more dramatic effect.
- Clean up: Use a cotton swab dipped in micellar water to clean up any mistakes and create a sharp line.
- Set it: Setting spray is your friend!
(Professor Stardust demonstrates the floating crease liner, emphasizing the importance of keeping your eye open while applying the liner.)
Pro Tip: Experiment with different colors and line thicknesses to create unique and eye-catching looks.
C. The Geometric Liner
This technique involves creating geometric shapes on your eyelids, using the eyeshadow stick as a drawing tool.
- Prime your eyelids: You know the drill.
- Plan your design: Before you start, sketch out your desired design on a piece of paper. This will help you visualize the final look and avoid mistakes.
- Draw the shapes: Using the eyeshadow stick, carefully draw the geometric shapes on your eyelids. You can use tape as a guide for creating straight lines and sharp angles.
- Fill in the shapes: Fill in the shapes with the eyeshadow stick, ensuring even coverage.
- Clean up: Use a cotton swab dipped in micellar water to clean up any mistakes and create crisp, clean lines.
- Set it: You guessed it – setting spray!
(Professor Stardust demonstrates the geometric liner, creating a series of triangles and squares on the model’s eyelid.)
Pro Tip: Don’t be afraid to experiment with different shapes and placements. Consider using stencils or cookie cutters as guides for creating more complex designs. 🍪
D. The Abstract Liner
This technique is all about letting your creativity run wild! There are no rules here – just have fun and experiment with different shapes, colors, and textures.
- Prime your eyelids: Yes, even for abstract art!
- Just go for it!: Using the eyeshadow stick, create abstract shapes and lines on your eyelids. Don’t worry about perfection – the beauty of abstract art is in its imperfections!
- Blend and smudge (Optional): Use a flat shader brush to blend and smudge the edges of the lines, creating a softer, more diffused effect.
- Add glitter (Optional): For extra sparkle, add a touch of loose glitter to your eyelids.
- Set it: Because even chaos needs to stay put.
(Professor Stardust demonstrates the abstract liner, creating a swirling, shimmering design on the model’s eyelid.)
Pro Tip: Embrace the mess! Abstract liner is all about expressing your individuality and having fun.
V. Common Mistakes and How to Avoid Them (Because We All Make ‘Em!)
(Professor Stardust puts on her "stern but supportive" face.)
Let’s be honest, darlings. Graphic liner isn’t always easy. There will be times when you end up looking more like a glitter-covered raccoon than a glamorous goddess. But fear not! I’m here to help you avoid common pitfalls.
Common Mistakes:
- Skipping primer: This is a cardinal sin! Primer creates a smooth canvas and helps your eyeshadow stick adhere better.
- Using too much product: Start with a light hand and build up the color as needed. It’s easier to add more than to take away.
- Not blending: Harsh lines can look unforgiving. Blend the edges of your liner for a softer, more polished look.
- Choosing the wrong brush: Using a brush that is too large or too stiff can make it difficult to create precise lines.
- Trying to do too much too soon: Start with simple designs and gradually work your way up to more complex looks.
- Giving up too easily: Practice makes perfect! Don’t get discouraged if your first few attempts aren’t perfect. Keep practicing, and you’ll eventually master the art of graphic liner.
- Forgetting to set your look: This is essential for preventing smudging and creasing.
(Professor Stardust provides a handy table summarizing these mistakes and offering solutions.)
| Mistake | Solution |
|---|---|
| Skipping Primer | Always prime your eyelids! |
| Too Much Product | Apply in thin layers. Build up the color gradually. |
| Not Blending | Use a flat shader brush to blend the edges of your liner. |
| Wrong Brush | Experiment with different brushes to find the one that works best for you. |
| Too Complex Too Soon | Start with simple designs and gradually increase the complexity. |
| Giving Up Too Easily | Practice, practice, practice! |
| Forgetting to Set | Use a setting spray to lock your look in place. |
VI. Inspiration and Resources
(Professor Stardust beams, switching to a slide showcasing inspiring graphic liner looks.)
The world is your oyster, my glittery gems! Don’t be afraid to draw inspiration from anywhere and everywhere.
Sources of Inspiration:
- Social Media: Instagram, Pinterest, and TikTok are treasure troves of graphic liner inspiration. Follow makeup artists, beauty bloggers, and fellow glitter enthusiasts for ideas.
- Art and Design: Look to paintings, sculptures, architecture, and fashion for inspiration.
- Nature: The colors and patterns found in nature can be a great source of inspiration. Think about the vibrant hues of a sunset or the intricate patterns of a flower. 🌺
- Your Own Imagination: Don’t be afraid to let your creativity run wild and come up with your own unique designs.
Resources:
- YouTube Tutorials: Countless makeup artists and beauty bloggers offer tutorials on graphic liner techniques.
- Online Makeup Courses: Consider taking an online makeup course to learn more about graphic liner and other makeup techniques.
- Makeup Books and Magazines: Many books and magazines offer tips and tricks for creating graphic liner looks.
VII. Conclusion: Go Forth and Sparkle!
(Professor Stardust strikes a dramatic pose, arms outstretched.)
And there you have it, my dazzling disciples! You are now equipped with the knowledge and tools to conquer the world of graphic liner. Remember to experiment, have fun, and most importantly, express yourself! Don’t be afraid to make mistakes – they’re just learning opportunities in disguise. So go forth, unleash your inner Picasso, and sparkle brighter than ever before! ✨✨✨
(Professor Stardust blows a kiss to the class as the disco ball continues to spin, bathing the room in a kaleidoscope of light.)
Class dismissed! Now, go forth and bedazzle! 💖
For detailed product specifications and purchases, please go to :https://zenamakeup.com/products/liquid-glitter-waterproof-eyeshadow-stick
Leave a Reply