The Two-Faced Beauty of EasyGlow: Mastering the Shimmer & Metallic Eyeshadow Stick Symphony
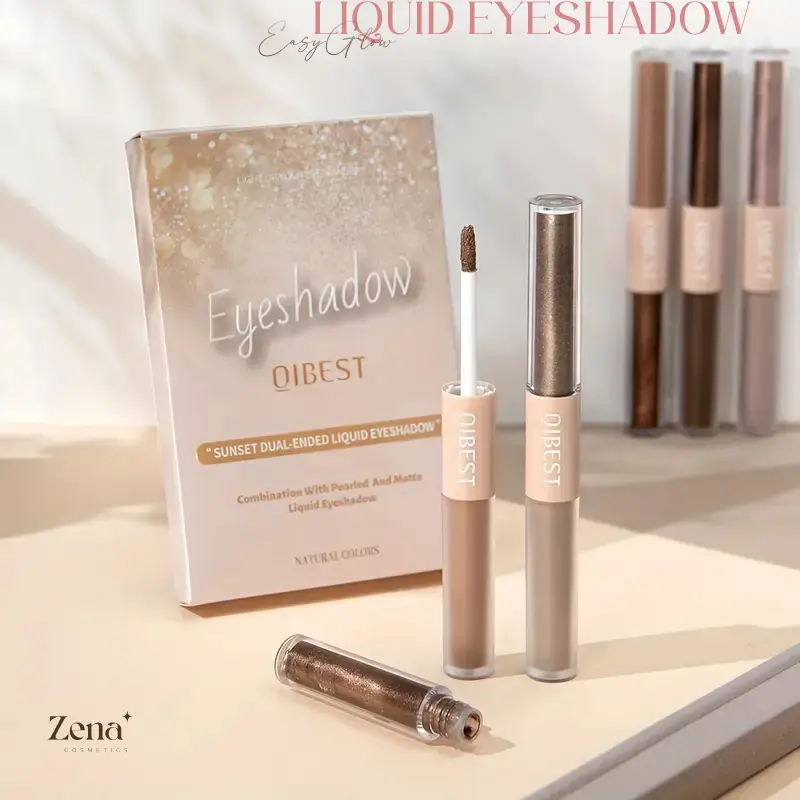
Alright, beauty enthusiasts, gather ’round! Today, we’re diving deep into the dazzling world of the EasyGlow Eyeshadow Stick, specifically focusing on its dual-personality prowess: the art of utilizing both shimmer and metallic finishes on opposite ends to create eye-catching looks. Forget boring one-dimensional eyeshadow – we’re about to unlock the secrets to creating dimension, depth, and downright delicious eye makeup with this little stick of genius.
Think of this lecture as your personal masterclass, complete with witty banter, practical tips, and enough visual aids to make your eyeballs sing. So, grab your EasyGlow (or a similar dual-ended stick), a mirror, and let’s get ready to paint some masterpieces!
I. Introduction: Why Two Finishes are Better Than One (and Why We Love EasyGlow)
Let’s be honest, we live in a world obsessed with multi-tasking. Our phones are cameras, calculators, and cat video machines all in one. So, why should our eyeshadow be any different? Enter the dual-ended eyeshadow stick, and in our case, the EasyGlow, a champion of convenience and creativity.
But why is having two different finishes on one stick so revolutionary?
- Dimension, Darling, Dimension! Using both shimmer and metallic finishes instantly adds depth and dimension to your eyes. It’s like turning your eyelids into a 3D movie screen!
- Highlight & Contour, Simplified: The shimmer can act as a natural highlight, catching the light and making your eyes pop. The metallic finish provides a richer, deeper color that can define and contour the crease.
- Versatility, Galore! From a subtle daytime glow to a dramatic evening smokey eye, the possibilities are endless. You’re basically getting two eyeshadows for the price (and space) of one.
- Beginner-Friendly Bliss: Let’s face it, eyeshadow palettes can be intimidating. These sticks are incredibly easy to apply and blend, making them perfect for makeup newbies.
- Travel-Friendly Treasure: Forget lugging around a million palettes. This little stick is compact and ready to roll, making it your perfect travel companion.
Think of it like this:
| Feature | Single Eyeshadow | Dual-Ended (EasyGlow) |
|---|---|---|
| Dimension | Flat, potentially boring | Dynamic, eye-catching! |
| Complexity | Can be challenging to layer | Easier to create depth |
| Portability | Requires multiple products | All-in-one solution |
| Beginner-Friendly | Can be overwhelming | User-friendly application |
II. Understanding the Players: Shimmer vs. Metallic – A Battle of the Finishes (But They’re Actually Friends)
Before we dive into application techniques, let’s break down the key differences between shimmer and metallic finishes:
-
Shimmer: Think of shimmer as a subtle glow. It contains finely milled particles that reflect light, creating a soft, luminous effect. It’s perfect for highlighting, brightening, and adding a touch of ethereal beauty. 🧚✨
- Texture: Usually smoother and more forgiving than metallic.
- Light Reflection: Soft, diffused glow.
- Ideal For: Inner corner highlight, brow bone highlight, all-over lid wash for a subtle look.
-
Metallic: Metallic finishes boast a more intense, reflective shine. They often contain larger, more noticeable particles that mimic the look of precious metals. It’s bold, glamorous, and perfect for making a statement. 👑💎
- Texture: Can sometimes be slightly drier or more textured than shimmer.
- Light Reflection: Intense, concentrated shine.
- Ideal For: Lid color, crease definition, creating a dramatic smokey eye.
Key Differences Summarized:
| Feature | Shimmer | Metallic |
|---|---|---|
| Shine Intensity | Subtle Glow | Intense Shine |
| Light Reflection | Diffused | Concentrated |
| Particle Size | Fine | Larger |
| Overall Effect | Soft, Luminous | Bold, Glamorous |
Think of it this way: Shimmer is the shy, understated friend who adds a touch of sparkle, while Metallic is the life of the party, demanding attention with its dazzling shine. Together, they create the perfect balance.
III. Application Techniques: Painting Your Eyes with Shimmer & Metallic Magic
Now for the fun part! Let’s explore some techniques to maximize the potential of your EasyGlow eyeshadow stick. Remember, makeup is all about experimentation, so don’t be afraid to play around and find what works best for you.
A. The Classic Gradient: Light to Dark, Shimmer to Metallic
This is a foolproof technique for creating a beautiful, blended look.
This is a foolproof technique for creating a beautiful, blended look.
- Prime Your Lids: Start with an eyeshadow primer to ensure your eyeshadow stays put all day (or night!). This is crucial, especially with stick formulas, to prevent creasing.
- Apply the Shimmer: Apply the shimmer end of the EasyGlow to the inner corner of your eye, extending it slightly towards the middle of your lid. You can either swipe it directly from the stick or use your finger to dab it on for a softer effect.
- Apply the Metallic: Apply the metallic end to the outer corner of your eye, blending it towards the middle of your lid, overlapping slightly with the shimmer.
- Blend, Blend, Blend!: This is the key! Use a blending brush to seamlessly blend the two shades together. Focus on the area where the shimmer and metallic meet, creating a smooth transition. Think of it as a gentle massage for your eyelids.
- Optional: Crease Definition: Use the metallic shade to define your crease. Apply a small amount to the crease and blend upwards. This adds depth and dimension to your eyes.
- Liner & Mascara: Finish with your favorite eyeliner and mascara to complete the look.
Visual Aid:
  (Inner Corner) Shimmer ➡️ Blended Area ➡️ Metallic (Outer Corner)
  Lightest Color                                    Darkest Color
B. The Halo Eye: A Spotlight of Shimmer
This technique creates a beautiful "halo" effect on your lid, highlighting the center and making your eyes appear larger.
- Prime Your Lids: Same as before, primer is your best friend.
- Apply the Metallic: Apply the metallic end of the EasyGlow to the inner and outer corners of your lid, leaving the center bare.
- Apply the Shimmer: Apply the shimmer end to the center of your lid, blending it slightly into the metallic shade on either side. This will create a bright, spotlight effect.
- Blend, Blend, Blend!: Use a blending brush to soften the edges and ensure a seamless transition between the shimmer and metallic shades.
- Optional: Crease Definition & Lower Lash Line: Define your crease with a matte eyeshadow that complements the metallic shade. You can also apply a small amount of the metallic shade to your lower lash line for added drama.
- Liner & Mascara: Finish with liner and mascara.
Visual Aid:
   Metallic (Inner Corner) ➡️ Shimmer (Center) ⬅️ Metallic (Outer Corner)
      Dark Color                Brightest Color               Dark Color
C. The Smokey Eye Simplified: Metallic as the Base, Shimmer to Highlight
This is a quick and easy way to create a smokey eye using your EasyGlow stick.
- Prime Your Lids: You know the drill!
- Apply the Metallic: Apply the metallic end all over your lid, blending it upwards towards your crease. Don’t worry about being too precise, we’ll blend it out later.
- Blend the Edges: Use a blending brush to soften the edges of the metallic shade, creating a smokey effect.
- Apply the Shimmer: Apply the shimmer end to the inner corner of your eye and brow bone to highlight.
- Smudge the Lower Lash Line: Apply a small amount of the metallic shade to your lower lash line and smudge it out for a more dramatic effect.
- Liner & Mascara: Line your eyes and apply several coats of mascara.
Visual Aid:
    (All Over Lid) Metallic ➡️ Blended Outwards
                         |
                         ⬇️
         Shimmer (Inner Corner & Brow Bone)
D. The "Barely There" Glam: A Touch of Shimmer, A Hint of Metallic
For those days when you want a subtle, natural look, this technique is perfect.
- Prime Your Lids: (Optional, but recommended for longevity).
- Apply a Thin Layer of Shimmer: Apply a thin layer of the shimmer end all over your lid.
- Apply a Touch of Metallic to the Outer Corner: Apply a small amount of the metallic end to the outer corner of your eye and blend it inwards.
- Blend, Blend, Blend!: Ensure everything is blended seamlessly for a natural, effortless look.
- Mascara: Finish with a coat of mascara.
IV. Pro Tips & Tricks: Elevating Your EasyGlow Game
- Invest in a Good Blending Brush: A fluffy blending brush is your best friend. It will help you create seamless transitions between the shimmer and metallic shades.
- Layering is Key: Don’t be afraid to layer your eyeshadow. You can build up the intensity of the metallic shade by applying multiple layers.
- Use Your Fingers! For a softer, more diffused look, use your fingers to apply and blend the eyeshadow. The warmth of your fingers will help melt the product into your skin.
- Experiment with Different Colors: The possibilities are endless! Try pairing different shades of shimmer and metallic to create unique and personalized looks.
- Don’t Forget the Lower Lash Line: Applying a small amount of eyeshadow to your lower lash line can add depth and definition to your eyes. Use a small, precise brush for best results.
- Clean Your Brush Regularly: This will prevent color build-up and ensure that your eyeshadow applies smoothly.
- Embrace the Mess! Makeup is all about experimentation, so don’t be afraid to make mistakes. Learn from them and have fun!
- Don’t be afraid to mix brands! If you love a specific shimmer from another brand, use the EasyGlow stick as a base and layer your favourite shimmer on top.
V. Troubleshooting: Common Issues and How to Fix Them
- Creasing: This is a common issue, especially with stick formulas. To prevent creasing, always use an eyeshadow primer and set your eyeshadow with a translucent powder.
- Uneven Application: If your eyeshadow is applying unevenly, try using a different brush or apply it with your fingers.
- Too Much Shine: If the metallic shade is too intense for your liking, try applying it with a damp brush for a softer, more diffused look.
- Blending Issues: If you’re having trouble blending the shimmer and metallic shades together, try using a clean blending brush and focus on the area where the two shades meet.
VI. Conclusion: Unleash Your Inner Artist with EasyGlow
The EasyGlow eyeshadow stick, with its shimmer and metallic duality, is a versatile and user-friendly tool that can help you create a wide range of eye-catching looks. By understanding the differences between shimmer and metallic finishes and mastering the application techniques we discussed today, you can unlock your inner artist and create stunning eye makeup that will turn heads wherever you go.
So, go forth and experiment! Play with different colors, techniques, and finishes. Don’t be afraid to make mistakes and have fun. Remember, makeup is all about self-expression, so let your creativity shine! ✨🎨 And most importantly, rock that EasyGlow magic! You’ve got this!
For detailed product specifications and purchases, please go to :https://zenamakeup.com/products/liquid-dual-end-easyglow-eyeshadow-set-double-your-eye-sparkles-day-night
Leave a Reply