Lecture: Earth Heartbeat Palette: Crafting Warm & Cool-Toned Glimmer Eyes
Welcome, Glamour Geologists! 🌏💖✨
Get ready to excavate the secrets of the Earth Heartbeat Palette and unearth your inner shimmer goddess! Today, we’re not just talking eyeshadow; we’re embarking on an expedition into the fascinating world of color theory, texture, and the transformative power of glimmer. Forget boring beige – we’re diving headfirst into warm, molten lava landscapes and cool, glacial wonderlands, all within the confines of a single, glorious palette. Buckle up, buttercups, because this lecture is going to be dazzling!
Course Outline:
- Introduction: Why the Earth Heartbeat Palette? 💖
- A love letter to this versatile palette.
- Understanding its color story and potential.
- Foundation First: Priming for Perfection ✍️
- The vital role of eyeshadow primer.
- Primer recommendations for different skin types.
- Warm Glimmer Eyes: Embrace the Golden Hour ☀️
- Color theory: Warm tones decoded (reds, oranges, golds).
- Step-by-step tutorial for a warm, glimmering eye look.
- Product placement, blending techniques, and tips for longevity.
- Troubleshooting common warm-tone woes.
- Cool Glimmer Eyes: Icy Elegance and Galactic Glamour ❄️
- Color theory: Cool tones decoded (blues, purples, silvers, greens).
- Step-by-step tutorial for a cool, glimmering eye look.
- Product placement, blending techniques, and tips for longevity.
- Troubleshooting common cool-tone woes.
- Mixing & Matching: When Warm Meets Cool (Gasp!) 🤝
- Creating harmonious contrast.
- Tips for incorporating both warm and cool shades in one look.
- Examples of successful warm-cool combinations.
- Advanced Techniques: Beyond the Basics 🚀
- Cut creases, halo eyes, and other glimmer-enhanced techniques.
- Using shimmer toppers for added dimension.
- Playing with different textures (matte, satin, shimmer, glitter).
- Tools of the Trade: Your Arsenal of Applicators 🖌️
- Brush recommendations for different eyeshadow types and techniques.
- The importance of clean brushes.
- Other helpful tools (spoolies, cotton swabs, makeup remover).
- The Big Finish: Setting for Staying Power 🪄
- The role of setting spray.
- Setting spray recommendations.
- Final tips for a flawless, long-lasting glimmer eye.
- Final Words: Glimmer On, You Magnificent Moles! 🎉
1. Introduction: Why the Earth Heartbeat Palette? 💖
Let’s be real: the makeup world is OVERFLOWING with palettes. So why dedicate an entire lecture to this particular one? Because, my dear students, the Earth Heartbeat Palette (let’s call it EHP from now on) is a chameleon. It’s a master of disguise. It’s the Meryl Streep of eyeshadows!
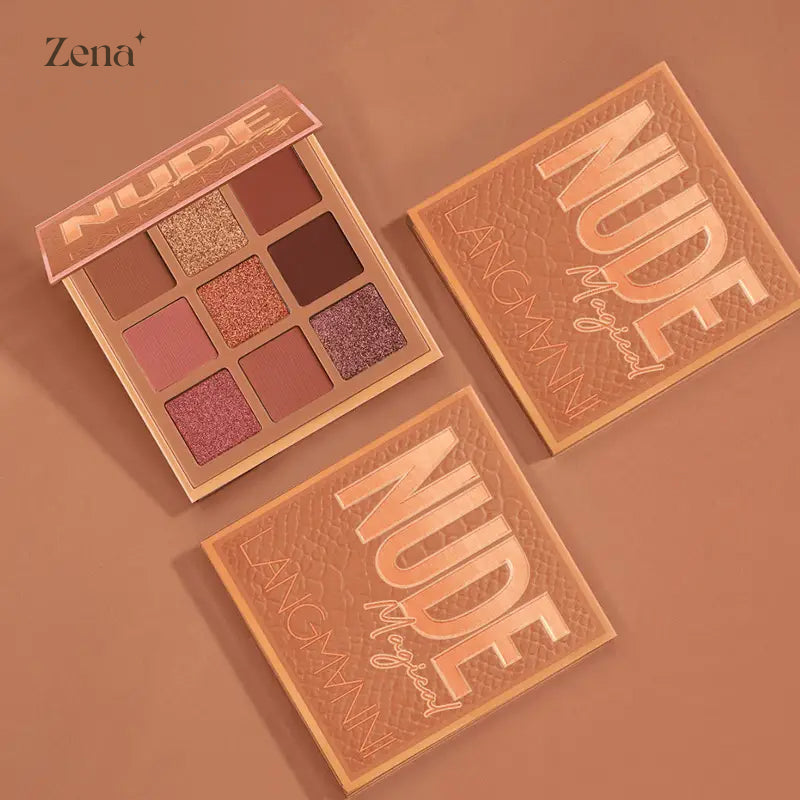
The beauty of EHP lies in its versatility. It usually boasts a thoughtfully curated selection of both warm and cool tones, often inspired by the natural world – think rich browns, fiery oranges, icy blues, and shimmering greens. This means you can create a multitude of looks, from subtle daytime shimmer to dramatic nighttime glam, all with a single palette. No more lugging around a suitcase full of eyeshadows!
Key Features of a Hypothetical Earth Heartbeat Palette:
| Feature | Description |
|---|---|
| Color Story | A mix of warm and cool tones, often inspired by nature (earth, fire, water, ice). |
| Texture Variety | Matte, satin, shimmer, and potentially glitter finishes for creating depth and dimension. |
| Pigmentation | High pigmentation for vibrant color payoff. |
| Blendability | Smooth and blendable formulas for easy application and seamless transitions. |
| Versatility | Suitable for creating a wide range of looks, from natural to dramatic. |
| Cruelty-Free | (Hopefully!) Ethically sourced ingredients and cruelty-free production. |
2. Foundation First: Priming for Perfection ✍️
Imagine trying to paint a masterpiece on a canvas covered in oil. Disaster, right? That’s your eyelid without primer. Eyeshadow primer is the unsung hero of the makeup world. It creates a smooth, even base, prevents creasing, intensifies color payoff, and extends the wear time of your eyeshadow. Basically, it’s the glue that holds your entire eye look together.
Why Primer is Your BFF:
- Smooths: Fills in fine lines and imperfections.
- Evens Tone: Conceals discoloration and redness.
- Gripping Power: Gives eyeshadow something to cling to.
- Prevents Creasing: Stops those dreaded eyeshadow lines from forming.
- Boosts Color: Makes your eyeshadow shades POP!
Primer Recommendations Based on Skin Type:
| Skin Type | Primer Recommendation | Why? |
|---|---|---|
| Oily Skin | Oil-Free, Mattifying Primer: Look for primers with ingredients like silica or charcoal to absorb excess oil. | Prevents eyeshadow from sliding around and creasing. |
| Dry Skin | Hydrating Primer: Look for primers with ingredients like hyaluronic acid or glycerin to moisturize the eyelid. | Creates a smooth, hydrated base for eyeshadow to adhere to. |
| Mature Skin | Anti-Aging Primer: Look for primers with ingredients like peptides or antioxidants to smooth fine lines and wrinkles. | Creates a more youthful-looking base for eyeshadow. |
| Sensitive Skin | Hypoallergenic, Fragrance-Free Primer: Look for primers with minimal ingredients to avoid irritation. Always patch test a new primer before applying it to your entire eyelid. | Minimizes the risk of allergic reactions and irritation. |
Application Tip: Apply a thin layer of primer to your entire eyelid, from lash line to brow bone. Let it set for a minute or two before applying eyeshadow. This allows the primer to properly grip the skin.
3. Warm Glimmer Eyes: Embrace the Golden Hour ☀️
Ah, warm tones! Think sunsets, campfires, and pumpkin spice lattes. These shades are all about warmth, radiance, and bringing out the golden undertones in your skin.
Color Theory: Warm Tones Decoded
- Reds: Passionate, bold, and attention-grabbing. Think rusty reds, brick reds, and cranberry shades.
- Oranges: Energetic, playful, and vibrant. Think burnt orange, terracotta, and golden orange.
- Yellows: Cheerful, sunny, and optimistic. Think mustard yellow, golden yellow, and bronze.
- Golds: Luxurious, glamorous, and timeless. Think champagne gold, rose gold, and antique gold.
Step-by-Step Tutorial: Warm Glimmer Eye
Let’s create a stunning warm glimmer eye look using our hypothetical EHP!
- Prep: Apply your eyeshadow primer and let it set.
- Transition Shade: Using a fluffy brush, apply a matte terracotta shade (think "Desert Sand" from EHP) to your crease and blend upwards towards your brow bone. This will create a soft, diffused base for the rest of your look.
- Crease Definition: Using a smaller, more precise brush, apply a matte burnt orange shade (think "Volcanic Ash" from EHP) to your crease, focusing on the outer corner of your eye. Blend gently to create depth and definition.
- Lid Color: Using a flat shader brush, apply a shimmer rose gold shade (think "Molten Lava" from EHP) to your entire eyelid. Pack the color on for maximum impact.
- Inner Corner Highlight: Using a small brush, apply a shimmer champagne gold shade (think "Golden Nugget" from EHP) to your inner corner to brighten the eyes.
- Lower Lash Line: Using a small brush, apply the matte terracotta shade to your lower lash line, connecting it to the outer corner of your eye.
- Blend, Blend, Blend! Use a clean blending brush to soften any harsh lines and create a seamless transition between the shades.
- Eyeliner (Optional): Apply a brown or bronze eyeliner to your upper lash line for added definition.
- Mascara: Apply several coats of your favorite mascara to your upper and lower lashes.
- Falsies (Optional): Add a pair of false eyelashes for extra drama.
Product Placement Diagram:
          Brow Bone
       /____________
      | Transition  |
      |    Shade    |
      ____________/
          Crease
       /___________
      |  Crease     |
      | Definition  |
      ___________/
       /___________
      |  Lid Color  |
      ___________/
      /     |
     /      |
    /_______|_______
   | Inner  |  Outer |
   | Corner | Corner |
   _______|_______/
          Lash Line
Tips for Longevity:
- Layering: Build up the color gradually for a more intense and long-lasting effect.
- Setting Spray: Spritz your face with setting spray after you’ve finished your makeup to lock everything in place.
- Powder: Lightly dust a translucent powder over your eyelids to absorb excess oil and prevent creasing.
Troubleshooting Warm-Tone Woes:
- Looking Muddy: Avoid using too many dark shades in the crease. Start with a lighter transition shade and gradually build up the color.
- Looking Too Orange: Balance out the orange tones with a touch of brown or gold.
- Washing Out Your Skin Tone: Choose warm shades that complement your skin tone. If you have fair skin, opt for softer, more muted warm tones. If you have deep skin, you can rock bolder, more vibrant warm tones.
4. Cool Glimmer Eyes: Icy Elegance and Galactic Glamour ❄️
Step aside, Elsa! Cool tones are all about icy elegance, mysterious depths, and a touch of otherworldly glamour. Think glaciers, moonlit nights, and sapphire seas.
Color Theory: Cool Tones Decoded
- Blues: Calming, serene, and sophisticated. Think navy blue, sky blue, and teal.
- Purples: Mysterious, regal, and romantic. Think lavender, plum, and amethyst.
- Silvers: Sleek, modern, and futuristic. Think sterling silver, platinum, and gunmetal.
- Greens: Earthy, refreshing, and nature-inspired. Think emerald green, forest green, and seafoam green.
Step-by-Step Tutorial: Cool Glimmer Eye
Let’s create a captivating cool glimmer eye look using our EHP!
- Prep: Apply your eyeshadow primer and let it set.
- Transition Shade: Using a fluffy brush, apply a matte cool-toned taupe shade (think "Glacier Ice" from EHP) to your crease and blend upwards towards your brow bone.
- Crease Definition: Using a smaller, more precise brush, apply a matte navy blue shade (think "Midnight Sky" from EHP) to your crease, focusing on the outer corner of your eye. Blend gently to create depth and definition.
- Lid Color: Using a flat shader brush, apply a shimmer silver shade (think "Star Dust" from EHP) to your entire eyelid. Pack the color on for maximum impact.
- Inner Corner Highlight: Using a small brush, apply a shimmer light blue shade (think "Arctic Breeze" from EHP) to your inner corner to brighten the eyes.
- Lower Lash Line: Using a small brush, apply the matte cool-toned taupe shade to your lower lash line, connecting it to the outer corner of your eye.
- Blend, Blend, Blend! Use a clean blending brush to soften any harsh lines and create a seamless transition between the shades.
- Eyeliner (Optional): Apply a black or navy blue eyeliner to your upper lash line for added definition.
- Mascara: Apply several coats of your favorite mascara to your upper and lower lashes.
- Falsies (Optional): Add a pair of false eyelashes for extra drama.
Product Placement Diagram: (Same as Warm Glimmer Eyes)
Tips for Longevity: (Same as Warm Glimmer Eyes)
Troubleshooting Cool-Tone Woes:
- Looking Washed Out: Choose cool shades that complement your skin tone. If you have warm undertones, try incorporating a touch of gold or bronze to balance out the coolness.
- Looking Too Gray: Add a pop of color, such as a bright inner corner highlight or a colorful eyeliner.
- Looking Dated: Avoid overdoing the frosted eyeshadow look. Focus on creating dimension and using modern application techniques.
5. Mixing & Matching: When Warm Meets Cool (Gasp!) 🤝
Who says you have to choose sides? The beauty of makeup is that you can break the rules and experiment! Mixing warm and cool tones can create a stunning and unique look, but it requires a bit of finesse.
Tips for Harmonious Contrast:
- Start Small: Introduce a small pop of a contrasting color, such as a warm inner corner highlight with a cool-toned eye look, or vice versa.
- Balance: If you’re using both warm and cool shades on your lid, make sure to balance them out. For example, if you have a warm crease, use a cool shade on the outer corner of your eye.
- Transition Shades: Use neutral transition shades to bridge the gap between warm and cool tones.
- Consider Undertones: Pay attention to the undertones of your skin. If you have warm undertones, you might be able to pull off more warm shades in a cool-toned look.
Examples of Successful Warm-Cool Combinations:
- Warm Crease + Cool Lid: A matte terracotta crease with a shimmer silver lid.
- Cool Crease + Warm Lid: A matte navy blue crease with a shimmer rose gold lid.
- Warm Inner Corner Highlight + Cool Eye Look: A champagne gold inner corner highlight with a cool-toned smoky eye.
- Cool Inner Corner Highlight + Warm Eye Look: A light blue inner corner highlight with a warm-toned sunset eye.
6. Advanced Techniques: Beyond the Basics 🚀
Ready to level up your glimmer game? Let’s explore some advanced techniques!
- Cut Crease: A sharp, defined crease that separates the lid color from the crease color. Use a concealer or eyeshadow primer to create the cut crease and then pack on your desired shade. Shimmer shades look particularly stunning in a cut crease.
- Halo Eye: A spotlight effect on the center of the lid. Apply a dark shade to the outer and inner corners of your eye and then apply a shimmer shade to the center of the lid. Blend the edges for a seamless transition.
- Shimmer Toppers: These are sheer, glittery formulas that can be applied over your eyeshadow for added dimension and sparkle. Use a shimmer topper in a similar shade to your eyeshadow for a subtle shimmer, or use a contrasting shade for a more dramatic effect.
7. Tools of the Trade: Your Arsenal of Applicators 🖌️
A painter is only as good as their brushes, and the same goes for makeup artists! Investing in quality brushes is essential for creating flawless eye looks.
Brush Recommendations:
- Fluffy Blending Brush: For applying and blending transition shades.
- Crease Brush: For defining the crease.
- Flat Shader Brush: For packing color onto the lid.
- Small Brush: For applying inner corner highlights and lower lash line color.
- Pencil Brush: For smudging eyeliner and creating detailed work.
The Importance of Clean Brushes:
Dirty brushes can harbor bacteria and lead to breakouts. Clean your brushes regularly with a brush cleaner or mild soap and water.
Other Helpful Tools:
- Spoolie: For grooming eyebrows and blending out harsh lines.
- Cotton Swabs: For cleaning up mistakes and creating sharp lines.
- Makeup Remover: For removing eyeshadow and correcting errors.
8. The Big Finish: Setting for Staying Power 🪄
You’ve created a masterpiece, now it’s time to protect it! Setting spray is the final step in your makeup routine, and it helps to lock everything in place and prevent your makeup from fading or creasing.
Setting Spray Recommendations:
- For Oily Skin: Look for oil-free and mattifying setting sprays.
- For Dry Skin: Look for hydrating setting sprays.
- For All Skin Types: Look for setting sprays that are long-lasting and transfer-resistant.
Final Tips for a Flawless, Long-Lasting Glimmer Eye:
- Use a light hand: Apply eyeshadow in thin layers and build up the color gradually.
- Blend, blend, blend! Blending is key to creating a seamless and professional-looking eye look.
- Set your makeup: Use a setting spray to lock everything in place and prevent fading or creasing.
- Have fun! Don’t be afraid to experiment with different colors and techniques.
9. Final Words: Glimmer On, You Magnificent Moles! 🎉
Congratulations, you’ve successfully completed your journey into the dazzling world of glimmer eyeshadow! With the Earth Heartbeat Palette and a little bit of practice, you can create endless warm and cool-toned eye looks that will make you feel like the shimmering superstar you truly are. Now go forth and glimmer, you magnificent moles! The world needs your sparkle!
For detailed product specifications and purchases, please go to :https://zenamakeup.com/products/earth-heartbeat-9-shade-glimmer-eyeshadow-palette
Leave a Reply