The Art of the Underlash: Mastering Eyeliner & Mascara for a Killer Lower Lash Line
(Welcome, Glamazons! Prepare for a deep dive into the captivating, often-overlooked world of the lower lash line. Forget subtle, we’re going bold, beautiful, and breaking all the "rules." This ain’t your grandma’s makeup tutorial – unless your grandma’s a rockstar!)
Lecture Overview:
This lecture will explore the transformative power of defining the lower lash line using eyeliner and mascara. We’ll debunk myths, explore different techniques, understand product choices, and, most importantly, discover how to tailor this often-intimidating technique to suit your individual eye shape and desired aesthetic. Get ready to unleash your inner makeup artist and conquer the underlash!
Table of Contents:
- Why Bother with the Underlash? (The Case for Lower Lash Definition) 👑
- Decoding the Anatomy of the Lower Lash Line: 👁️
- Eyeliner Essentials: A Crash Course in Tools and Techniques: ✍️
- 3.1 Pencil Power: The Undisputed King (or Queen!)
- 3.2 Gel-icious: For Precision and Drama
- 3.3 Liquid Courage: Tread Carefully, Darling!
- 3.4 The Shadow Smudge: Subtlety at its Finest
- 3.5 Winged Wonders: Taking Flight Below
- Mascara Magic: Separating, Defining, and Volumizing Those Lower Lashes: ✨
- 4.1 The Wand Wrangle: Choosing the Right Brush
- 4.2 The Blink & Roll: Application Techniques
- 4.3 Mascara Mishaps: Avoiding Spider Lashes and Smudging!
- Eye Shape SOS: Tailoring the Underlash to Your Unique Peepers: 🧐
- 5.1 Almond Eyes: The Lucky Ones!
- 5.2 Round Eyes: Adding Definition and Length
- 5.3 Hooded Eyes: Conquering the Crease (and the Lower Lash!)
- 5.4 Upturned Eyes: Balancing the Drama
- 5.5 Downturned Eyes: Lifting and Brightening
- Color Theory for the Underlash: Beyond Basic Black: 🌈
- The Smudge Factor: Embracing Imperfection (or at Least Controlling It): 😈
- Product Recommendations: Our Holy Grail Underlash Arsenal: 🏆
- Putting it All Together: Step-by-Step Tutorials: 🎬
- Troubleshooting: Common Issues and How to Fix Them: 🚑
- The Underlash Hall of Fame: Iconic Looks to Inspire: 🤩
- Practice Makes Perfect: Your Underlash Assignment! 📝
1. Why Bother with the Underlash? (The Case for Lower Lash Definition) 👑
Okay, let’s be real. The underlash is often relegated to the "optional" category of makeup. But I’m here to tell you, darlings, that neglecting it is like serving a gourmet meal on a paper plate – a crime against beauty! Defining the lower lash line can:
- Enhance Eye Shape: Make your eyes appear bigger, brighter, and more alluring.
- Add Depth and Dimension: Creates a more complex and captivating eye look.
- Balance the Upper Lid: Prevent the top eyeliner from overpowering the overall look.
- Smoky Eye Perfection: Essential for achieving that sultry, smoldering effect.
- Express Yourself! It’s a fantastic way to add personality and edge to your makeup.
Think of it as the finishing touch, the punctuation mark that completes the sentence of your eye makeup. It’s the difference between "Hello" and "Hello, gorgeous!"
2. Decoding the Anatomy of the Lower Lash Line: 👁️
Before we dive in, let’s get acquainted with the terrain. Understanding the nuances of the lower lash line is crucial for successful application:
- Waterline (Inner Rim): The delicate area inside the lower lash line. Applying eyeliner here can dramatically intensify the look, but requires specific products and a steady hand (and maybe a shot of espresso!).
- Lash Line (Outer Rim): Where your lower lashes actually grow. This is where we’ll primarily be focusing our eyeliner and mascara efforts.
- Skin Below the Lash Line: This area is often the target for smudging and softening the eyeliner for a smoky effect.
3. Eyeliner Essentials: A Crash Course in Tools and Techniques: ✍️
Eyeliner is the foundation upon which our underlash masterpiece is built. Let’s explore the different types and how to wield them effectively:
3.1 Pencil Power: The Undisputed King (or Queen!)
- Pros: Beginner-friendly, versatile, easy to smudge for a softer look, great for the waterline.
- Cons: Can be less precise than other types, may require frequent sharpening.
- Best For: Everyday looks, smoky eyes, waterline application.
- Application Tip: Use short, light strokes along the lash line. Smudge immediately with a brush or your finger for a lived-in effect.
( ✏️ = My go-to emoji for pencil eyeliner!)
3.2 Gel-icious: For Precision and Drama
- Pros: Highly pigmented, long-lasting, precise application with a brush.
- Cons: Requires practice, can dry out quickly, not ideal for beginners.
- Best For: Defined lines, winged eyeliner, dramatic looks.
- Application Tip: Use a fine-tipped brush and work in thin layers. Clean the brush regularly to prevent product buildup.
( 🏺 = Because gel comes in a pot, right?!)
3.3 Liquid Courage: Tread Carefully, Darling!
- Pros: Boldest, most dramatic line, long-lasting.
- Cons: Most difficult to apply, unforgiving of mistakes, not recommended for beginners.
- Best For: Graphic liner looks, extreme wings, when you want to make a statement.
- Application Tip: Brace your elbow on a table for stability. Start with a thin line and gradually build up the thickness.
( ✒️ = Representing that fine-tipped applicator!)
3.4 The Shadow Smudge: Subtlety at its Finest
- Pros: Softest, most natural look, easy to blend, great for sensitive eyes.
- Cons: Least defined, may not last as long as other types.
- Best For: No-makeup makeup looks, adding subtle definition, those with sensitive eyes.
- Application Tip: Use a small, angled brush to apply eyeshadow along the lash line. Smudge with a blending brush for a soft, diffused effect.
( 🌫️ = For that soft, diffused effect!)
3.5 Winged Wonders: Taking Flight Below
- Pros: Adds a dramatic, edgy touch, can lift and elongate the eye.
- Cons: Requires practice and precision, not suitable for all eye shapes.
- Best For: Fashion-forward looks, creating a statement, those who dare to be different.
- Application Tip: Extend the lower lash line upwards towards the end of your brow. Connect the wing to the lower lash line.
( 🦋 = Because wings!)
TABLE 1: Eyeliner Type Comparison
| Eyeliner Type | Difficulty Level | Best For | Longevity | Pigmentation |
|---|---|---|---|---|
| Pencil | Beginner | Everyday, Smoky Eyes | Moderate | Moderate |
| Gel | Intermediate | Defined Lines, Wings | Long-Lasting | High |
| Liquid | Advanced | Graphic Liner, Drama | Long-Lasting | Highest |
| Shadow | Beginner | Natural, Soft | Short | Low |
4. Mascara Magic: Separating, Defining, and Volumizing Those Lower Lashes: ✨
Mascara is the icing on the underlash cake. It adds definition, length, and volume, making your eyes pop. But beware, darlings, the road to perfect lower lashes is paved with potential for spider lashes and smudging!
4.1 The Wand Wrangle: Choosing the Right Brush
- Small, Skinny Brushes: Ideal for separating and defining lower lashes. Reduces the risk of clumping.
- Tapered Brushes: Good for reaching those tiny inner corner lashes.
- Plastic Bristle Brushes: Great for separation and definition.
- Fiber Bristle Brushes: Can add more volume, but may be more prone to clumping.
( 🪄 = Because it’s magic!)
4.2 The Blink & Roll: Application Techniques
- The Vertical Wiggle: Hold the wand vertically and wiggle it back and forth across the lashes. This helps to separate and define each lash.
- The Blink Method: Look down and gently blink as you apply the mascara. This coats the lashes from the root.
- One Coat Wonder: Less is more! Applying too much mascara can lead to clumping and smudging. One coat is usually sufficient for the lower lashes.
4.3 Mascara Mishaps: Avoiding Spider Lashes and Smudging!
- Wipe the Wand: Before applying, wipe off any excess mascara from the wand.
- Use a Lash Comb: If your lashes clump together, use a lash comb to separate them.
- Waterproof Formula: Opt for a waterproof or smudge-proof formula to prevent raccoon eyes.
- Powder Power: Dust a light layer of translucent powder under your eyes to absorb excess oil and prevent smudging.
- Don’t Overdo It! Resist the urge to apply multiple coats.
( 🕷️ = The enemy!)
5. Eye Shape SOS: Tailoring the Underlash to Your Unique Peepers: 🧐
The key to a flawless underlash is understanding your eye shape and adapting your technique accordingly.
5.1 Almond Eyes: The Lucky Ones!
5.1 Almond Eyes: The Lucky Ones!
- Technique: You can pretty much rock any underlash look! Experiment with different eyeliner types and mascara formulas.
- Tip: Try a subtle smoky eye with a pencil liner and a few coats of mascara.
( 🌰 = Almond, duh!)
5.2 Round Eyes: Adding Definition and Length
- Technique: Focus on elongating the eye. Use a winged eyeliner or a slightly thicker line on the outer corner.
- Tip: Avoid lining the entire lower lash line, as this can make your eyes appear smaller. Concentrate on the outer half.
( ⚽ = Round like a ball!)
5.3 Hooded Eyes: Conquering the Crease (and the Lower Lash!)
- Technique: Keep the eyeliner thin and close to the lash line. Avoid heavy, smoky looks, as they can make your eyes appear smaller and more hooded.
- Tip: Use a waterproof eyeliner to prevent smudging. Focus on defining the outer corner of the eye.
( 🛌 = Like a hood!)
5.4 Upturned Eyes: Balancing the Drama
- Technique: Balance the upturned shape by lining the entire lower lash line.
- Tip: Experiment with different colors of eyeliner to add a pop of color.
( ⬆️ = Pointing up!)
5.5 Downturned Eyes: Lifting and Brightening
- Technique: Focus on lifting the eye. Use a winged eyeliner that flicks upwards at the outer corner.
- Tip: Avoid lining the entire lower lash line, as this can accentuate the downturn. Concentrate on the outer third of the eye.
( ⬇️ = Pointing down!)
6. Color Theory for the Underlash: Beyond Basic Black: 🌈
Black eyeliner is a classic, but don’t be afraid to experiment with color!
- Brown: Softer and more natural than black. Great for everyday looks.
- Navy Blue: Makes the whites of your eyes appear brighter.
- Purple: Enhances green and hazel eyes.
- Green: Complements brown eyes.
- White/Nude: Brightens the waterline and makes eyes appear larger.
( 🎨 = Color!)
7. The Smudge Factor: Embracing Imperfection (or at Least Controlling It): 😈
Let’s face it, smudging happens. But instead of fearing it, let’s embrace it! A smudged lower lash line can create a sultry, lived-in look. The key is to control the smudge, not let it control you.
- Smudge Intentionally: Use a small brush or your finger to gently smudge the eyeliner immediately after application.
- Use a Setting Spray: After applying your makeup, use a setting spray to help lock everything in place and prevent further smudging.
- Carry Q-Tips: Keep Q-tips on hand for quick clean-ups.
( 😈 = For the rebellious smudge!)
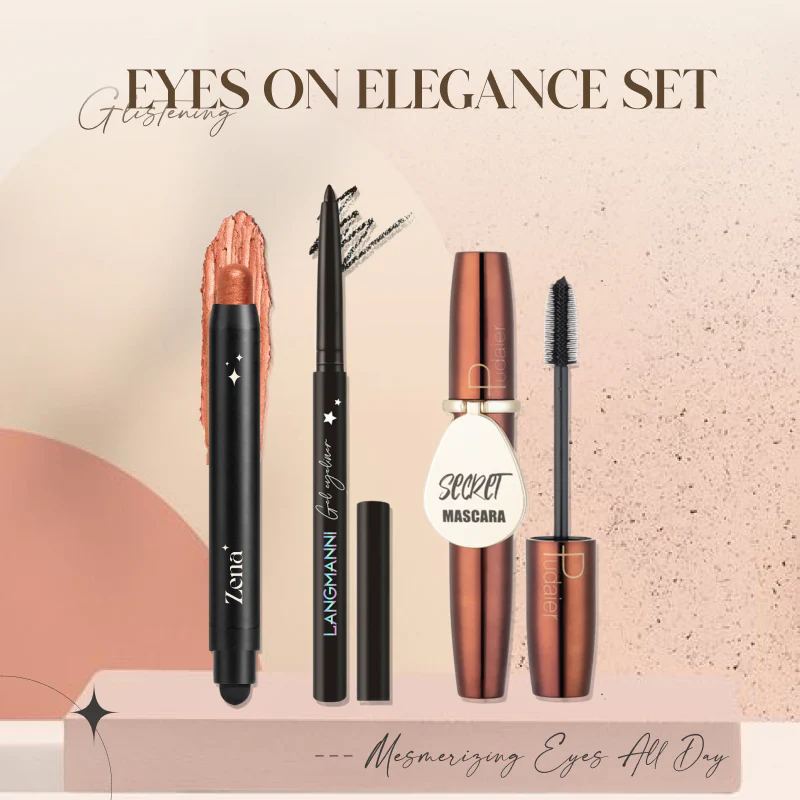
8. Product Recommendations: Our Holy Grail Underlash Arsenal: 🏆
- Eyeliner:
- Pencil: Urban Decay 24/7 Glide-On Eye Pencil (classic!)
- Gel: Maybelline Eye Studio Lasting Drama Gel Eyeliner (budget-friendly and amazing)
- Liquid: Stila Stay All Day Waterproof Liquid Eye Liner (precise and long-lasting)
- Mascara:
- Lower Lash Mascara: Clinique Bottom Lash Mascara (designed specifically for lower lashes)
- Waterproof Mascara: L’Oréal Paris Voluminous Lash Paradise Waterproof Mascara (smudge-proof and volumizing)
- Tools:
- Angled Brush: For applying eyeshadow as eyeliner.
- Blending Brush: For softening and smudging eyeliner.
- Lash Comb: For separating lashes.
( 🛍️ = Time to shop!)
9. Putting it All Together: Step-by-Step Tutorials: 🎬
(Visual aids and demonstrations would be included here in a live lecture setting. For this text-based format, I will provide detailed written instructions):
Tutorial 1: The Classic Smoky Underlash
- Apply a dark brown or black pencil eyeliner to the lower lash line.
- Immediately smudge the eyeliner with a blending brush.
- Apply one coat of mascara to the lower lashes.
- Optional: Add a touch of dark eyeshadow to the outer corner of the eye for extra drama.
Tutorial 2: The Defined Underlash with a Wing
- Apply a gel eyeliner to the lower lash line, creating a thin line that extends slightly beyond the outer corner of the eye.
- Create a small wing that flicks upwards towards the end of your brow.
- Apply one coat of mascara to the lower lashes.
Tutorial 3: The Natural Underlash
- Apply a brown eyeshadow to the lower lash line with an angled brush.
- Smudge the eyeshadow with a blending brush.
- Apply one coat of mascara to the lower lashes.
( 📹 = For visual tutorials!)
10. Troubleshooting: Common Issues and How to Fix Them: 🚑
- Smudging: Use a waterproof eyeliner and mascara. Set your makeup with a setting spray. Dust a light layer of translucent powder under your eyes.
- Clumping: Wipe off excess mascara from the wand. Use a lash comb to separate lashes.
- Uneven Lines: Practice makes perfect! Use short, light strokes. Clean up mistakes with a Q-tip dipped in makeup remover.
- Irritation: Use hypoallergenic products. Avoid applying eyeliner to the waterline if you have sensitive eyes.
( 🩹 = Quick fixes!)
11. The Underlash Hall of Fame: Iconic Looks to Inspire: 🤩
- Twiggy: The queen of the exaggerated lower lash line.
- Audrey Hepburn: Elegant and defined.
- Elizabeth Taylor: Sultry and dramatic.
- Rihanna: Always pushing boundaries with her makeup looks.
( 🌟 = The stars!)
12. Practice Makes Perfect: Your Underlash Assignment! 📝
Now it’s your turn! Grab your eyeliner and mascara and experiment with different techniques. Don’t be afraid to make mistakes – that’s how you learn! Share your creations on social media using the hashtag #UnderlashUnleashed.
( ✍️ = Get to work!)
(Class dismissed! Go forth and conquer the underlash! Remember, makeup is about expressing yourself and having fun. Don’t be afraid to experiment and find what works best for you. And most importantly, remember to blend, blend, blend! See you in the next lecture!)
For detailed product specifications and purchases, please go to :https://zenamakeup.com/products/glam-essentials-glitter-cream-eyeshadow-mascara-eyeliner-set
Leave a Reply